If you’re more crafty and less mushy when it comes to Valentine’s Day, then be sure to check these DIY Date Idea Arrows that are perfect for your special someone.
Maybe it’s the free chocolate and the pink and red color combo everywhere, but I’m really into Valentine’s DIYs this year. And I’m going to run with it while I can.
Plus, we are secret romantics at heart! If you’re more crafty and less mushy when it comes to this holiday, then these DIY Date Idea Arrows are just for you and your someone special.
And they just so happen to be part of our roundup of our favorite DIY Valentine’s Gifts.
In case you happen to have skipped the crafty gene, you can still use the general concept of date night tags and put them on something else.
They still make for a great addition to these date night gift basket ideas whether it’s Valentine’s Day or not.
Just pair it with our DIY Valentine Arrow Cookie Picks, and you’ve got the sweetest gift for your significant other.
Materials and Tools Needed to Make DIY Date Idea Arrows
1/4 inch dowel rods – Length is dependent on how long your mailing tubes are.
Felt sheets – Colors of your choice
Tacky glue — Or any fabric craft glue
Scissors
Wrapping paper — Optional for wrapping around the tube.
Round hanging labels — We purchased labels from Martha Stewart’s line at Staples.
Pen
How to Make DIY Date Idea Arrows
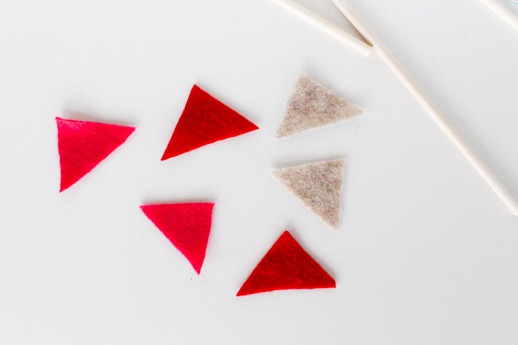
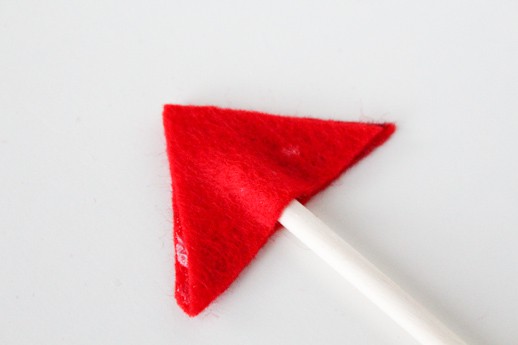
Step 1 – Cut out a triangle to use as a pattern for the tips of the “arrows”.
Cut out two triangles from each color.
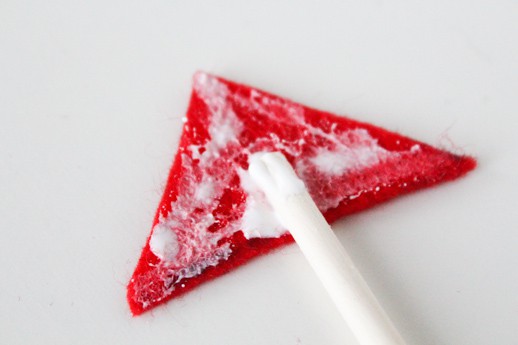
Step 2 – Place one triangle on a flat surface and cover with tacky glue making sure to get the edges.
Step 3 – Then, place a dowel rod just below halfway down the arrow.
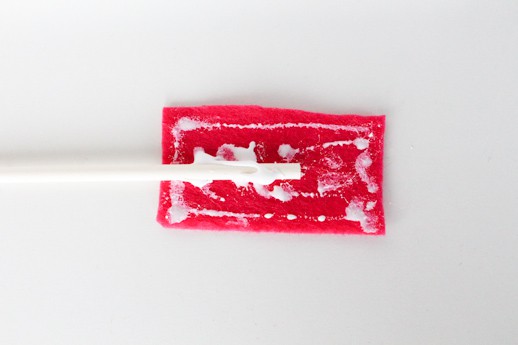
Step 4 – Cover a second triangle with glue. Then place it over top, lining up the edges with the first, and press gently together. Repeat this for all of the dowel rods. (I only made three).
Step 5 – Once the glue has dried, you can trim up the edges of the triangles with scissors to give them a more finished look.
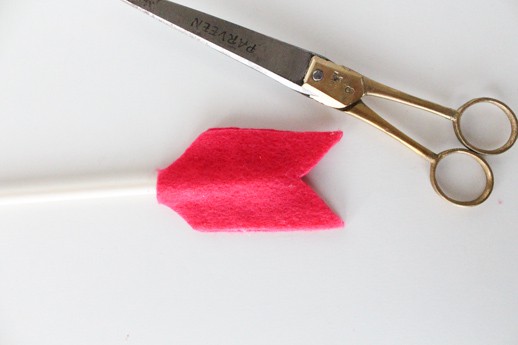
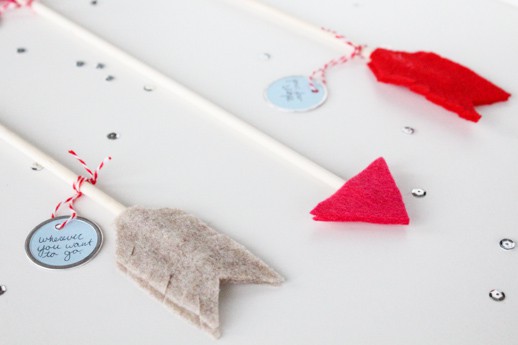
Repeat the same steps that you took for the arrowheads, but use a rectangle shape this time for the ends of the arrows.
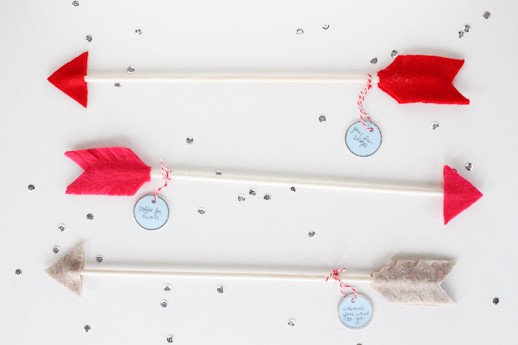
Step 6 – Once they’re glued in place on both sides like before, cut a v-shape in the bottom edge of the felt and then cut sections along the edges of the rectangles to create a fringed look.
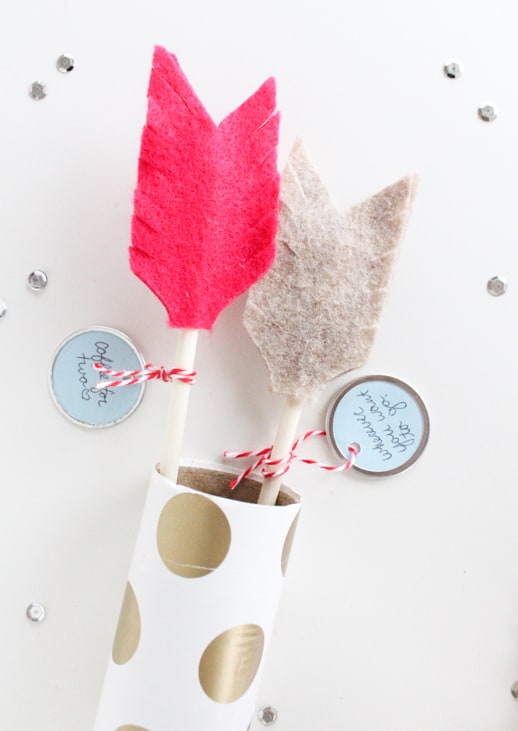
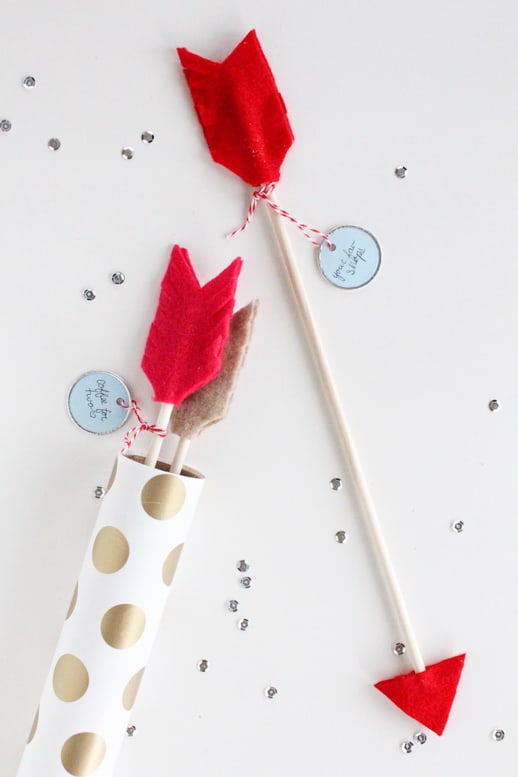
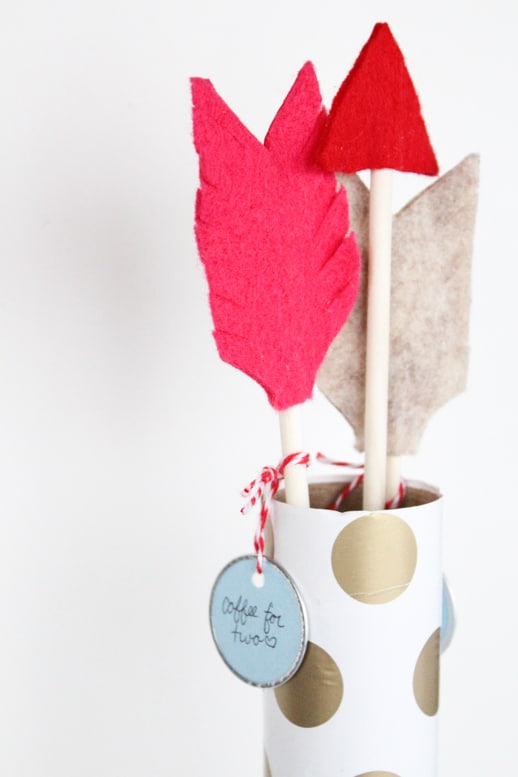
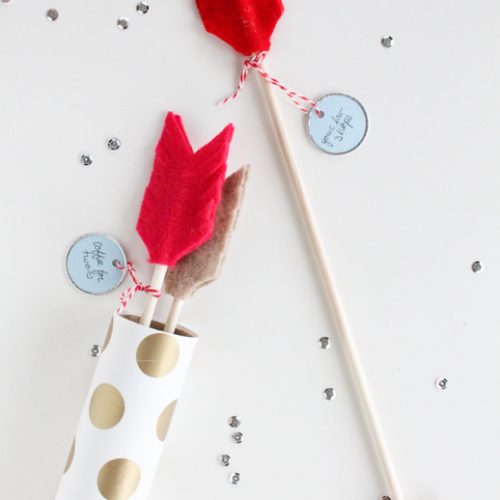
Step 7 –Once the arrows are done, write your date ideas (or even special messages) onto the labels and wrap them around the arrows with twine.
Step 8 – To decorate the mailer tube, I wrapped it in gold polka-dotted wrapping paper from Hobby Lobby.
More Unique Valentine’s Day DIYs and Recipes
- DIY You’re Dynamite Valentine’s — Another easy project that also utilizes mailing tubes (if you have extra leftover)
- DIY Candied Valentine’s Day Printables — Perfect for small gifting
- Funny DIY Printable Cards
- Frosted Heart-Shaped Brownies
DIY Date Idea Arrows
Equipment
- Scissors
Materials
- 1/4 inch dowel rods — Length is dependent on how long your mailing tubes are.
- Felt sheets — Colors of your choice
- Tacky glue — Or any fabric craft glue
- Mailing tubes
- Wrapping paper Optional for wrapping around the tube.
- Round hanging labels We purchased labels from Martha Stewart’s line at Staples.
- Pen
Instructions
- Cut out a triangle to use as a pattern for the tips of the “arrows”.Cut out two triangles from each color.
- Place one triangle on a flat surface and cover with tacky glue making sure to get the edges.
- Then, place a dowel rod just below halfway down the arrow.
- Cover a second triangle with glue. Then place it over top, lining up the edges with the first, and press gently together. Repeat this for all of the dowel rods. (I only made three).
- Once the glue has dried, you can trim up the edges of the triangles with scissors to give them a more finished look.Repeat the same steps that you took for the arrowheads, but use a rectangle shape this time for the ends of the arrows.
- Once they’re glued in place on both sides like before, cut a v-shape in the bottom edge of the felt and then cut sections along the edges of the rectangles to create a fringed look.
- Once the arrows are done, write your date ideas (or even special messages) onto the labels and wrap them around the arrows with twine.
- To decorate the mailer tube, I wrapped it in gold polka-dotted wrapping paper from Hobby Lobby.


Really loving those arrow, easy to make and so cute !
I hope you don’t mind , i put it in my “Valentine day’s selection” of DIY that i love ;)
http://dododo.fr/selec-diy-be-my-valentine/
I made mini cardboard versions of these using paper straws so I could hide a message inside as an original Valentine’s card idea. Thank you so much for the inspiration!
Am going to use pixie sticks and send them to school with our son for Valintines Day!
Thanks in support of sharing such a good opinion, post
is pleasant, thats why i have read it completely
With havin so much written content do you ever run into any problems of plagorism or copyright violation?
My site has a lot of exclusive content I’ve either written myself or outsourced but it seems a lot of it is popping it up all over the web without my agreement. Do you know any solutions to help prevent content from being stolen? I’d certainly appreciate it.
LOVE it! Super cute and love that its so unique.. Your blog is adorable!!
thanks so much!
LOVE, LOVE this idea! My 15 yr old daughter is going to do this for her boyfriend too :) And, it’s so inexpensive for her to do and so unique! I could even have my grandson (he’s 3) make a couple for his Mommy (she doesn’t have a Valentine this year) but to get anything for him, that’s homemade she will LOVE. And it will be so much fun to write down exactly what he says to put on the arrows…lol I can only imagine, what he will come up wth Thank you so much!!
This looks like such a fun little project!
It is!
Love this idea!!!
thanks so much!
So cute! I like how cupid is gonna get a tool revamp!
Haha, thanks Gabriel! Hope you’ve adjusted well back to real life after the Alt whirlwind :)
Love it – so cute!
thanks Shannon :)
Oh, these are so cute!! I have an obsession for arrows. We love this idea! Thanks for sharing!
Any time!
This is such a sweet idea :)
These are so cute Ashley. I love ’em.
These are absolutely adorable and so do-able!! =)
thanks Chloe!
Can you please just move to California? I think we should hang out all the time. You can be all crafty and I can just look on and be super jealous of your many talents. I can’ t wait to go through your site and read every post.
hahaha! Sharon, you’re hilarious :) Also, the feeling is mutual!
So cute!
thanks vicki :)
awww this is such a sweet project :) thanks for posting
thanks so much!
Awww this is so sweet. Thanks for the inspiration!
Always :)
This is so sweet! I love DIYs that I could probably do with things I already have. Plus, the final product is really cute!
I totally agree, no reason to buy new supplies every time!
Such a perfect, sweet and so romantic project! Sometimes is so easy and simple to cheer someone! Thank you, you’ve cheered my day :)
Have a great weekend!
P.S.: Coming here is always so inspiring!