DIY Hanging Flower Installation
If you’re looking for a statement party, engagement, or wedding decor piece, then this DIY Hanging Flower Installation is for you!
If you follow us along on Instagram, you might recognize this DIY hanging flower installation from a video sneak peek that we shared on Sunday.
Trust us, we’re just as giddy over it as you were! It’s a project that we’ve been wanting to make for a while now. And the new studio was the perfect white backdrop for it.
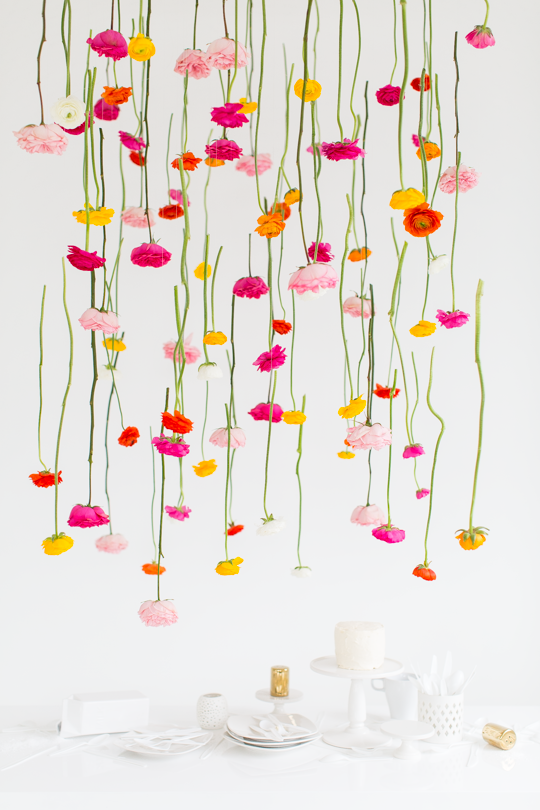
When you have flowers hanging from the ceiling this is definitely a labor of love project that requires an extra hand but the finishing product is worth it. So this stunning installation is probably best for a huge event like a spring bridal shower or even a wedding reception.
Materials and Tools Needed to Make a DIY Hanging Flower Installation
To be able to suspend and space the flowers easier, we wanted to make something simple to reconstruct that would withstand the weight of the flowers while not being a total eyesore.
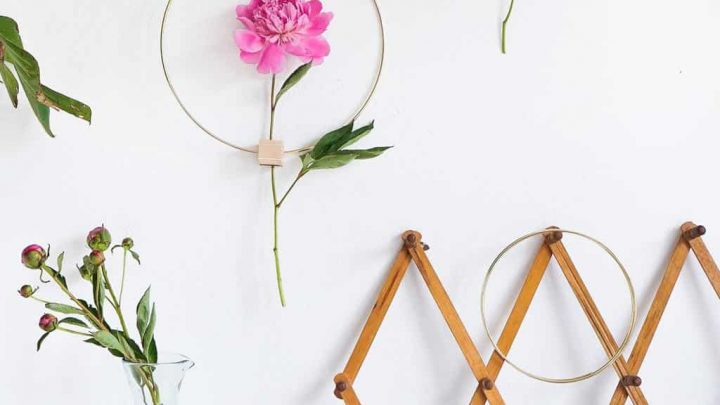
Instead of creating more work for ourselves, we just repurposed the framed chicken wire from our DIY paper wall art post.
Essentially, it’s just a wooden canvas frame (however big you want the artwork/installation to be) with chicken wire stapled to the back. You can find the step-by-step photos for it here.
Wooden frame with chicken wire stapled to the back
4 screw eye hooks
Drill and corresponding drill bit
Picture hanging wire
Wire cutters
Fishing line
Scissors
Pliers
Wire loop clamps — This kind or this kind
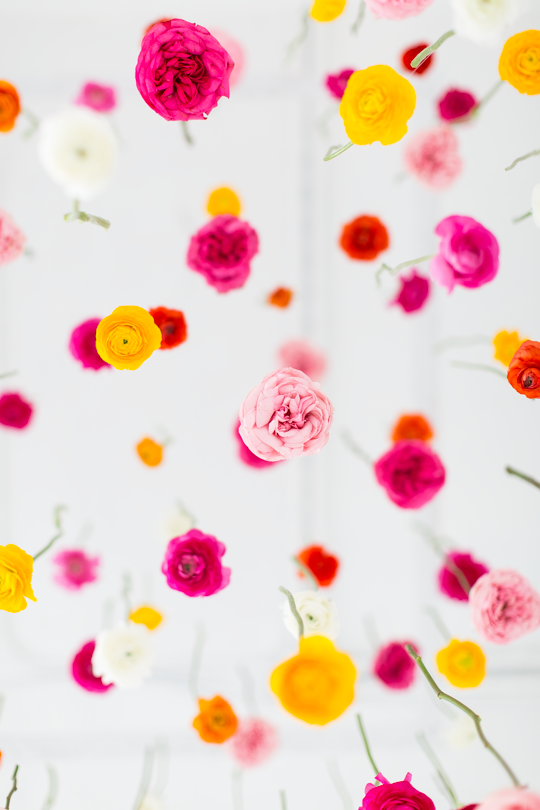
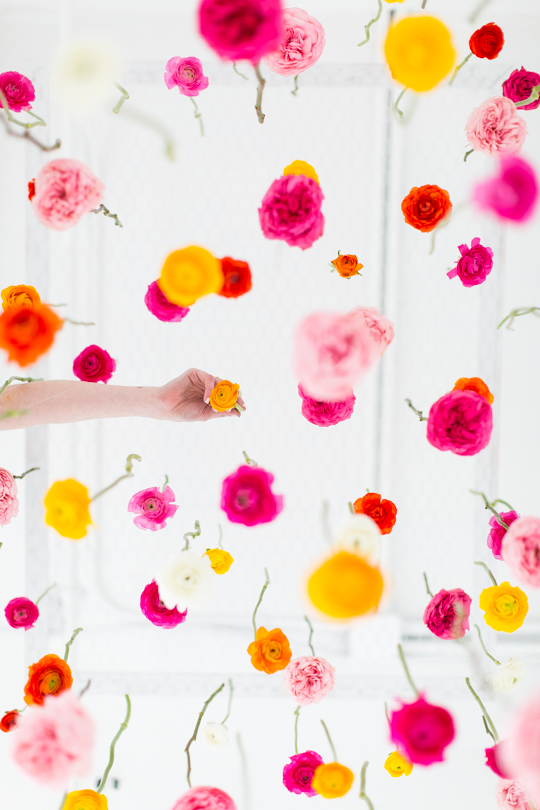
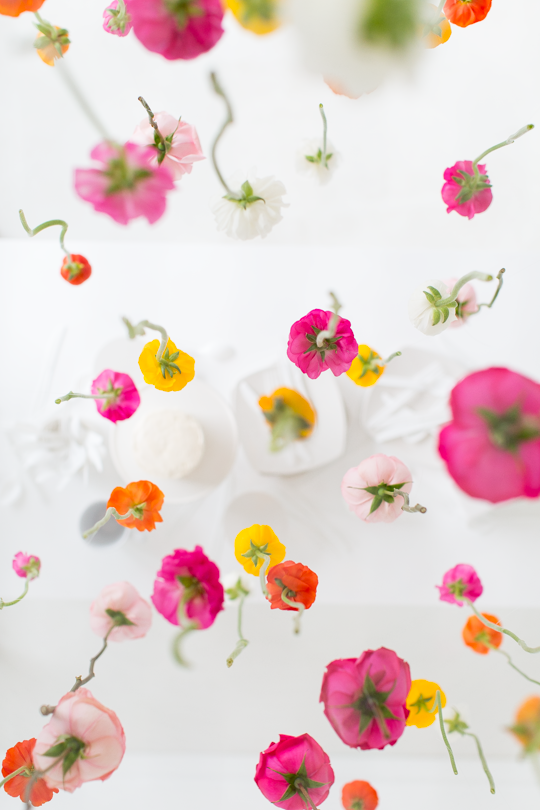
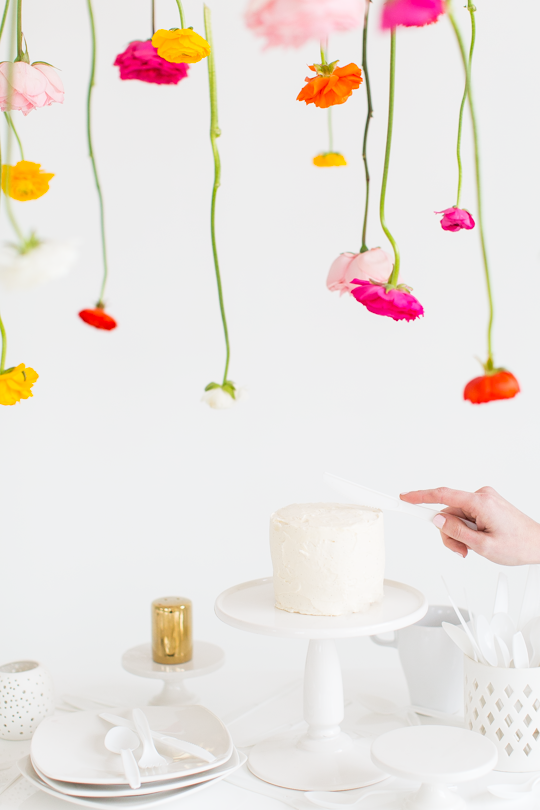
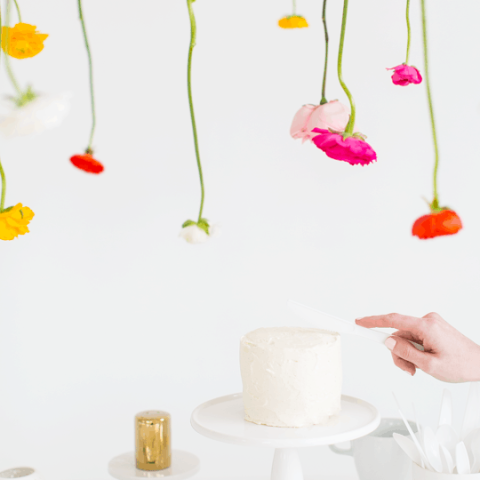
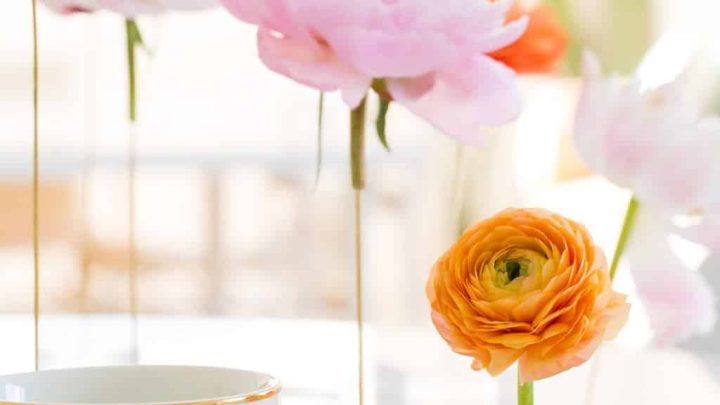
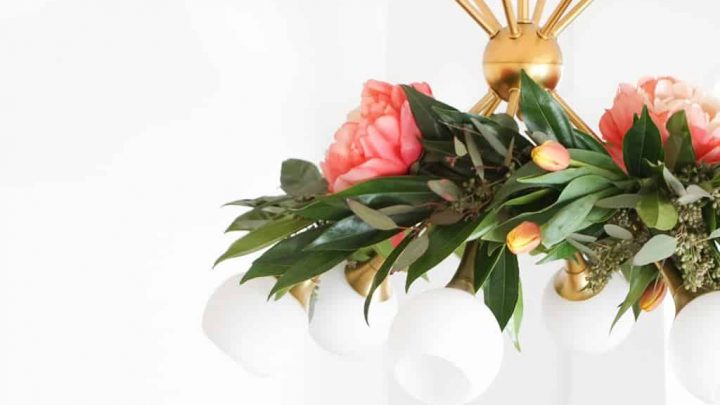
Wholesale flowers — We used garden roses and ranunculus.

How to Make a DIY Hanging Flower Installation
1 — Once you have the wooden frame and chicken wire portion constructed, drill a hole in each of the corners on one side of the frame.
2 — Next, screw an eye hook into each corner to be able to attach the picture wire.
Measure how far down you’ll need the structure to hang from the ceiling. In our case, it was two feet.

3 — Loop the wire through and make a tight knot on one of the hooks, and wrap the excess wire around the loop and around the remaining wire until it’s secure.
4 — Then, measure two feet of wire from the top of the hook (as opposed to pre-measuring and accidentally making different sized knots), leaving yourself about 4-6 inches extra to make a loop on the end.
Repeat for all four corners.
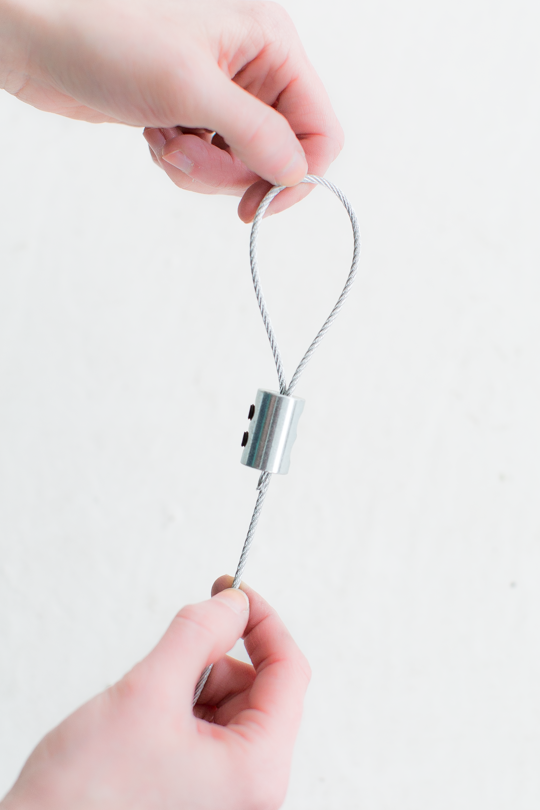
5 — Once you have the hooks in place, use the wire loop enclosures to make a loop at the end of each corner to hang to structure evenly.

6 — Screw the other four cup hooks into the ceiling equal distance to where each of your four corners of the structure will be placed, and suspend the loops from each.
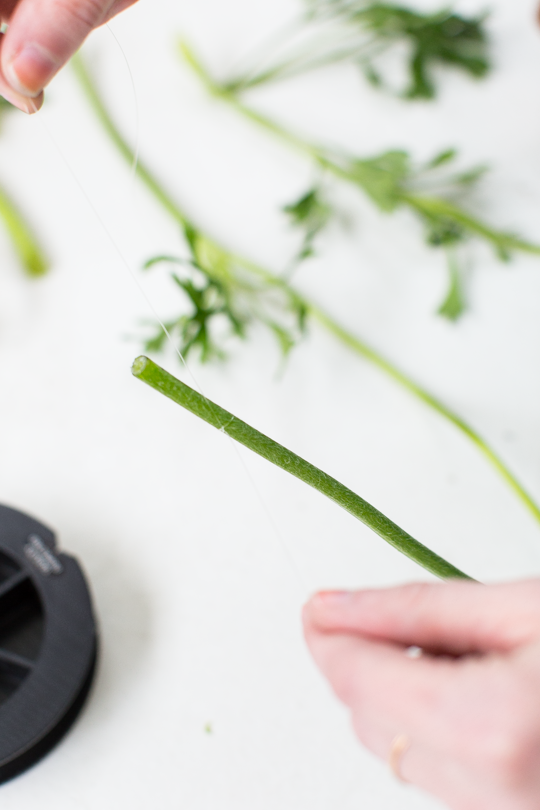
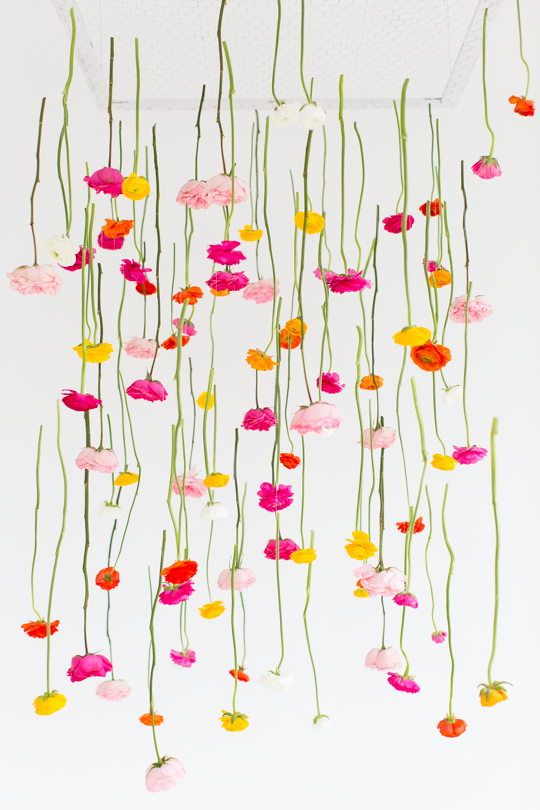
7 — To hang each stem, simply wrap and knot the fishing wire to the end of each flower. Wrap and knot them tightly, but not so tight that it cuts through the stem.
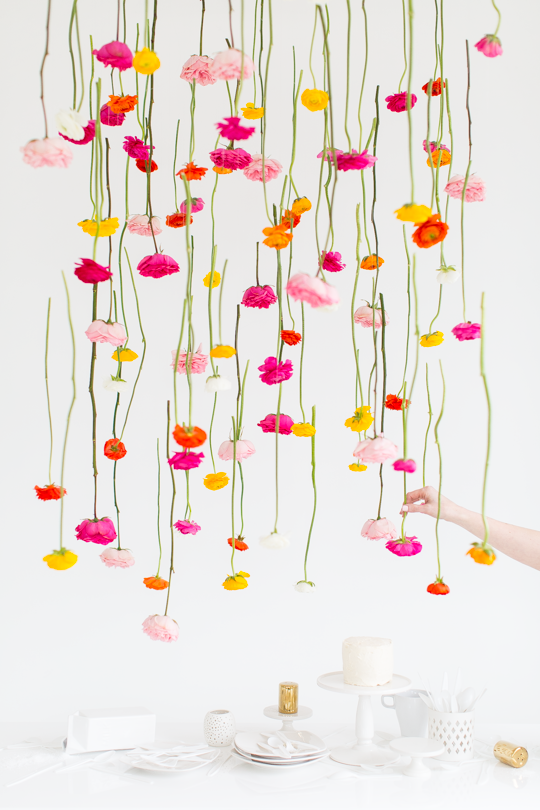
Hang each stem from the chicken wire by the other end of the fishing line, placing them sporadically as you go.
Five hours and a few arguments later, you should have something that looks like this!
How Long Will This DIY Hanging Flower Installation Keep?
You’ll definitely want to be sure that you install the flowers the day of (and as close as possible to the time) of the event or party so that the flowers are still fresh and bright.
We left ours up for three days to see how long it would last.
And by the next day, only two or three stems had fallen but they were definitely sad looking!
By day three, all of the colors were much darker with a few petals lost.
Flowers Used for the Party Decor
The overall look is stunning and we would absolutely make it again for an occasion.
However, you definitely need to find a good wholesale flower supply to make it remotely affordable.
(Then again, our DIY budget is probably much smaller than most event budgets!)
We use Fifty Flowers because they have an awesome selection year-round, and you don’t have to be licensed to buy from them in bulk.
We used the ranunculus and garden rose variety packs for this project.

Few Things to Keep In Mind When Hanging Flowers From The Ceiling
1 — Choose the right type of flower.
Heavy flowers like roses may not be suitable for hanging, so choosing something that will stay in place is important. Lighter flowers like daisies or baby’s breath are ideal.
2 — Make sure the flowers are fresh.
Wilted flowers will not look as nice and will be more likely to fall out of the arrangement.
3 — Use a variety of colors and textures.
This will add interest and depth to your arrangement.
4 — Hang the flowers at different heights.
This will give the arrangement a more natural look.
5 — Use a fishing line or clear tape to secure the flowers in place.
This will ensure that they stay put and don’t fall out.
So what are the odds you’re going to be going home to make one of these bad boys?! Yes, it’s not exactly your average family dinner decor.
But it would definitely come in handy for a birthday party, engagement, wedding, or photo booth or dessert table backdrop, no?

More DIY Hanging Flowers Idea
- Easy DIY Hanging Flower Wall
- DIY Rainbow Art Wall Hanging
- DIY Hanging Marble Serving Board For Under $5
- Colorful DIY Fabric Wall Hanging
- DIY Hanging Diamond Decor For Your Home
DIY Hanging Flower Installation
Equipment
- Drill and corresponding drill bit
- Wire cutters
- Scissors
- Pliers
Instructions
- Once you have the wooden frame and chicken wire portion constructed, drill a hole in each of the corners on one side of the frame.
- Screw an eye hook into each corner to be able to attach the picture wire.Measure how far down you’ll need the structure to hang from the ceiling. (Ours hung 2 feet from the ceiling.)
- Loop the wire through and make a tight knot on one of the hooks, and wrap the excess wire around the loop and around the remaining wire until it’s secure.
- Measure two feet of wire from the top of the hook (as opposed to pre-measuring and accidentally making different sized knots), leaving yourself about 4-6 inches extra to make a loop on the end.Repeat for all 4 corners.
- Once you have the hooks in place, use the wire loop enclosures to make a loop at the end of each corner to hang to structure evenly.
- Screw the other 4 cup hooks into the ceiling equal distance to where each of your four corners of the structure will be placed, and suspend the loops from each.
- To hang each stem, simply wrap and knot the fishing wire to the end of each flower. Wrap and knot them tightly, but not so tight that it cuts through the stem.Hang each stem from the chicken wire by the other end of the fishing line, placing them sporadically as you go.

Be sure to share your DIY Hanging Flower Installation with us on Instagram using the hashtag #sugarandclothloves, so we can follow along, too! We always love seeing all of your creations!


Please note that we may earn a commission for some of the above affiliate links. However, products featured are independently selected and personally well-loved by us!