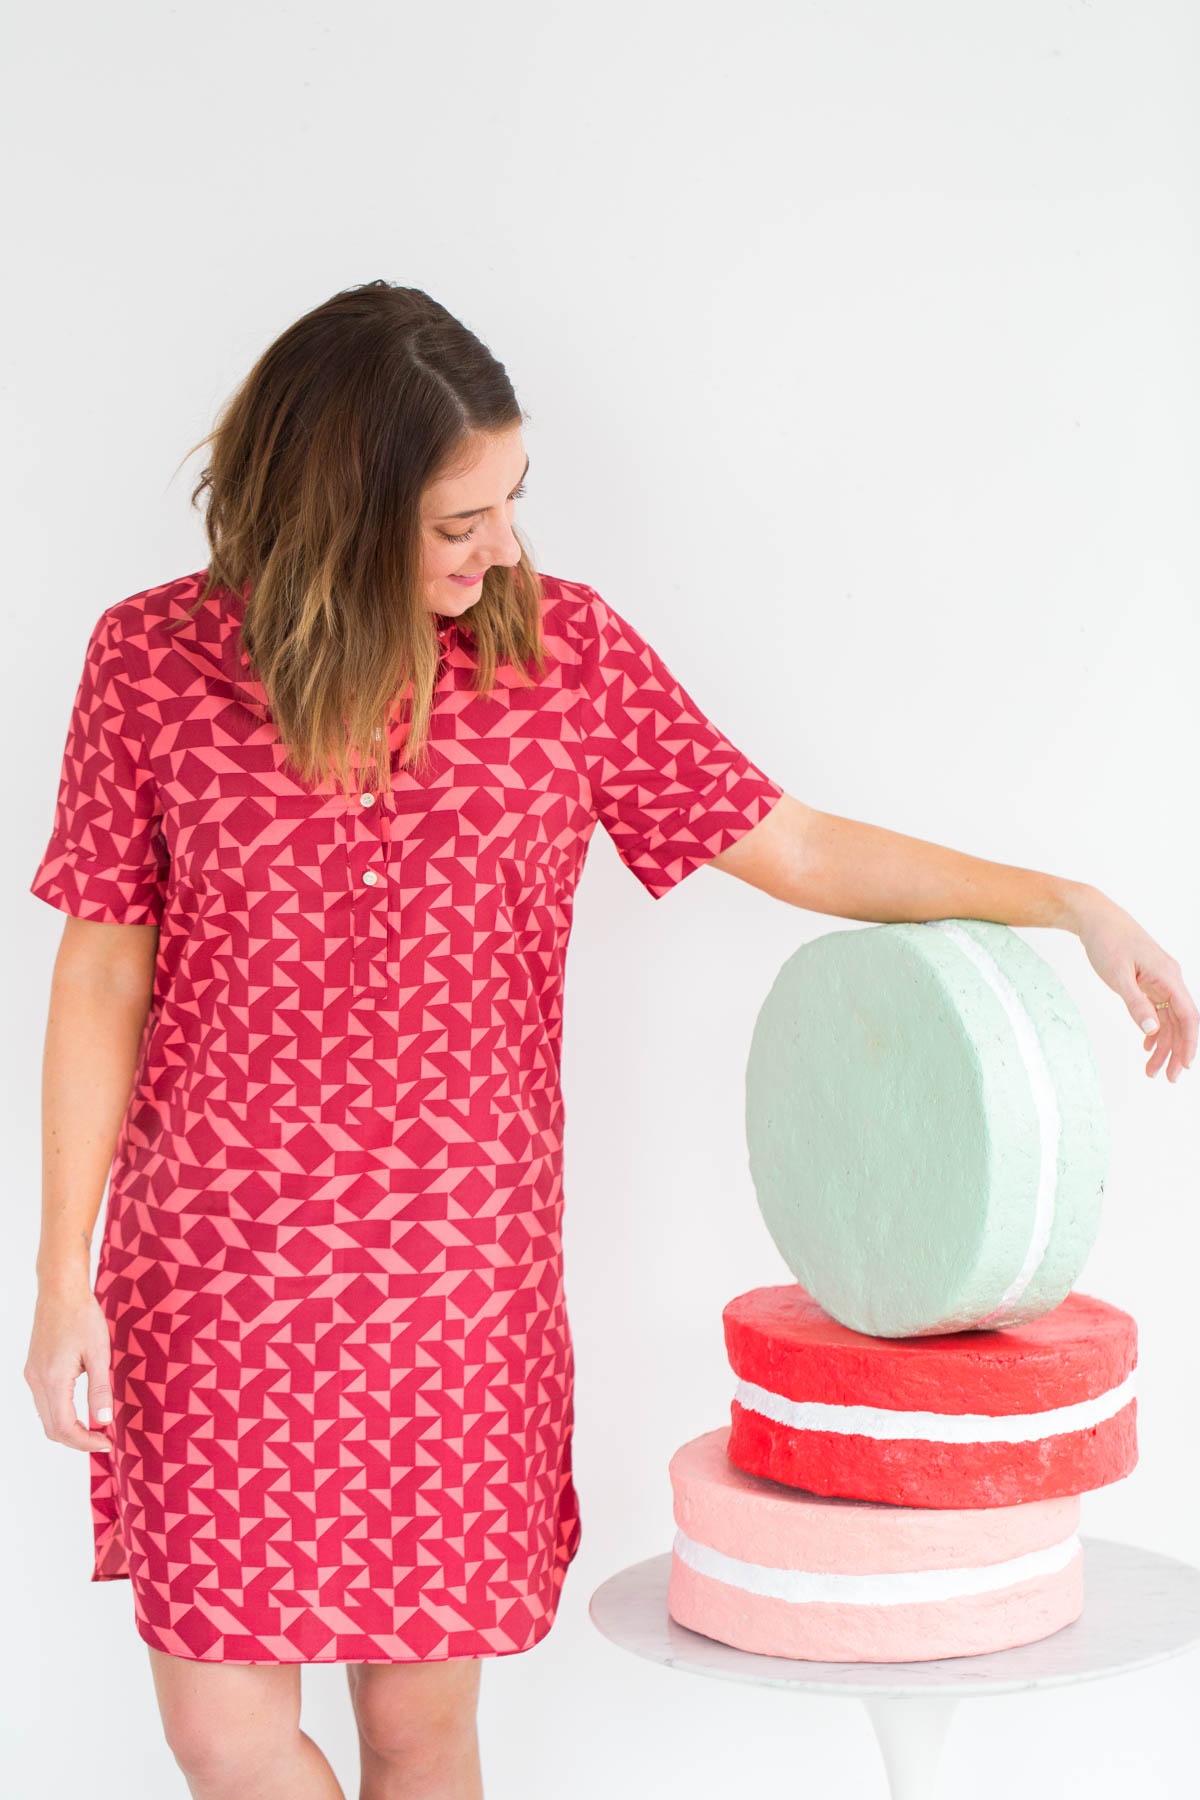
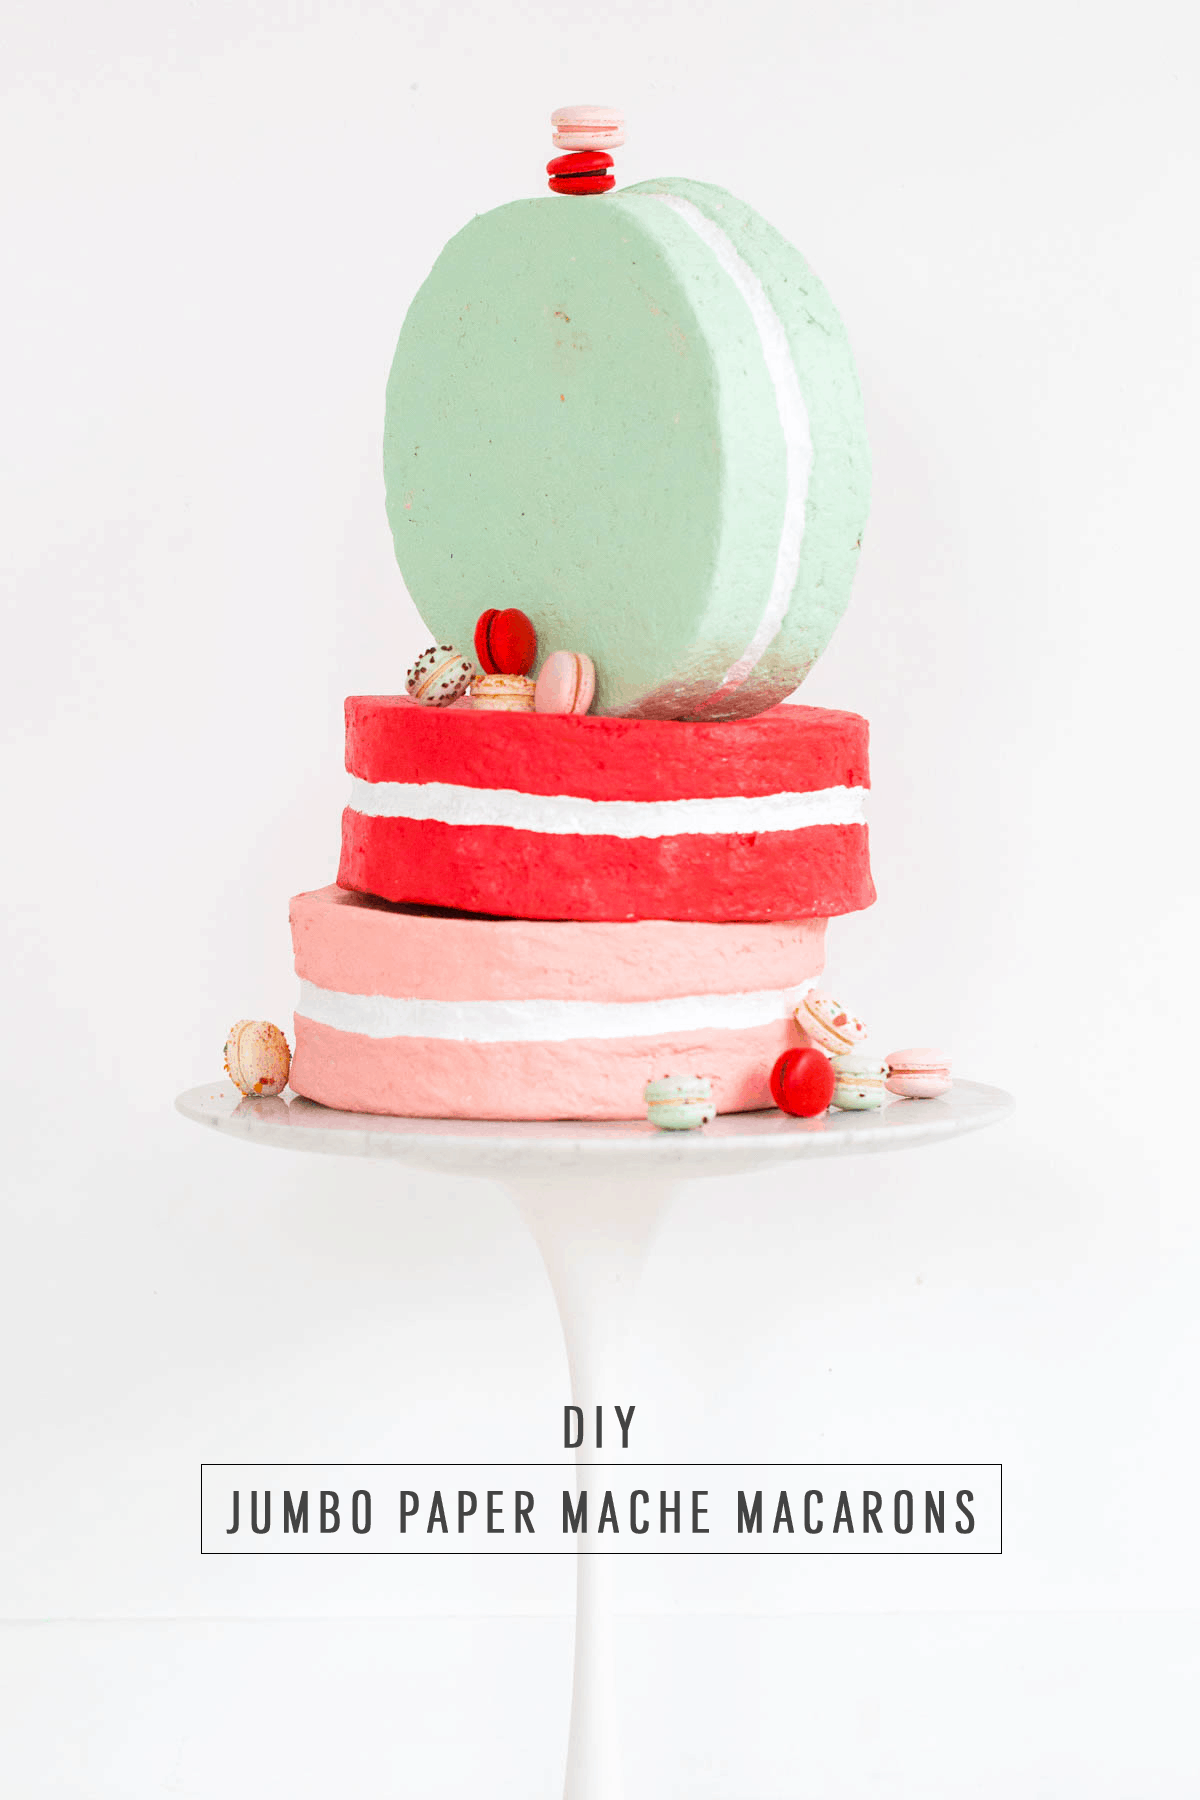
There is quite the story behind these jumbo DIY paper maché macarons, and it’s not all pretty. In fact, it involves several hours of elbow grease, a lot of toilet paper, and a couple of industrial fans to name a few. Things are getting weird, right?! That’s pretty much how we felt the whole time making these, haha!
It all started with me stalking our local party store (much love, Emerson Sloan!), when I found their giant macarons. The issue is they always sell out, and are little pricey for the number of them that I wanted. I literally wanted to make 10 or more, which would obviously break the bank.
I also couldn’t find them anywhere else online (I even stalked the manufacturer), so I very enthusiastically decided I should make my own. Fast forward a week later, and I must have been drunk when I thought that. I now totally understand why they’re $80! I honestly grew a mustache with the amount of time it took to make three… hence why we only have three.
And in case you’re like a paper maché guru that’s now judging me, go right ahead. I’m much more the five-minute DIY type. Let’s just think of this has speed dating and it didn’t work out with us, but we can still be friends.
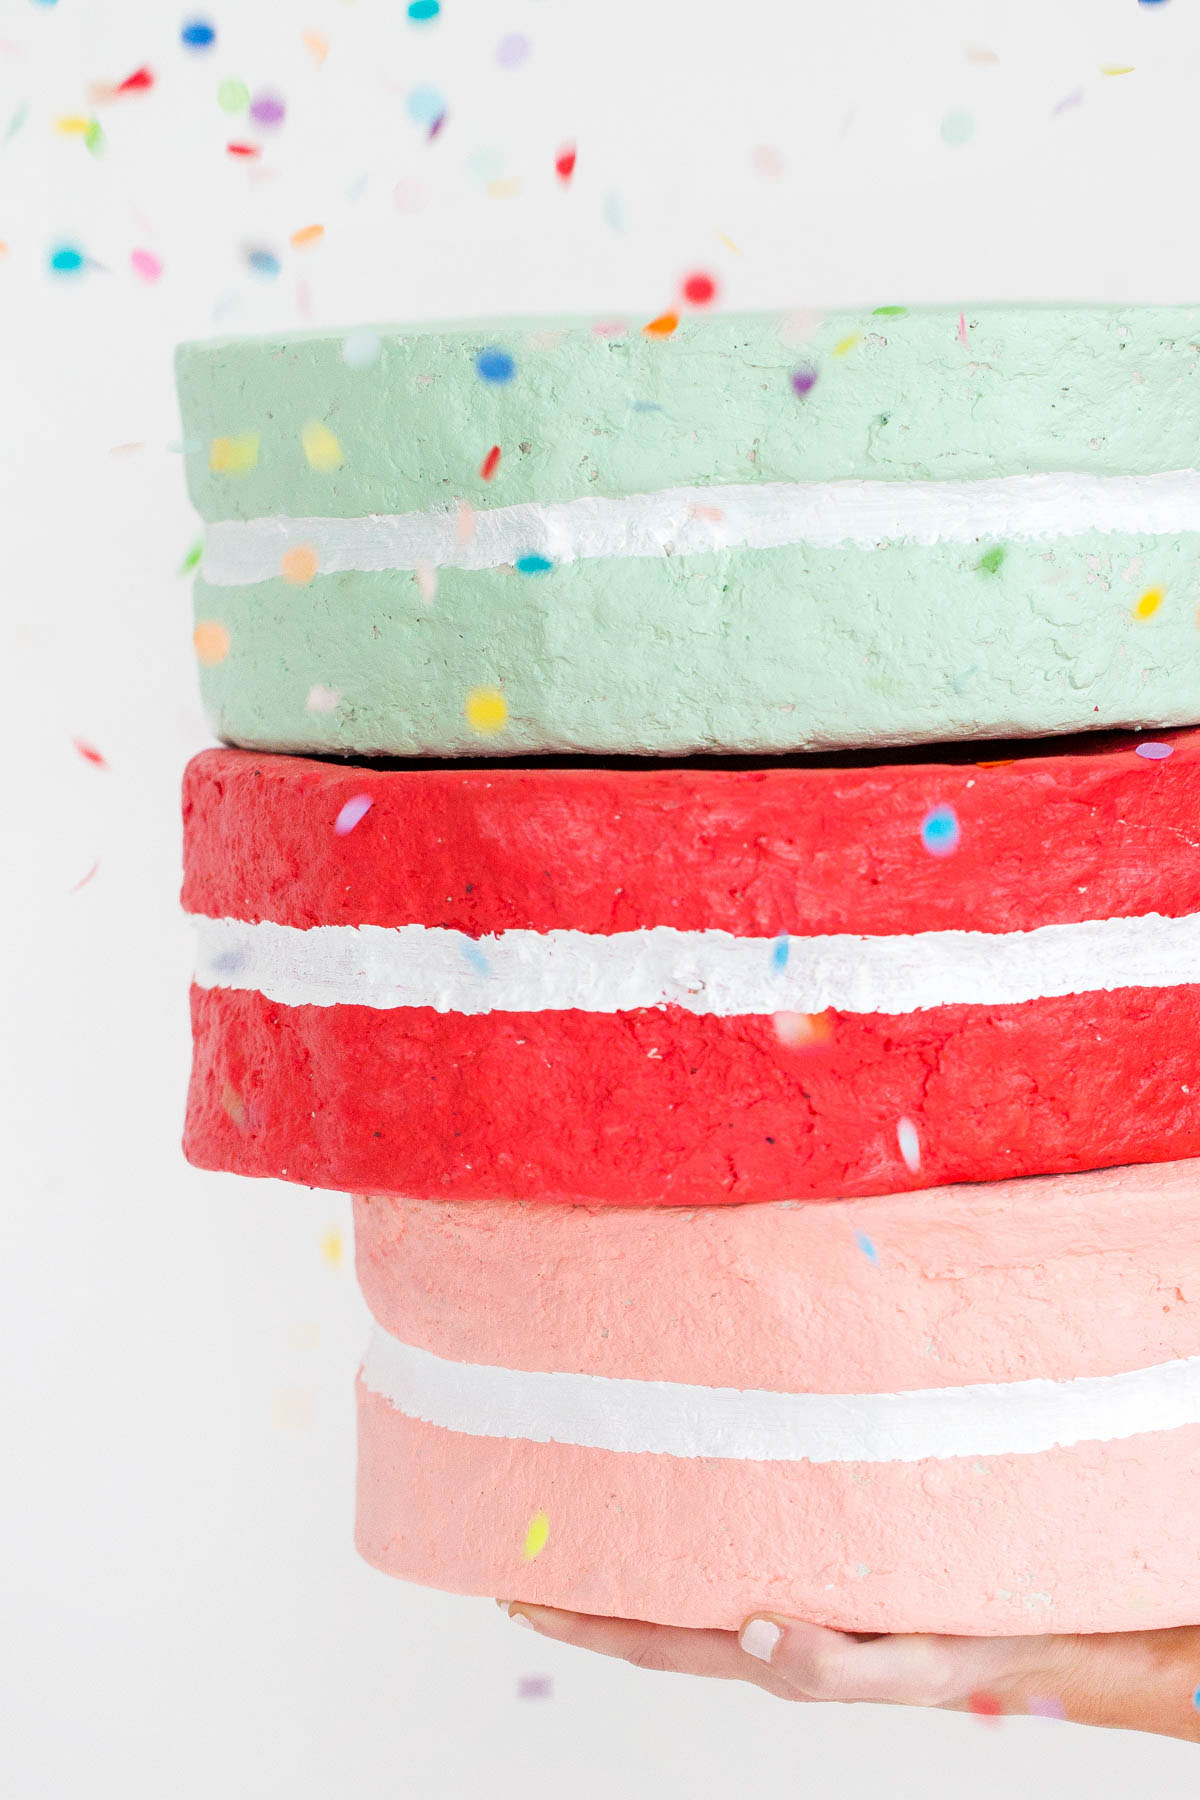
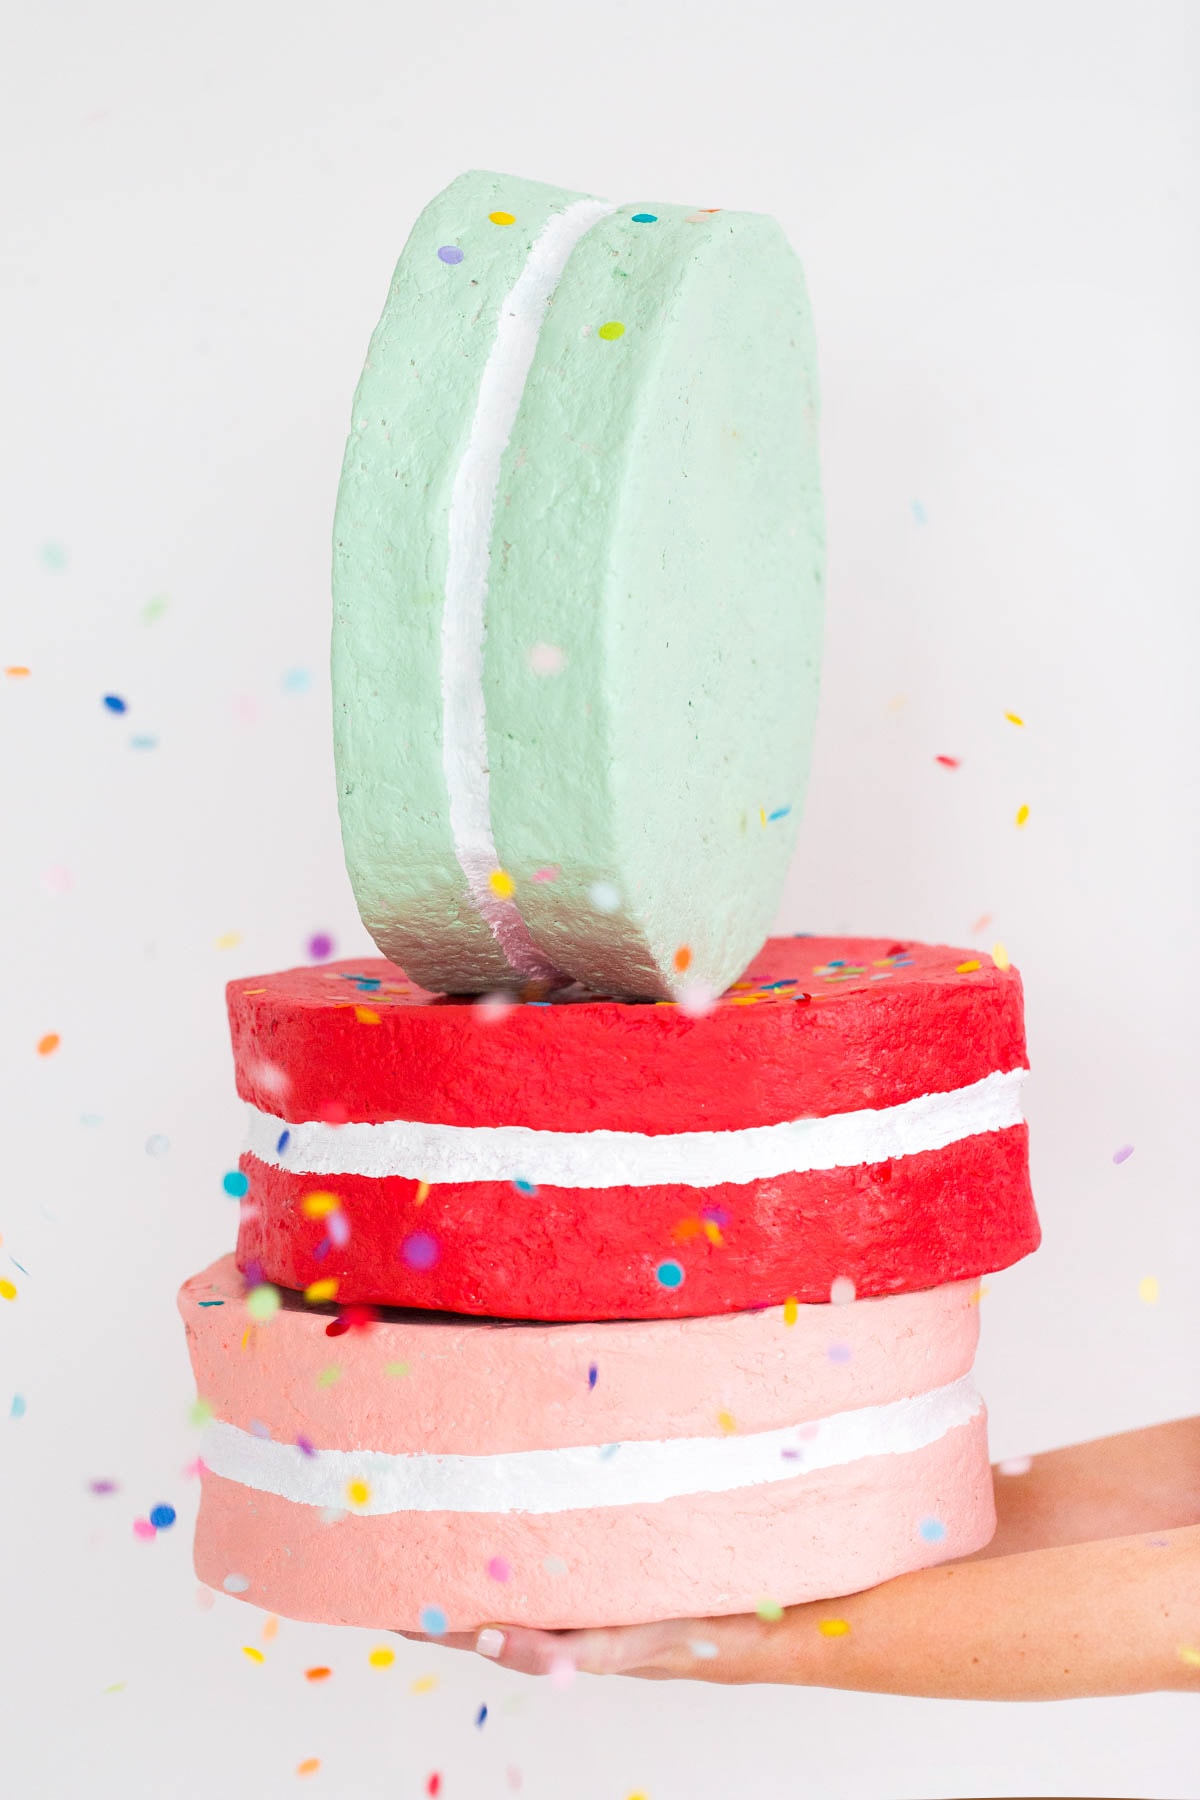
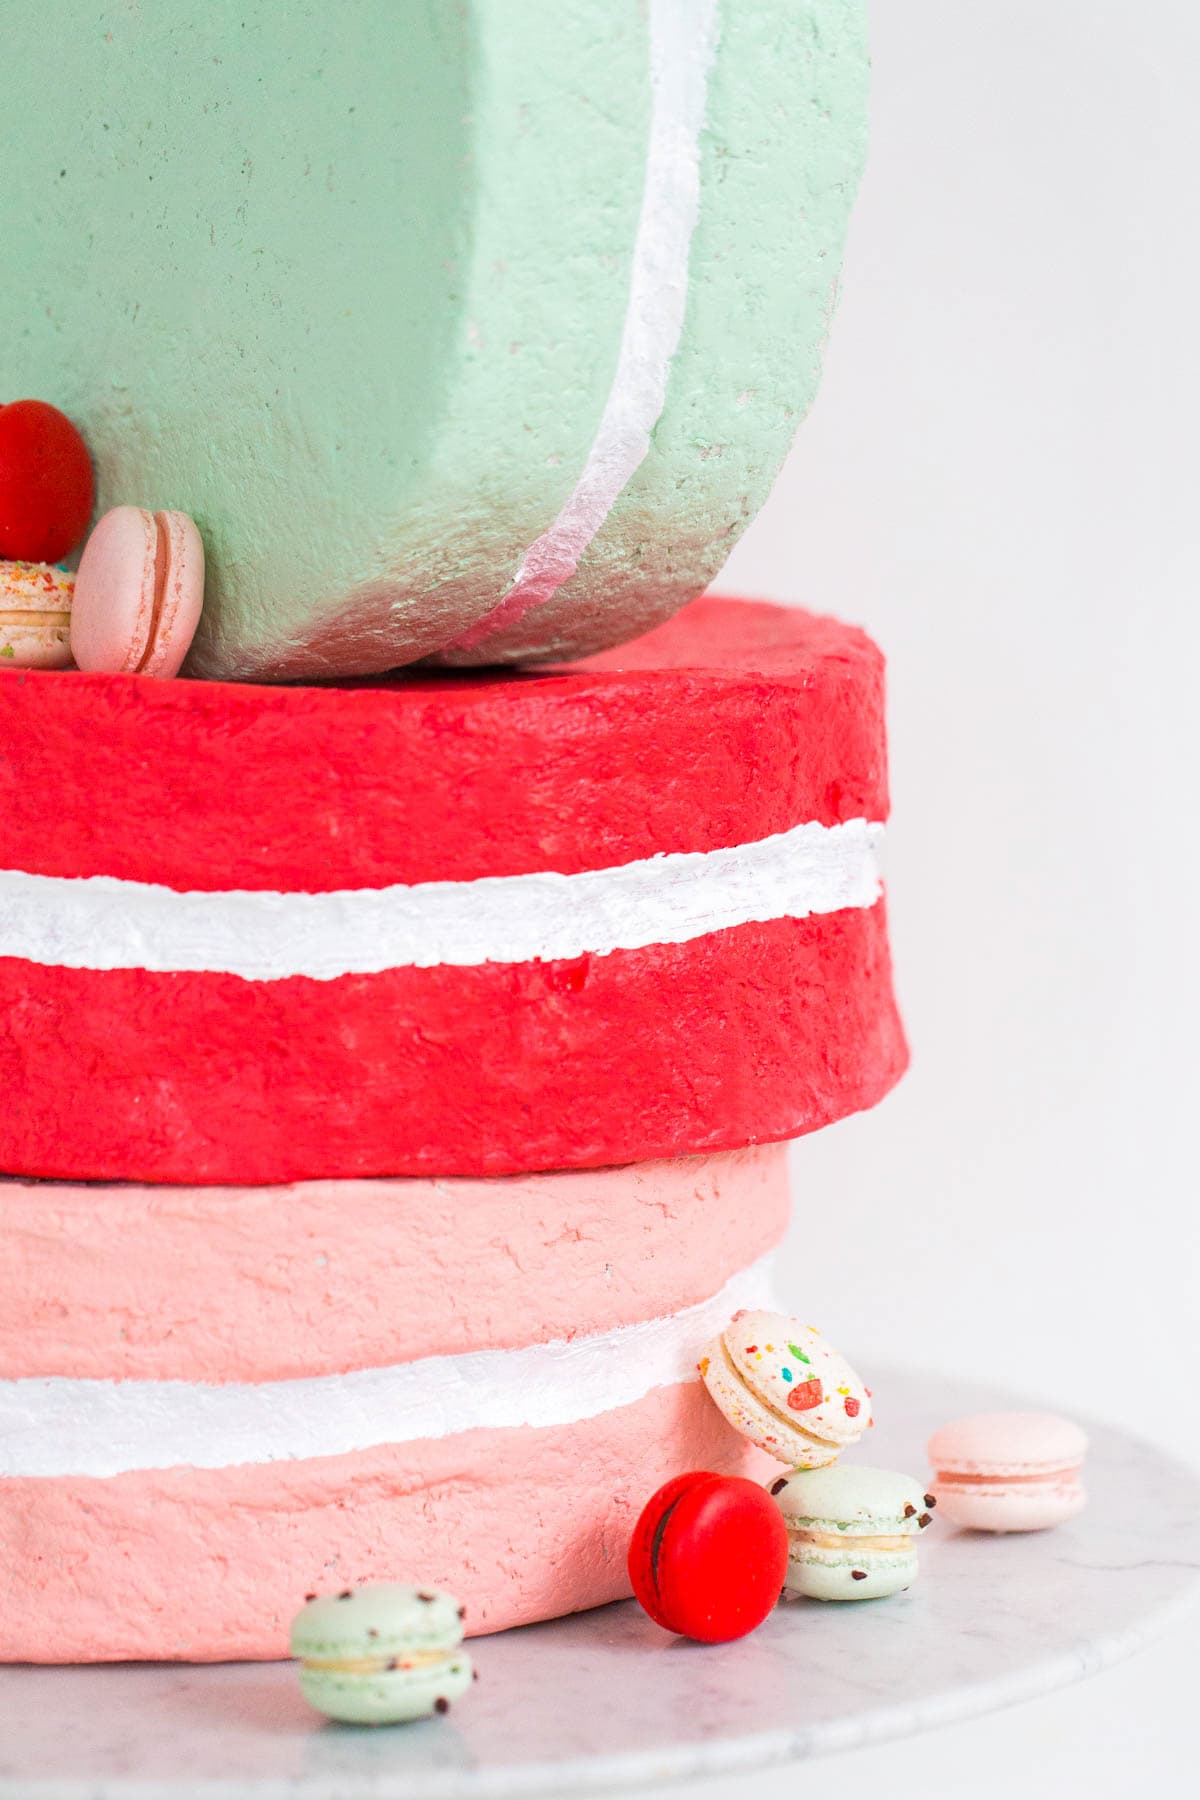
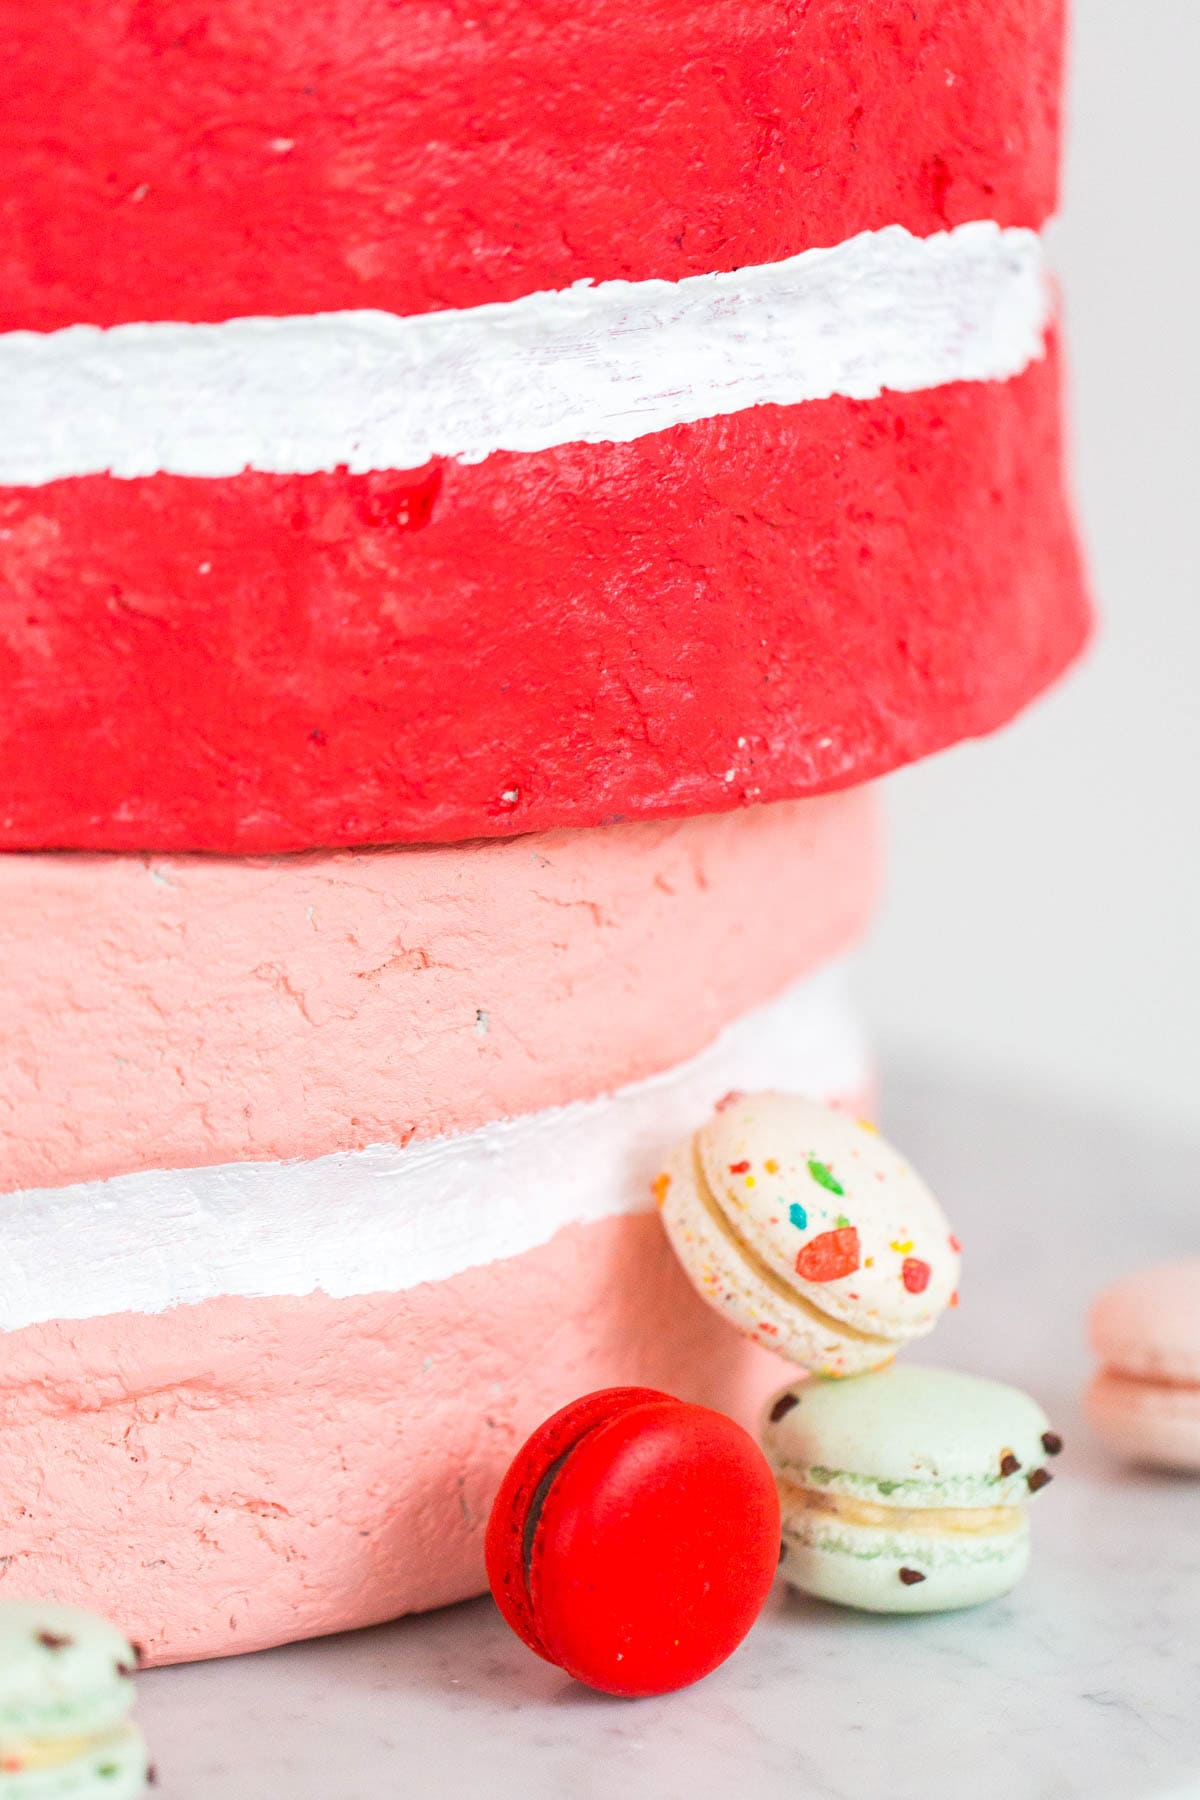
For those of you still willing to give it a go, my recommendation is to make them a bit… smaller. Ours are 14 inches wide and 6.5 inches tall, and are heavy like a rock. That’s another thing I did wrong, but we’ll get to that. If this tutorial seems short, my apologies. It’s because I’m still tired from making these…
Paper mache clay recipe (What I used. Super sturdy, but heavy like a rock)
Classic paper mache recipe (What I should have used. Sturdy enough, but light)
Sturdy cardboard
Painter’s or duct tape
Box cutter
Craft paints in the colors of your choice
Paint brushes
There are several different types of paper mache. Some are easier to mix than others, some are sturdier, and some are easier to mold. I thought using the paper mache clay recipe would be easier to make the macaron “feet” on the edges on the cookies, but it turns out it just made the process take a lot longer and weigh a ton.
I recommend going with a more traditional recipe and using resin or mod podge over top of the whole thing at the end.
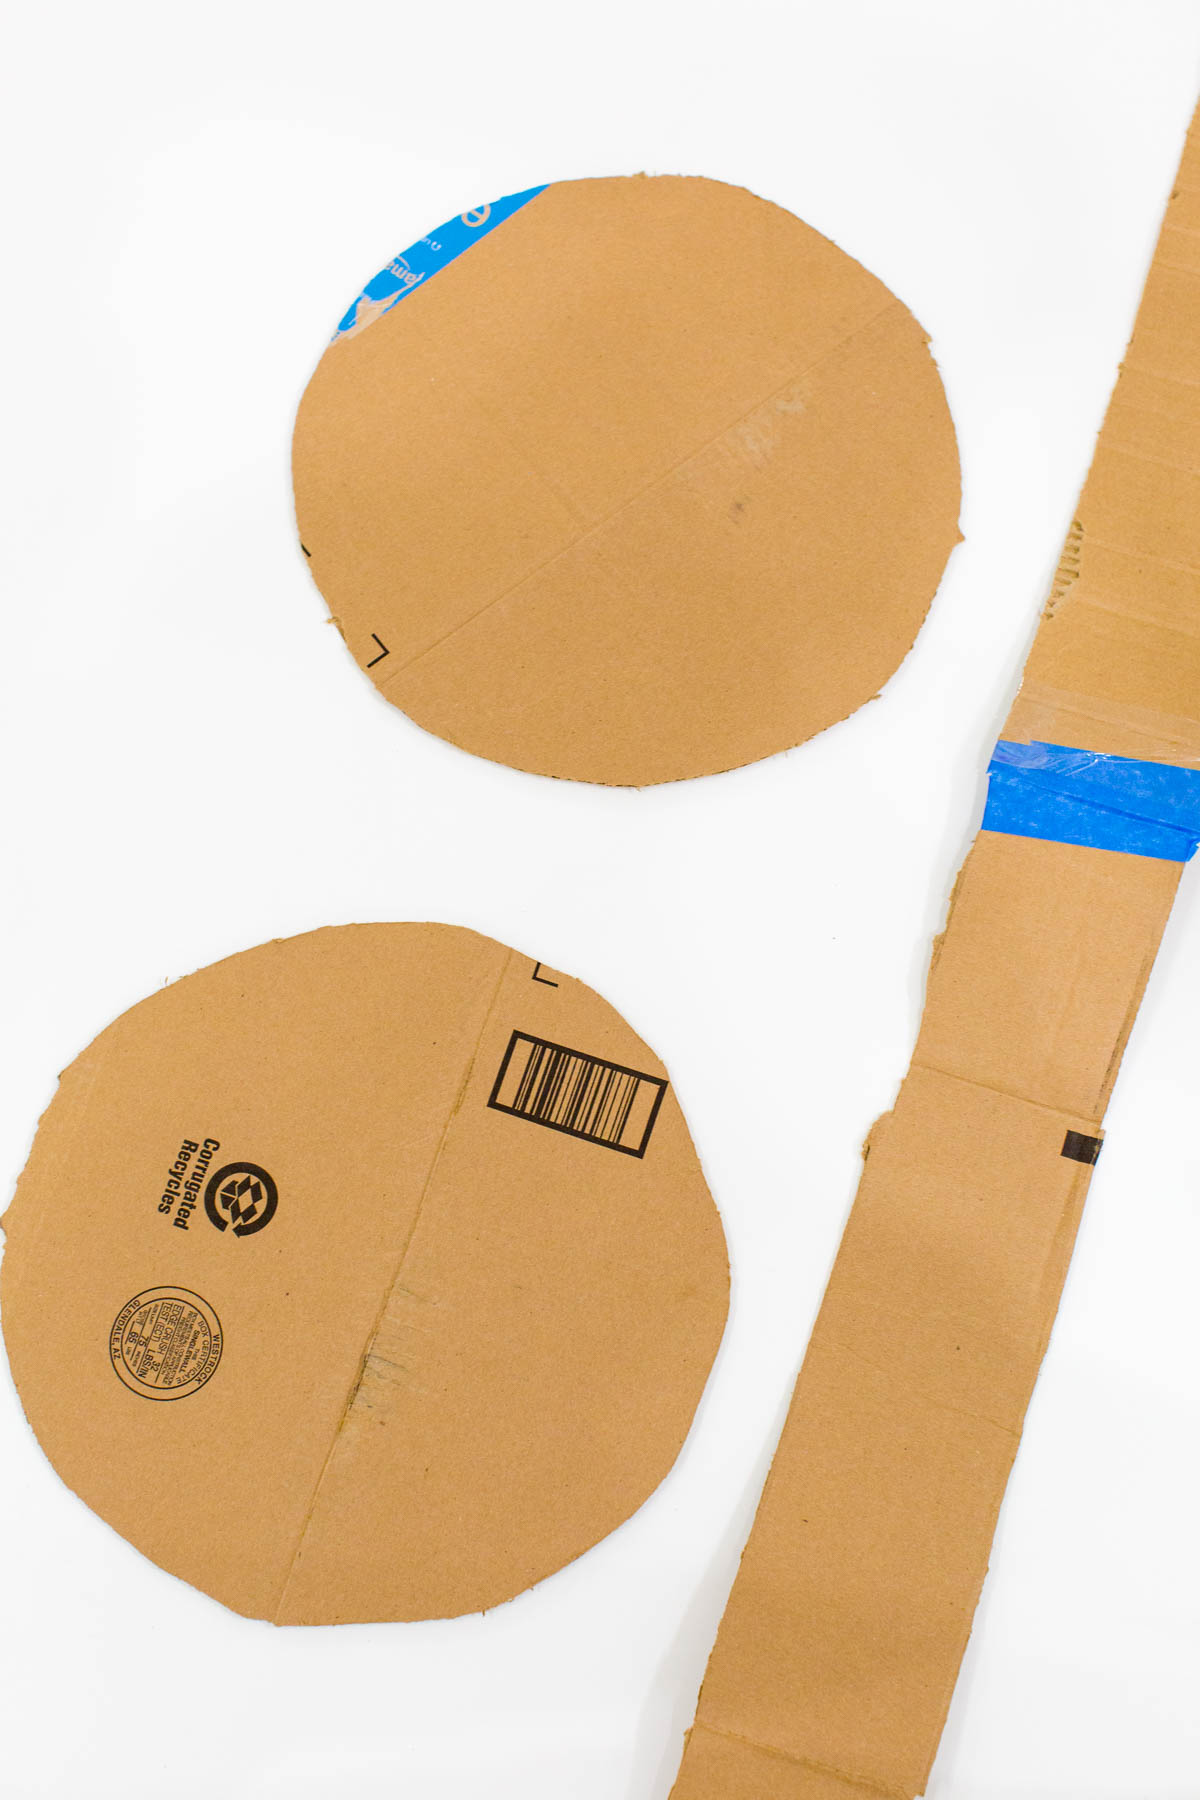
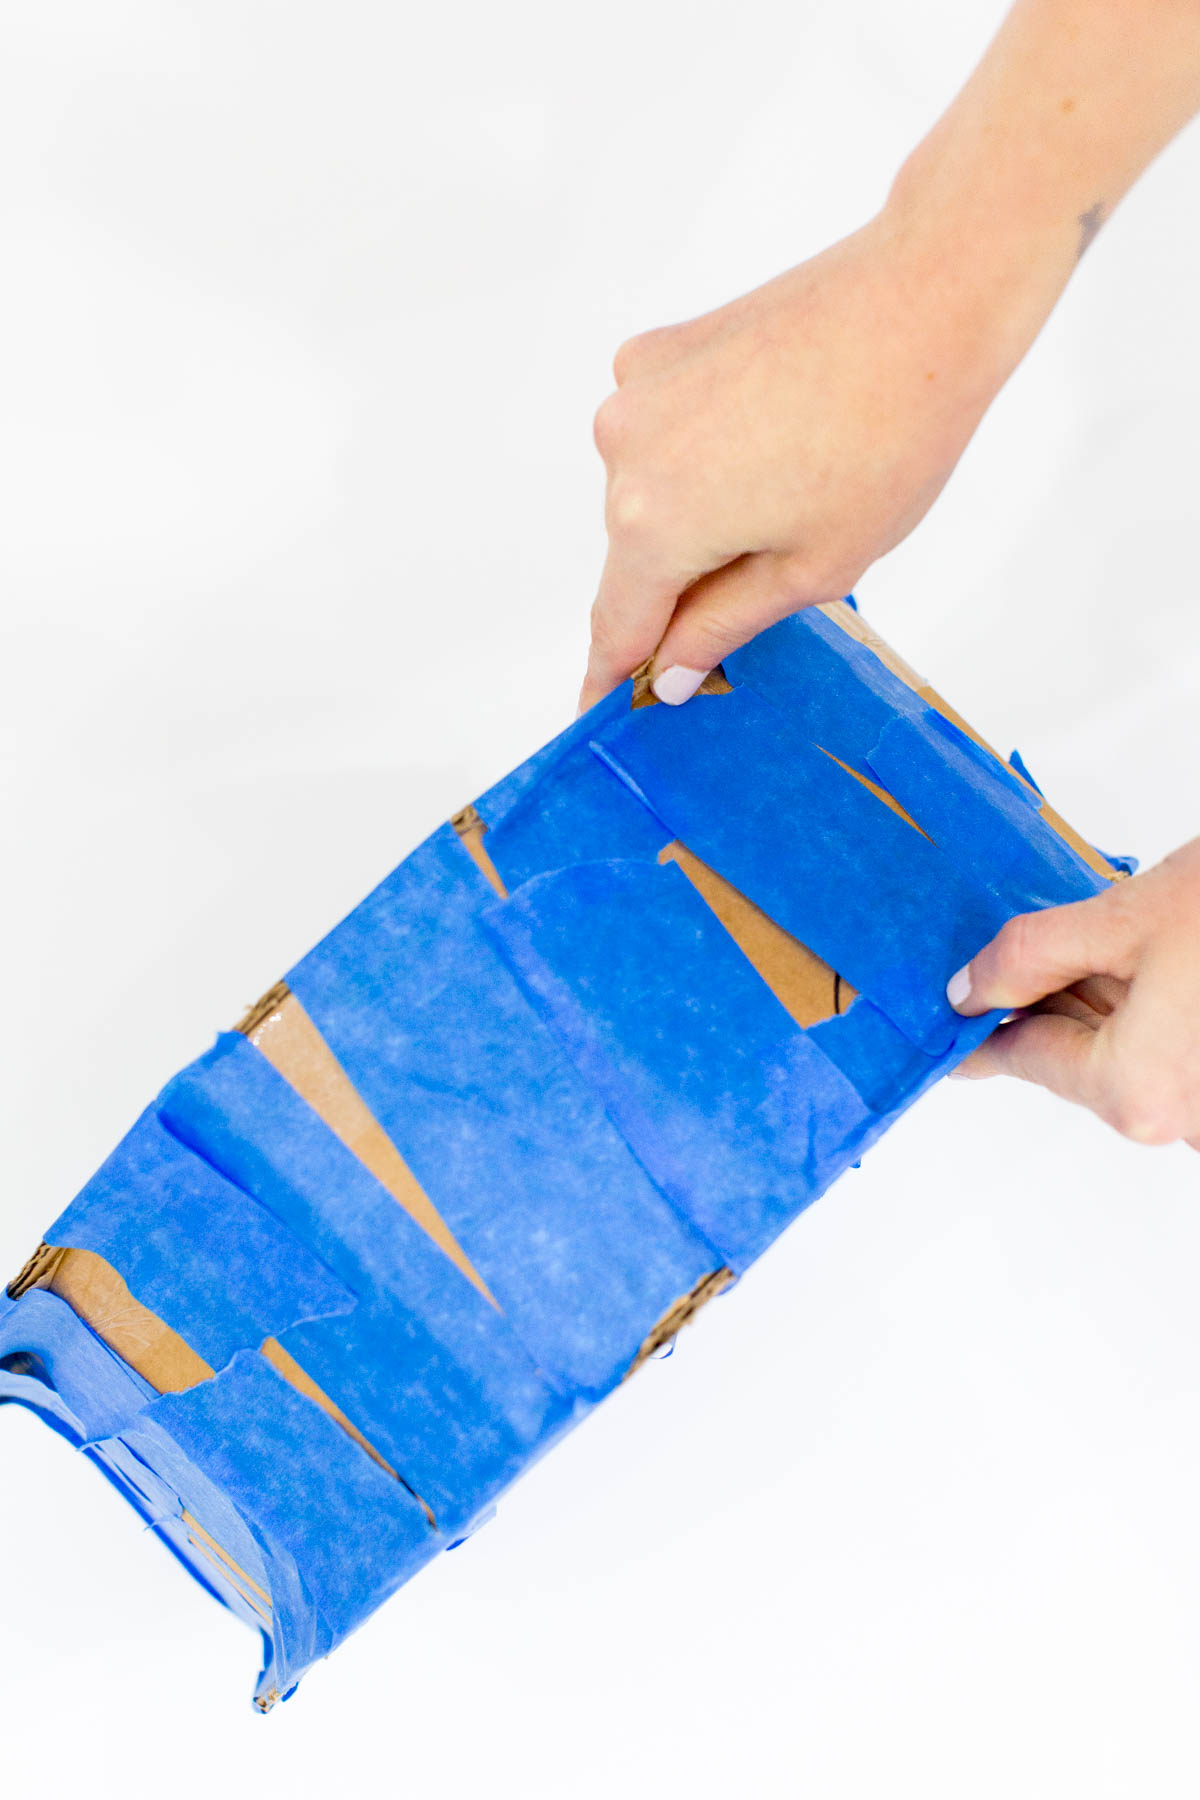
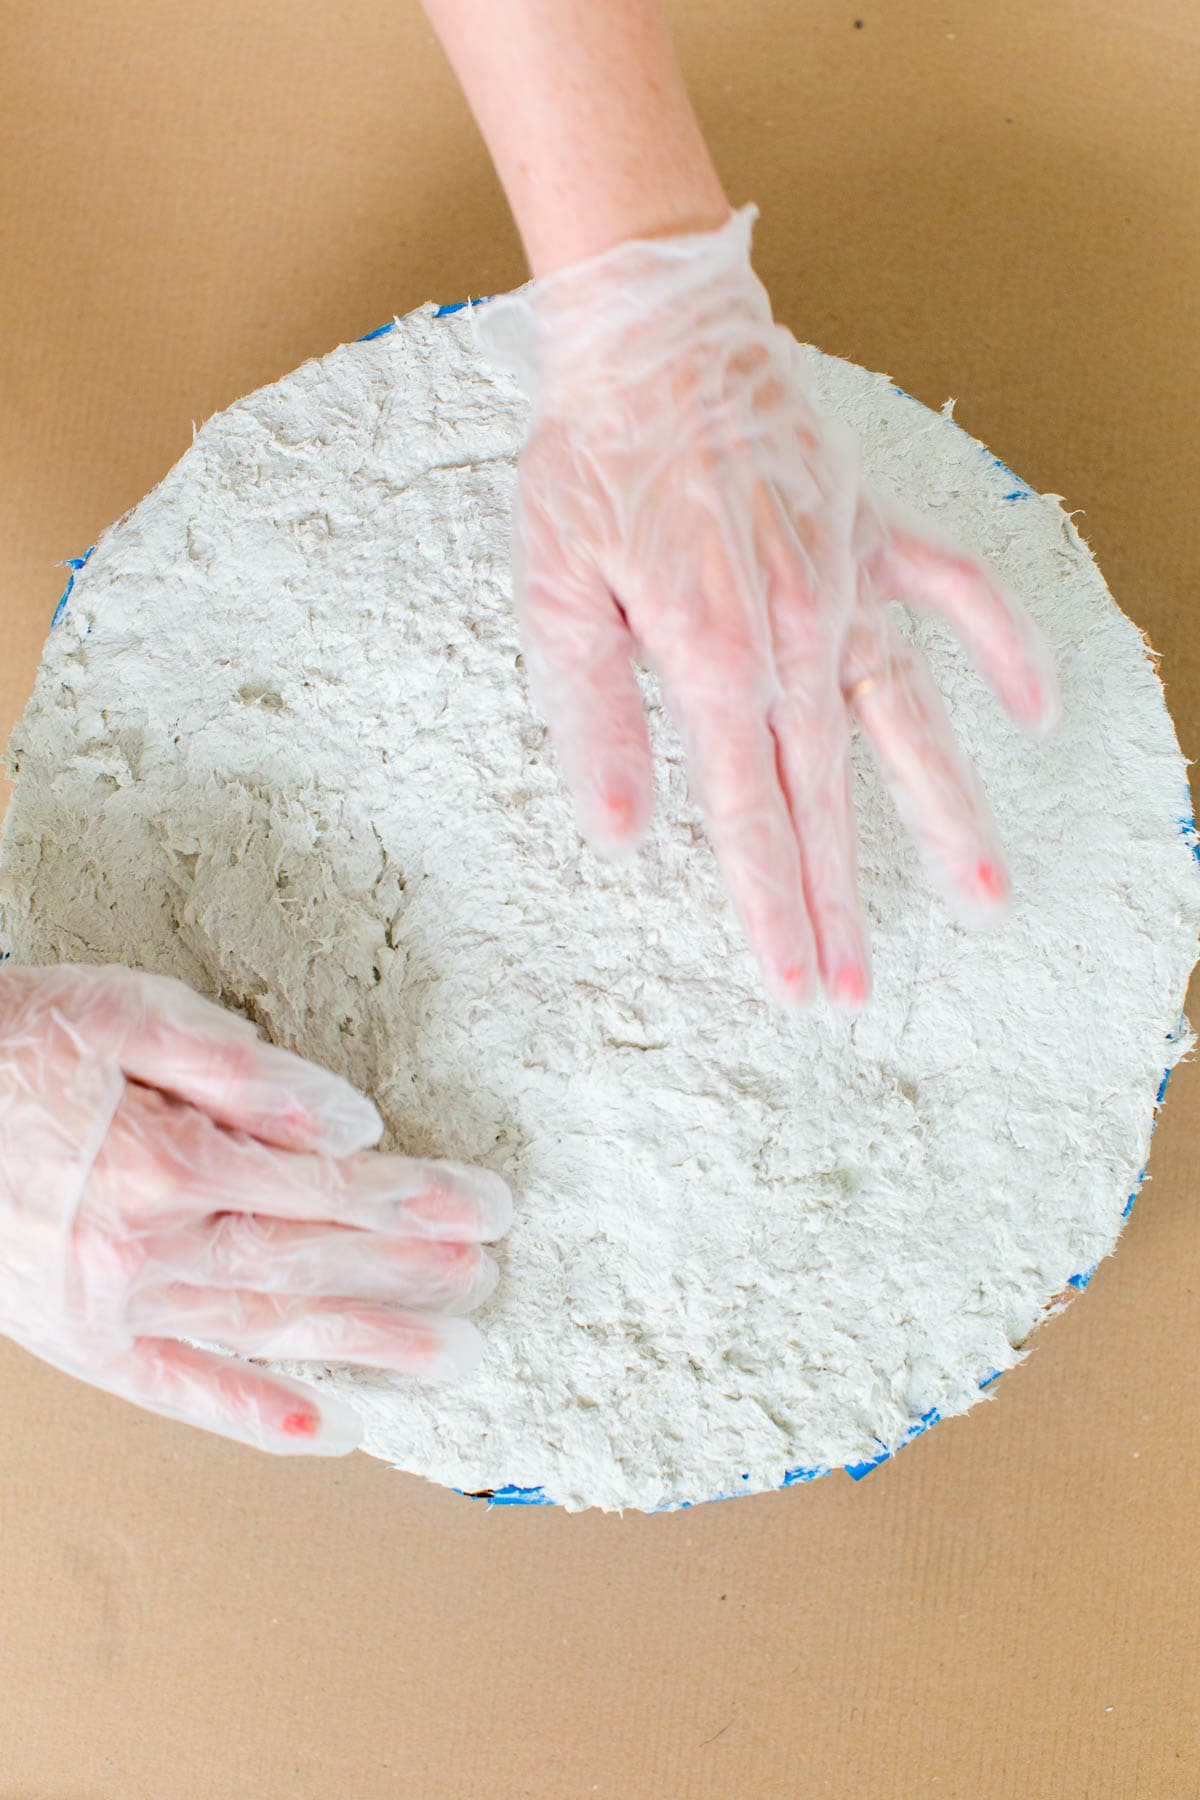
First you’ll need to make your macaron form to build the rest of the paper mache form from. You’ll need to same sized circles, and one long rectangle that runs the full length of the two circles to make a giant 3-D circle taped together with painter’s tape.
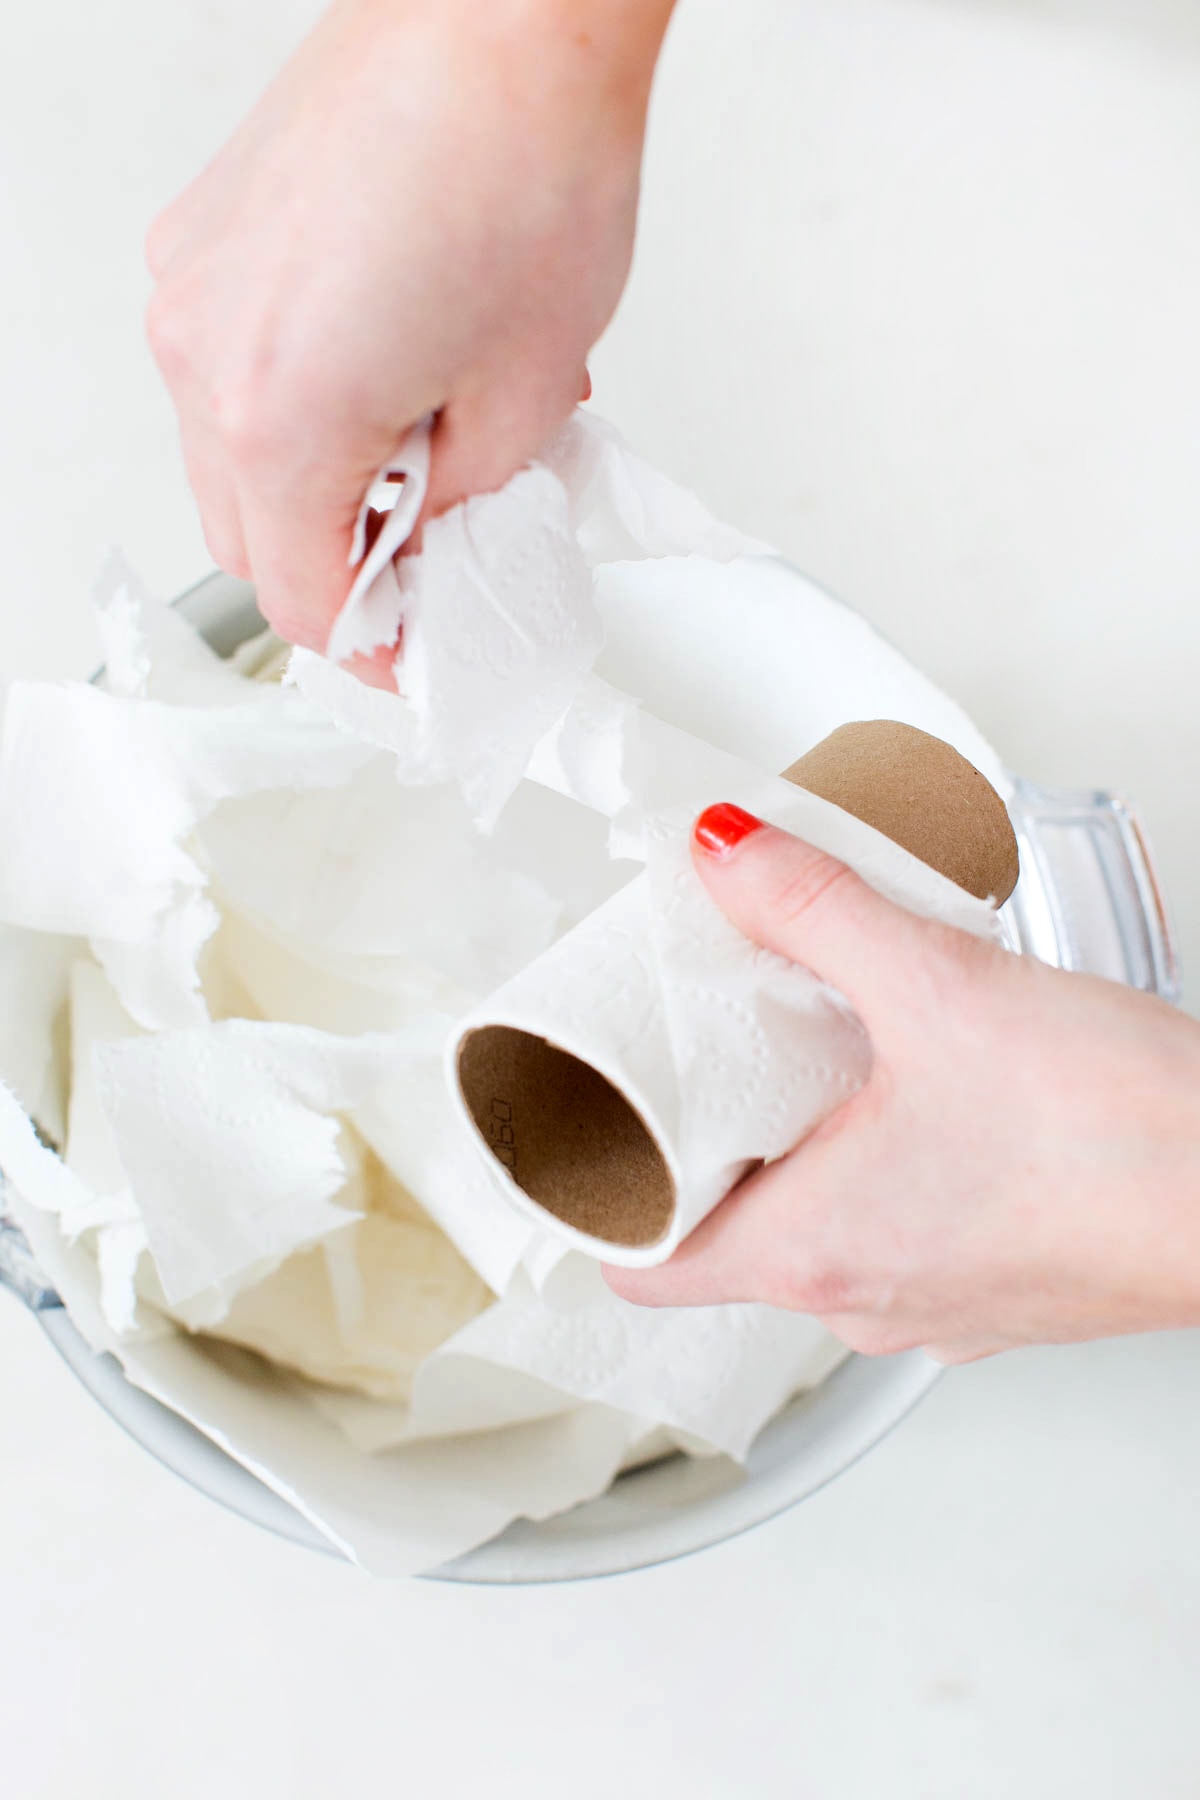
Now you’ll prep and/or mix your paper mache recipe to start building the macaron from. For us, that involved ripping a ton of toilet paper shreds, soaking them in water, and then draining. From there you add it to sheet rock adhesive and Elmer’s glue, then stir it with a giant drill stirrer. It’s a lot.
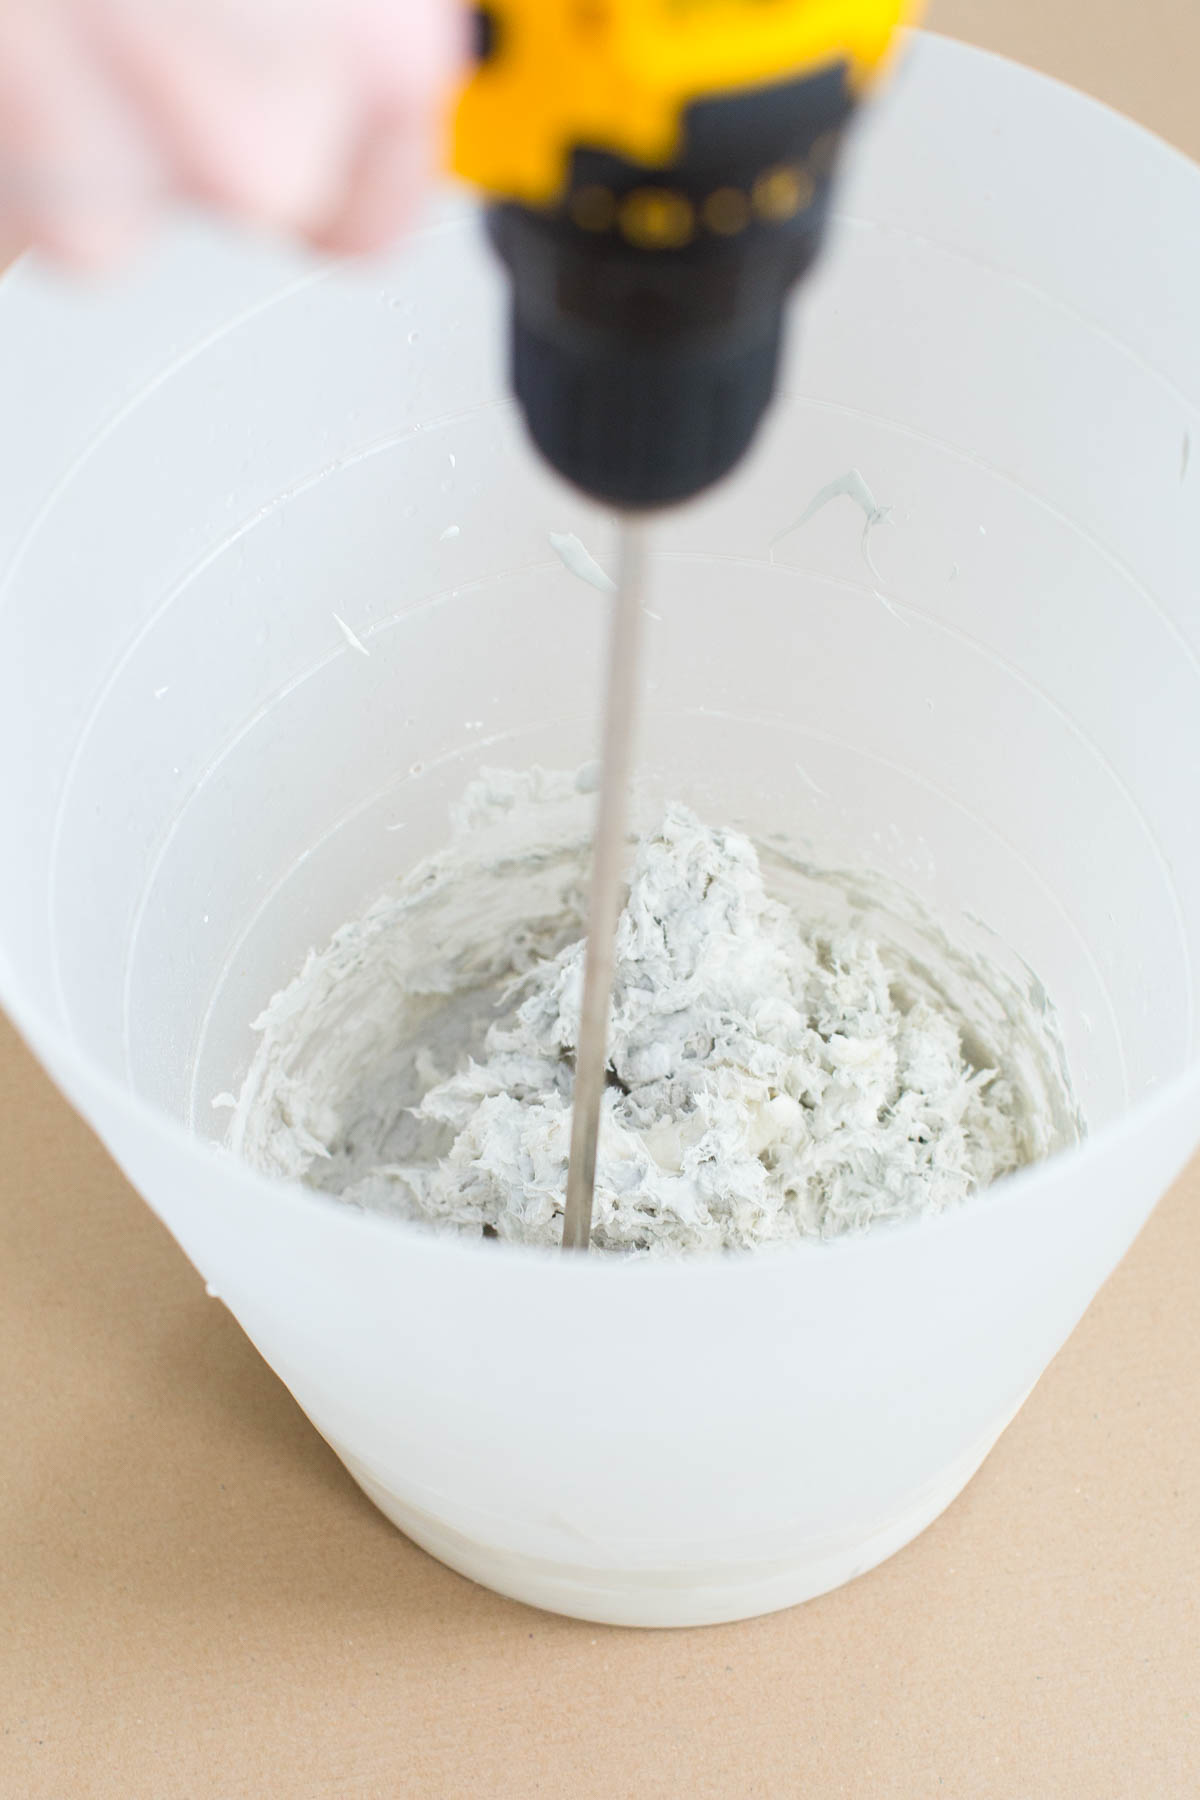
Admittedly the clay recipe was really easy to form the macron from, but if you didn’t let the toilet paper soak long enough, it made it hard to spread. If you go the clay route, let it get nice and soggy for a while. Because it also goes on really thick, it takes a super long time to dry.
That’s where the industrial fan came into play. See what I mean, yet?!
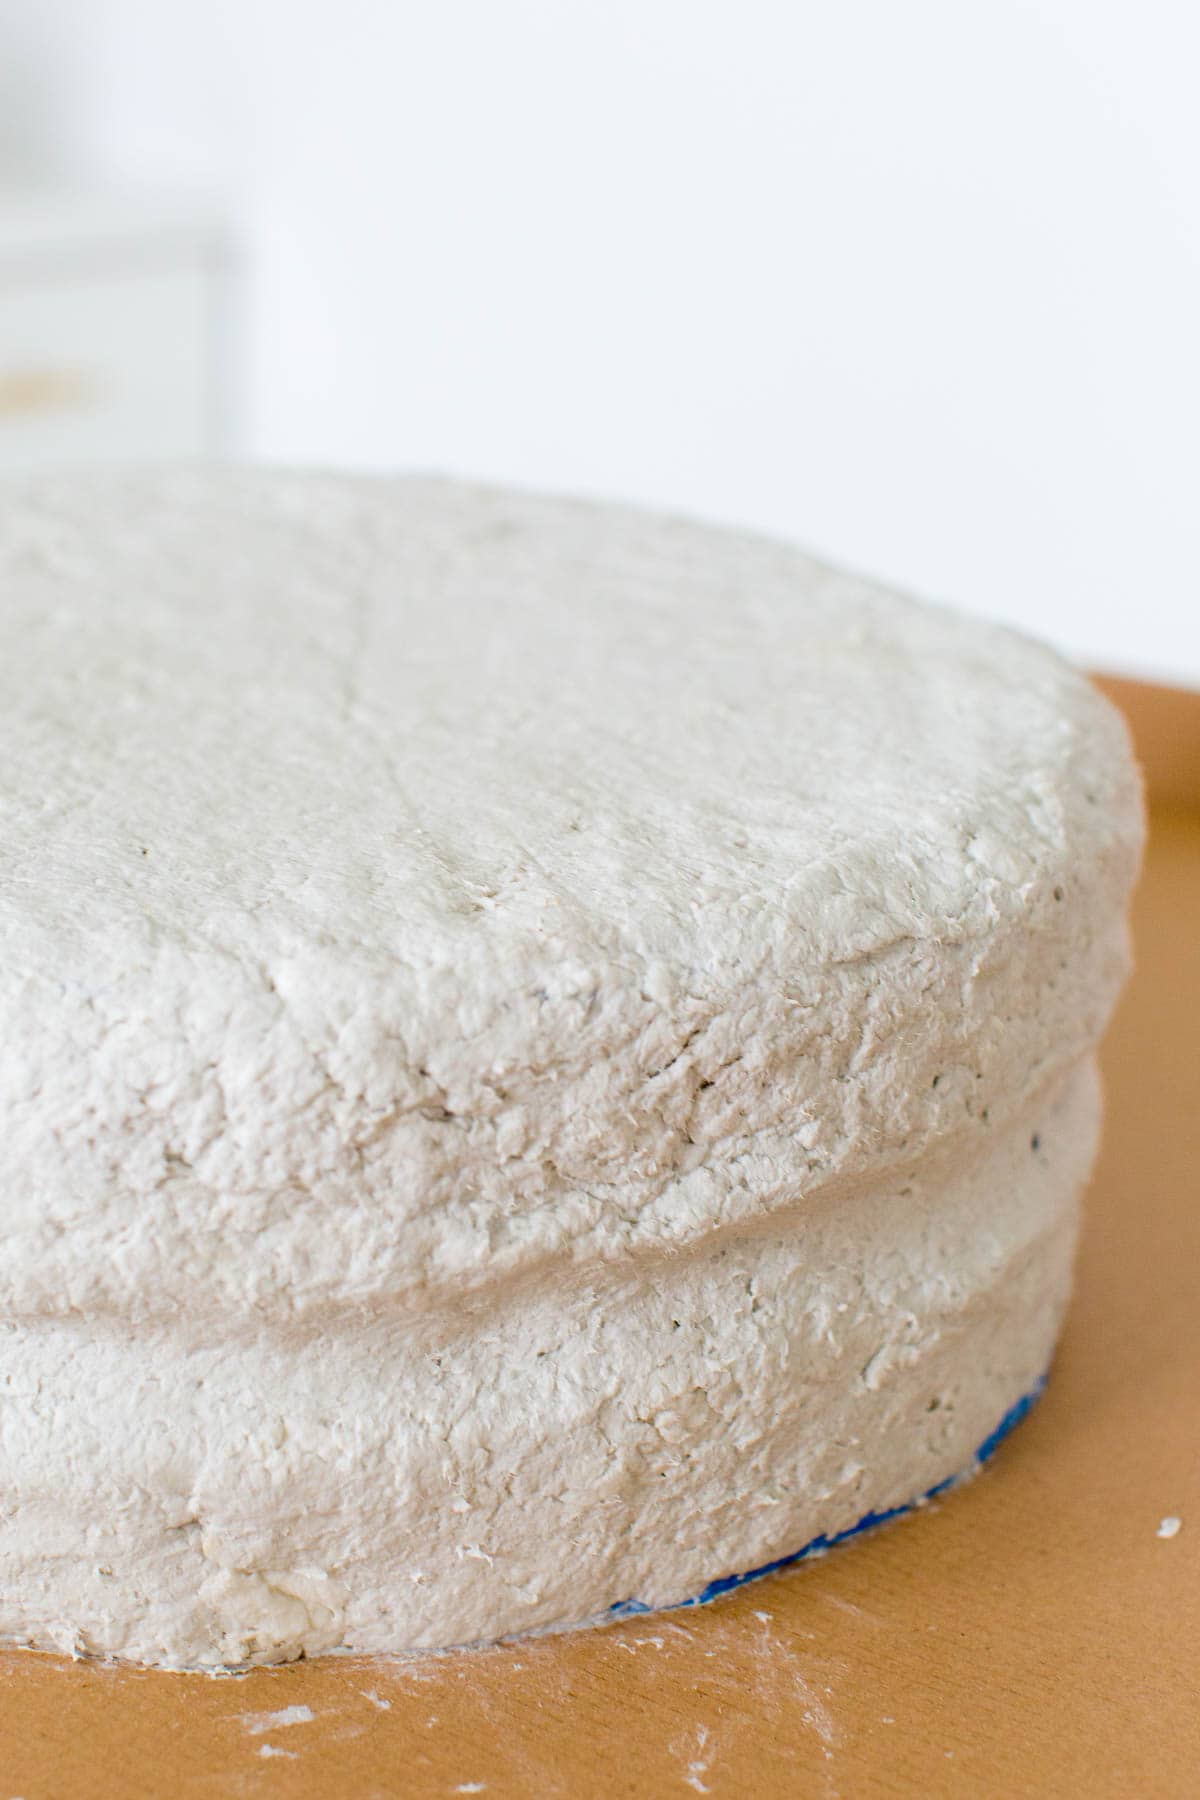
After about four days of fan drying and constant flipping, they finally dried enough to paint them token mac colors…
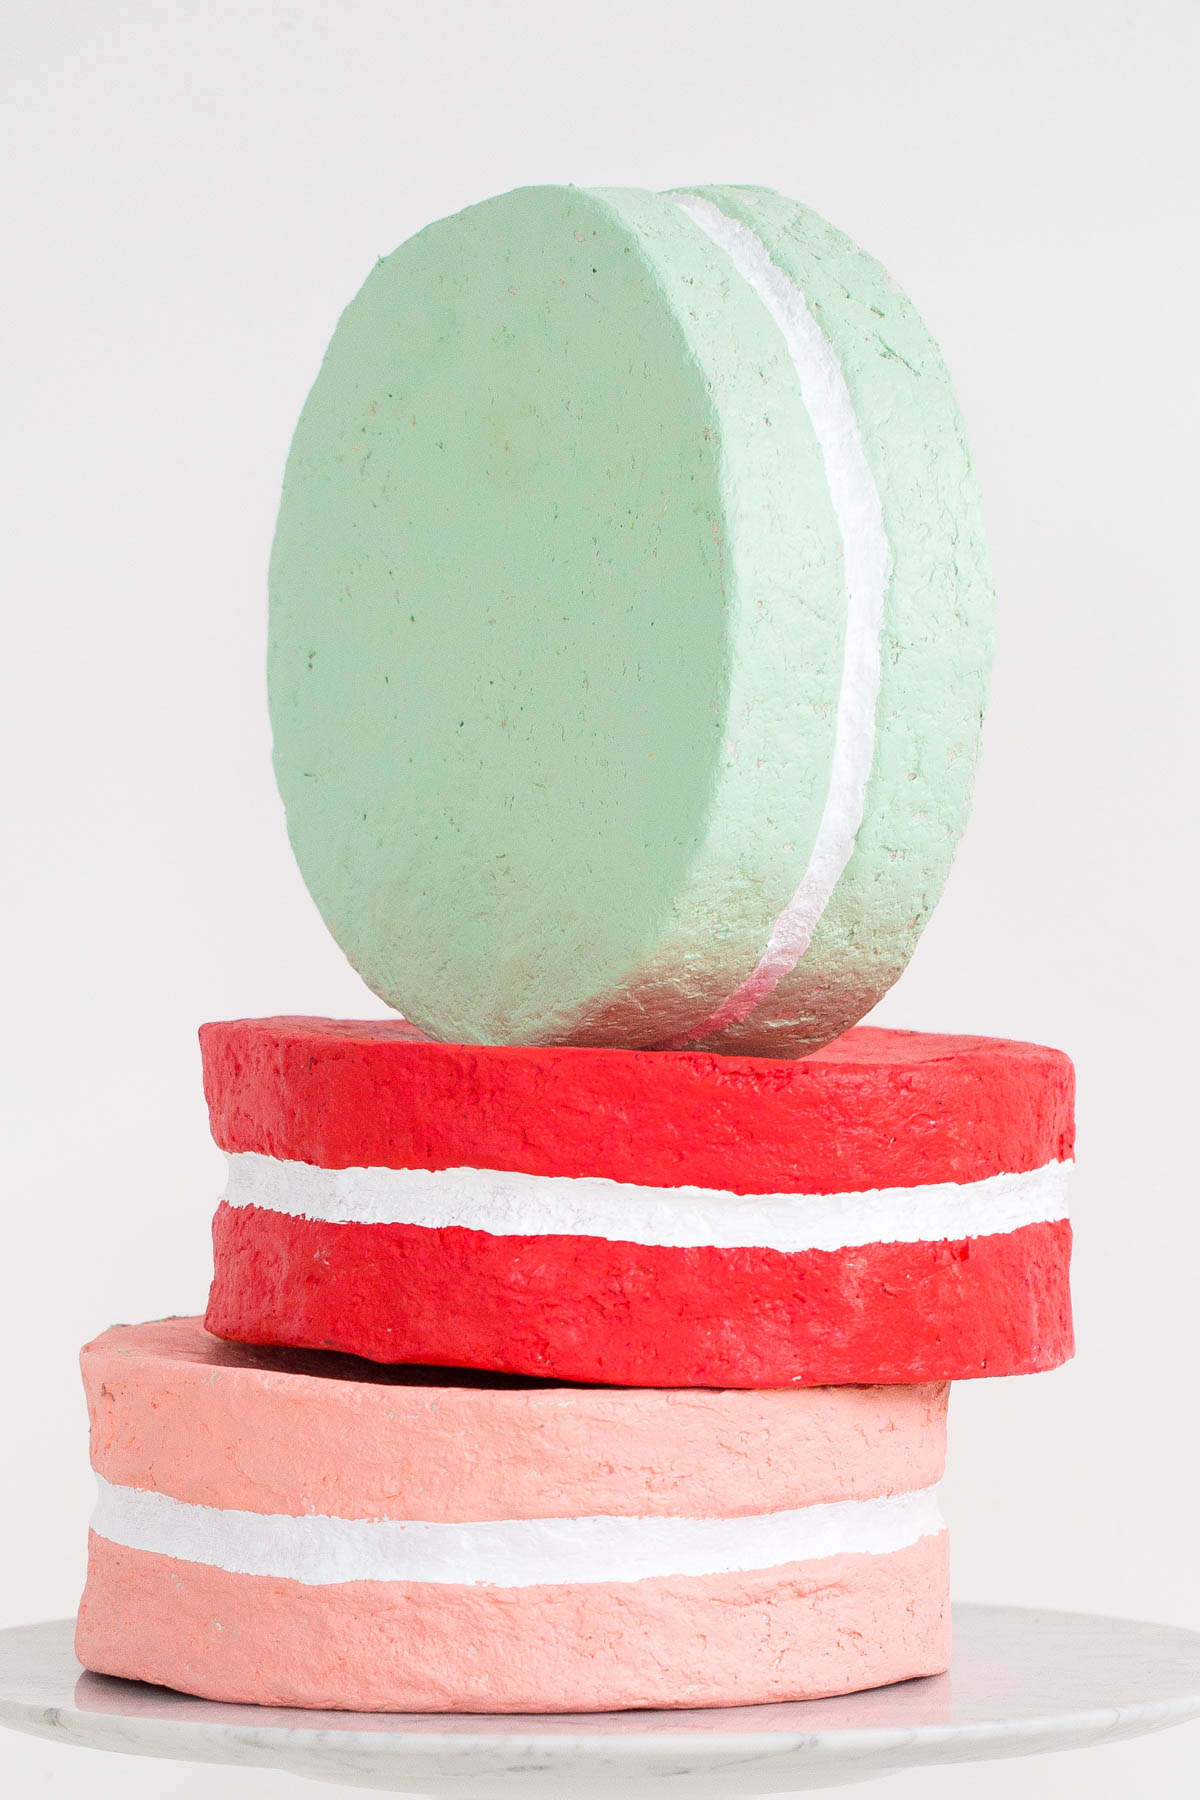
Now the question is, “Would I ever make jumbo paper mache macarons again?” Hells no. But if you all do, you should totally send me a picture! In the meantime, I’m going to go find a glass case to put mine in so that they last forever.
I think it’d be super fun to hang these from the ceiling…of course, if they’re not too heavy! haha! Maybe mini ones will do for the ceiling. :)
XO from Austin,
Sarah | The Bella Insider | @sarah_thebella
Such a cute idea!!
Everything about this story reminds me of when I had the “brilliant” idea to make a series of 10 pinatas for a project in art school…I don’t know how any crafters/bloggers have the patience to make their own; it took me ages. Never again!
hahaha! Why do we get so ahead of ourselves?! Glad I’m not in this alone :)
Get out!!! These are too cute!
Thank you, Marlene! :)
Ha. Well, they sound like a beast to make… but I’m so glad you did. They are completely amazing!
Haha, so true! In the end they were fun.. everyone needs some jumbo macarons in their studio, right?!
These are so clever Ashley!
Thanks, Tori! Had to :)
These are adorable! And I feel you on paper mache (and clay, in general) taking forever to dry sometimes! THese look great, but THANK YOU for being honest about the process! There’s nothing worse than attempting what looks like a super straight-forward DIY project only to encounter lots of issues. I feel like I could go on about paper mache for days… anyways, happy weekend!!
haha, right?! Just trying to keep it real around here ;)