Skip to content
Menu
Menu
Gift Guides
For Her
For Him
For Kids
Just Because
For Special Occasions
Decor
Bedroom
Kids’ Room
Living Room
Office
Bathroom
Kitchen
Outdoors
Recipes
Cocktails
Shots
Gin
Rum & Brandy
Sparkling
Tequila
Vodka
Whiskey
Wine & Beer
Non Alcoholic Drinks
Dinner
Desserts
Cakes & Cupcakes
Cookies & Candy
Donuts
Ice Cream
Macarons
No Bake Desserts
Snacks & Appetizers
Healthy Bites
DIY Projects
Home Decor
Entertaining
Travel
Beauty & Style
Printables
Behind The Blog
Holidays
Mother’s Day
Father’s Day
Fourth of July
Game Day
Halloween
Thanksgiving
Christmas
Birthdays
Valentine’s Day
St. Patricks Day
Easter
Shop
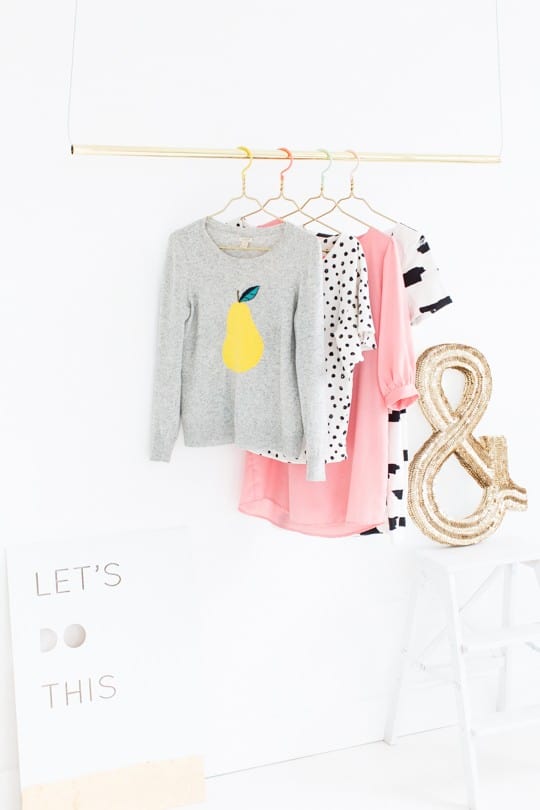
dipped
DIY Color Dipped Clothes Hangers
…
Read more
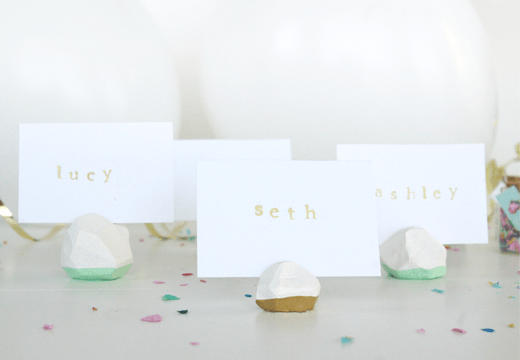
DIY Geometric Place Card Holders
…
Read more
Be an insider.
What’s Trending
Houston Local
Messages from Ashley
No, Thank You
CLOSE