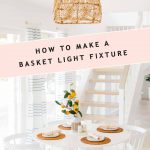
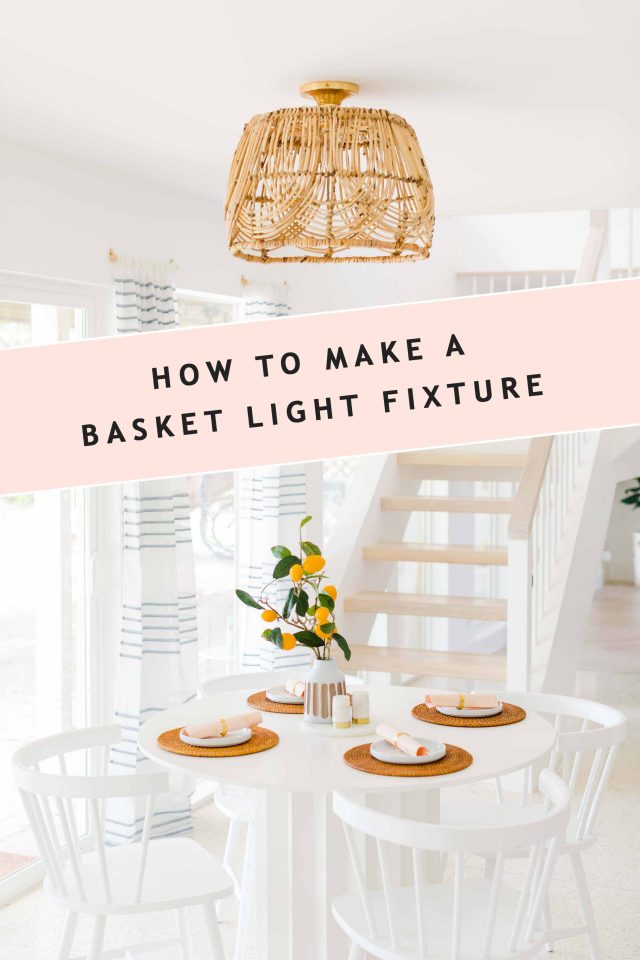
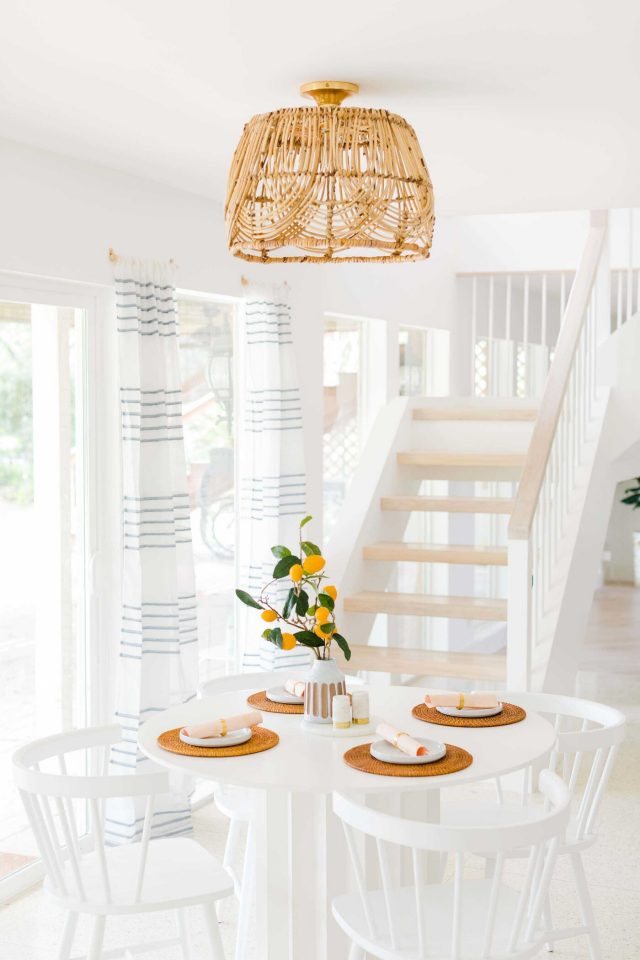
DIY Basket Pendant Light — On the hunt for an easy DIY pendant light to make? I’m sharing how to make a basket light fixture. And it’s so simple!
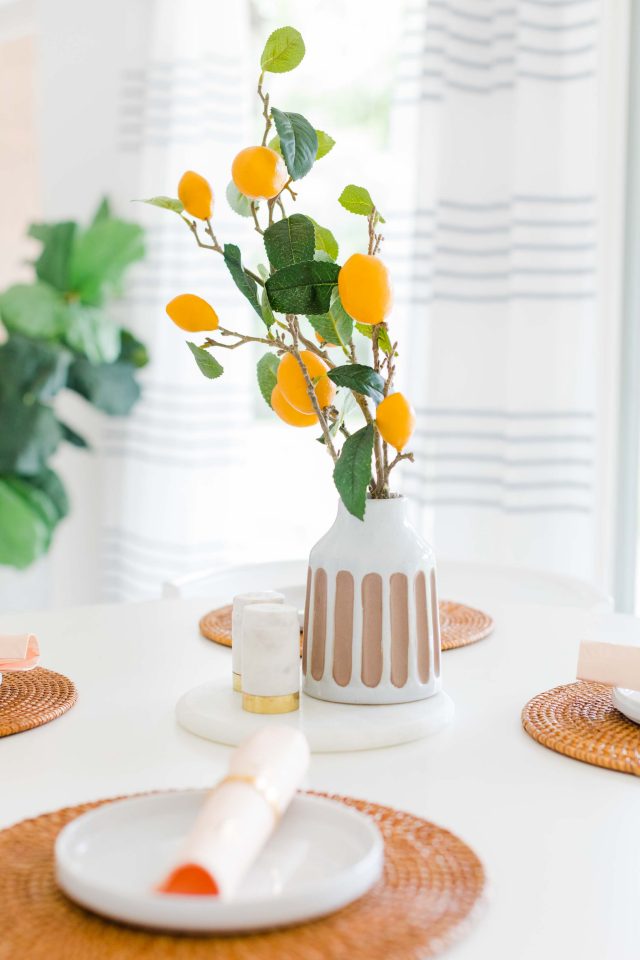
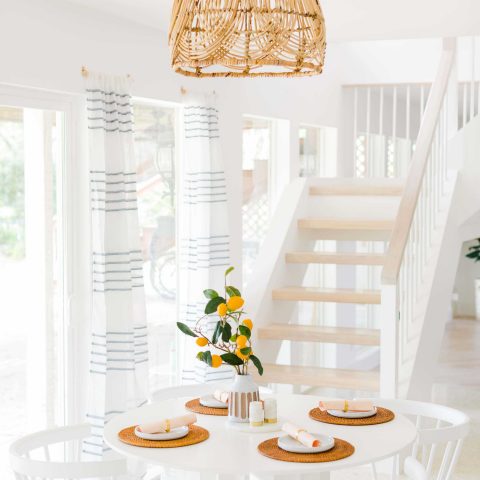
Hello, hello from the breakfast nook in our new house! I’m finally making this house feel more like home one DIY Basket Pendant Light at a time!
Okay, so not really via DIY pendant lights, but you get what I’m saying. We’ve officially been living in the new house for about two months now.
And I try to balance the fact that we still have WAY too many boxes lying around with a few styled corners.
We still have a ways to go with the breakfast area and how it flows to the connecting spaces such as the family room and our renovated kitchen. So this isn’t a true before and after of this space just yet!
That said, it does look DRASTICALLY different than it did in the original listing photos gallery in this post.
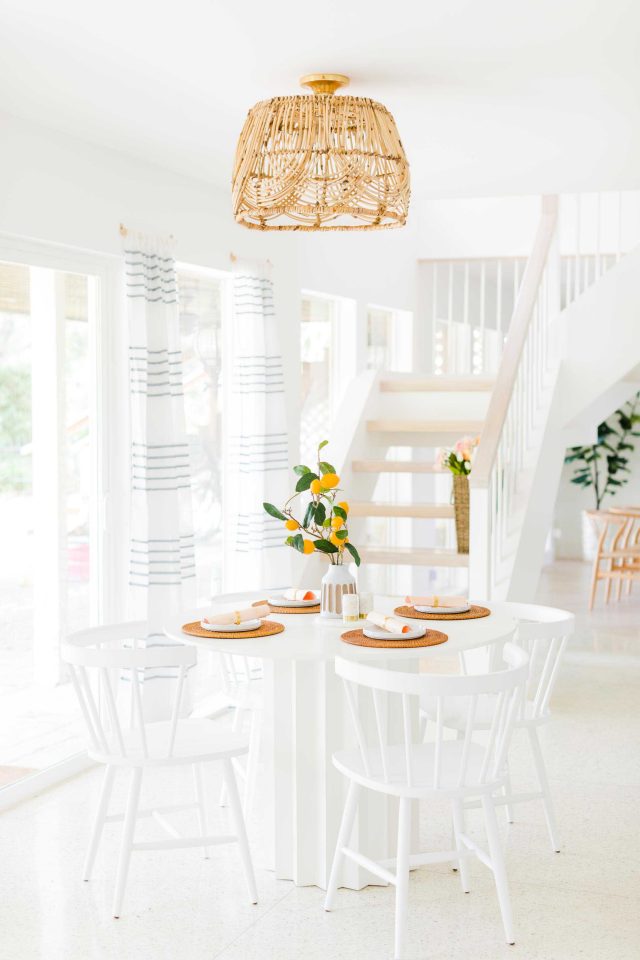
For now, I’m just focusing on sharing how to recreate this woven basket pendant light by using a plain old basket from the store and a few key supplies.
Servings: 1
As you can tell, this isn’t a TRUE pendant light per se. But you could easily lengthen it as much as you’d like using the same DIY idea!
Our ceilings in this room are just at eight feet, so I didn’t want to make the ceiling feel shorter by having a low hanging pendant light.
I opted for essentially creating a semi-flush DIY pendant light instead. This is also a really great option if you’re just looking to update an old light fixture because it’s easy to swap an old one out for this hanging basket light!
Breakfast Room Decor
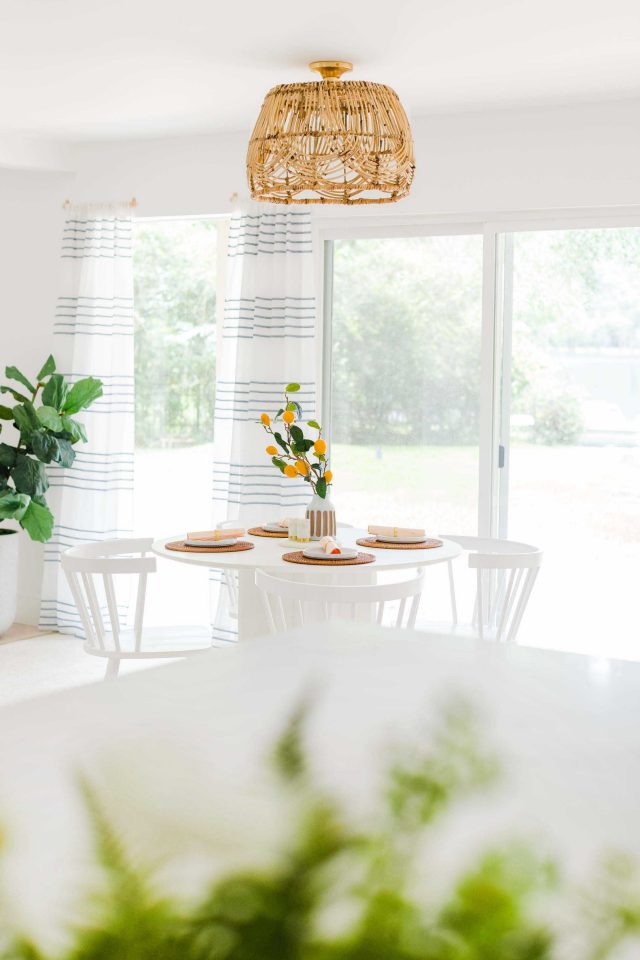
Since the light fixture is relatively short, I styled the finished product with a faux lemon plant stem to add height to the table (which is currently on a limited 20% off). The lemon stem also gives it a really modern, clean feel while still staying classic, too!
I also tied in the basket light fixture with the woven placemats for the table settings as well. I wanted a pop of color (that was still neutral) since the table and chairs are white.
The hunt for curtains was a long search. But I finally found ones that I liked from At Home.
Materials Needed To Make A DIY Pendant Light
Woven basket of your choice — I used this one from At Home Stores, but this one is similar and this set is spot on!
Semi-flush mount light kit — Here it is in black or silver or here in gold if you’re installing new instead of repurposing an old light
Choosing Your Basket
I originally snagged this basket from At Home to serve as storage for our living room blankets. But my friend Shannon mentioned repurposing some similar to our hanging floral baskets and I loved that idea!…
Having a basket with a defined center at the bottom is really helpful when it comes to this DIY. You can easily still recreate this light fixture either way, but wanted to at least give you that tip!
I also preferred using a basket that didn’t have handles, but you could easily use this rattan basket as a DIY Ikea Hack version!
How To Make a Basket Pendant Light Fixture | How To Wire a Basket Pendant Light
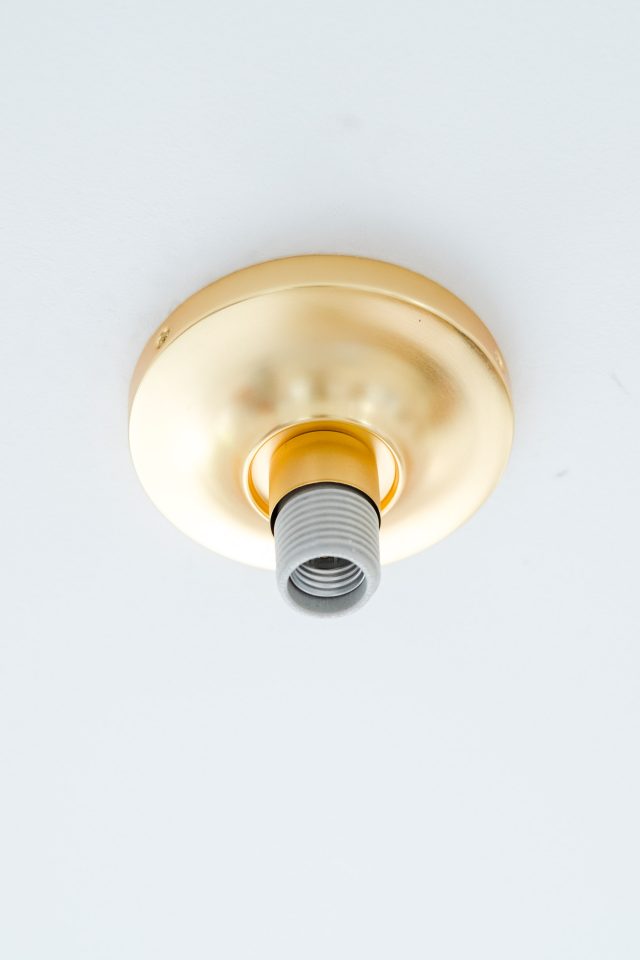
Again, I used the base of a semi-flush mount light. There are a lot of fixture options out there for this. And most will have some sort of shade already included.
I linked to several options in the materials box above. But the how-to photo gives you an idea of what it looks like installed on the ceiling without a shade.
If you’re buying one of the ones I linked to, you’ll essentially install everything BUT the shade that comes with it.
This is an easy video tutorial for switching out a ceiling light to follow along with. I know electrical wiring can be intimidating though!
I’ve used Task Rabbit for having a quick light installed several times!
If you’re on the hunt for an easy DIY pendant light to make, I’m sharing how to make a basket light fixture and it’s so simple!
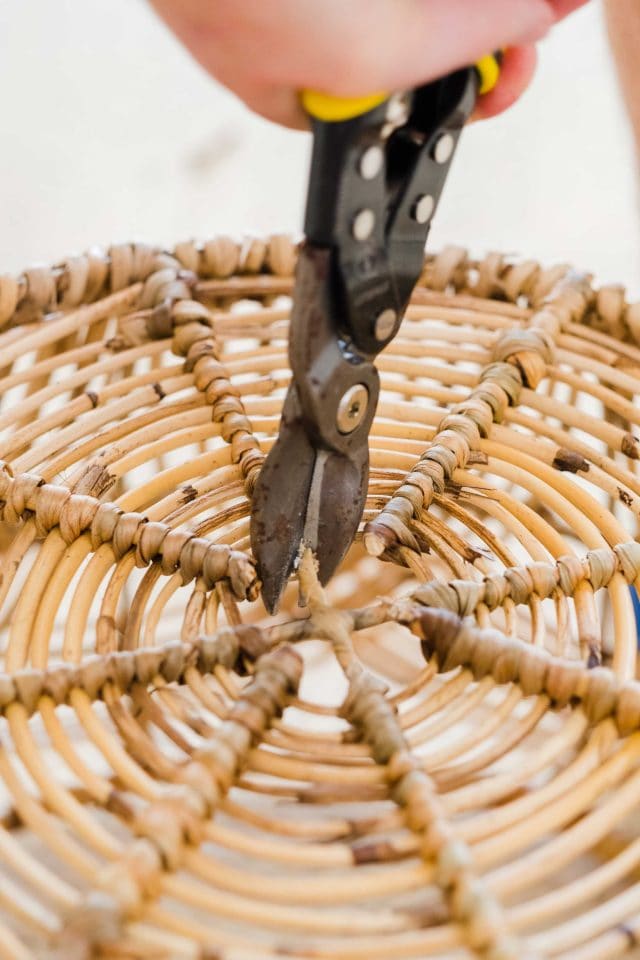
1 — Once you have the wiring for the light complete, use cutting pliers to create a hole in the bottom of the basket.
Make sure that the hole is just wide enough to slip over the light bulb socket. However, you also want it to be a hair smaller in diameter than your shade ring. A shade ring looks like this.
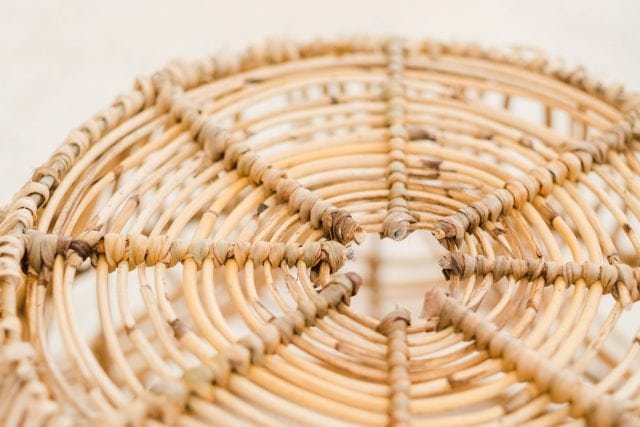
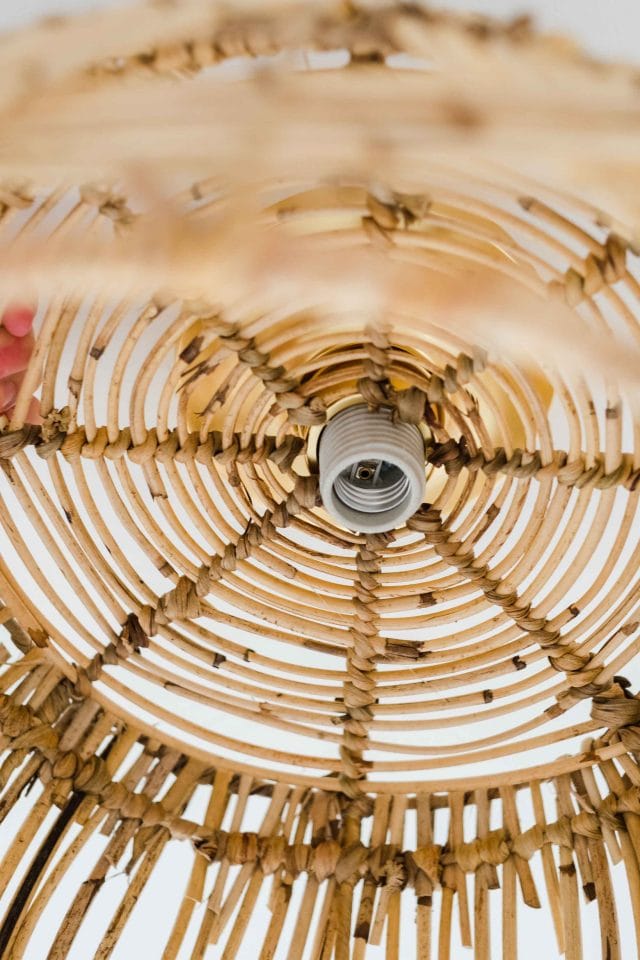
2 — Once the hole is cut, slip it over the bulb socket until it reaches the base of the mount and screw the shade ring onto the socket to hold it in place.
Essentially you’re allowing the mounted light to hold the weight of the basket in between the shade ring and the top of the bulb socket.
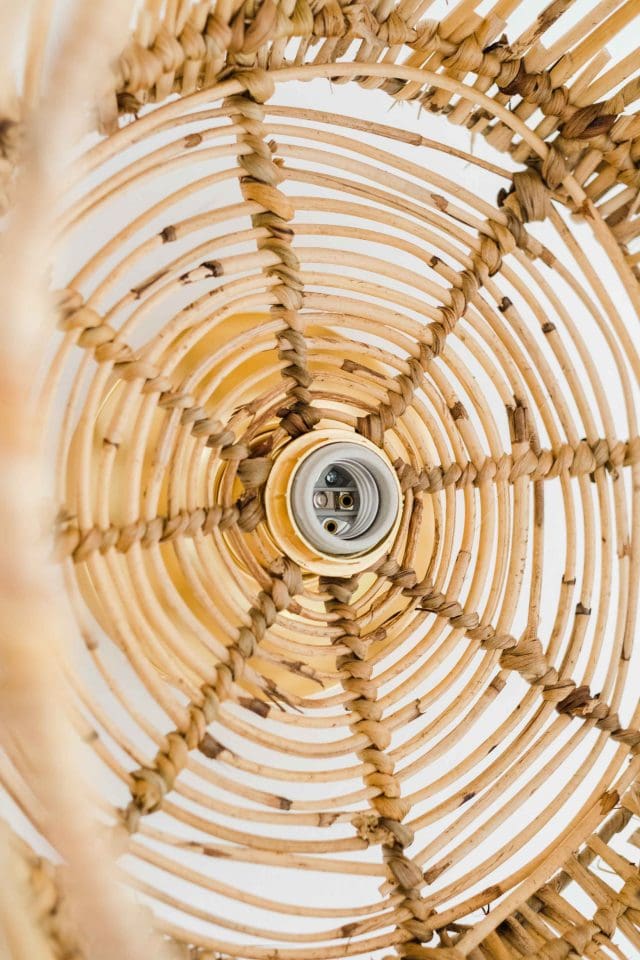
You’ll see in the photo above that the basket is now securely held in place with the shade ring.
3 — Once you have your basket securely in place, all you have to do is insert a cute round bulb and you’re all set!
What do you think?! I LOVE the way it turned out! It’s also really pretty when it’s lit up at night and the light is shining through the design!
More DIY Home Decor Projects
Like the idea of repurposing everyday home decor items as DIYs’s Here are a few other projects I’ve made!
- Repurpose a serving board as a DIY marble table
- Making DIY trivets and serving boards out of marble tiles
- A DIY side table out of a cake pan
Below is a full printable tutorial for how to make a DIY basket pendant light in your house…
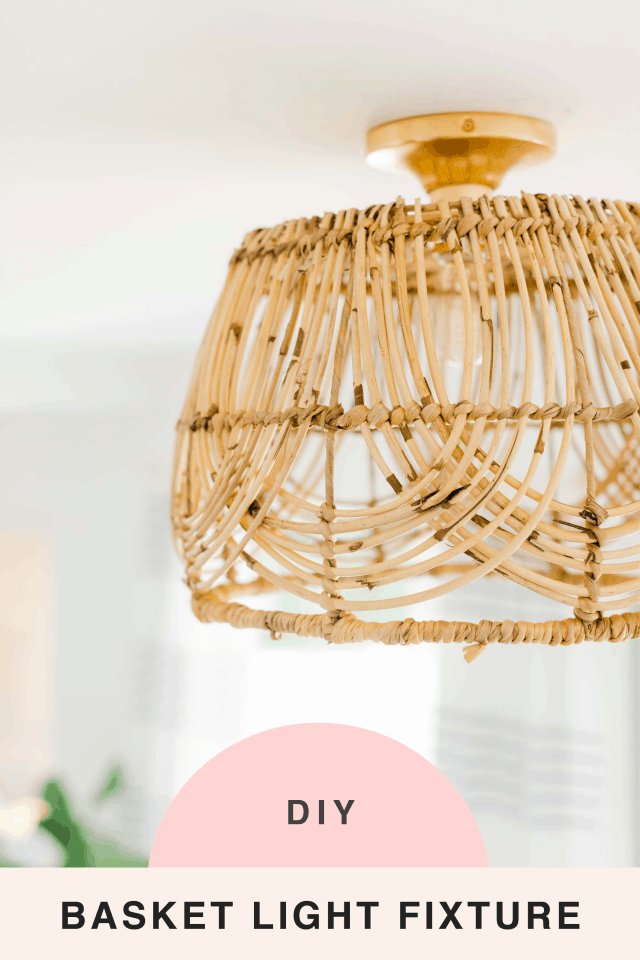
DIY Basket Light Fixture
DIY Basket Pendant Light
Equipment
- Heavy-duty cutting pliers
Materials
- 1 woven basket I used this one from At Home Stores, but this one is similar and this set is spot on!
- 1 semi-flush mount light kit Here it is in black or silver or here in gold
Instructions
- Once you have the wiring for the light complete, use cutting pliers to create a hole in the bottom of the basket.Make sure that the hole is just wide enough to slip over the light bulb socket. However, you also want it to be a hair smaller in diameter than your shade ring. A shade ring looks like this.
- Once the hole is cut, slip it over the bulb socket until it reaches the base of the mount and screw the shade ring onto the socket to hold it in place.Essentially you’re allowing the mounted light to hold the weight of the basket in between the shade ring and the top of the bulb socket.
- Once you have your basket securely in place, all you have to do is insert a cute round bulb and you’re all set!

Hello, there! I LOVE LOVE LOVE this as it’s exactly what I’m looking for to replace a glass shade on a pendant light in our kitchen and have searched without luck to find one ready made. I did find a very similar basket so am trying to decide if I want to go for it or not.
My biggest question/concern is, will the integrity of the basket be compromised and start unraveling at the cutting point?
Thanks so very much!!
Hi Lisa! We haven’t had any issues with our basket light so far, but we can totally understand your concern. It probably helps to use a good pair of sharp cutting pliers to get a clean cut. Plus, we made sure to only cut exactly what we needed.
This light is sooo cute! I love it so much! I am wanting to do some home projects when the kids go back to school and I would love to recreate this. I am planning on doing some kitchen cabinet refinishing this month so maybe after this. Thanks so much for sharing!!!
Thank you for this useful article!
Thanks on your marvelous posting! I quite enjoyed reading it, you’re a great author.I will make sure to bookmark your blog and will often come back in the foreseeable future. I want to encourage you to definitely continue your great posts, have a nice morning!
Thank you!
Hi,
I ve looked everywhere. Cant find where you got the light kit. The stores i showed the light part never seen one like this. If you have the exact name and store or on line link please.
Thanks Sharon
Hi Sharon! We have a few options linked in the blog under the “Materials Needed To Make A DIY Pendant Light”. You could repurpose an old light if you like the base and fixture. Just make sure anything you’re using is a semi-flush mount light.
We purchased ours from Amazon (which we linked with other options since the exact one we used is currently unavailable.) There are a lot of fixture options out there for this… more so than just a kit option. So most will have some sort of shade already included.
Hope this helps!
Hi,
Well i kinda like the one you used as mine also needs the ring to twist up to hold the basket in place. Even if its outta stock can you still name it as nobody at stores has seen this kind
Thanks
Hi Sharon! Can you clarify what you mean by “can you still name it”? Even if it’s out of stock, there is an Amazon link with the for more info on the brand, model, measurements, etc. Progress Lighting also has their own retail shop. We also included another similar option (that’s available in chrome, gold and silver) and those are not out of stock. You should be able to find any semi-flush mount ceiling light fixtures at any store that sells lights. Hope this helps!
Hi, sorry but your link, Semi-flush mount light kit — Here it is in black or silver or here in gold, does not look like the one used in the tutorial. It needs to have external threads for the socket ring.
I love this idea but curious if cutting out the center which acts as the connection point for the support wires impacts the integrity of the light fixture after a while. Does it sag in the middle or bow out? Thanks again for sharing your tips & tricks.
Hi Carrie! We made this for our home so we see it everyday and so far we haven’t had any issues with it sagging or bowing out. We do recommend cutting a hole just wide enough to slip over the light bulb socket but you also want it to be a hair smaller in diameter than your shade ring so that it doesn’t sag. Hope this helps!
Thanks on your marvelous posting! I quite enjoyed reading it, you’re a great author.I will make sure to bookmark your blog and will often come back in the foreseeable future. I want to encourage you to definitely continue your great posts, have a nice morning!
I love the light fixture!! But I’m also loving the curtains 😍 Can you share the source for them?
Hi Andrea! They are from At Home Store. XOXO
Hi! Thanks for sharing this but the link for the gold socket doesn’t work. It’s bringing me to a light fixture.
Hi Lauren! You have to buy the light fixtures come with the sockets so that’s why it is linked to the fixture (or at least the one that we used)! We didn’t have to buy a separate socket. Hope this helps!
Thank you so much for this! I am going to use this idea for a space in my home but the link to the gold light socket isn’t directing to the correct place. Could you share where you found yours?
Hi Rachel! You are right! We fixed the link. You can find the gold socket here: https://shopstyle.it/l/bjL4I
Love this DIY, looks great!! Will you share your source for table and chairs?
Hi Annie! Thanks for asking! We are going to update our post with the sources since you’re not the only one wondering. Here’s the table thats currently 20% off:
https://shopstyle.it/l/6qUi
and dining chair:
https://www.athome.com/davin-chair-white/124225739.html
The contrast between the wicker of the basket and the crisp, clean look of the rest of the room is on point! I love how you thought of the height details with the lemon stem. It’s the little things that can make a room look extra nice. Thanks for sharing!
Thank you so much, Ashley! XOXO
OMG! That is so cute!
Thanks, Krissy!
Oh my gosh this post is amazing! Thank you so much!!
You’re welcome!
This is so cute and I never would have thought it was that easy – thanks for sharing!
It is totally easy! XOXO
So unique and fun! I have places in my house where I want to put these!
Thank you, Katie!
I just sent this to my friend who has been shopping for one of these for months! Thank you!
Thanks, Lauren! I hope she likes it!
I love this idea! So cute!
Thanks, Marsha!
I LOVE this!! Any idea if the basket you used is still being sold? For some reason it won’t let me click on it in the materials.
Hi Chelsa! I just clicked the links and they should work. We noted in the materials that our basket was from the Home Store but there were two similar ones in the material section: https://shopstyle.it/l/8rnT. Hope this helps!