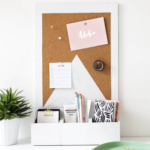
DIY Desk Organizer
A super easy to make DIY desk organizer with a cork board that requires no nails, hammers or drills to make.
Servings: 1
Cost: 35
Equipment
- Scalpel or X-acto knife
- Ruler
- Painter's tape or washi tape
Ingredients
- 1-3 wooden box no lids required
- 1 MDF wood sheet 10mm thick and cut to correct size
- 1 Self adhesive cork sheet 5mm thick or more
- Paper
- White spray paint
Instructions
- Spray paint the wood sheet and boxes white. Lay down thin coats of spray paint and allow each to dry in between.
- When the wood and boxes dry, glue the sides of the three boxes together. The boxes should be lined side by side with the open ends facing the top. Apply pressure for 1-2 minutes to hold them together.
- Allow the glue to set, about 5 minutes.
- Glue the back of the boxes to the bottom of the wood board. Make sure to line up the bottom of the boxes with the bottom of the wood to create a right angle for the organizer to stand straight upright. Apply pressure again for a minute.
- Leave to dry, preferably overnight. Now you can see the space you have for the pin board.
- Use a ruler to measure how big your cork section needs to be to fill the space. Leave about an inch white border around the edges.
- With your measurements, draw out the shape on the back (the peelable side) of the cork. Cut this out with a scalpel and ruler.
- On the front of the cork sheet, measure a centre point within the width and use this to create the triangle shape.
- Place the painter’s tape or washi tape on that centre point and lead it down to the bottom corner, repeating on the other side. A central point closer to the bottom will result in a shorter triangle and vice versa.
- Tape the spare paper to cover the rest of the cork so that the only part that’s showing is the part you want white.
- Spray paint this section with a few light coats. Some spray paints don’t take to cork well so you may need few coats.
- Once the paint is dry, remove the tape and spare paper. Peel away a corner of the backing paper.
- Place this on the wood panel, lining it up before you stick. Once stuck, you can pull the rest of the backing away slowly, sticking as you work your way across the wood.
- Smooth out and you’re all done!