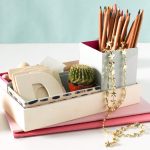
DIY Nesting Desk Organizer
An easy to make and easy to customize DIY nesting desk organizer that fits together AND has a spot for everything.
Servings: 1
Cost: 25
Equipment
- Scalpel or X-acto knife
- Ruler
- Cutting mat
- Sandpaper
Ingredients
- 2-3 wooden box or tray 9" x 6" x 1.5" or your desired size
- 3 panels basswood 1/16″ x 4″ x 24″ or your desired size
- Acrylic paint optional
Instructions
- Measure the dimensions of your wooden tray or box and mark down what sizes you’ll need to build the different nesting boxes. To build different size boxes, you can replace our size dimensions with your numbers.
- For the first tall box, cut two pieces of basswood with the X-Acto knife that measure 3" x 4". To cut the basswood, lightly score the wood a few times and it will easily cut through.
- Cut two pieces that measure 2.75" x 4" for the parallel sides. The shorter pieces will be glued inside the longer sides.
- Cut a piece for the bottom of the box which will measure 3" x 3".
- Optional: If you want to paint the inside of box, do so now before gluing the wood sides together.
- Use super glue to glue the sides together in a butt joint. A butt joint is when one piece of wood is butted up against another piece to form a corner.
- Allow each side to dry before you continue.
- Add glue into the corners to reinforce the hold.
- Glue the bottom of the box on.
- Sand any rough edges.
- Optional: You can paint the outside of the box too once it’s all dry.
- Repeat to build the rest of the boxes!
Notes
Due to the wooden box that we used, our nesting boxes measure:
- Tall box -- 3" x 4" x 3"
- Long box -- 8.75" x 1.5" x 2.5"
- Medium box -- 5.5" x 1.75" x 3"
- Tiny box -- 2.25" x 1.25" x 1.5"
