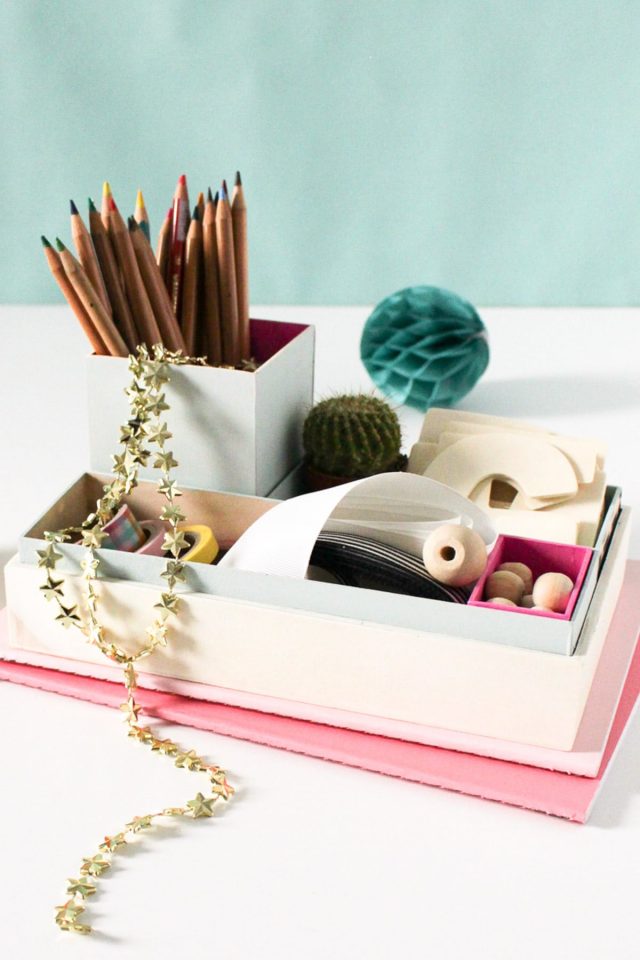
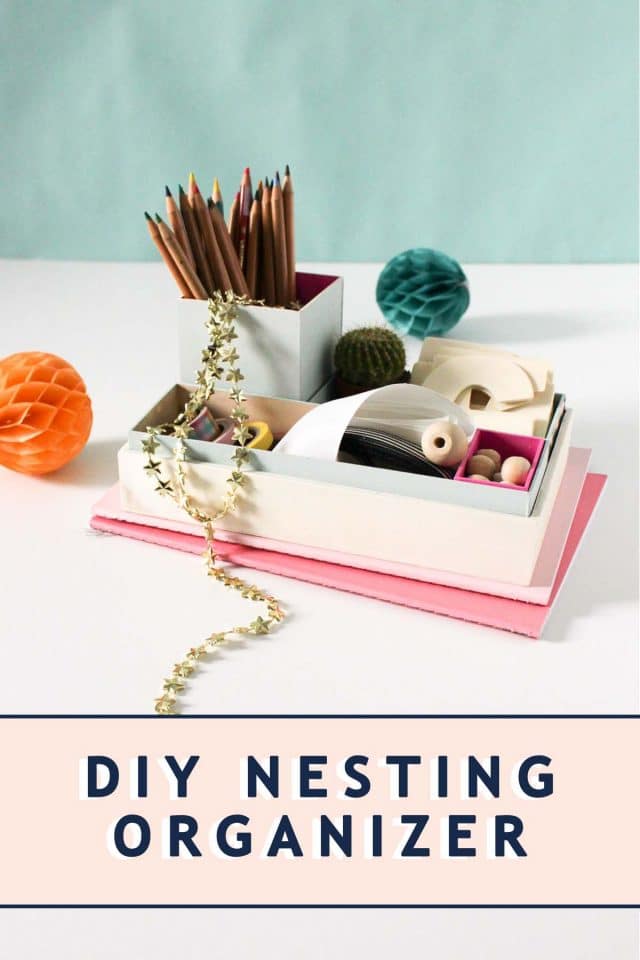
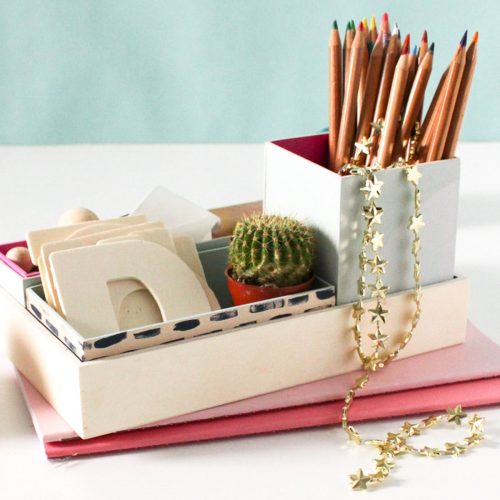
DIY Nesting Desk Organizer Set
DIY Nesting Desk Organizer — An easy to make and easy to customize DIY Nesting Desk Organizer that fits together AND has a spot for everything.
It’s the perfect time of year for a spring cleaning! Between my craft supplies, photo props and other blogging gear, my home studio could really use some tidying.
My desk, for one, can easily get buried under office supplies that I use everyday and never seem to put away.
When I, Anusha, found a simple wooden tray, I knew with a little DIY-ing it would be a perfect desk catchall.
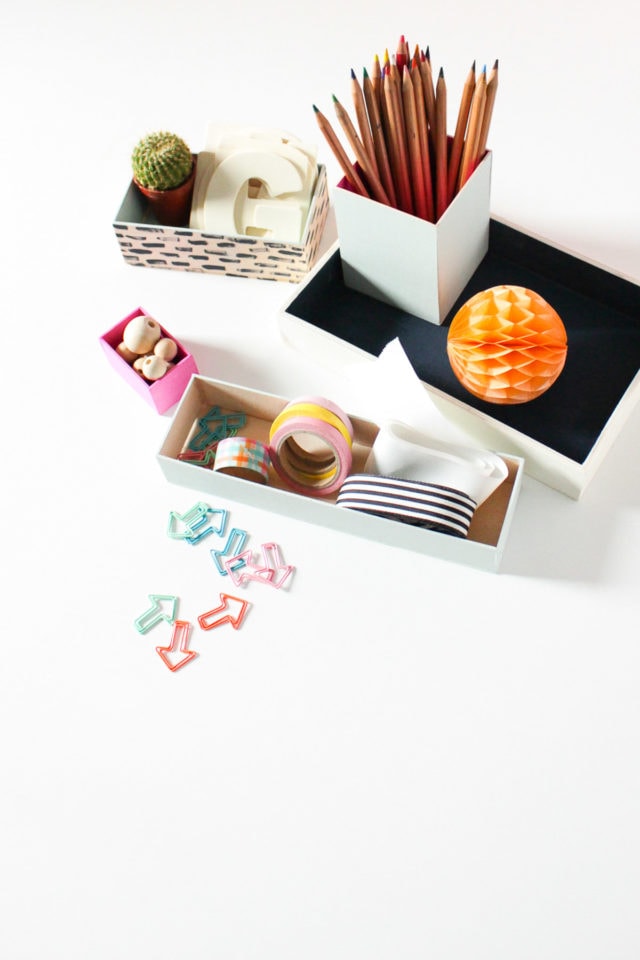
This DIY Nesting Desk Organizer neatly fits together AND has a spot for everything. It’s so easy to customize and make it your own too!
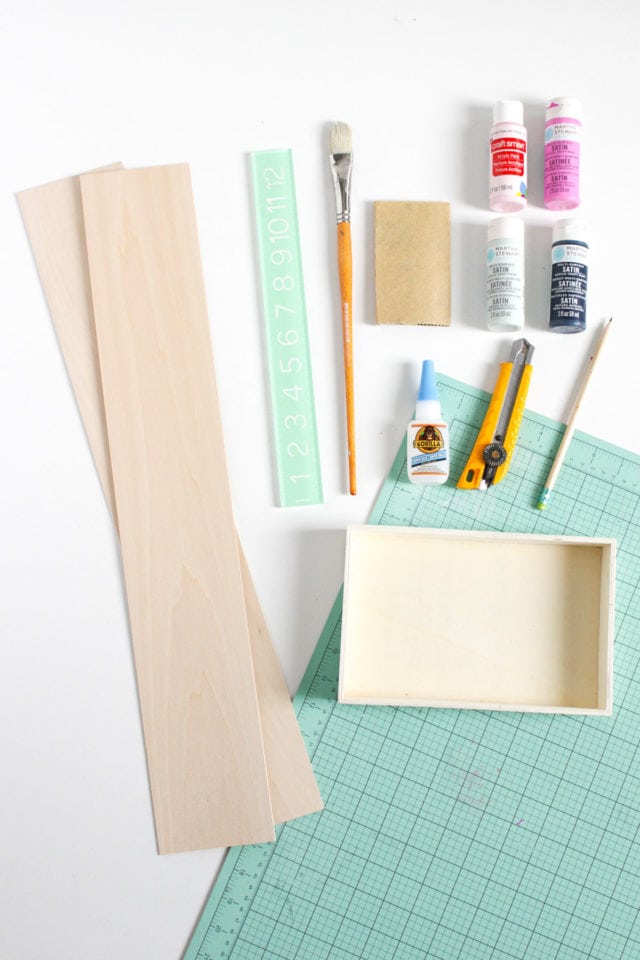
Materials Needed To Make A DIY Nesting Desk Organizer
Panels of basswood — Measuring 1/16″ x 4″ x 24″ or depending on your desired size and boxes
Wooden box or tray — You can find any wooden box of any size at Michaels or your local craft store. The box photographed was purchased from Hobby Lobby and measures 9″ x 6″ x 1.5″.
Acrylic paint — In any of your desired colors
Office Organization Ideas: How To Make A DIY Nesting Desk Organizer
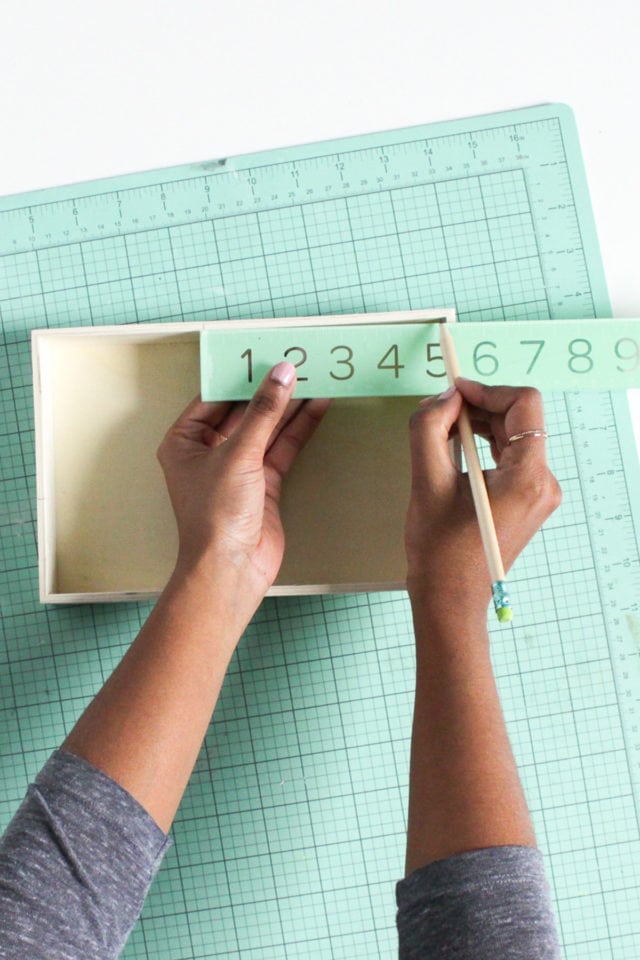
Measure the dimensions of the wooden box and mark down what sizes you’ll need to build your nesting boxes. To build different size nesting boxes, you can replace our size dimensions with your numbers if you opted for a different wooden box or tray.
Our nesting boxes measure:
- Tall box: 3″ x 4″ x 3″
- Long box: 8.75″ x 1.5″ x 2.5″
- Medium box: 5.5″ x 1.75″ x 3″
- Tiny box: 2.25″ x 1.25″ x 1.5″
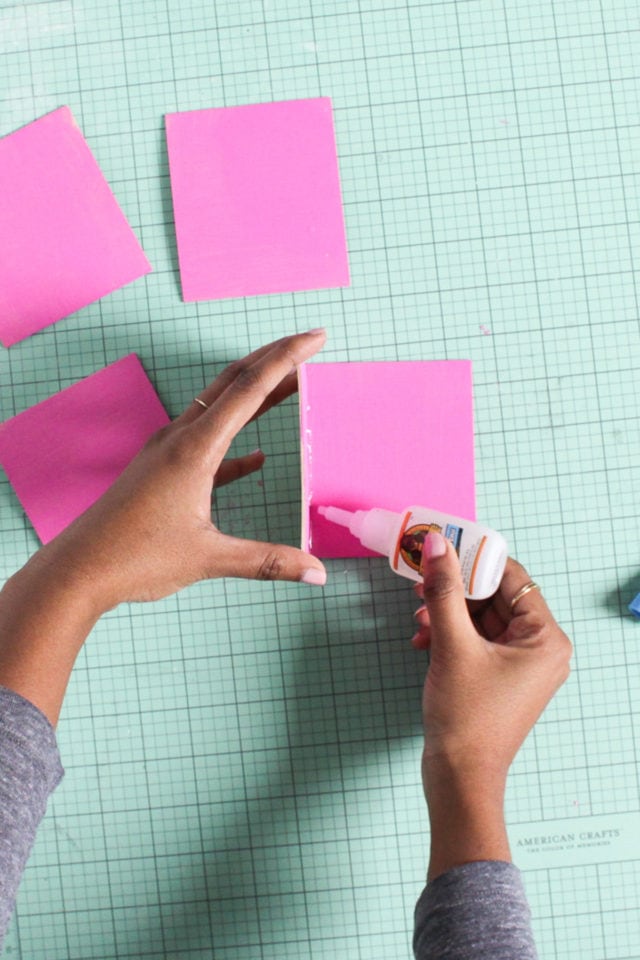
For the first tall box, cut two pieces of basswood with the X-Acto knife to measure 3″ x 4″.
To cut the basswood, lightly score the wood a few times, and it will easily cut through.

Then, cut two pieces that measure 2.75″ x 4″ for the parallel sides. The shorter pieces will be glued inside the longer sides.
Finally, cut a piece for the bottom of the box which will measure 3 in. x 3 in.
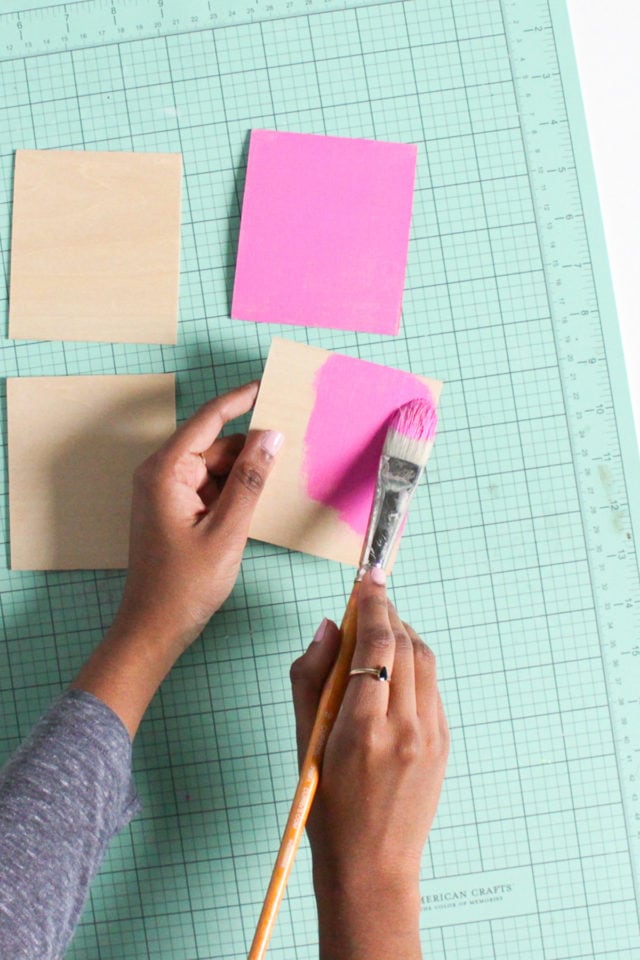
If you want to paint the inside of box, you can do that now before gluing the wood sides together.
Use super glue to glue the sides together in a butt joint.
A butt joint is when one piece of wood is butted up against another piece to form a corner.
Allow each side to dry before you continue.
Add glue into the corners to reinforce the hold.
Lastly, glue the bottom of the box on. F
Finally, sand any rough edges.
Optional: You can paint the outside of the box too once it’s all dry. Repeat the steps to build the rest of the boxes!
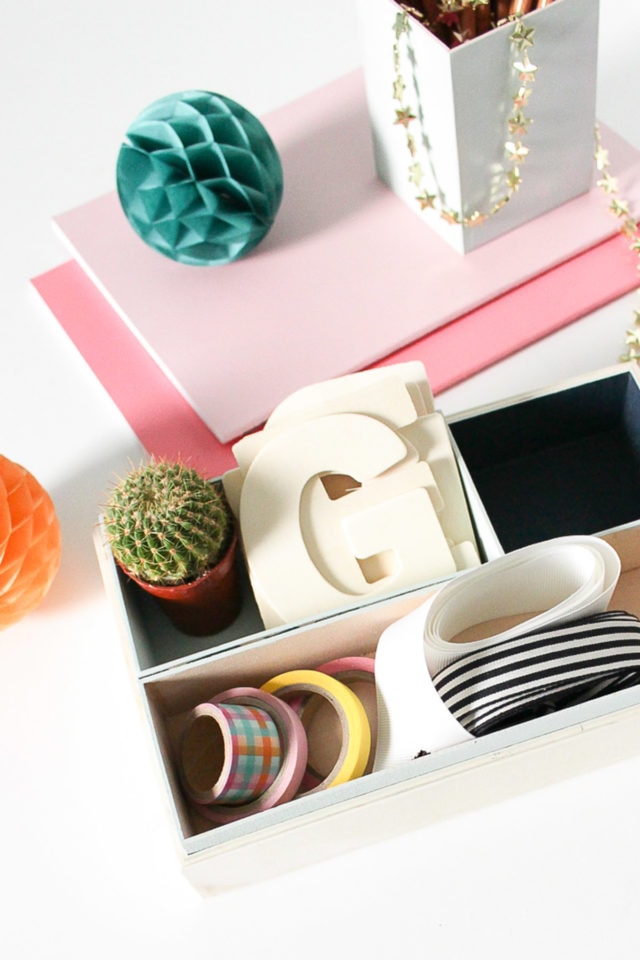
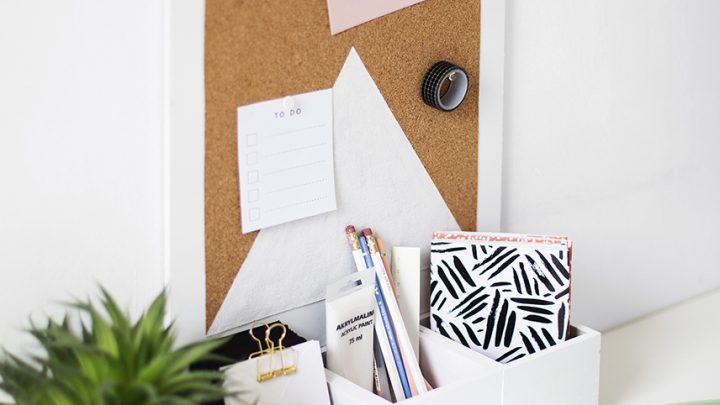
Finally somewhere to put washi tapes, ribbons and my tiny cactus! What would be in your desk organizer?
More Office & Desk Decor Ideas & DIY’s
Love this DIY Nesting Organizer? Here are other easy office projects and inspirational makeovers from our archives —
- Desk organizer with a cork board back
- A home office design makeover
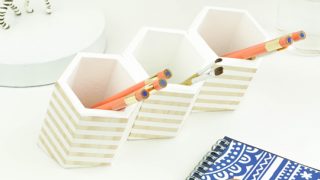
- Hexagonal desktop storage organizer for your pens and supplies
- Desktop dry erase board made from a photo frame
- The before & after of our study room makeover
- How to make geometric chalkboard surfaces for your desk
Office Accessories: DIY Nesting Desk Organizer
DIY Nesting Desk Organizer
Equipment
- X-Acto knife or straight edge
- Ruler
- Cutting mat
- Sandpaper
Materials
- 2-3 wooden box or tray 9" x 6" x 1.5" or your desired size
- 3 panels basswood 1/16″ x 4″ x 24″ or your desired size
- Acrylic paint optional
Instructions
- Measure the dimensions of your wooden tray or box and mark down what sizes you’ll need to build the different nesting boxes. To build different size boxes, you can replace our size dimensions with your numbers.
- For the first tall box, cut two pieces of basswood with the X-Acto knife that measure 3" x 4". To cut the basswood, lightly score the wood a few times and it will easily cut through.
- Cut two pieces that measure 2.75" x 4" for the parallel sides. The shorter pieces will be glued inside the longer sides.
- Cut a piece for the bottom of the box which will measure 3" x 3".
- Optional: If you want to paint the inside of box, do so now before gluing the wood sides together.
- Use super glue to glue the sides together in a butt joint. A butt joint is when one piece of wood is butted up against another piece to form a corner.
- Allow each side to dry before you continue.
- Add glue into the corners to reinforce the hold.
- Glue the bottom of the box on.
- Sand any rough edges.
- Optional: You can paint the outside of the box too once it’s all dry.
- Repeat to build the rest of the boxes!
Notes
- Tall box -- 3" x 4" x 3"
- Long box -- 8.75" x 1.5" x 2.5"
- Medium box -- 5.5" x 1.75" x 3"
- Tiny box -- 2.25" x 1.25" x 1.5"

Please note that we may earn a commission for some of the above affiliate links. However, products featured are independently selected and personally well-loved by us!
The article is very easy to understand, detailed and meticulous! I had a lot of harvest after watching this article from you! I find it interesting, your article gave me a new perspective! I have read many other articles on the same topic, but your article convinced me! driving directions
Love this! So neat!
Thanks for the tutorial!
Glad you like Anusha’s project :)
Superb! I love the modular concept!
So glad you like how this turned out! We’re excited to have Anusha contributing with us :)
I decided to get real fancy and purchased one of those minimal see through acrylic desks. It looks great, chic, clean and fancy but I have no drawers, no desk organization, no storage. It’s really just a blank canvas. All that to say this DIY is perfect for my new work area.
Haha! This sounds like an issue we’d have as well :) Glad we could help you find a solution!
I love this and the pastel colours are so perfect for spring!
So glad you like the DIY, Natalie! xo