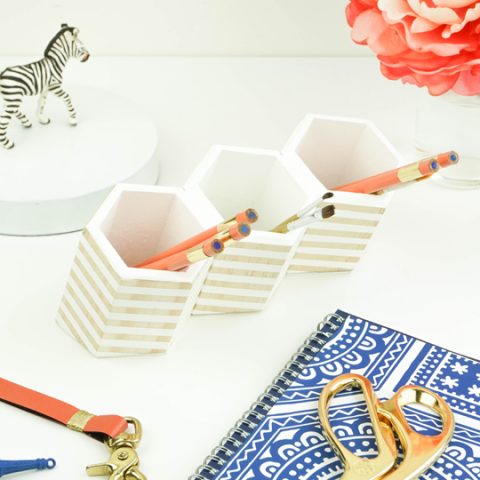
Hexagon DIY Pen Holder
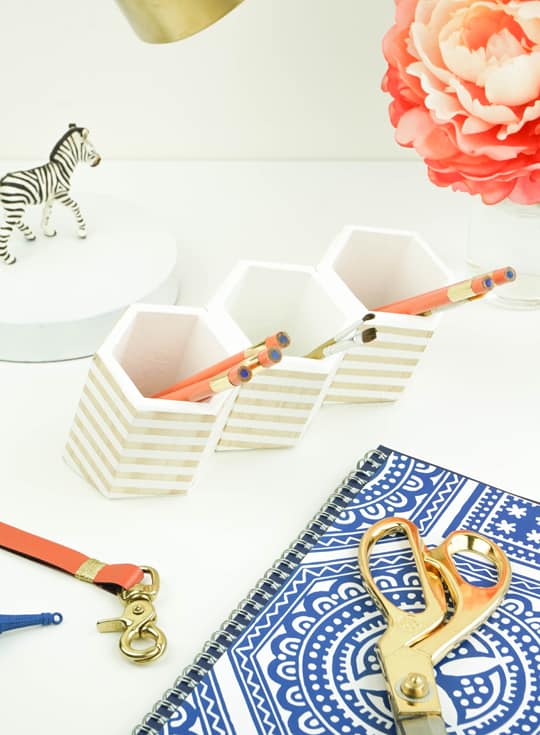
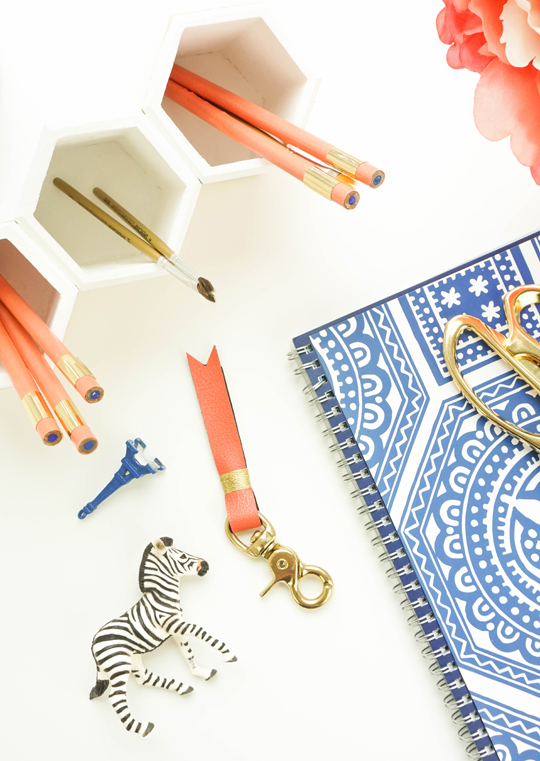
Create a pretty way to keep your desk organized while displaying all your cute things simultaneously with a Hexagonal DIY Desktop Organizer!
We’re helping you head back to school, college, or even just a little office refresh, in style with this DIY desktop organizer! Hello! Erin here with a DIY project perfect for back-to-school. The start of a new academic year is synonymous (in my mind anyway!) with new school supplies. It’s easy to keep your makeup and brushes organized with this DIY leather hexagon vanity tray.
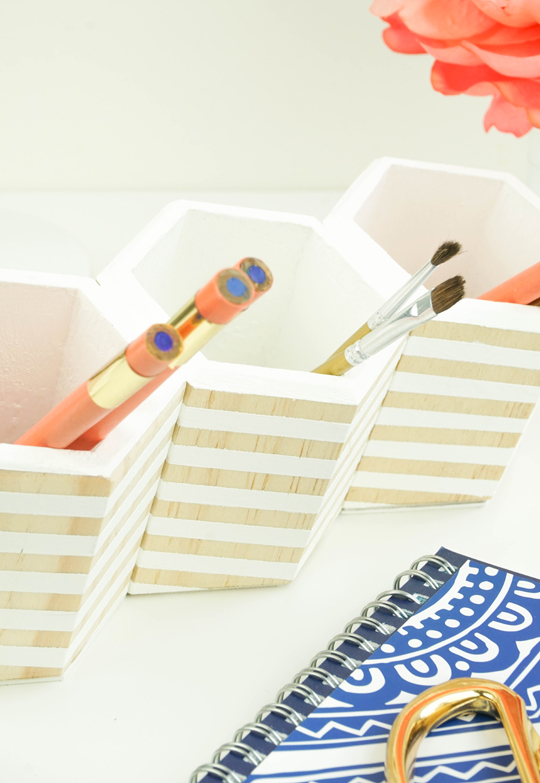
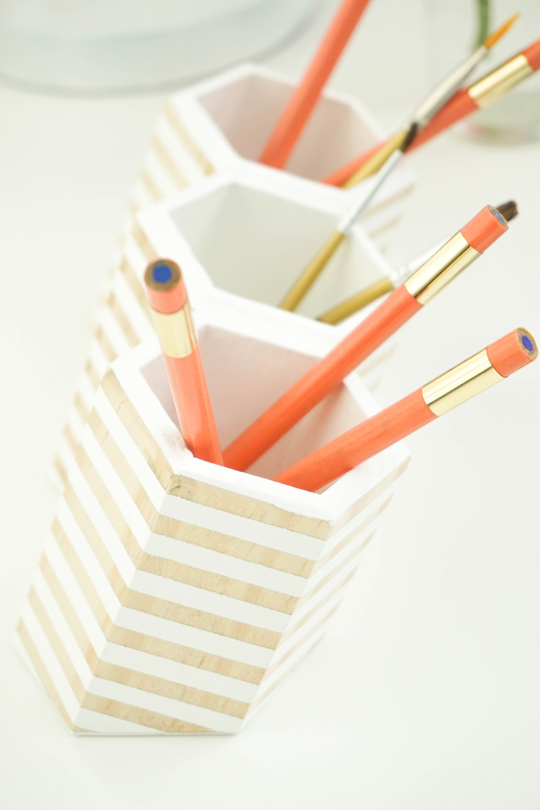
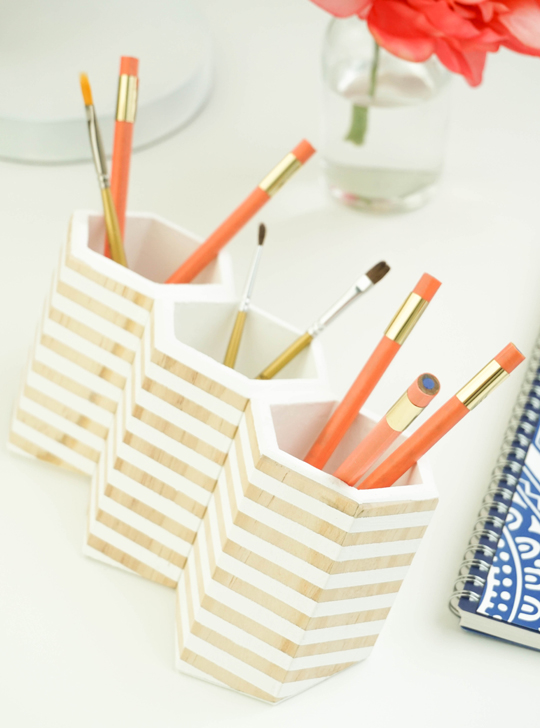
But when you’re stocking up on the materials called for by each syllabus, pretty pens, pencils, and of course, every cute pouch and organizer, there is no better time to make this hexagonal DIY desktop organizer. This modern desk organizer has tons of room for supplies and an angled opening that lends a sculptural element to any desktop!
Besides, if you share my love for office supplies, why not create a pretty way to keep your desk organized and the cute things on display all at the same time?!
Materials and Tools Needed
- Hexagonal wooden cups — You may also use unfinished wooden boxes, but I love the modern shape of these hexagon cups. You can also purchase similar hexagon storage here.
- Patterning tape or washi tape — To create the stripe patterns
- White acrylic paint — Or any other color you wish
- Wood glue
- Heavy card stock or chipboard — For the bottom of your cups
- Miter saw, or hand saw
- Ruler and pencil
- Scissors
- Paintbrush
DIY Desk Organizer – How To Make A DIY Desktop Organizer
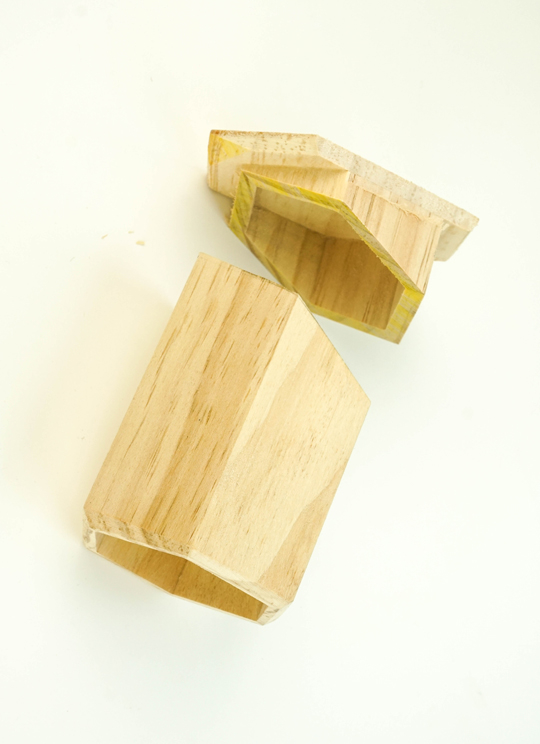
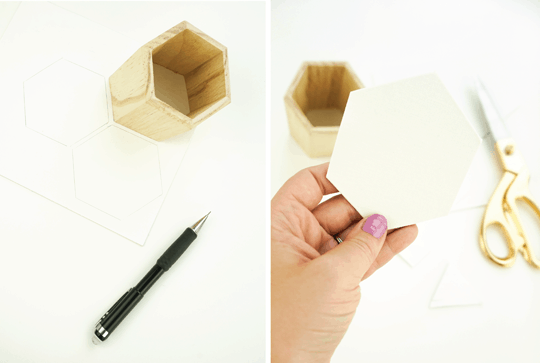
Step 1 — Begin by drawing a diagonal line with a ruler on the side facets of each cup, towards the base. I chose to draw the diagonal at a 22.5-degree angle.
Step 2 — Set your miter saw to the angle drawn on the cups. In my case, I set the saw to 22.5 degrees.
Saw along the angled pencil line, cutting off the base of each cup.
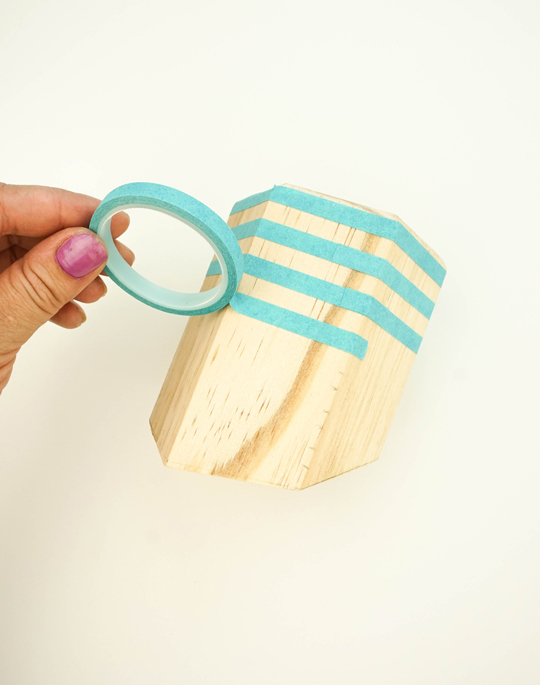
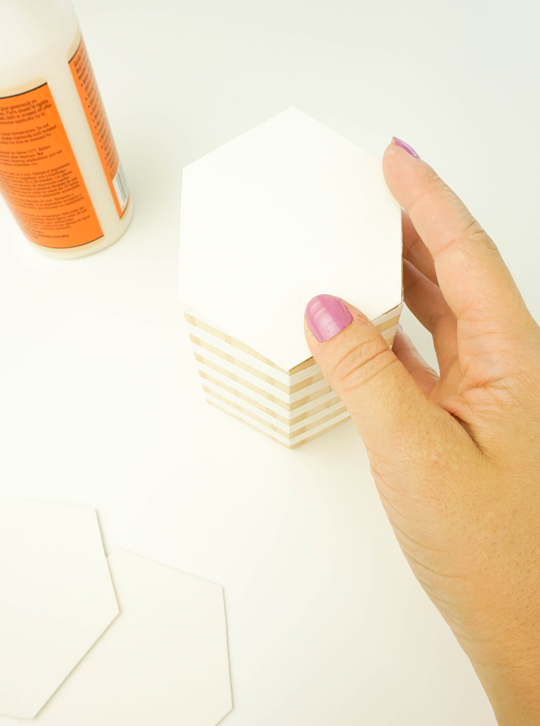
Step 3 — Tape 1/4″ horizontal stripes around each cup with patterning or washi tape. Start at the mouth of the cup and work your way down to the bottom.
Press the tape down firmly to prevent paint from seeping underneath. Do your best to line up the stripes from cup to cup.
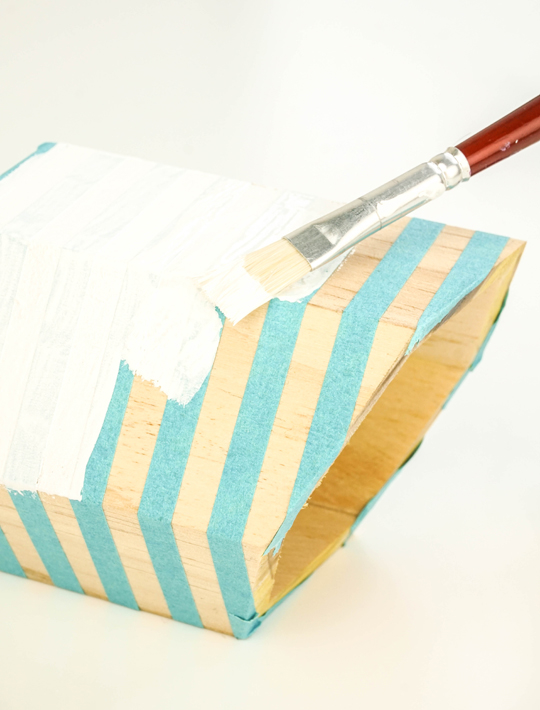
Step 4 — Paint the outside of the cup, the rim of the cup, and the inside of the cup with acrylic paint.
Step 5 — Allow to dry and apply another coat.
Trace around the bottom of the angled cup onto the underside of the card stock. Repeat twice more.
Cut out the 3 hexagons. These will serve as the bottom of the cups.
Step 6 — Turn cups upside down and attach the card stock hexagons to the bottom of each cup with wood glue.
Step 7 — Then attach the 3 cups side-by-side with wood glue.
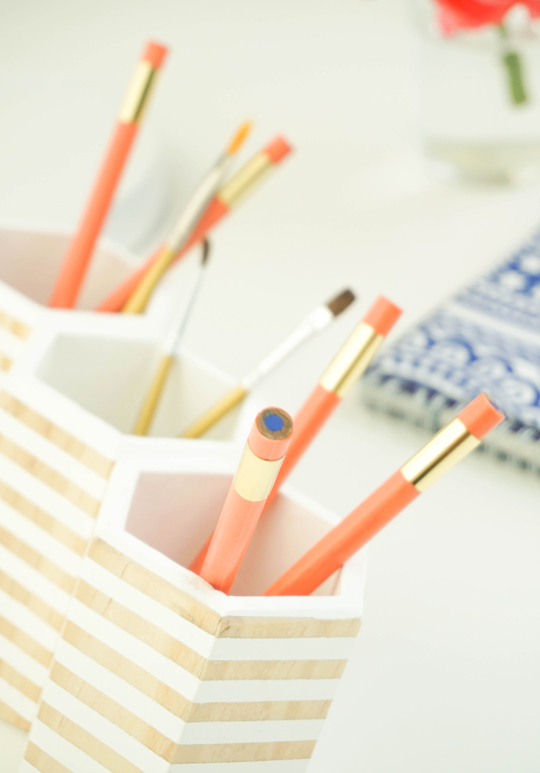
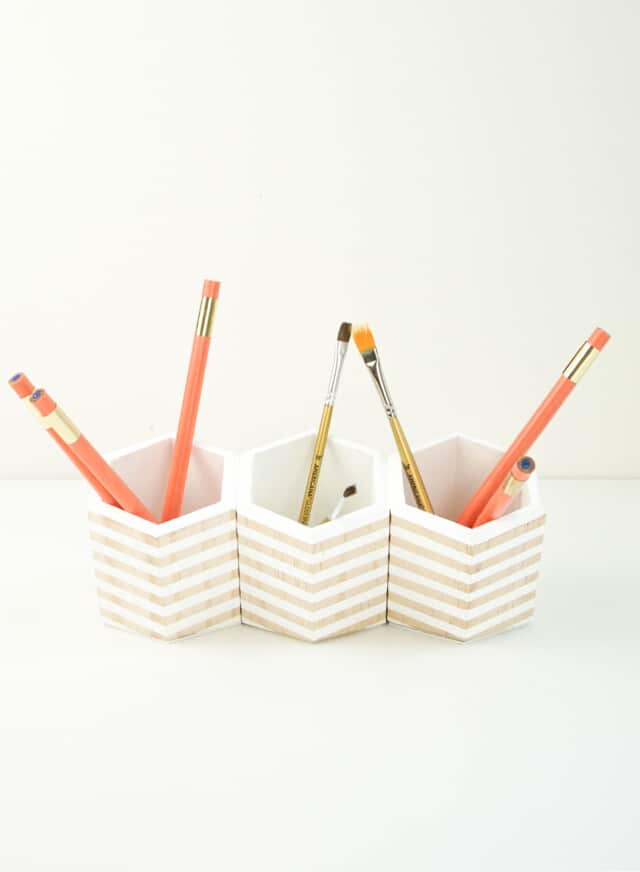
Allow to dry and fill with your favorite supplies.
And now you’ll have an organized desk. Wasn’t that super easy?!?
Other DIY Organization Projects
The result is a modern desk organizer perfect for corralling supplies and keeping your study space uncluttered and tidy throughout the school year! This also would make for a great beauty organizer for your brushes and makeup. Plus, you can’t put off doing anything when you combine it with this Geometric DIY Chalkboard Desk to jot down all your notes and to-dos. Looking for more ways to stay organized? Here are some of our favorite desk organizer ideas from our archives to keep your desk clean and tidy —
- Desk organizer with cork board
- Nesting tray organizer
- Desktop dry erase board frame
- Geometric chalkboard desk
- Vanity tray with storage
- Leather hexagon vanity tray
Hexagon DIY Pen Holder
Equipment
- Miter saw or hand saw
- Ruler
- Pencil
- Scissors
- Paintbrush
Materials
- 3 hexagonal wooden cup
- Patterning tape or washi tape 1/4" wide
- White acrylic paint or any other color
- Heavy card stock or chip board
Instructions
- Drawing a diagonal line with a ruler on the side facets of each cup, towards the base. I chose to draw the diagonal at a 22.5 degree angle.
- Set your miter saw to the angle drawn on the cups. In my case, I set the saw to 22.5 degrees.
- Saw along the angled pencil line, cutting off the base of each cup.
- Tape 1/4″ horizontal stripes around each cup with patterning or washi tape. Start at the mouth of the cup and work your way down to the bottom. Press tape down firmly to prevent paint from seeping underneath. Do your best to line up the stripes from cup to cup.
- Paint the outside of the cup, the rim of the cup and the inside of the cup with acrylic paint.
- Allow to dry and apply another coat.
- Trace around the bottom of the angled cup onto the underside of the card stock. Repeat twice more.
- Cut out the 3 hexagons. These will serve as the bottom of the cups.
- Turn cups upside down and attach the card stock hexagons to the bottom of each cup with wood glue.
- Attach the 3 cups together, side-by-side with wood glue.
- Allow to dry and fill with your favorite supplies.

Don’t forget to share your DIY Desktop Organizer with us on Instagram using the hashtag #sugarandclothloves. We always love seeing all of your creations! Looking for more interior design inspiration? You can find them all of our home decor tutorials and ideas right here!
Affordable Wall Art: 54 Stylish Prints Under $200
Looking for affordable wall art that still makes a big…
Continue Reading Affordable Wall Art: 54 Stylish Prints Under $200
Easy IKEA Billy Hacks Anyone Can DIY at Home
Get inspired by clever IKEA Billy hacks for living rooms,…
Continue Reading Easy IKEA Billy Hacks Anyone Can DIY at Home
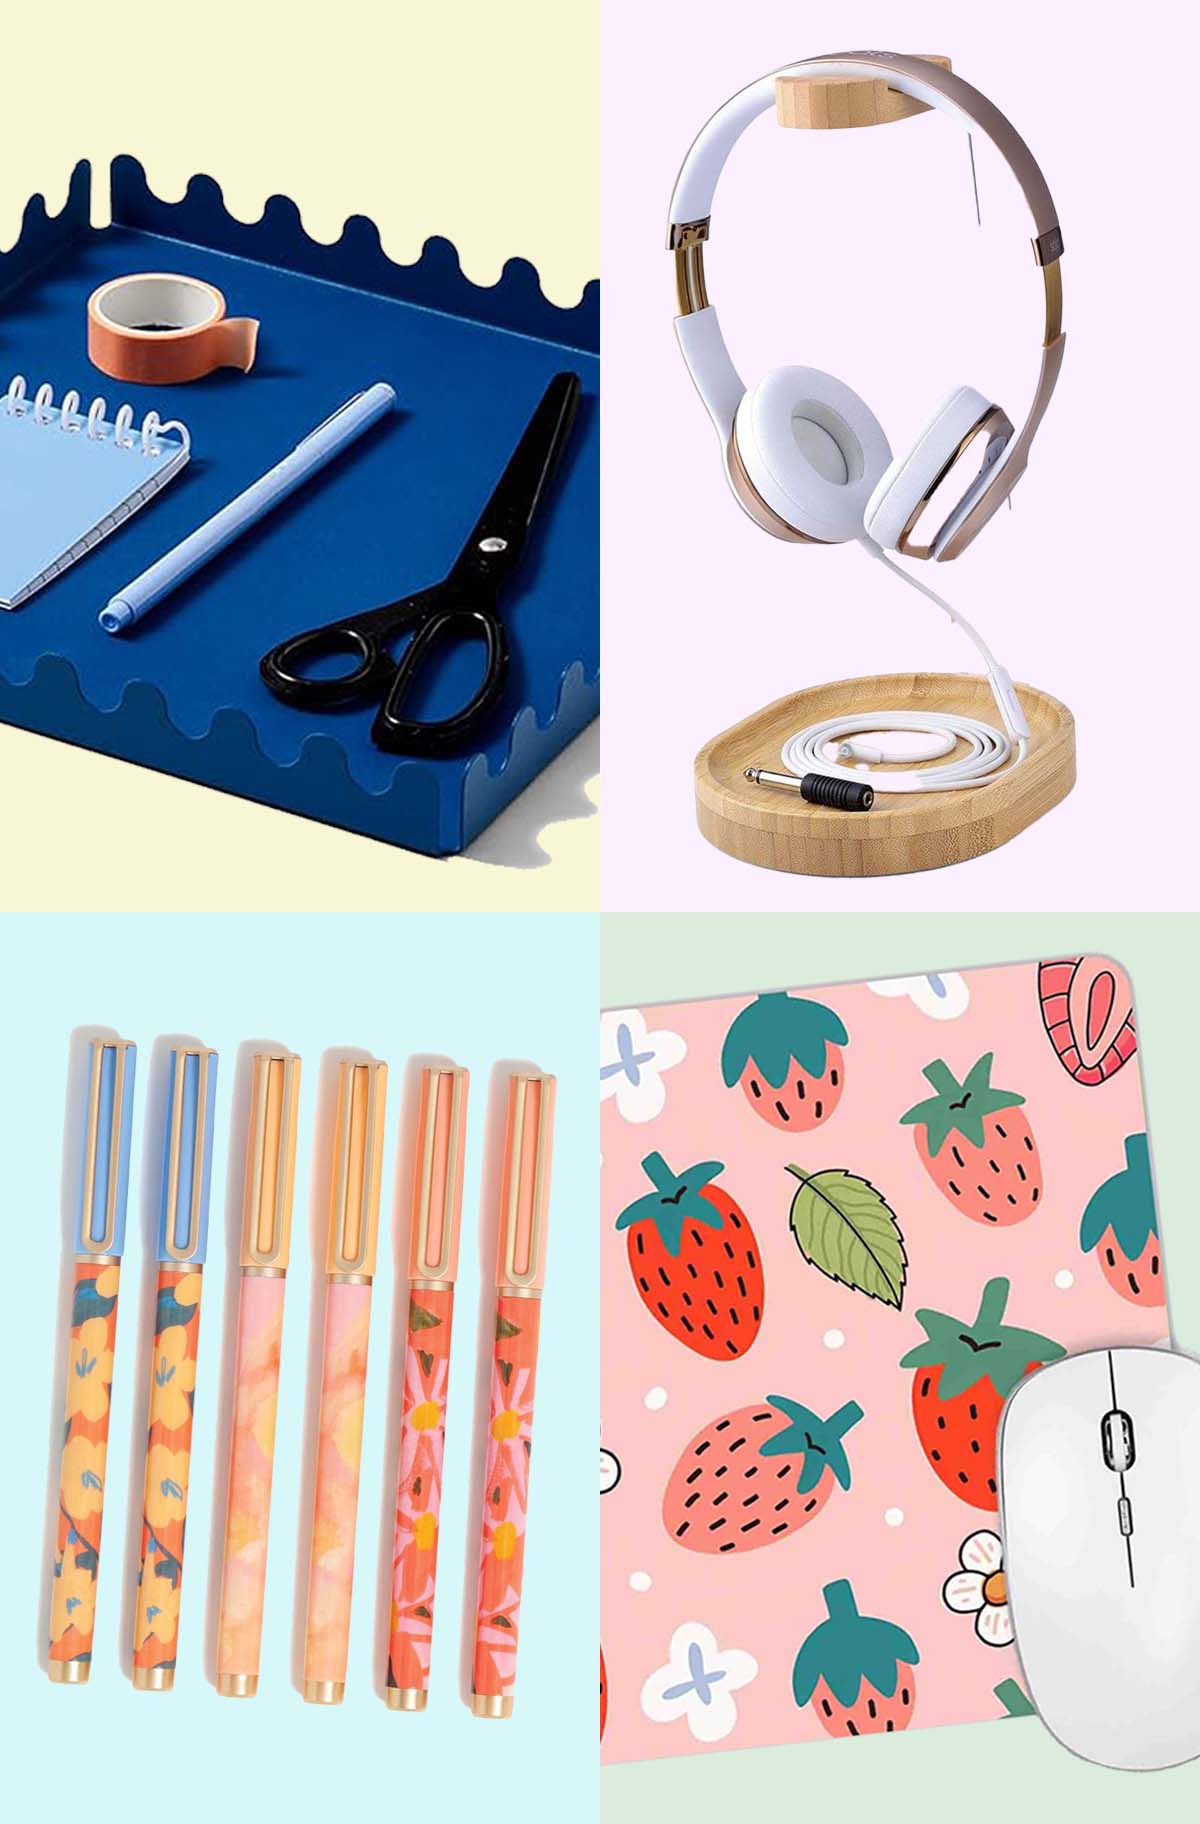
46 Cute Desk Accessories to Brighten Your Workspace
From colorful pens to quirky paperweights, spruce up your work…
Continue Reading 46 Cute Desk Accessories to Brighten Your Workspace
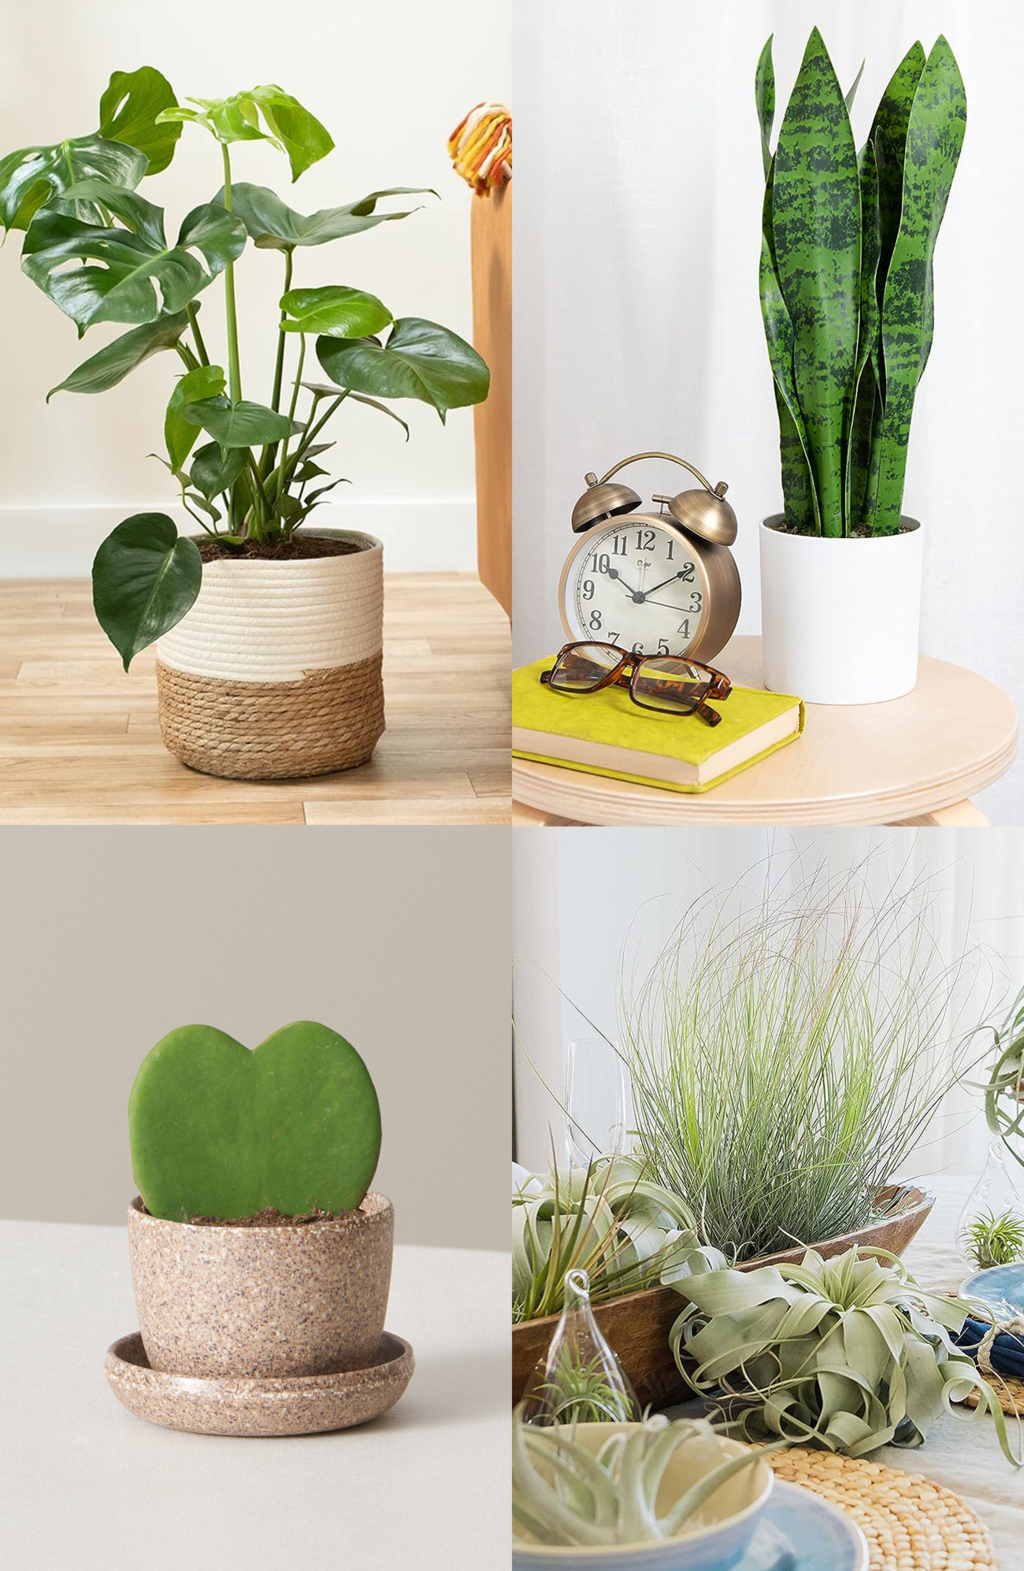
19 Unique & Easy Houseplants that We’re Loving
Looking for unique house plants? Dive into our guide to…
Continue Reading 19 Unique & Easy Houseplants that We’re Loving
Please note that we may earn a commission for some of the above affiliate links. However, products featured are independently selected and personally well-loved by us!
This website was… how do you say it? Relevant!! Finally I’ve found something which helped me. Kudos!|
So glad to hear, Cleopatra!
Me encanta, a penas llegue a Miami comprare todo para hacerlo!
This is awesome! I might have to do this to organize the thousands of colored ink pens I keep buying.
These organizers are gorgeous! I want to make some for my desk!
Paige
http://thehappyflammily.com
It is so cute! Thing I’m going to do it :)
Xo
http://catrrine.blogspot.pt/
would love to try it once :) loved it and love you too…you are very beautiful