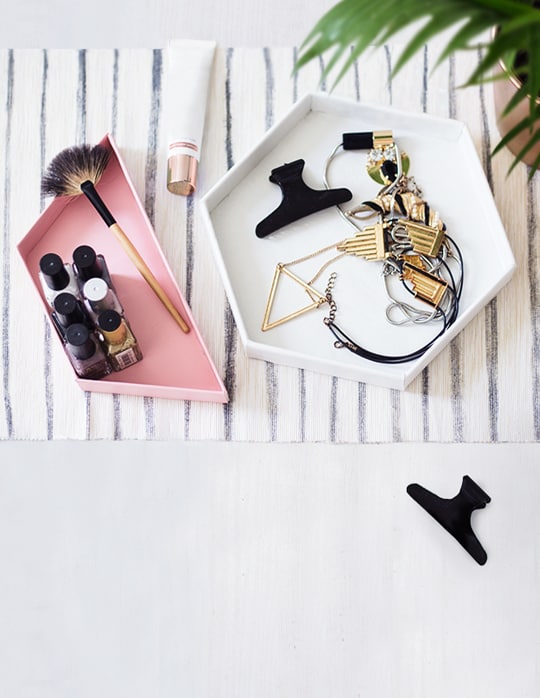
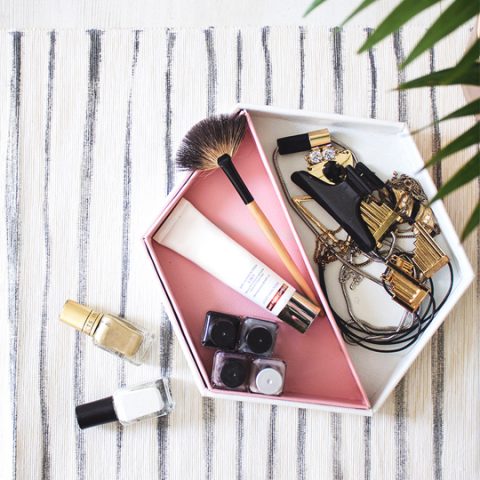
Leather Hexagon DIY Vanity Tray
Keep yourself organized and in style with this Leather Hexagon DIY Vanity Tray!

Looking for a stylish and functional way to organize your vanity essentials? Look no further than our Leather Hexagon DIY Vanity Tray!
This easy-to-make project is perfect for crafters of all skill levels, and the finished product will add a touch of modern elegance to your bathroom. This tutorial from Terri will guide you step-by-step through the process of creating your own leather hexagon vanity tray.
We’ll cover everything you need to know, from gathering the necessary materials (including leather sheets, craft card, and cutting tools) by using a template (which we provide) and adhering the leather to the tray base.
By the end, you’ll have a beautiful and practical addition to your vanity or a unique hostess gift or housewarming gift that will keep any space organized and clutter-free.
Materials and Tools Needed
- Leather sheets — In two colors of your choice with a thickness around 2mm
- Hexagon templates — Click to download large tray here and inner tray here PDF template.
- A4 thick cardstock paper — Or any similar thickness to cardboard
- Pencil
- Scissors
- Exacto knife — Or rotary cutter with a sharp blade
- All purpose glue, glue gun or leather adhesive
How to Make a Leather Hexagon DIY Vanity Tray
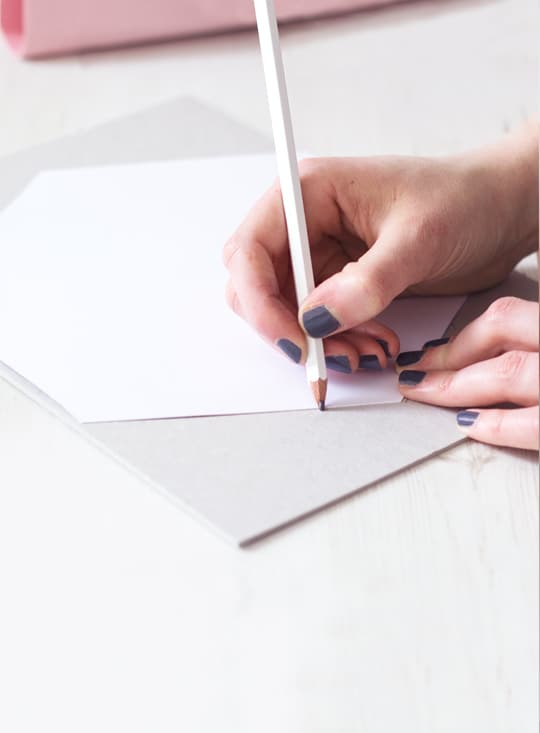
1 — Trace and cut the hexagon tray and inner tray templates onto the cardstock: These will serve as the structure for the trays.
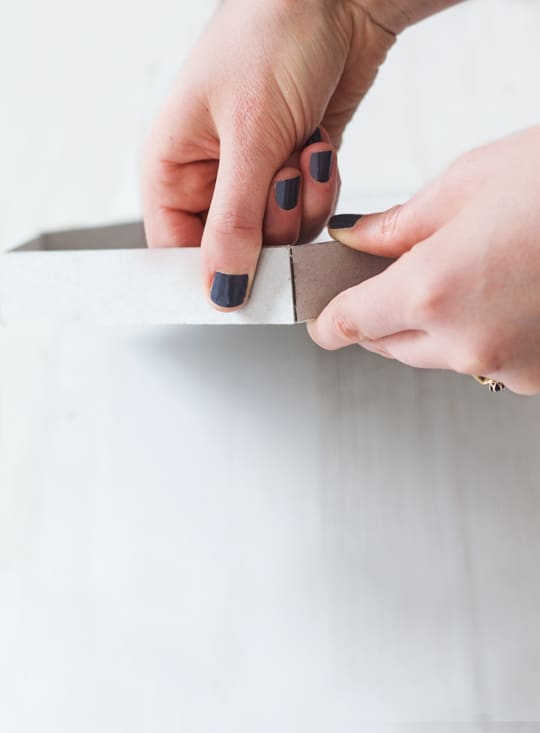
2 — Assemble and glue all the cardstock pieces together: Start with the tray base first. Press the sides together with your fingers. Don’t worry too much about it looking a little messy as you’re going to cover this later.
When you’ve done this with both the hexagon tray and the inner tray, start cutting the leatherette to cover them.
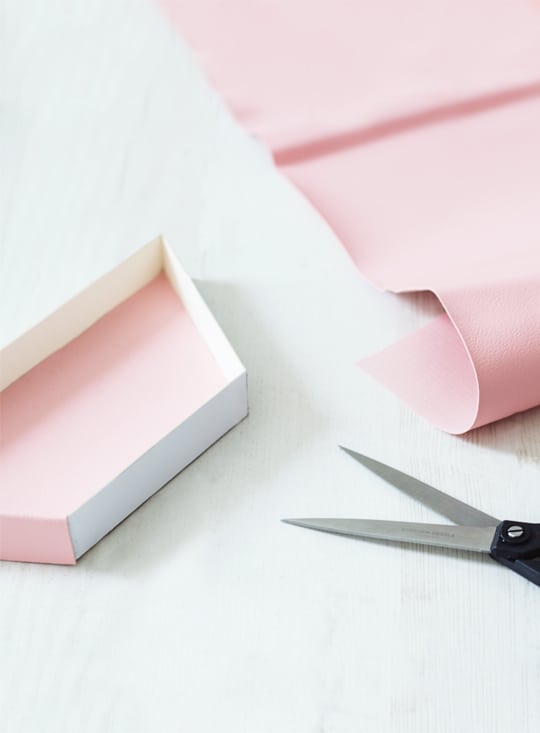
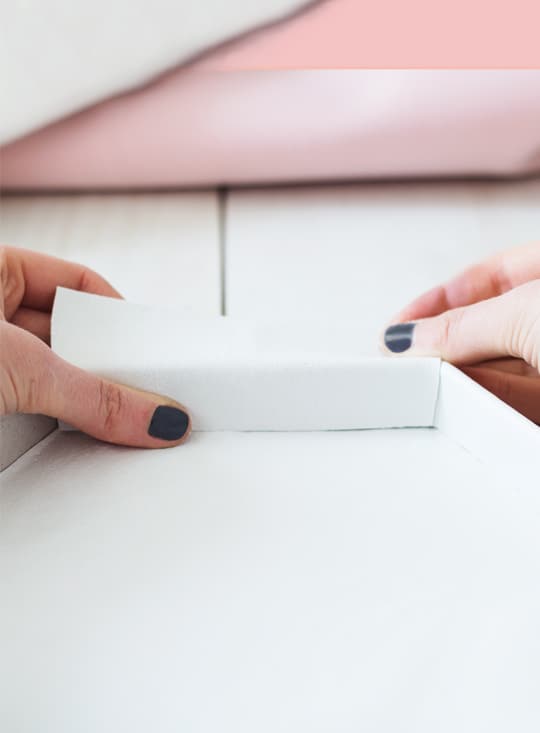
3 — Cut the leather: For the sides, use the template as a guide, doubling the depth of the sides to cover both the outside and inside of each.
For the tray bases, simple trace and cut the assembled cardstock tray onto the leather with a pen, leaving a slight border around the edge (approximately 1-2 cm) for folding later.
4 — Fold and glue the leather: Apply a generous amount of glue on each side, spreading it evenly so there are no lumps. Carefully fold the leather edges inwards, towards the traced hexagon shape on the right side (smooth side). Ensure the folds are clean and meet evenly at the corners.
Gently press the folded edges onto the craft card base, adhering them firmly. Hold them in place for a few minutes to allow the glue to set.
A handy tip is to put a line of glue along the top of each side so that as you bring the leatherette over the top, it creates smooth fold without any air bubbles.
5 — Repeat this for each side: Then, glue in the inside piece followed by the bottom base piece.
6 — Finishing touches: Once the glue dries completely, trim off any excess leather that may have overlapped.
Tutorial Notes and Tips
- When cutting the leather, ensure a sharp blade to avoid ragged edges.
- Apply a light touch with the glue to prevent it from seeping through the leather.
- Use weights or clamps to hold the folded edges in place while the glue dries, ensuring a secure bond. If using a rotary cutter, make sure to replace the blade regularly for clean cuts.
More Organizing Accessories
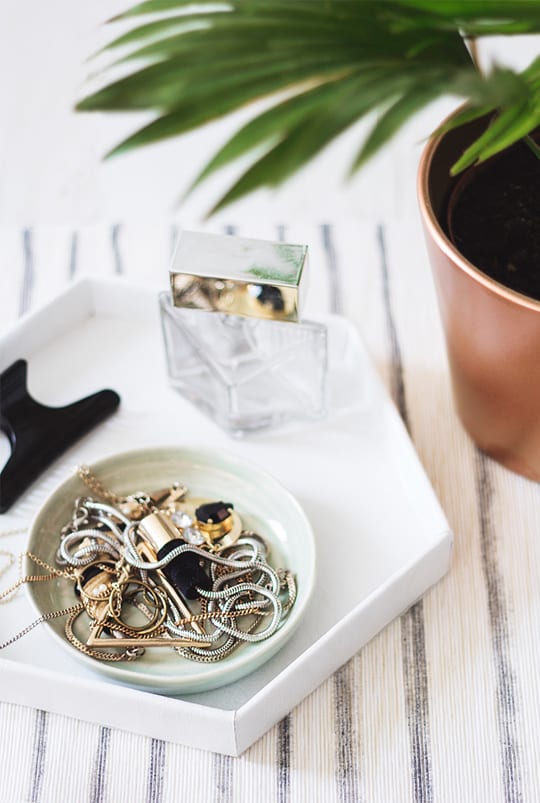
Now you’re ready to fill your trays with whatever you want. The leather covering means it’s wipeable which is handy for beauty products! If you have any leftover leather scraps, repurpose them into DIY leather drawer pulls (as we did with our Ikea dresser hack) or DIY leather bar and drink tags.
For many ways to stay organized, check out a few of our favorite ideas below —
- Creative Bow Holder Ideas
- DIY Desk Organizer
- Best Under the Bed Storage Ideas
- Inspring Ikea Kallax Hacks
Leather Hexagon DIY Vanity Tray
Equipment
- Pencil
- X-Acto knife
- Scissors
Materials
- 2 leather sheet color of choice with thickness around 2mm
- 4 cardstock paper minimum A4 thick
- 1 large hexagon tray template
- 1 inner tray template
- All-purpose glue
Instructions
- Trace and cut the hexagon tray and inner tray template onto the cardstock: This will serve as the base structure of your tray.
- Assemble and glue all the cardstock pieces together: Start with the tray base first. Press the sides together with your fingers. Don’t worry too much about it looking a little messy as you’re going to cover this later.
- Cut the leather: For the sides, use the template as a guide, doubling the depth of the sides to cover both the outside and inside of each. For the tray bases, simple trace the assembled cardstock tray onto the leather with a pen, leaving a slight border around the edge (approximately 1-2 cm) for folding later.
- Fold and glue the leather: Apply a generous amount of glue on each side, spreading it evenly so there are no lumps. Carefully fold the leather edges inwards, towards the traced hexagon shape on the right side (smooth side). Ensure the folds are clean and meet evenly at the corners. Gently press the folded edges onto the craft card base, adhering them firmly. Hold them in place for a few minutes to allow the glue to set.
- Repeat this for each side: Then, glue in the inside piece followed by the bottom base piece.
- Finishing touches: Once the glue dries completely, trim off any excess leather that may have overlapped.

Affordable Wall Art: 54 Stylish Prints Under $200
Looking for affordable wall art that still makes a big…
Continue Reading Affordable Wall Art: 54 Stylish Prints Under $200
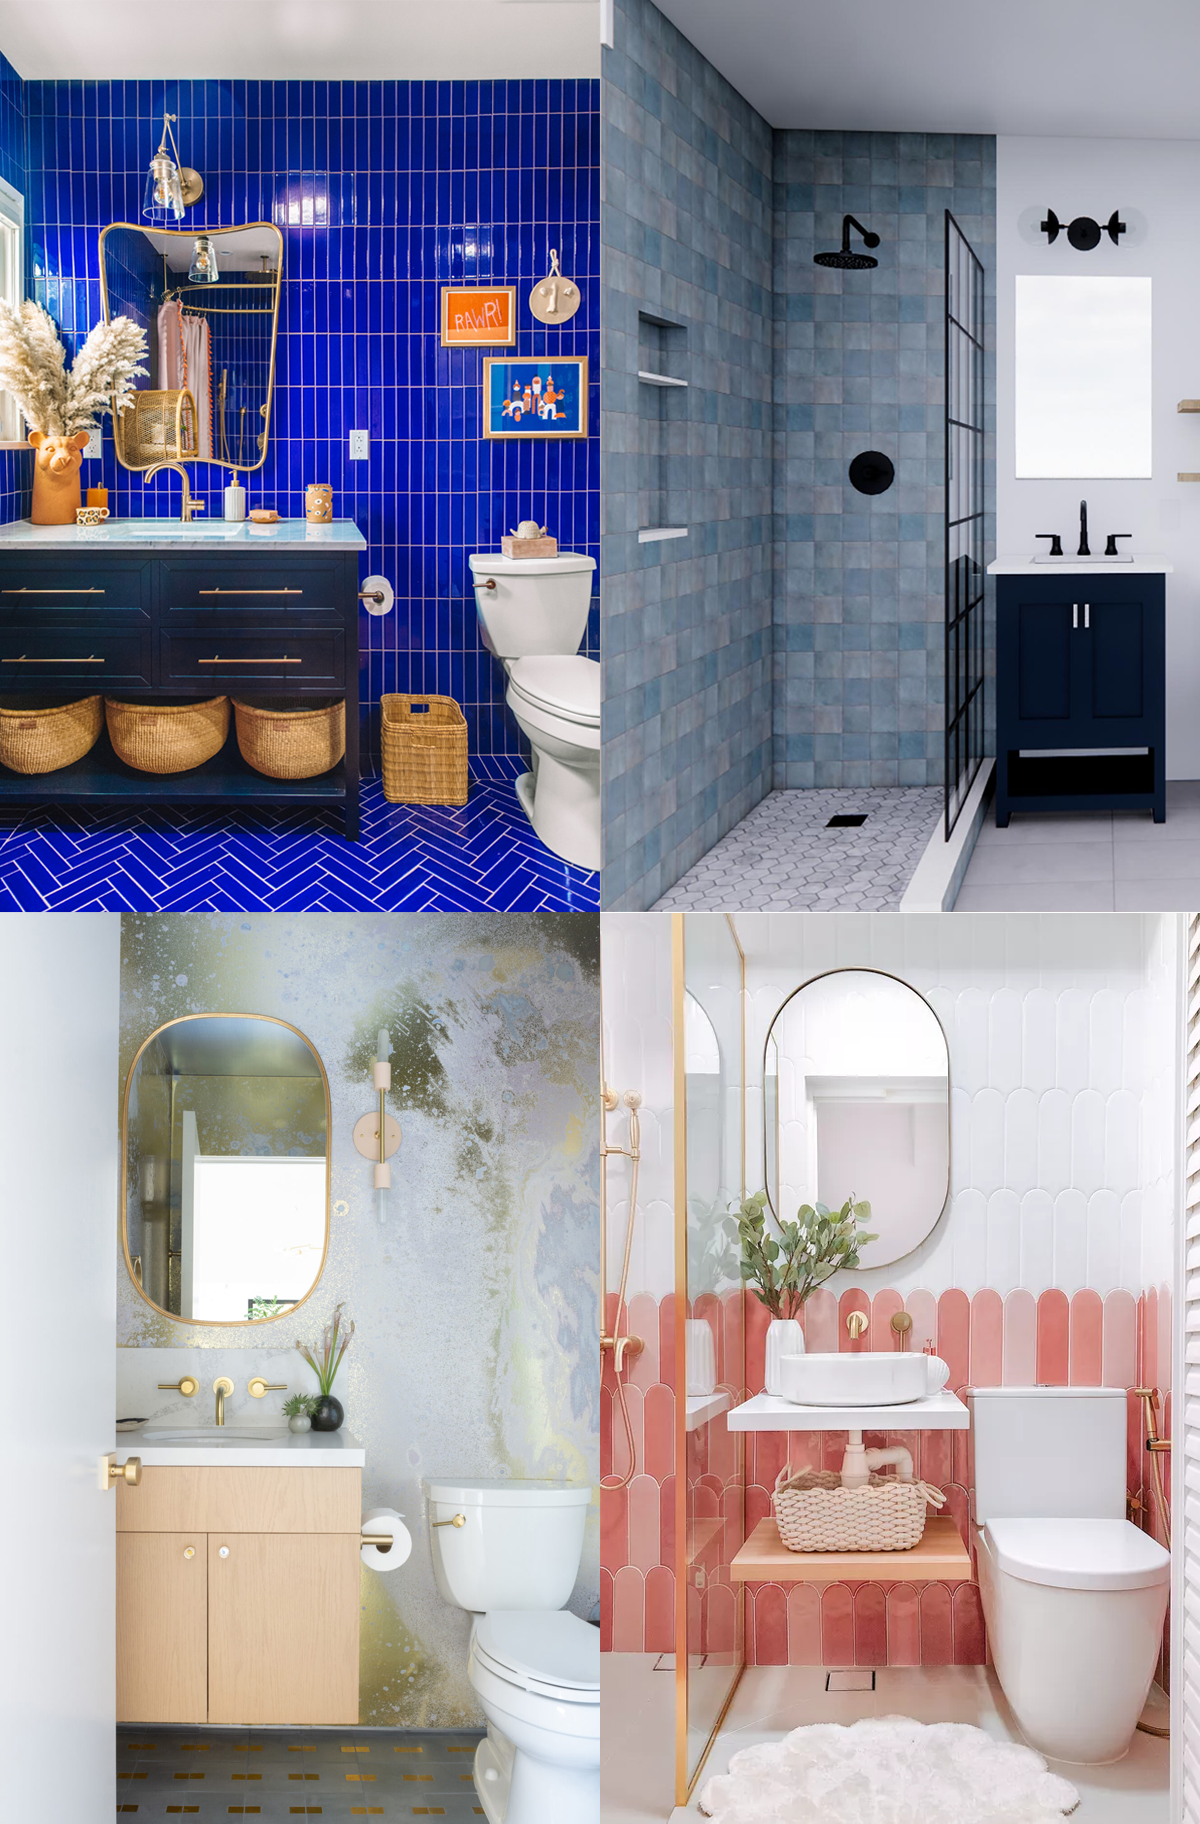
Small Bathroom Ideas That Make a Big Impact
Find practical small bathroom ideas, including clever storage solutions, decor…
Continue Reading Small Bathroom Ideas That Make a Big Impact
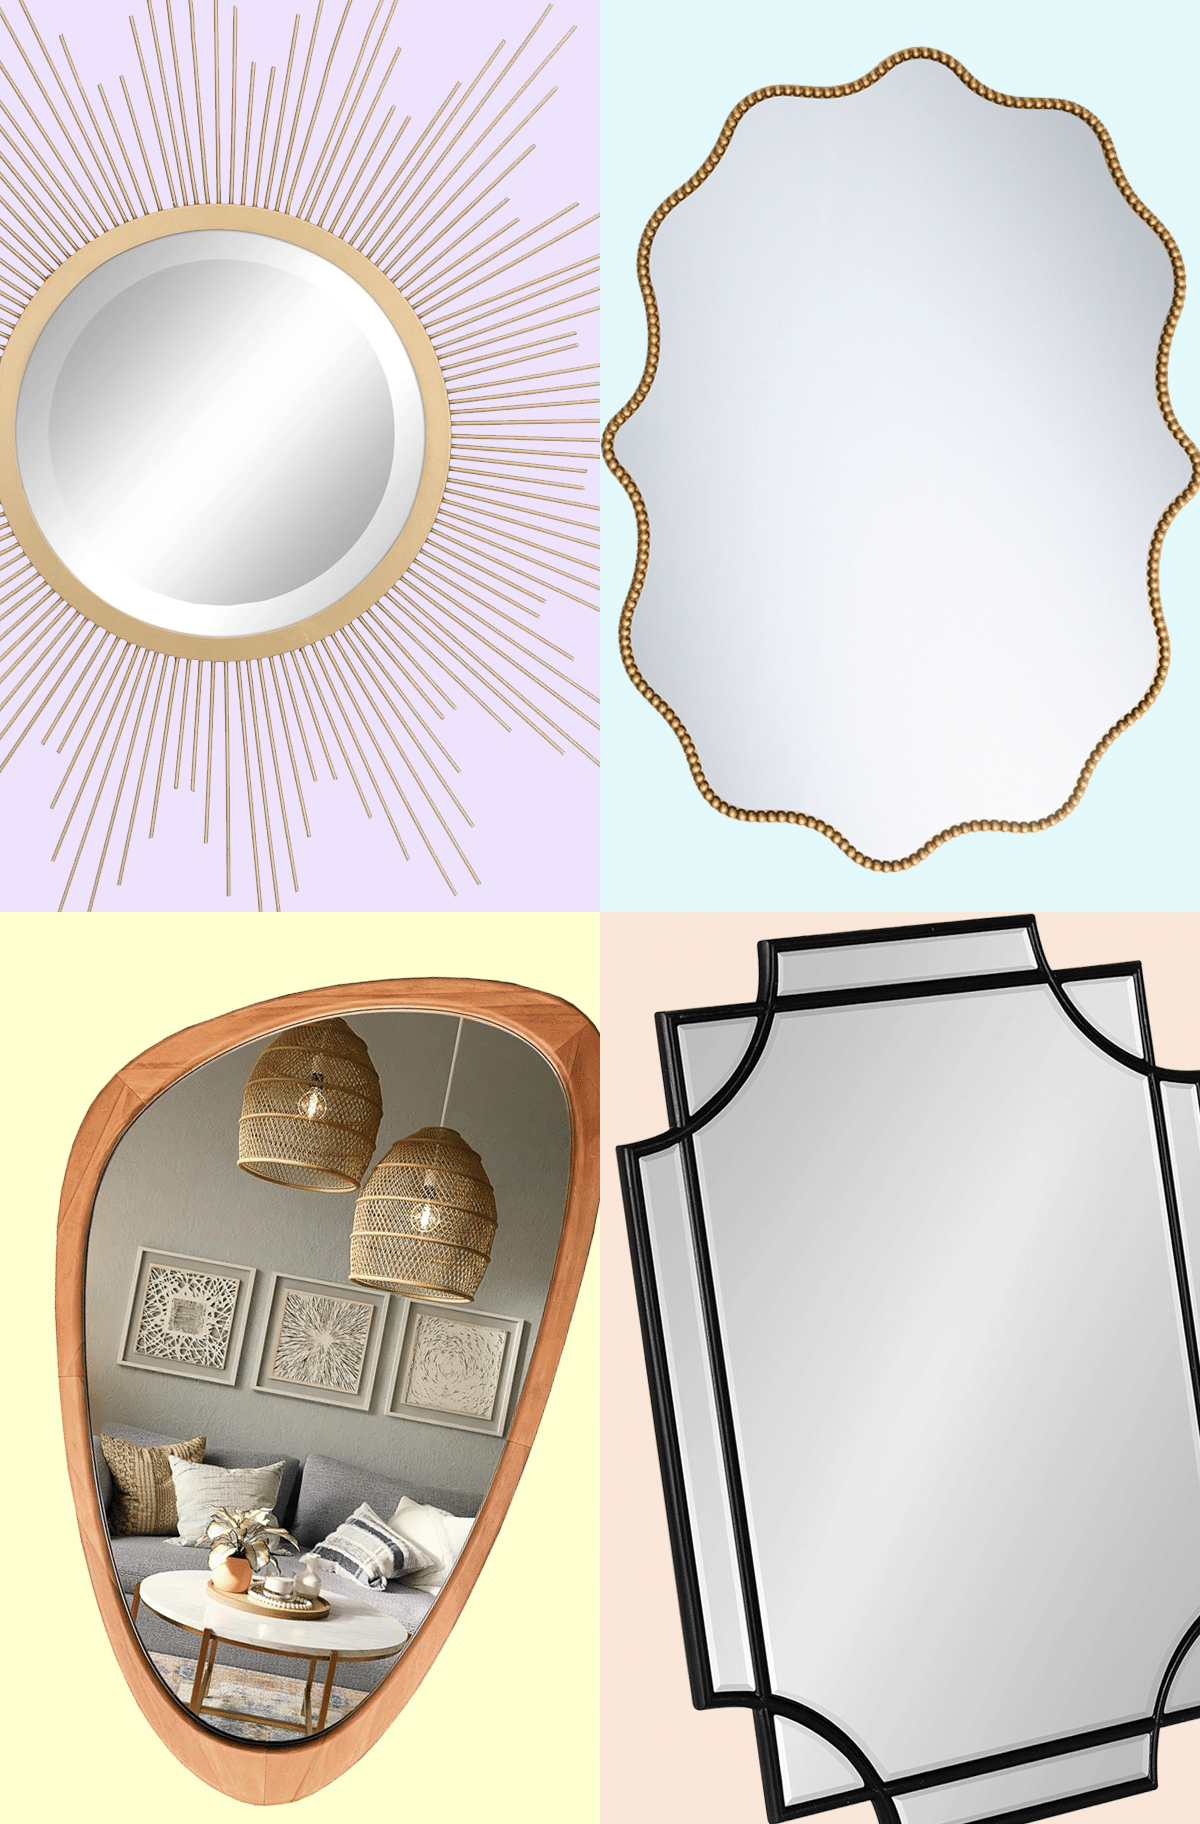
28 Decorative Wall Mirrors You’ll Wish You Bought Sooner
Looking for the perfect wall mirror? Explore our roundup of…
Continue Reading 28 Decorative Wall Mirrors You’ll Wish You Bought Sooner
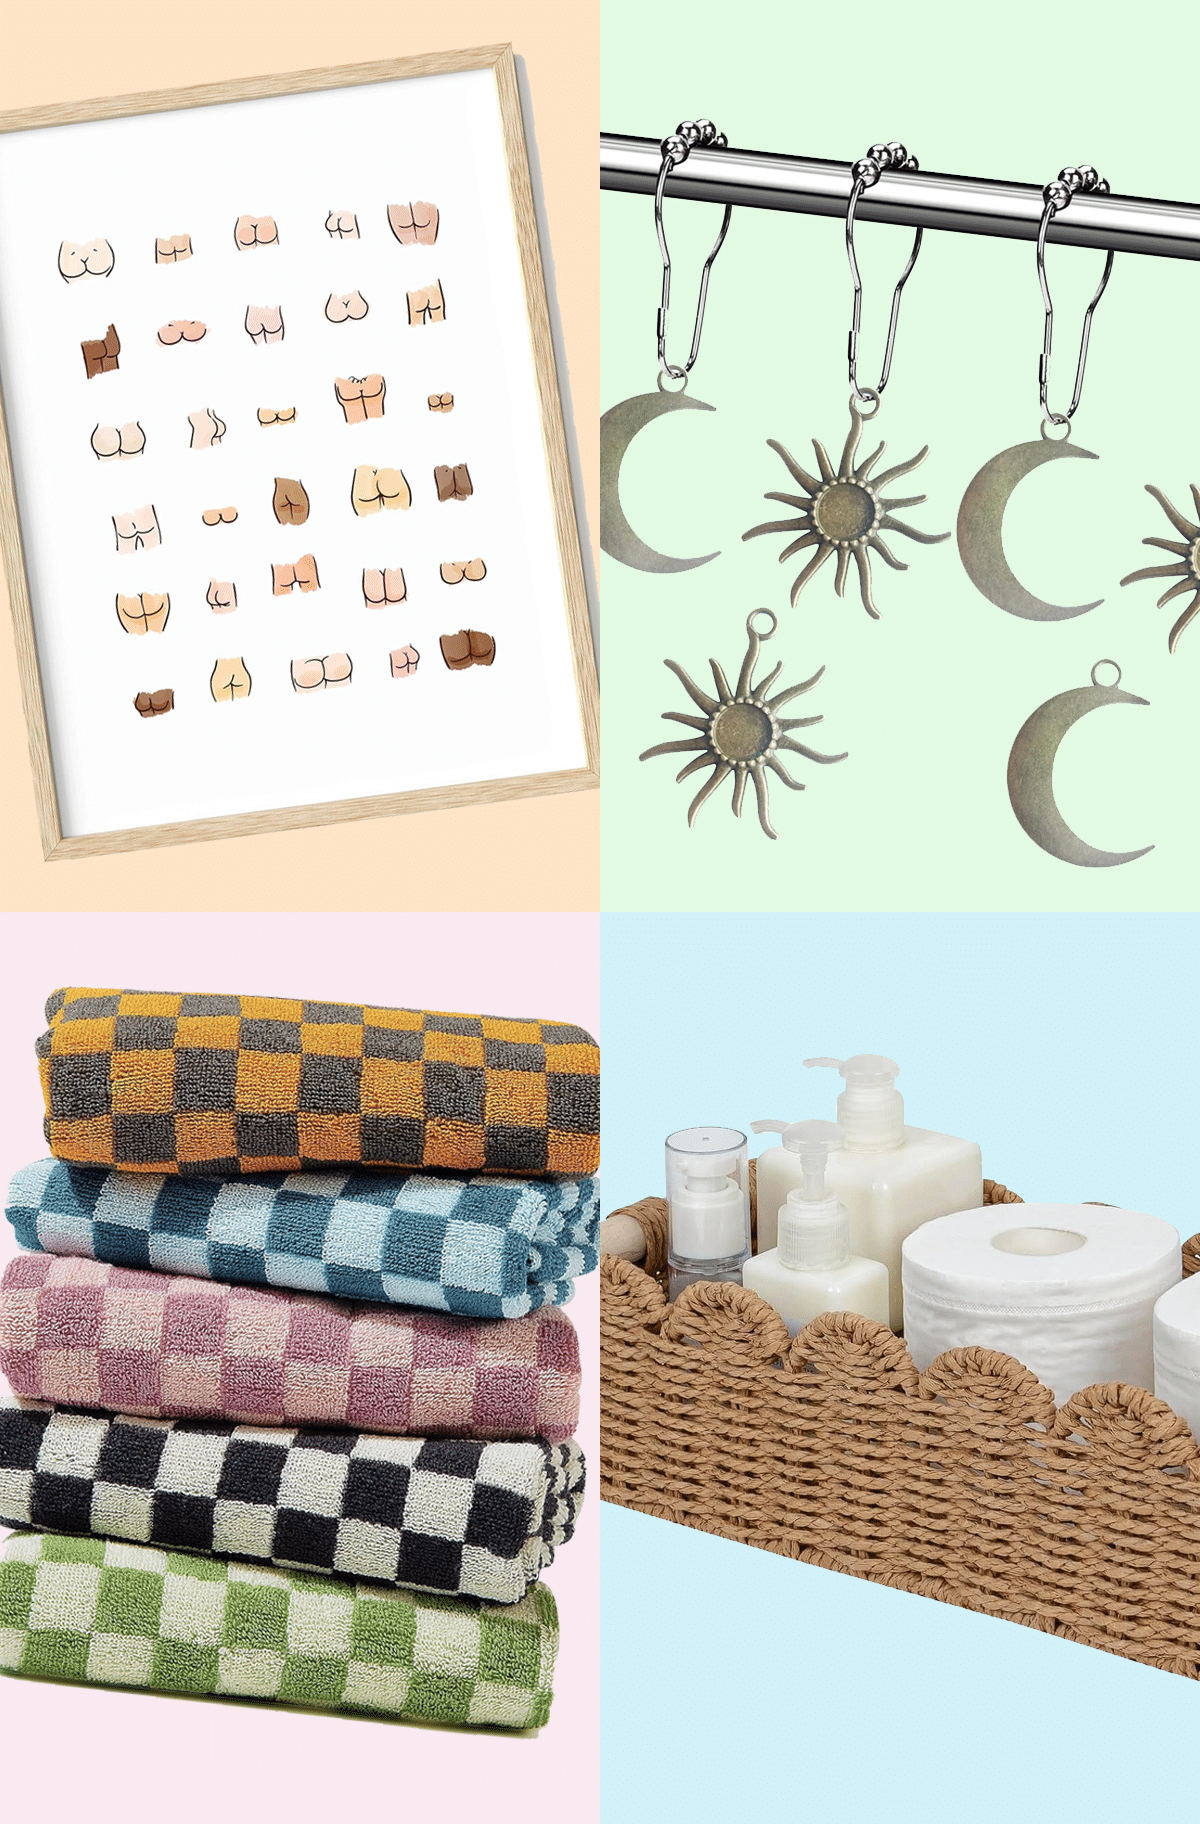
60+ Affordable Amazon Bathroom Decor Finds
From shower curtains to bath mats, elevate your bathroom style…
Please note that we may earn a commission for some of the above affiliate links. However, products featured are independently selected and personally well-loved by us!
Wow~ Love this!
I think everything posted made a lot of sense. However,
what about this? suppose you added a little information? I ain’t suggesting your content is not good.,
however what if you added something that grabbed
people’s attention? I mean DIY Leather Hexagon Vanity Tray | Sugar &
Cloth is kinda plain. You should look at Yahoo’s front page and
see how they create post headlines to grab people to open the links.
You might try adding a video or a picture or two to get people excited about what you’ve written.
In my opinion, it would bring your posts a little bit more interesting.
What a great idea! From the first picture I never would have guessed it was made from cardboard!
Love this! Super cute way to stay organized!
This is such an innovative idea! I particularly love the leather covering and contrasting colours – wow!
Gabrielle | A Glass Of Ice
x
Love it!
Lovely, I have to try this!
Absolutely love this idea!!
http://isoscella.blogspot.co.uk
Love this!
Oh I love, love, love this idea – would also be a great coffee table tray. Now I know what my next little DIY project will be. Thanks for the lovely idea :)
Ilia from http://www.iliascupoftea.com X