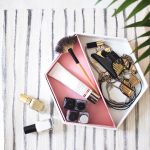
Leather Hexagon DIY Vanity Tray
Keep yourself organized and in style with this Leather Hexagon DIY Vanity Tray.
Servings: 1
Cost: $30
Equipment
- Pencil
- Exacto knife
- Scissors
Ingredients
- 2 leather sheet color of choice with thickness around 2mm
- 4 cardstock paper minimum A4 thick
- 1 large hexagon tray template
- 1 inner tray template
- All-purpose glue
Instructions
- Trace and cut the hexagon tray and inner tray template onto the cardstock: This will serve as the base structure of your tray.
- Assemble and glue all the cardstock pieces together: Start with the tray base first. Press the sides together with your fingers. Don’t worry too much about it looking a little messy as you’re going to cover this later.
- Cut the leather: For the sides, use the template as a guide, doubling the depth of the sides to cover both the outside and inside of each. For the tray bases, simple trace the assembled cardstock tray onto the leather with a pen, leaving a slight border around the edge (approximately 1-2 cm) for folding later.
- Fold and glue the leather: Apply a generous amount of glue on each side, spreading it evenly so there are no lumps. Carefully fold the leather edges inwards, towards the traced hexagon shape on the right side (smooth side). Ensure the folds are clean and meet evenly at the corners. Gently press the folded edges onto the craft card base, adhering them firmly. Hold them in place for a few minutes to allow the glue to set.
- Repeat this for each side: Then, glue in the inside piece followed by the bottom base piece.
- Finishing touches: Once the glue dries completely, trim off any excess leather that may have overlapped.
