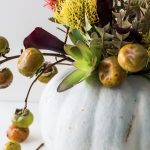
DIY Halloween Floral Centerpiece
A perfectly creepy DIY Halloween Floral Centerpiece idea that's cheery with just a touch of eery. It's a great excuse to expand the lifespan of your dried flowers.
Servings: 1
Cost: $30
Equipment
- Knife
Ingredients
- 1 waterproof floral tape
- 1 drinking glass to hold flowers
- 1 white pumpkin
- Flowers of your choice
Instructions
- Carve an opening on top of the pumpkin that’s just big enough to fit and insert the drinking glass. Scoop out all of the pumpkin guts, just like you would when carving one.
- Tape a grid along the glass rim with the waterproof floral tape. The grid allows you to easily manipulate the placement of your flowers and branches and ensures that they do not bundle up.
- Fill the glass with water 3/4 of the way up. Insert the glass into the pumpkin.
- Start inserting stems randomly as you see fit. They don’t need to be perfectly placed because it’s supposed to look a little rough around the edges.
- Once you have all of the florals placed where you want them, insert persimmon branches into the gap between the glass and the pumpkin. You will not need to place them inside the glass because branches do not need water. This way, you’ll also be able to get the cool hanging effect around the edges.
Notes
Please be aware that the estimated costs of this project is dependent on which florals you choose to use. The great thing is that dried brown flowers work great for a Halloween/fall themed centerpiece.
