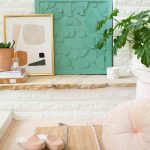
DIY Wooden Artwork
A step-by-step guide on how to create your own wooden artwork that's easy on the wallet!
Servings: 1
Cost: $50
Equipment
- Cricut knife blade
- Hot glue gun and glue sticks
Ingredients
- Balsa wood sheets
- 1 Wooden picture frame 24"×24" or size of your choice
- 1 scrap wood to fit your frame, you can use the chipboard backing from the picture frame
- Spray paint in the color of your choice
Instructions
Designing your artwork:
- Connect your computer to your Cricut Maker and change the blade if necessary by unlatching the side B cutter and replacing it with the knife blade.
- Select which shapes you want to cut from the Design Space options. We used circles, rectangles, triangles, squares, half circles, hexagons, and ovals. (More tips for shapes below in the tips section!).After you have all desired shapes click the “make it” tab in the top right corner.
- Tape down your wood securely to the mat and make sure your shapes on the design board line up with the size of your material selected in Design Space.
- Load your mat into the machine by lining it up and pressing the flashing double-sided arrow. (If your mat is misaligned, press the unload/load button and try again).
- Finally, press the flashing Cricut logo button on your machine and your wood cut will begin, once complete unload the mat and separate your shapes from the wood sheet.
- Repeat this process until you have your desired amount of shape variations for your final wooden artwork.
- Assembling the wooden pieces:
- To create the wooden canvas that your shapes will be applied to, use a simple wooden frame with the chipboard backing of the frame glued in place or glue a piece of scrap wood to the back of a wooden frame for a heftier finished product.
- Lay out the shapes on your board and rearrange them to your liking.
- Optional: To give your artwork more dimension, glue additional wooden squares behind some of your shapes to give them different heights.
- Once you have your shapes laid out on your wooden canvas, hot glue them into place and let dry.
- Now spray paint the final glued product with the color of your choice and let dry.
Notes
- You can follow a step-by-step guide for cutting shapes from Design Space right here.
- Our pro-tip: Reinforcing the wood with painter’s tape onto the Cricut mat is helpful.
- If your wood pieces are smaller than the mat you can move the shapes around to fit on your remaining material.
- When cutting wood on your Cricut, it’s really important to ensure the right materials and depth of cut selected. In this case, we used all balsa wood since we were able to buy it in bulk at the craft store so we selected balsa wood for cutting.