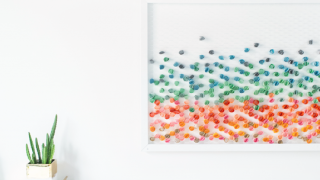
DIY Wooden Artwork – How to Cut Wood Into Shapes Easily
Showing you how to cut wood into shapes easily, PLUS, a really cool way to use them for making abstract DIY Wooden Artwork for your space.
I am OH so excited to be getting my DIY feet wet after the craziness of our recent move!
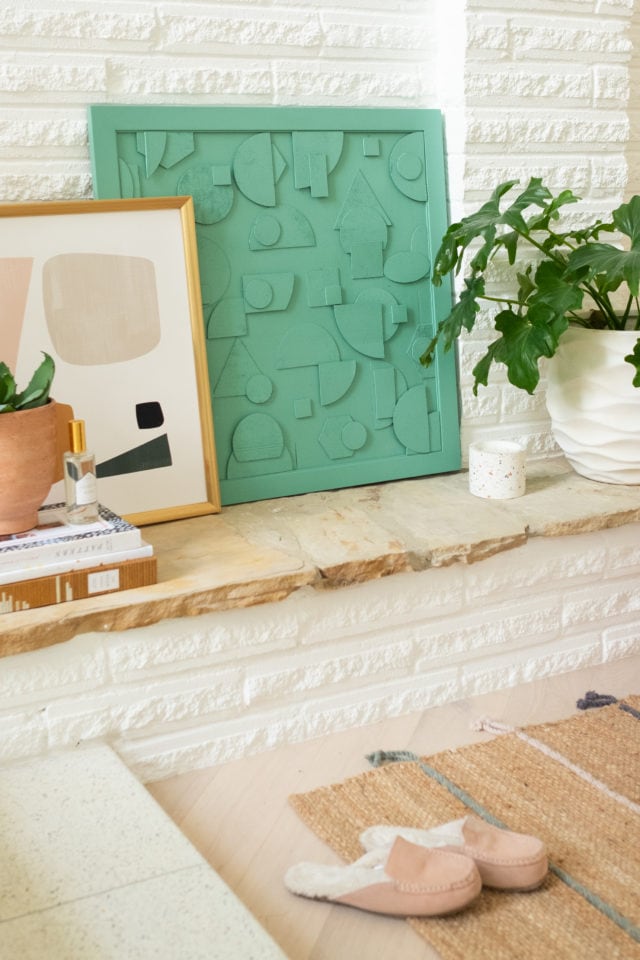
Naturally, I’m focusing on getting the house ready, so this DIY wooden artwork has the perfect new home.
Plus, I’m sharing how to cut the wood into shapes easily because no one needs a 36-hour-long artwork project after moving!
You only need a few simple materials to make this home decor DIY, and one of them happens to be my favorite crafting tool.
That’s right folks, I dusted off my old (just kidding, it’s brand new because they came out with a mint green version, so duh) Cricut Maker.
This baby is a crafter’s DREAM!!!
Like this cute set of coasters using Cricut infusible ink is a household staple.
I have a few more DIY ideas up my sleeve for this guy in just a few weeks, but more on that later…
What Woods are Compatible With the Cricuit?
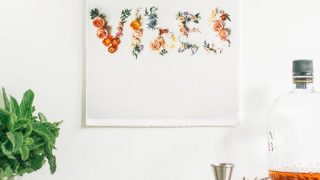
I originally came up with this idea after stumbling across this artwork. The problem was that it wasn’t the size I needed and was also VERY pricey.
All the shapes were simple and easy to find pre-uploaded in Cricut Design Space.
So all I had to do was create the framework for mounting the artwork and cutting out the shapes themselves with the Cricut Maker.
There are two types of wood that the Cricut Maker can cut: Bass and balsa wood.
Both are relatively soft woods so they can glide through the machine easily with intricate cuts using the knife blade even though they’re plenty thick enough for substantial projects.
Materials and Tools Needed to Make a DIY Wooden Artwork
Cricut knife blade
Wooden picture frame — Ours is 24″x 24″.
Piece of scrap wood to fit your frame — Or you can use the chipboard backing from the picture frame
Spray paint — In the color of your choice
How To Cut Wood Easily with the Cricut Maker
Designing your artwork:
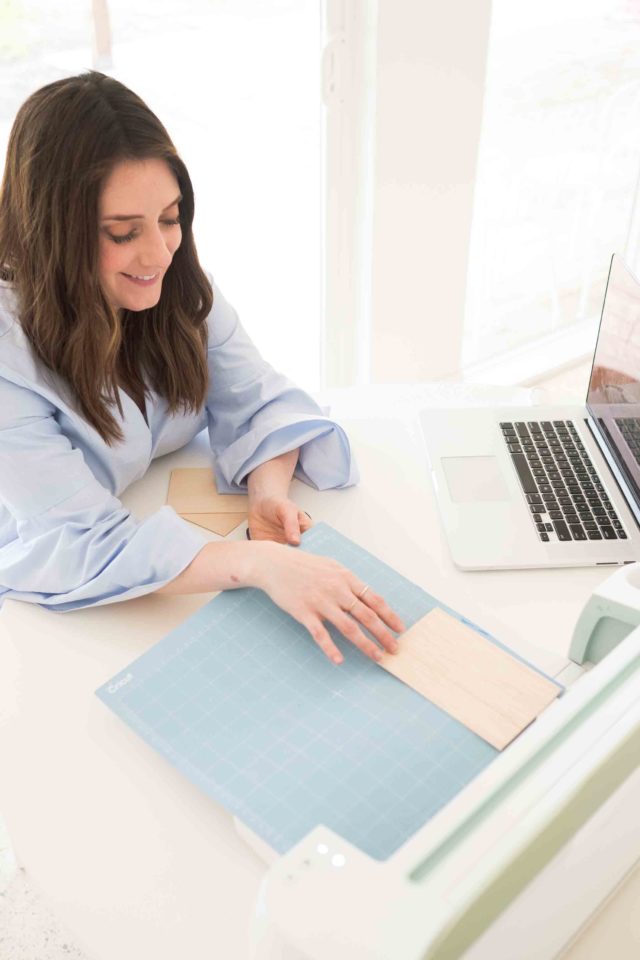
Step 1 — Connect your computer to your Cricut Maker.
Change the blade if necessary by unlatching the side B cutter and replacing it with the knife blade.
Step 2 — Select which shapes you want to cut from the Design Space options.
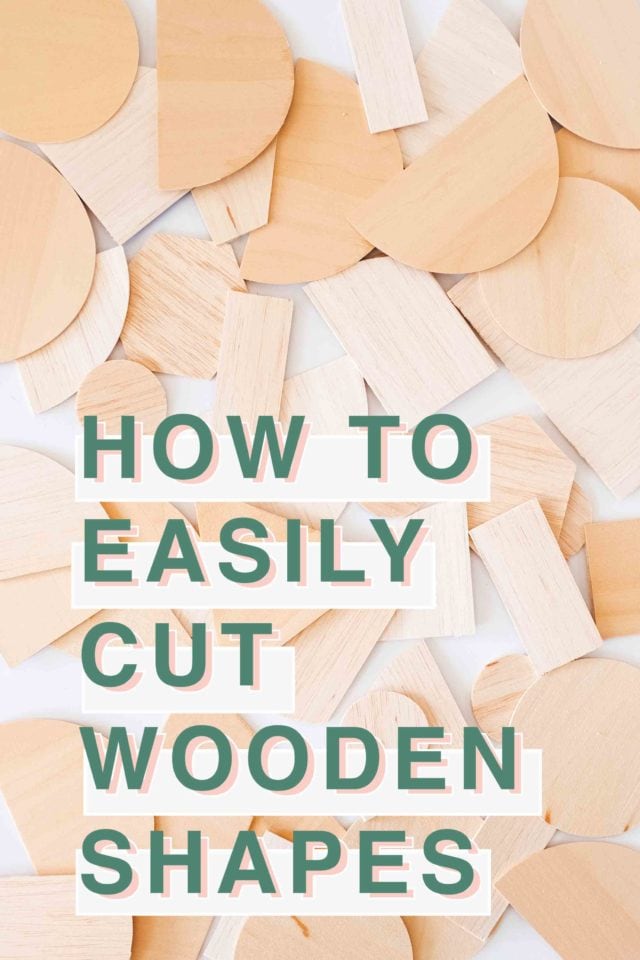
We used circles, rectangles, triangles, squares, half circles, hexagons, and ovals. (More tips for shapes below in the tips section!)
After you have all desired shapes, click the “make it” tab in the top right corner.
Step 3 — You can follow a step-by-step guide for cutting shapes from Design Space right here.
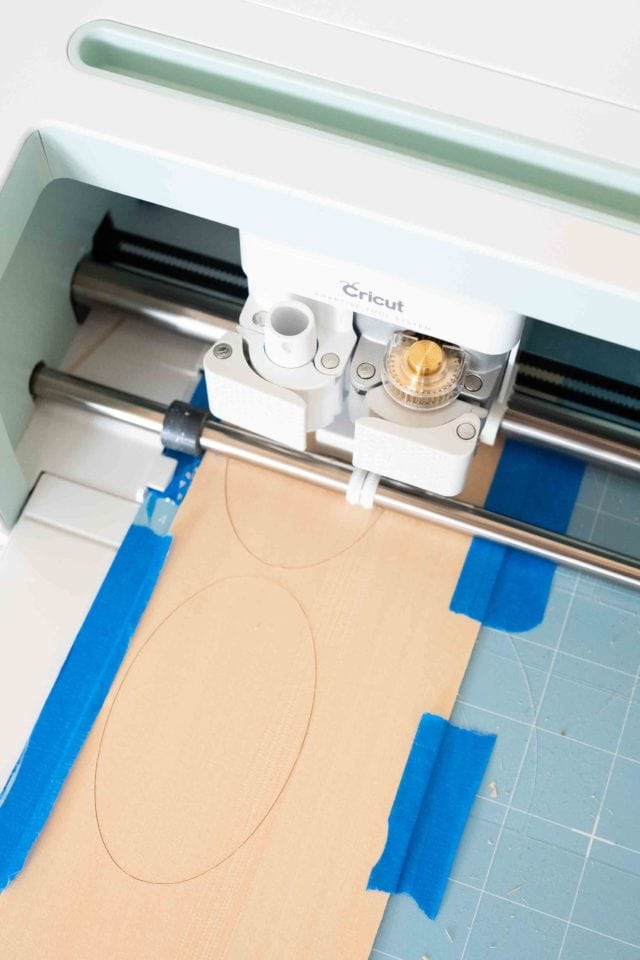
Our pro-tip: Reinforcing the wood with painter’s tape onto the Cricut mat is helpful.
If your wood pieces are smaller than the mat you can move the shapes around to fit on your remaining material.
Step 4 — When cutting wood on your Cricut, it’s really important to ensure the right materials and depth of cut selected. In this case, we used all balsa wood since we were able to buy it in bulk at the craft store so we selected balsa wood for cutting.
Step 5 — Tape down your wood securely to the mat and make sure your shapes on the design board line up with the size of your material selected in Design Space.
You can now load your mat into the machine by lining it up and pressing the flashing double-sided arrow (if your mat is misaligned press the unload/load button and try again).
Step 6 — You may now press the flashing Cricut logo button on your machine and your wood cut will begin, once complete unload the mat and separate your shapes from the wood sheet.
Step 7 — Repeat this process until you have your desired amount of shape variations for your final wooden artwork.
Assembling the wooden pieces:
Step 8 — To create the wooden canvas that your shapes will be applied to, use a simple wooden frame with the chipboard backing of the frame glued in place.
Or glue a piece of scrap wood to the back of a wooden frame for a heftier finished product.
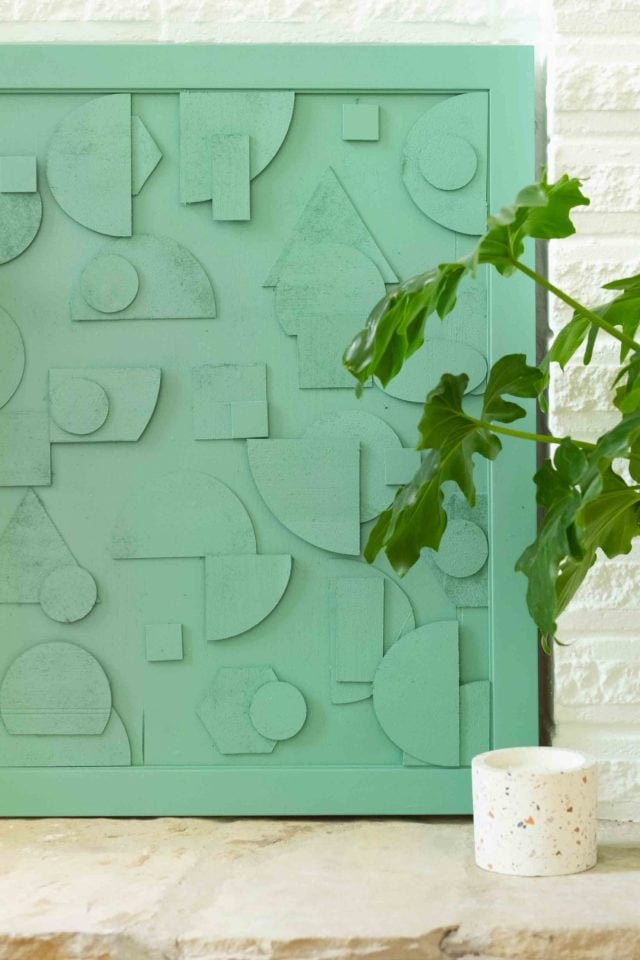
Step 9 — You can now lay them out on your board and rearrange them to your liking.
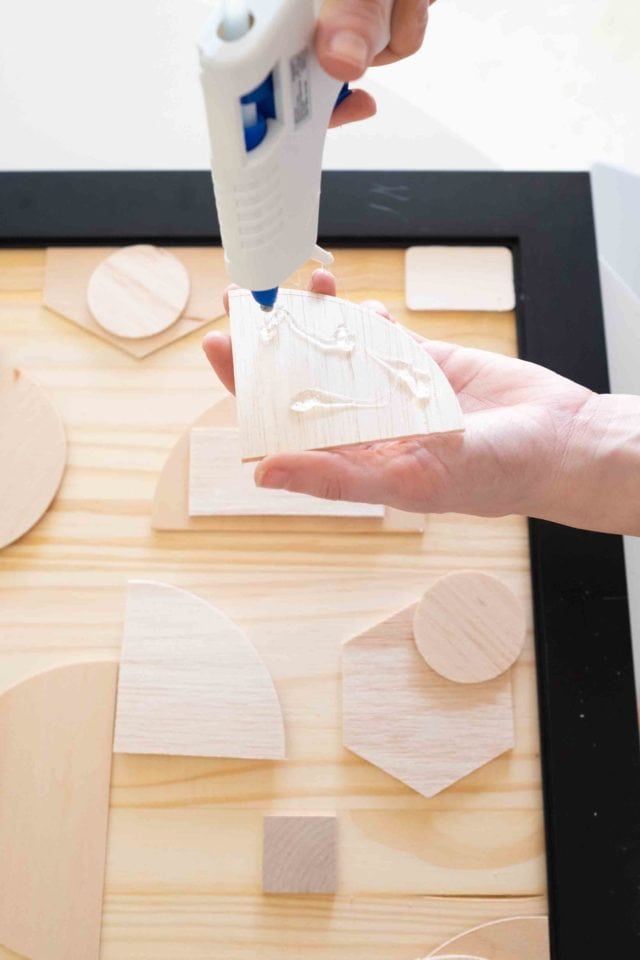
To give your artwork more dimension, glue additional wooden squares behind some of your shapes to give them different heights.
Step 10 — Once you have your shapes laid out on your wooden canvas, hot glue them into place and let dry.
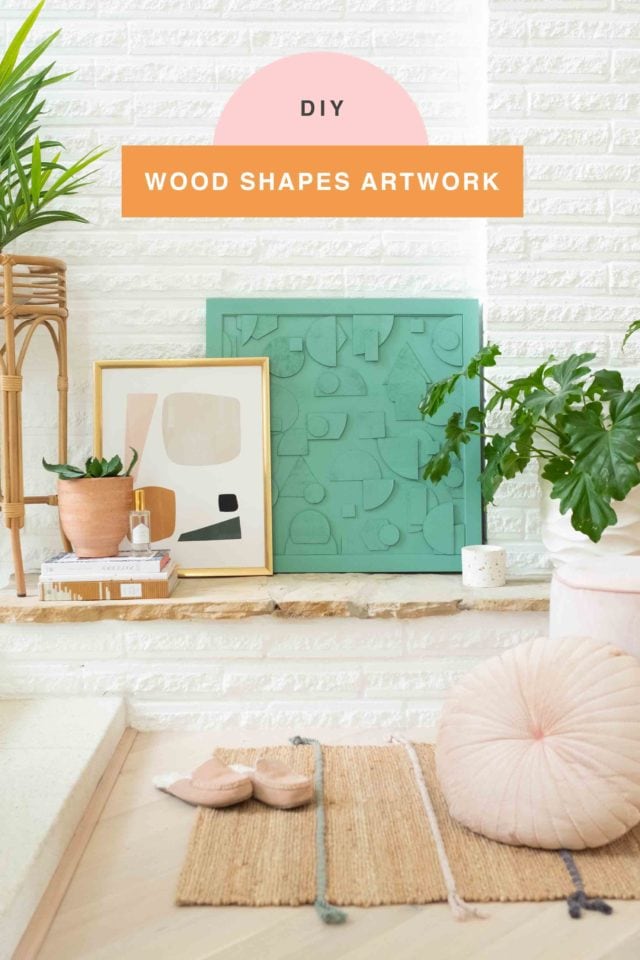
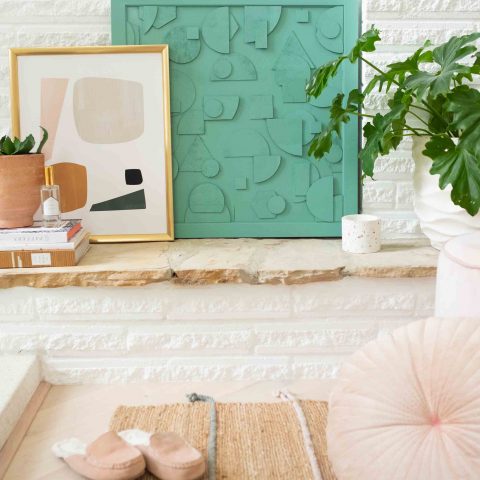
Step 11 — Now spray paint the final glued product with the color of your choice and let dry.
You’re now ready to display your custom DIY wooden artwork!
I’m really loving all things jade green lately. So I chose to spray paint the whole project a monochrome color of green.
That said, you could easily paint certain shapes different colors for a colorful color block version of this DIY too!
Tips for How to Cut Wood Shapes Easily
How to you overlap the shapes:
If you would like half circles or rectangles to overlap shapes, highlight the entire shape in Design Space.
Then, click the “slice” tab. Next, separate all the remaining shapes and delete the unwanted pieces left over.
How to add dimension:
To give your artwork more dimension, you can glue additional wooden squares behind some of your shapes to give them different heights.
Watch the cutting process:
The Cricut machine is programmed to go over the shape a certain number of times until your material is thoroughly cut.
We found that the programmed number of cuts for basswood and balsa wood was too high. So we often stopped it early.
Instead of letting it run the full length, we watched the cutting process closely.
And when the shapes seemed to move or be pushed by the blade, we pressed the paused button and then unloaded the mat.
If it asks you if you would like to cancel the cut, you can click “yes” and your project will still be there.
What if the wood moves around while cutting?
Be sure to tape your bass or balsa wood sheets to the cutting mat to make sure they stay in place.
However, if the materials loosen from the tape and starts to move when the blade is cutting, immediately stop the cut and cancel it.
We do not recommend trying to redo the cut on the same wood sheet. Simply get a new sheet and tape it a little firmer this time.

More Wood DIY Project Ideas
For more DIY wooden artwork and home decor like this, be sure to check out our related posts below –
- DIY Wooden Polaroid Displays + Video Tutorial
- How To Make DIY Mini Wooden Serving Boards
- DIY Distressed Wooden Shelves
- DIY Wooden Birthday Cake Decor
DIY Wooden Artwork
Equipment
- Cricut knife blade
- Hot glue gun and glue sticks
Materials
- Balsa wood sheets
- 1 Wooden picture frame 24"×24" or size of your choice
- 1 scrap wood to fit your frame, you can use the chipboard backing from the picture frame
- Spray paint in the color of your choice
Instructions
Designing your artwork:
- Connect your computer to your Cricut Maker and change the blade if necessary by unlatching the side B cutter and replacing it with the knife blade.
- Select which shapes you want to cut from the Design Space options. We used circles, rectangles, triangles, squares, half circles, hexagons, and ovals. (More tips for shapes below in the tips section!).After you have all desired shapes click the “make it” tab in the top right corner.
- Tape down your wood securely to the mat and make sure your shapes on the design board line up with the size of your material selected in Design Space.
- Load your mat into the machine by lining it up and pressing the flashing double-sided arrow. (If your mat is misaligned, press the unload/load button and try again).
- Finally, press the flashing Cricut logo button on your machine and your wood cut will begin, once complete unload the mat and separate your shapes from the wood sheet.
- Repeat this process until you have your desired amount of shape variations for your final wooden artwork.
- Assembling the wooden pieces:
- To create the wooden canvas that your shapes will be applied to, use a simple wooden frame with the chipboard backing of the frame glued in place or glue a piece of scrap wood to the back of a wooden frame for a heftier finished product.
- Lay out the shapes on your board and rearrange them to your liking.
- Optional: To give your artwork more dimension, glue additional wooden squares behind some of your shapes to give them different heights.
- Once you have your shapes laid out on your wooden canvas, hot glue them into place and let dry.
- Now spray paint the final glued product with the color of your choice and let dry.
Notes
- You can follow a step-by-step guide for cutting shapes from Design Space right here.
- Our pro-tip: Reinforcing the wood with painter’s tape onto the Cricut mat is helpful.
- If your wood pieces are smaller than the mat you can move the shapes around to fit on your remaining material.
- When cutting wood on your Cricut, it’s really important to ensure the right materials and depth of cut selected. In this case, we used all balsa wood since we were able to buy it in bulk at the craft store so we selected balsa wood for cutting.

This post is sponsored by Cricut. Sugar & Cloth has chosen to donate 5% of all sponsored campaigns to charity, which you can read more about right here.
Don’t forget to share your DIY wooden artwork with us on Instagram using the hashtag #sugarandclothloves. We always love seeing all of your creations! Looking for more interior design inspiration? You can find all of our home decor tutorials and ideas right here!
Easy Wall Art Projects to Try at Home


Please note that we may earn a commission for some of the above affiliate links. However, products featured are independently selected and personally well-loved by us!
its very creative work for designing

Yes, the Circuit is wonderful!
great DIY activity with a great result for the house afterwards!
Thanks, Natasha! XOXO
Aw. Thank you so much!
I never knew you could do this using a cricut. I love your finished project!
Thanks, Jen! Lots of people have been telling us this so we are glad they now know another thing that can make with it!
What a fantastic idea, i love it, although i dont have a cricut maker i am thinking of alternative ways to cut (or buy) bits of wood.
Hi Emma! This is definitely a great alternative! XOXO
I’m not a crafter but I bet even I could do this project. Looks easy and pretty!
Totally easy to do!
My Cricut Maker is my BFF. but I hadn’t thought to use it this way. LOVE the shape art!!!
Yay! Glad you found another use for it!
I love making my own home decor, and I have been searching for a DIY method for this. I loved it!
You’re welcome, Katie!