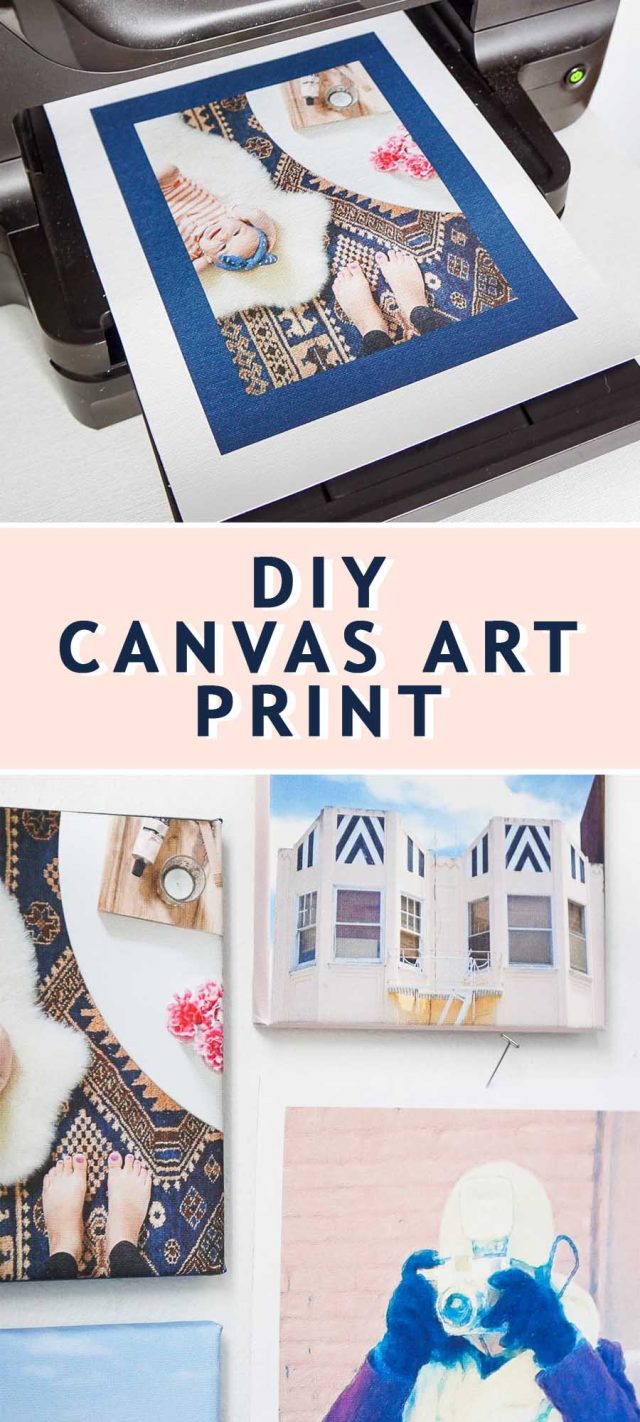
How to Print On Canvas
Customize your walls with your favorite photos using printable canvas paper for this DIY Canvas Art Print tutorial for your wall!
If you’re like me and you’re making it a New Year’s goal to finally print out some of those pictures you’ve been hoarding on your phone for the past year, then this DIY Canvas Art Print has your name written all over it.
It’s a great option for a custom photo gift idea for anyone or a personalized gift too!
I, Erin recently discovered an amazing little thing called printable canvases. This affordable paper allows you to transform those iPhone snaps into canvas wall art!
Inkjet Art Paper | What Is Printable Canvas Paper?
Canvas paper allows you to print photos onto textured canvas using your home printer and then stretch them onto wooden frames for gallery-wrapped-style works of art.
It is sold in a roll or sheet form. There are many advantages to canvas prints. Images printed on canvas paper do not fade like they would on regular paper.
You can also easily clean custom canvas prints with a duster or slightly damp cloth.
Materials and Tools Needed To Make A DIY Canvas Art Print
Mini blank art canvas — Blank canvases are available at any craft or art store or you can purchase them in bulk online.
Microsoft Powerpoint — Or any photo editing software
Inkjet printer — Canvas paper is thicker than regular print paper. Though most have the capability, verify with your printer specifications that it can accommodate canvas photo printing.
Scissors
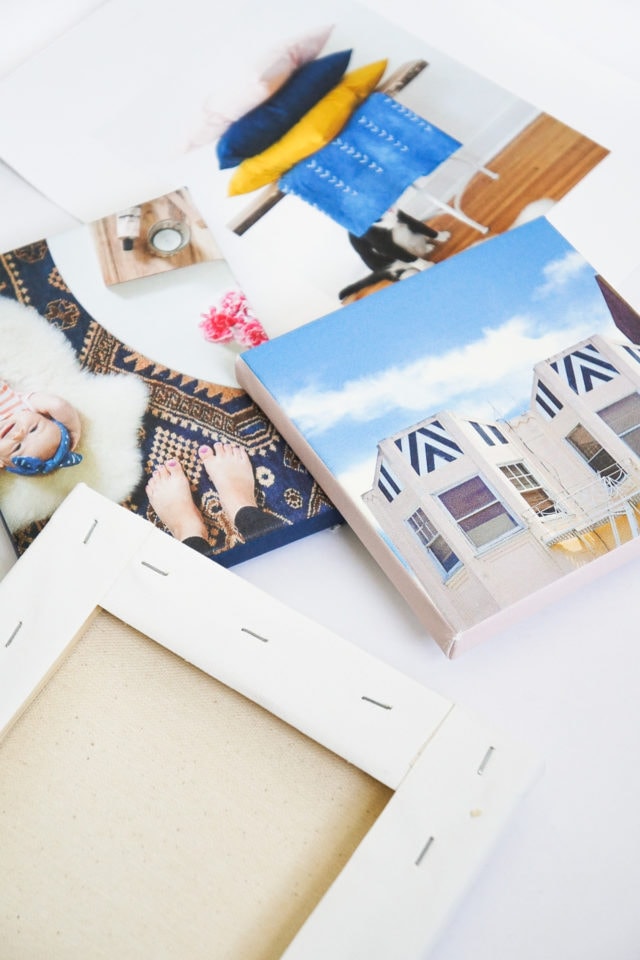
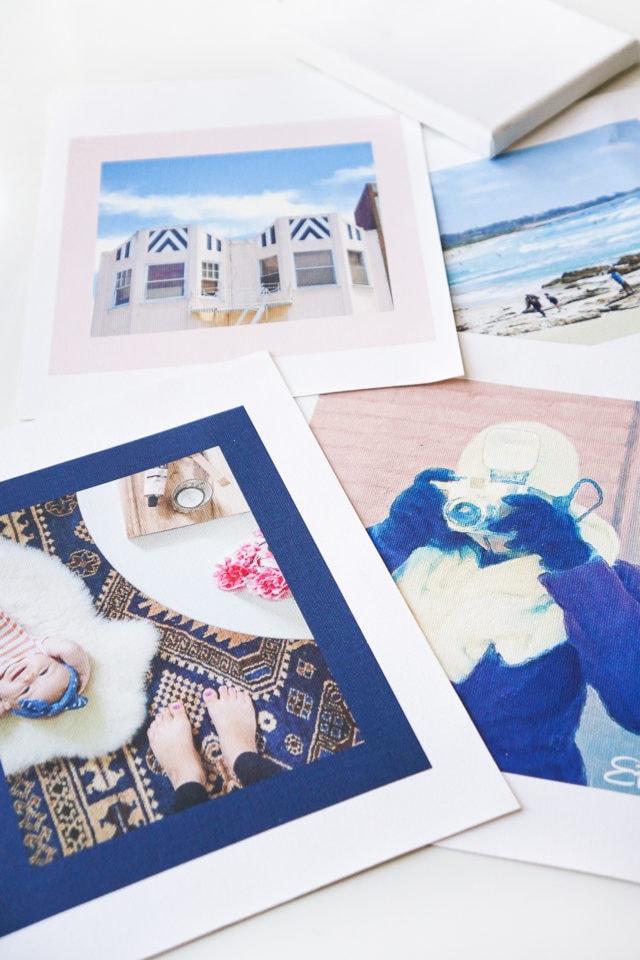
Notes: For this DIY project, I’ve created 5”x 7” and 5”x 5” canvas size frames. The sizing was limited by my printer which prints a maximum size of 8.5”x 11”.
If your printer can handle larger formats, consider using 11”x 17” printable canvas for additional size options.
How To Make An Easy DIY Canvas Art Print
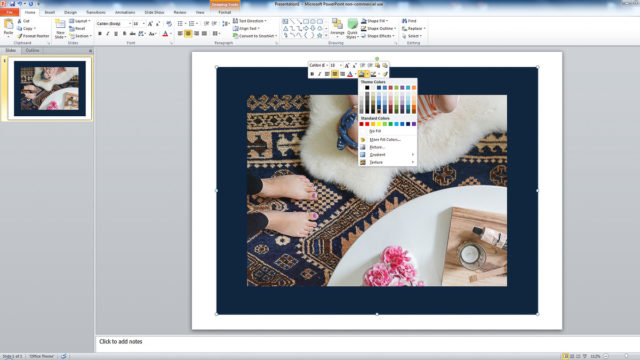
Step 1 — Open up a blank document in Powerpoint and insert your picture or artwork. Center the photo on the slide.
(I’m using Powerpoint, as it’s a program many may be familiar with, but you can also use Adobe Illustrator or any layout editing software as well.)
Step 2 — Then, pick the ‘rectangle shape’ from the top toolbar and draw a rectangle roughly 2-3 inches larger than your photo. You can just eyeball it since this border will be wrapped.
Right-click on the rectangle shape and choose ‘Send to Back’ in order to send it behind your photo.
Then, right-click on the rectangle shape again and choose a paint color fill similar to the general color of your photo. This color will be visible only along with your canvas trim so you can opt for just white.
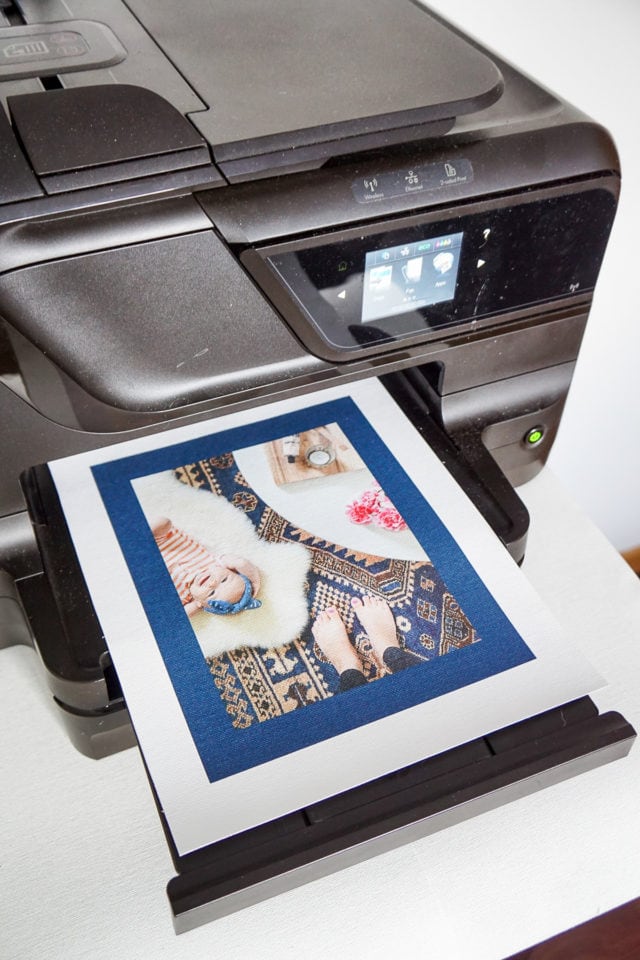
Step 3 — At this point, do a test print on standard paper to confirm color and sizing look good.
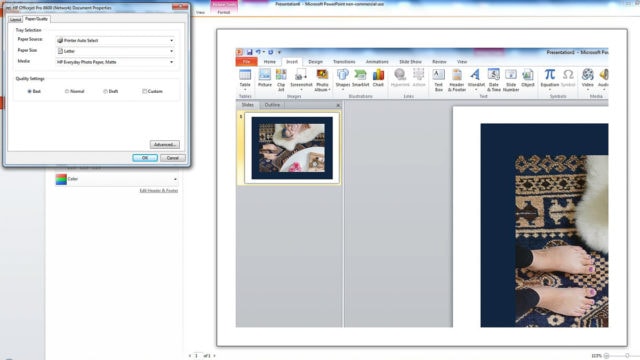
Step 4 — Next, select print settings to optimize printing on the canvas. Go to ‘”File” –> “Print” –> ‘Printer Properties’. Choose the following settings and hit “Print”:
— Print Quality: “Best”
— Paper Type: “Matte Photo Paper”.
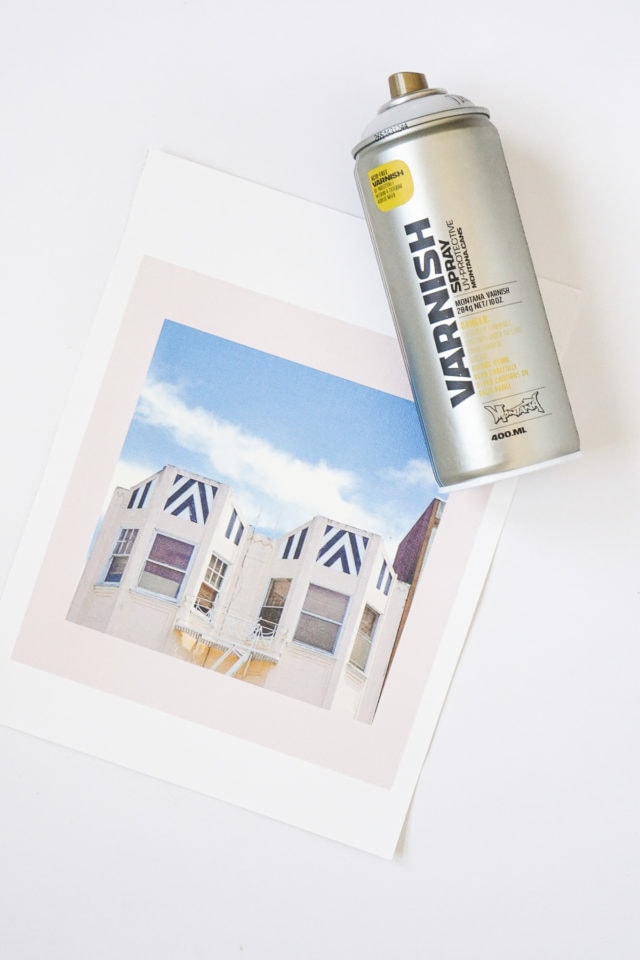
Step 5 — Once your canvas is printed, spray a coat of UV protective varnish. This coat of paint seals the ink and offers extra protection against sunlight and moisture.
How To Wrap A Canvas Print | How To Mount Your Canvas
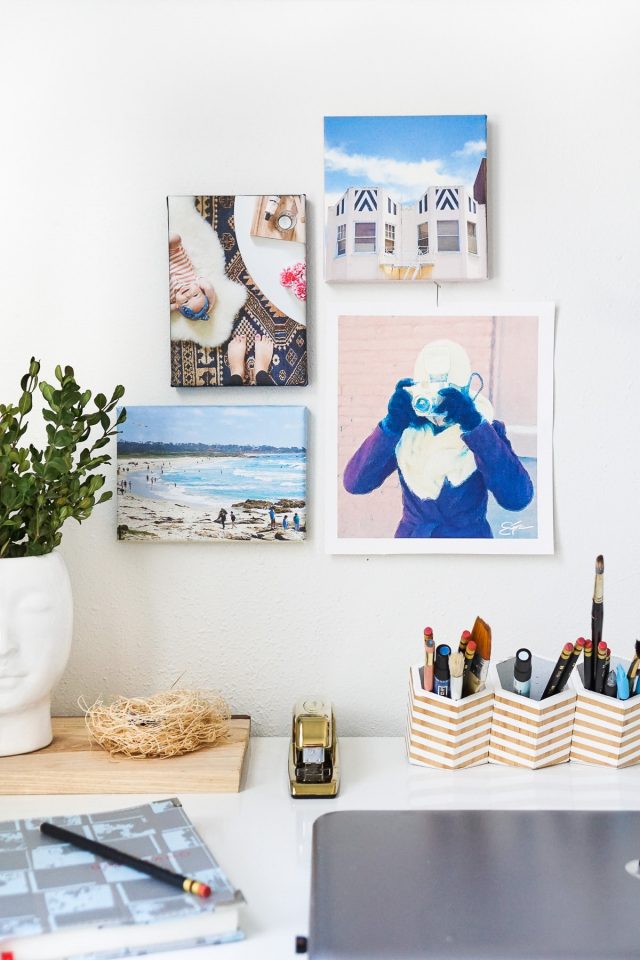
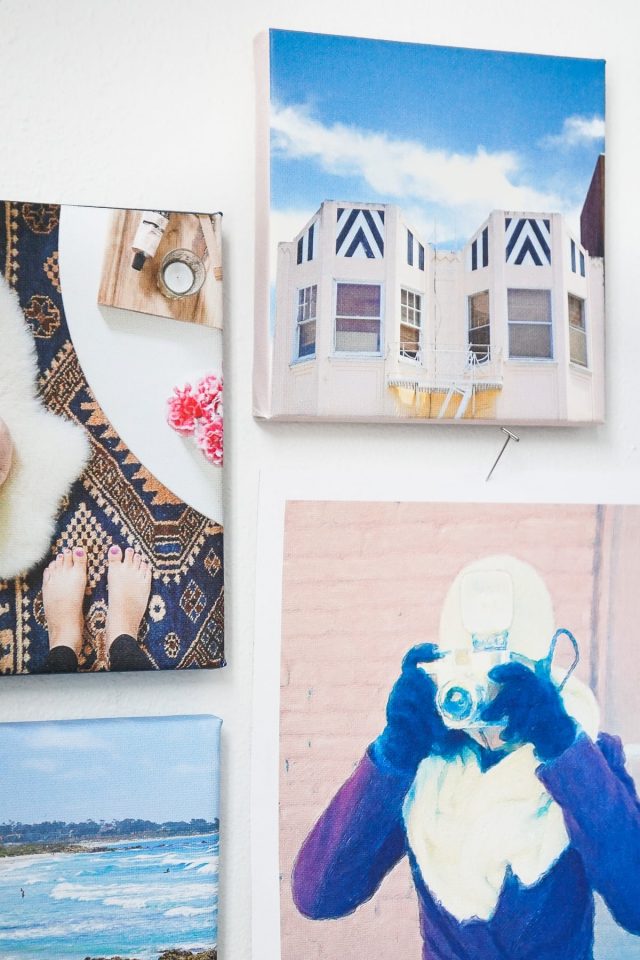
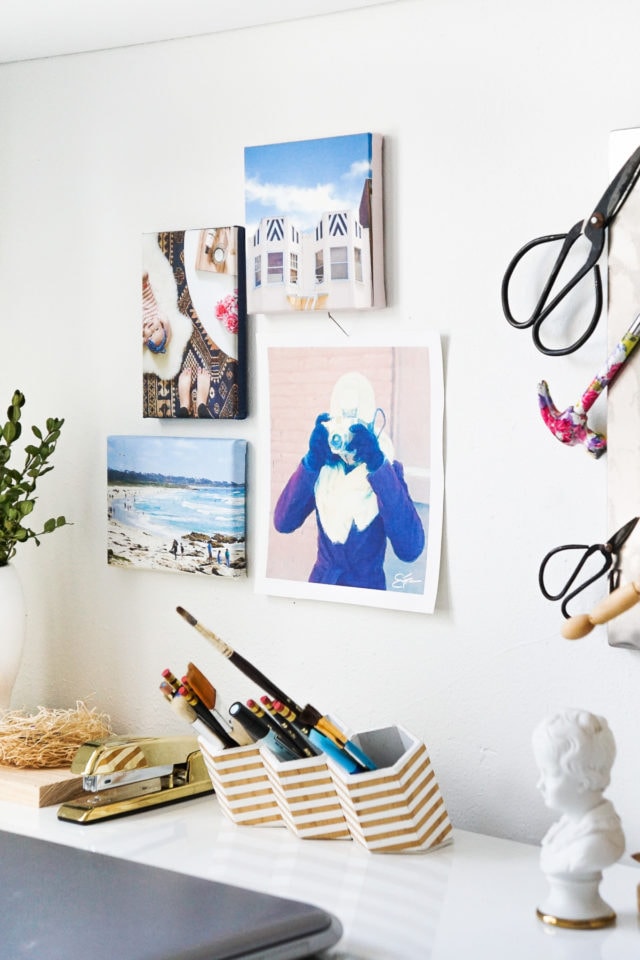
Note: We hung up one custom print without mounting it on the canvas frame so this is another optional wall hang! However, follow these steps below to mount your canvas:
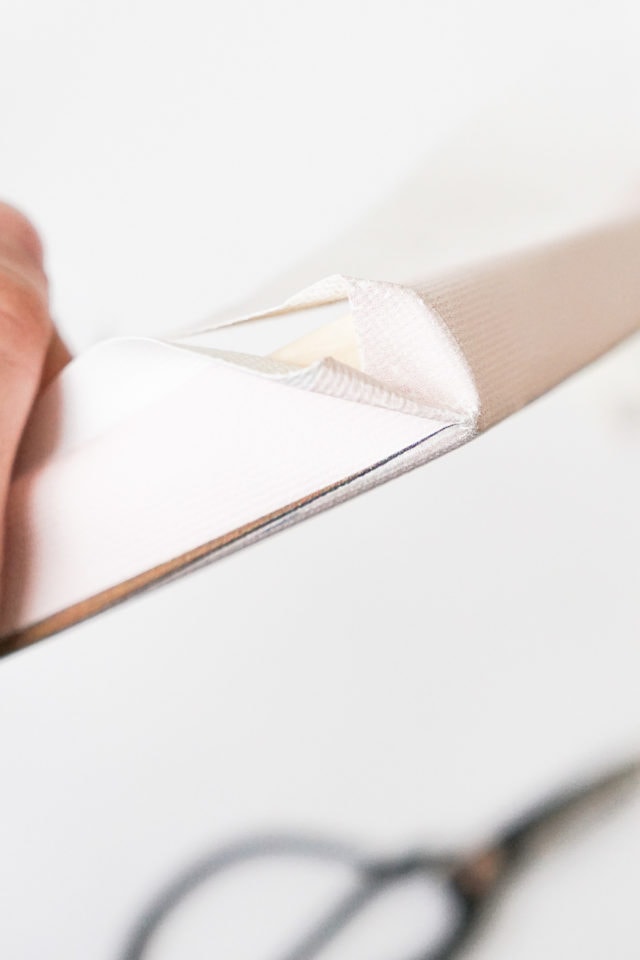
Step 6 — Use pliers to pull off the staples/blank canvas that came on the blank art canvases. This step is optional, but I found I got a tighter wrap by removing the blank canvas.
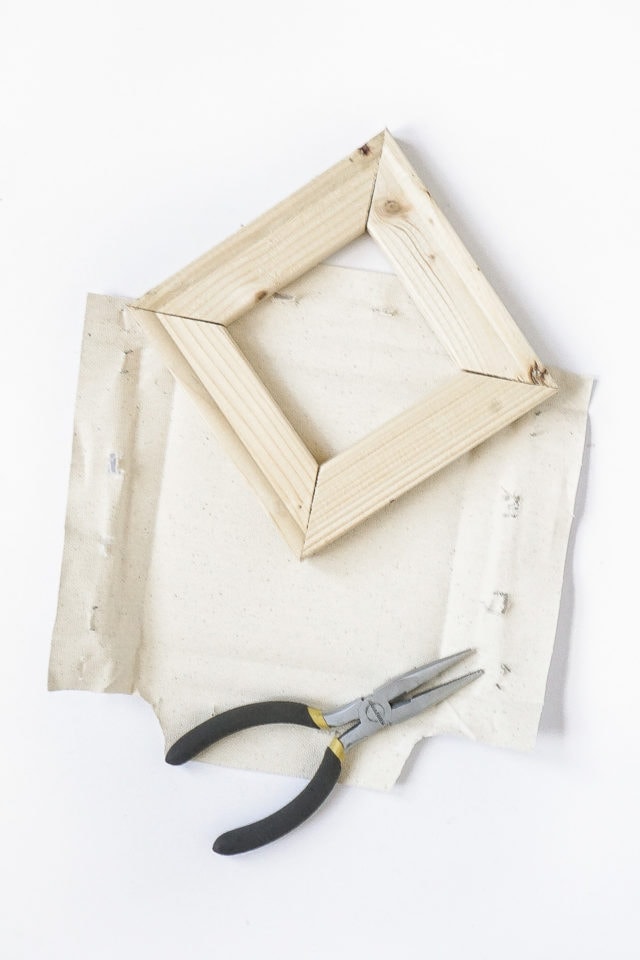
Step 7 — Lay your printed canvas face down, and center the wood frame on the canvas. Check the canvas edges to confirm correct placement.
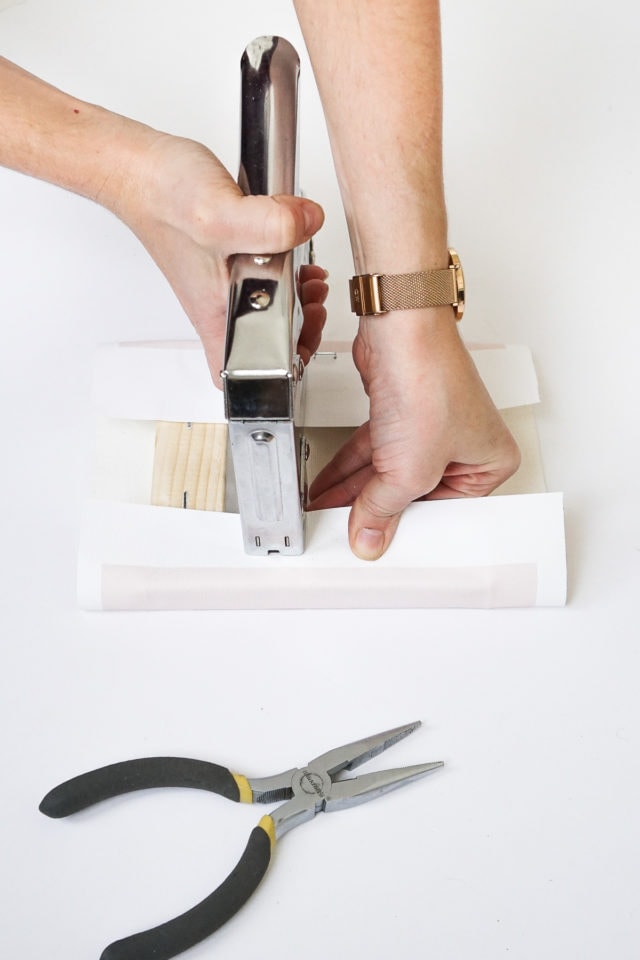
Beginning with one of the longer edges, fold the canvas around the wood frame and staple it towards the middle of the frame.
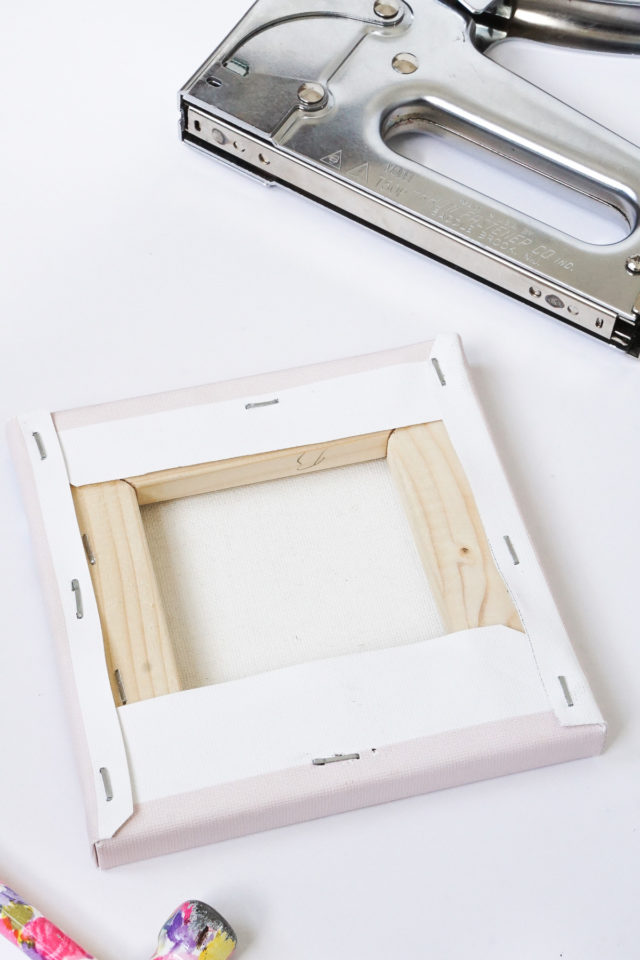
Then, fold the opposite edge around the other side of the frame pulling and stretching the canvas as tight as you can.
Staple the canvas into place. Professionals use canvas pliers to stretch larger canvases. However, for this size canvas, using your hands work just fine.

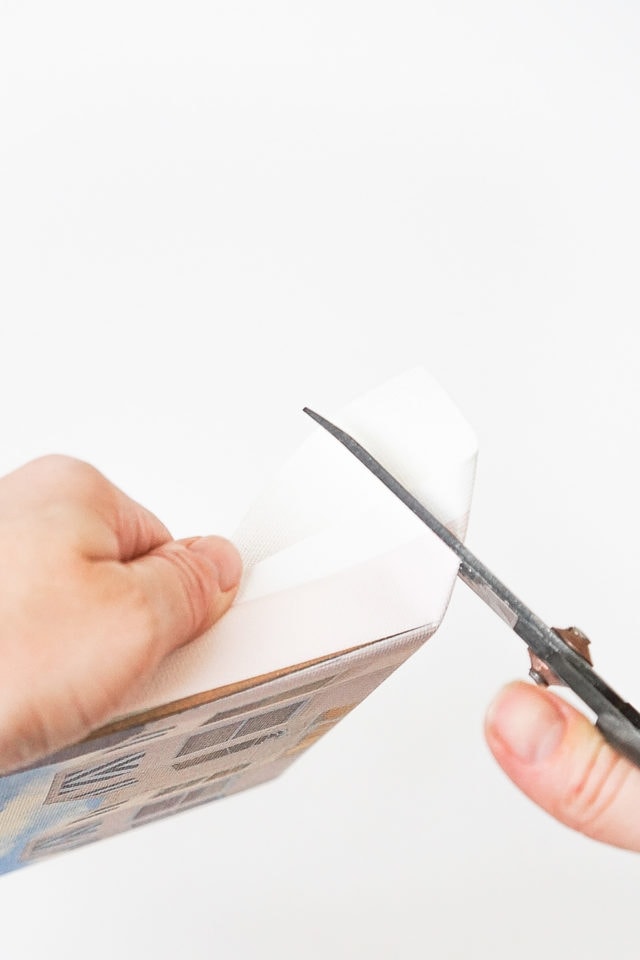
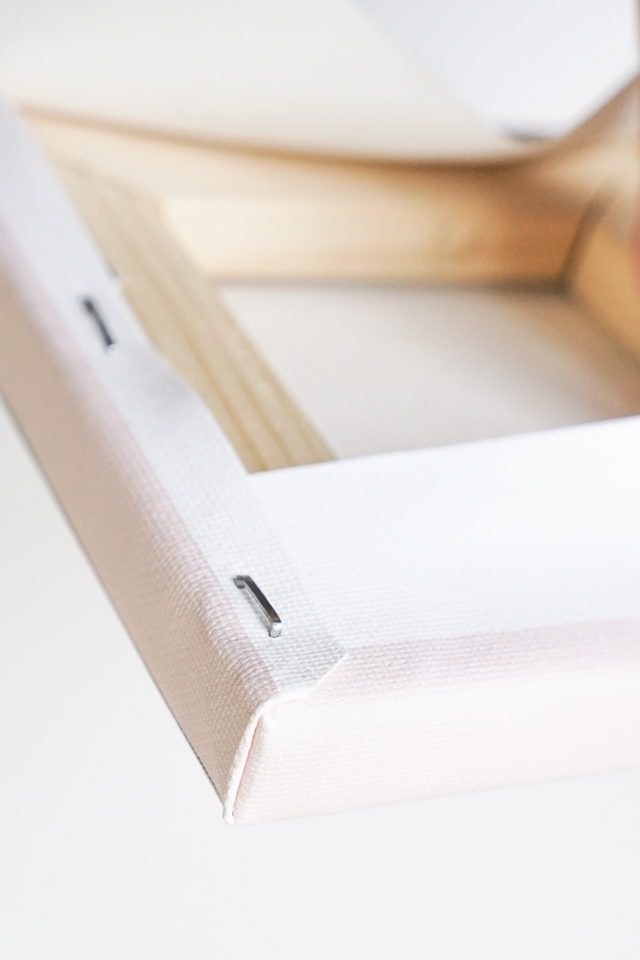
Step 8 — At this point, trim off excess canvas material at each corner at a 45-degree angle to help make the corners easier to wrap.
Step 9 — Wrap the first corner by taking hold of the loose canvas corner and pushing the corner in toward the center of the frame.
The goal is to make a small fold from the center of the canvas corner down to the corner of the wood frame.
Step 10 — Then fold the loose canvas flap onto the frame so the folded edge is parallel with the corner. Secure flap with a staple.
Repeat steps 6 & 7 to wrap the remaining 3 corners.
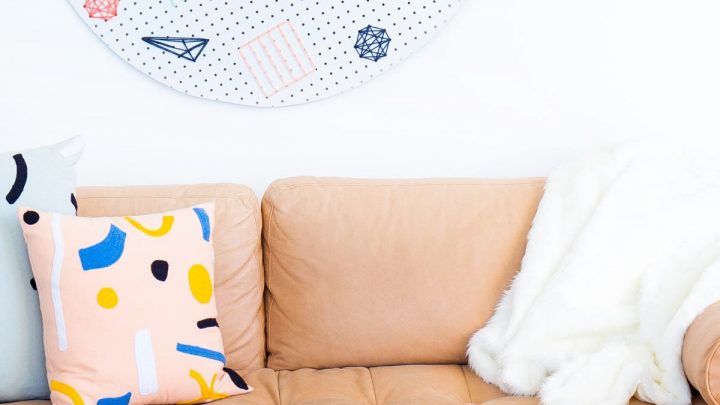
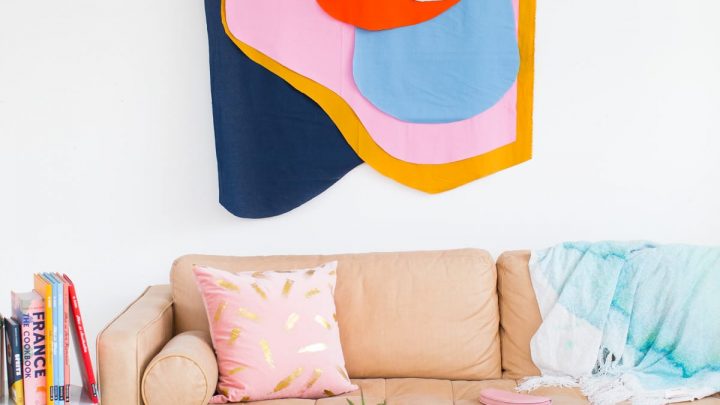
More Personalized DIY Wall Art Ideas
This canvas art project is a unique way to showcase your personal photography. For more easy DIY artwork projects for your home or office, check out a few of our favorites from the archives below —
For more easy DIY artwork projects for your home or office, check out a few of our favorites from the archives below —
- How to make your own DIY Watercolor Wall Art with acrylic paint
- DIY Large Abstract Canvas Painting in our revamped open concept living room
- DIY Paper Shapes Wall Art
- Or this DIY Paper Wall Art
And if you are looking to preserve your own art creations, they can easily be transferred online to custom art prints.
We especially love the idea of your or your kids art drawings or family recipes turned into a piece of art.
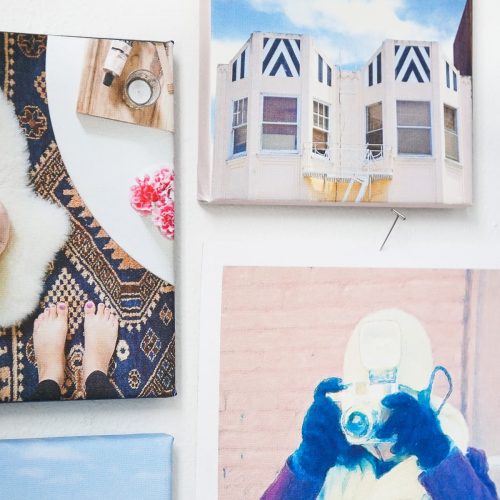
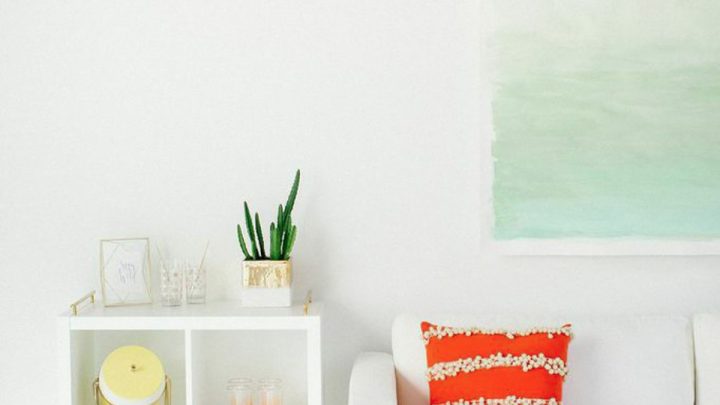
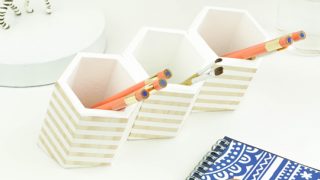
Our DIY Canvas Art hangs adorns our office walls under our Hexagonal DIY Desk Organizer.
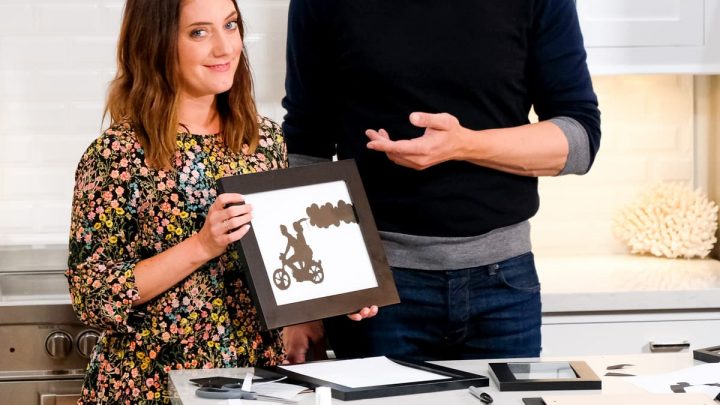
DIY Canvas Art Print
Equipment
- Microsoft PowerPoint, Adobe Illustrator or any layout editing software
- Inkjet printer
- Scissors
- Pliers
- Staple gun and staples
Materials
- Mini art canvas We created two 5”x 7” and 5”x 5” art pieces.
- Printable canvas paper
- UV protective varnish spray
Instructions
How to print your image onto the canvas:
- Open up a blank document in Powerpoint and insert your picture or artwork. Center the photo on the slide.
- Select the "rectangle shape" from the top tool bar and draw a rectangle roughly 2-3 inches larger than your photo. You can just eyeball it.
- Right click on the rectangle shape and choose "Send to Back" in order to send it behind your photo.
- Right click on the rectangle shape again and choose a color fill similar to the general color of your photo. Note that the color you select will appear along the sides of your frame.
- Do a test print on standard paper to confirm color and sizing look good.
- Edit your print settings to optimize printing on the canvas by going to "File" –> "Print" –> "Printer Properties"’. Choose the following settings and hit ‘Print’:— Print Quality: ‘Best’— Paper Type: ‘Matte Photo Paper.
- Once your canvas is printed, seal it with a spray coat of UV protective varnish to protect the ink.
How to mount your canvas:
- Optional: Use a pliers to pull off the staples and blank canvas that came on the blank art canvases. This step is optional, but I found that I got a tighter wrap by removing the blank canvas.
- Lay your printed canvas face down, and center the wood frame on the canvas. Check the canvas edges to confirm correct placement. Beginning with one of the longer edges, fold the canvas around the wood frame and staple towards the middle of the frame.
- Fold the opposite edge around the other side of the frame pulling and stretching the canvas as tight as you can.
- Staple the canvas into place.
- Trim off excess canvas material at each corner at a 45-degree angle to help make the corners easier to wrap.
- Wrap the first corner by taking hold of the loose canvas corner and pushing the corner in toward the center of the frame. The goal is to make a small fold from the center of the canvas corner down to the corner of the wood frame.
- Fold the loose canvas flap onto the frame so that the folded edge is parallel with the corner. Secure flap with a staple.
- Repeat these steps to wrap the remaining 3 corners.
Notes
- Due to my printer limitations which prints a maximum size of 8.5”x 11”, I opted to create a 5”x 7” and 5”x 5” canvas art print.
- If your printer can handle larger formats, consider using 11”x 17” printable canvas for additional size options.
- Professionals use a canvas pliers to stretch larger canvases. However, for this size canvas, using your hands work just fine.

Don’t forget to share your home decor projects with us on Instagram using the hashtag #sugarandclothloves. We always love seeing all of your creations! Looking for more interior design inspiration? You can find them all of our home decor tutorials and ideas right here!
Please note that we may earn a commission for some of the above affiliate links. However, products featured are independently selected and personally well-loved by us!
Great tutorial! Makes creating wall art feel totally doable.
LOVE THIS SO MUCH!!! Can’t wait to do a gallery wall in our dining room! :)
WOW! This is SO cool!! I am so excited to try it!
I love this idea! You make it look actually doable, and perfect for a Christmas gift!
Thank you for discussing this review with this remarkable web site. i’m going to promote this article in my fb take into account my local freinds
Interesting article! Wall arts play an important role in interior design. These are great way to add some flair to your room and really put your own personal touch on it. Thanks for sharing.
Thank you for checking it out!
Thank you for sharing this article. Indeed it is very beautiful and easy DIY print canvas wall art.
Thanks! We try to come up with DIY projects that aren’t too hard to do.
Great information and good ideas.
This a really fun and educational activity to join. It is a good idea to encourage people to join activities such as this. I also want to share these art ideas I read from https://panelwallart.com/blogs/artify-your-walls/the-animals-collection/ that might help you. Thank you for sharing this great news!
I am a great fan of these projects. These wall arts looking awesome and I can’t wait to try them. Thanks a lot for sharing the wonderful article.
Hi Amanda, so glad you loved the wall art! Let us know how it goes !
Thanks for sharing the guide I am in love with the canvas art and the frame making process is very easy looking for these kind of frames for a long time now easily make them.
Our women’s church retreat is in less than two weeks. Last year they did a silent auction to help several people like me to be able to go. I don’t have any income and am disabled.
I’m looking for ideas for gifts I can make (hopefully inexpensively. This year is going to be an auction. I want to give a as much as possible as the women have paid my way completely last year and half this year.
Thank you for your ideas. If you have any others please send them to me
760-885-8288i have had to move so I’m ptaying I can find the items needed.
Thank you for your time and knowledge o put this together. I hope to make nice things the ladies will boys on so there’s money to help more women to be able to go. It was such a blessing getting to know these women.
Hi Cyndi! I’m so glad you were able to find inspiration from this project! There’s definitely some great options for inexpensive DIY projects you can find my browsing around our DIY category! I love that you’re crafting gifts, handmade gifts are the best and so good for the soul! :) Hope you have fun on your retreat!
Hi,
I just love your decoration ideas the canvas print wall art. It influenced me very much. Thank you for sharing this post with us.
Hi there ! We’re so glad you found inspiration from the post! The final product is sure to be beautiful!