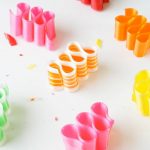
DIY Watercolor Candy Ribbon Place Card Holders
Learn how to make a sweet place card holder using watercolors and candy ribbons.
Cost: $10
Equipment
- Watercolor Paints
- Small round paint brush
- Paint palette or plate
Ingredients
- White 2″ x 3.5″ paper cards
- Practice paper — Optional
- Ribbon Candy
- Cup of water
Instructions
- With a brush, letter the names of your guests on the place cards so that they’ll have time to dry before it’s time to top the ribbon candy.The lettering style I’m using here is this: Use heavy lines for downward strokes. (To do so, apply more pressure on the brush). Use thin lines for upward strokes. (To do so, apply less pressure on the brush).If you’re new to hand lettering, take a moment to practice both thick downward and thin upward strokes on a separate sheet of paper as well as the names of the folks you’ll be writing out.
- Wet your brush with water and swirl in the color of your choice to activate the paint. If you’d like, swirl a few colors together on your paint palette creating a new color, all the while mixing in water until you reach the translucency of your liking.
- Then move to your white place cards for the real thing! If it’s helpful, lightly write out the names in pencil first, so you’ll have a spacing guide as you begin brush lettering.Allow place cards to dry and if need be, erase any visible pencil lines, but don’t erase over the watercolor!
- Break the ribbon candy pieces in half, so there are three loops or “humps,” if you will, at the top of each piece.
- Place the name cards atop the ribbon candy pieces in between the 2nd and 3rd “humps.”
