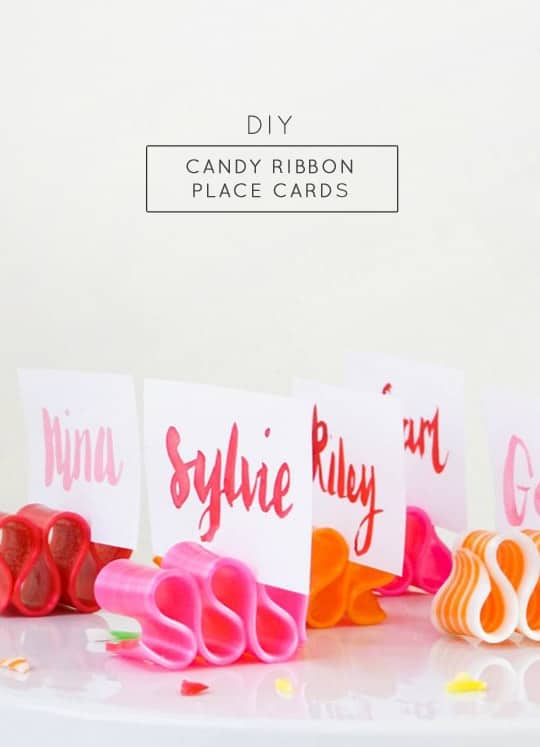
DIY Watercolor Candy Ribbon Place Card Holders
Channeling my new obsession over candy ribbon into these DIY Watercolor Candy Ribbon Place Card Holders for your table setting!
Though holiday traditions are the mainstay of our seasonal repertoire, I, Erin, still look forward to trying new recipes, decor, wrapping ideas, etc. to keep things fresh and interesting around here.
This year, ribbon candy is my jam! Where have you been all my life, ribbon candy?!
I’m tempted to sprinkle the sweet confection everywhere like jubilant pixie dust. But in these moments of weakness, I have to remind myself that less is usually more.
Like what we did in this DIY Candied Valentine’s Day Card that is so much fun (and yummy)!
Thus, I’ve channeled that energy into this DIY Watercolor Candy Ribbon Place Card for the win. They literally come together in a snap, and will rock the holiday socks off all your guests!
Also, these DIY Candle Holder Ideas are perfect if you want to give your home a burst of color and scent.
Materials Needed to Make a DIY Candy Ribbon Christmas Place Card Holders
Small round paint brush — I used a size No. 3.
Paint palette or plate
Cup of water
Practice paper — Optional
How to Make DIY Candy Ribbon Christmas Place Card Holders
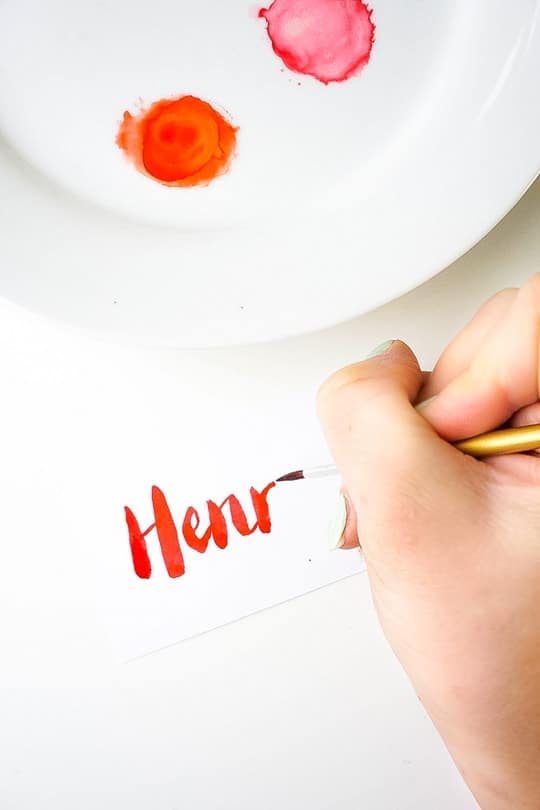
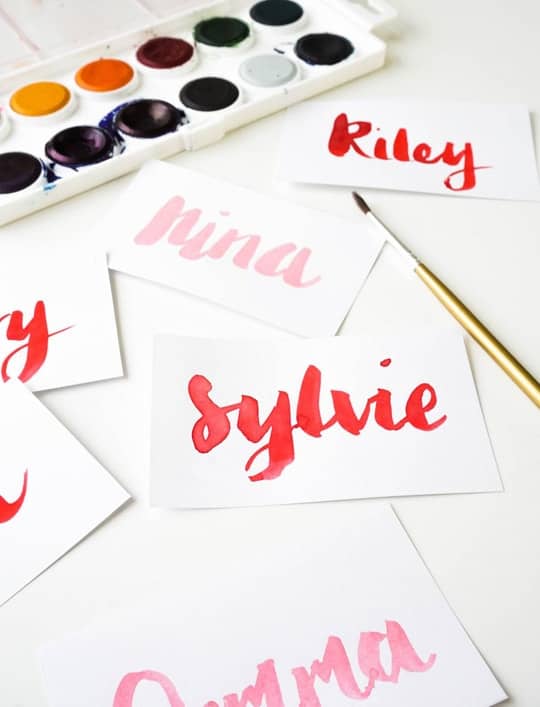
Step 1 – With a brush, letter the names of your guests on the place cards so that they’ll have time to dry before it’s time to top the ribbon candy.
The lettering style I’m using here is this: Use heavy lines for downward strokes. (To do so, apply more pressure on the brush). Use thin lines for upward strokes. (To do so, apply less pressure on the brush).
If you’re new to hand lettering, take a moment to practice both thick downward and thin upward strokes on a separate sheet of paper as well as the names of the folks you’ll be writing out.
I promise it’s easier than it looks!
Step 2 – Wet your brush with water and swirl in the color of your choice to activate the paint. If you’d like, swirl a few colors together on your paint palette creating a new color, all the while mixing in water until you reach the translucency of your liking.

Step 3 – Then move to your white place cards for the real thing! If it’s helpful, lightly write out the names in pencil first, so you’ll have a spacing guide as you begin brush lettering.
Allow place cards to dry and if need be, erase any visible pencil lines, but don’t erase over the watercolor!
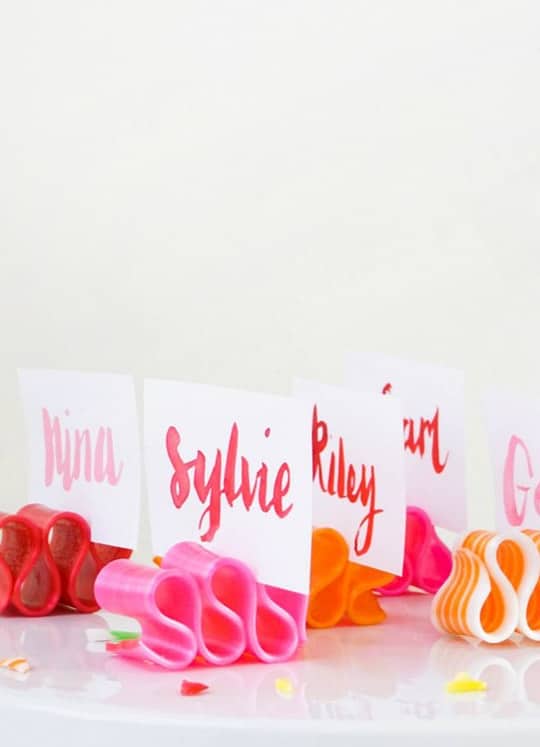
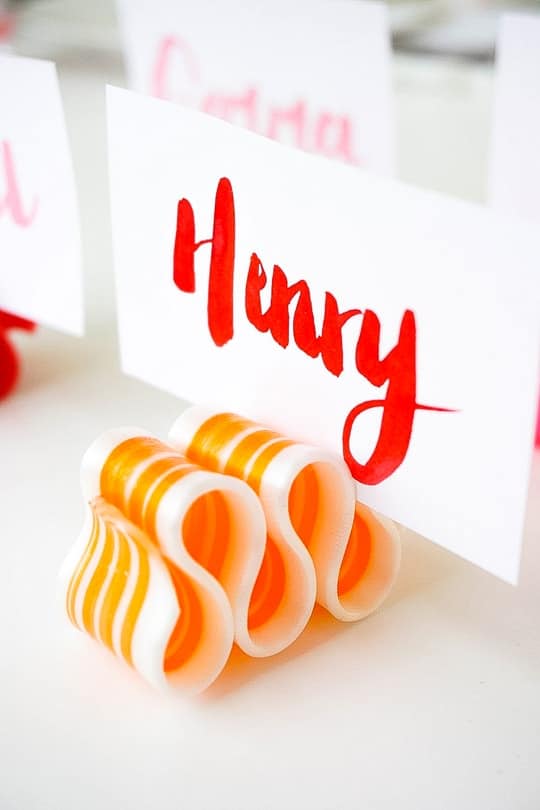
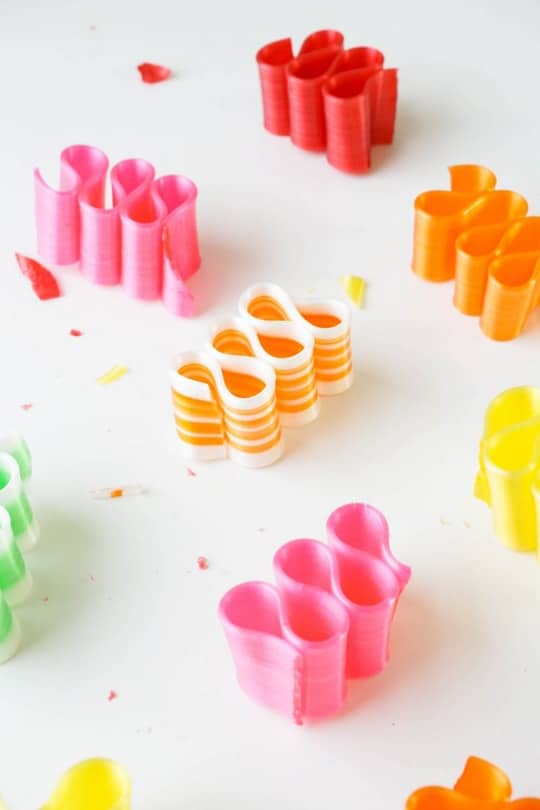
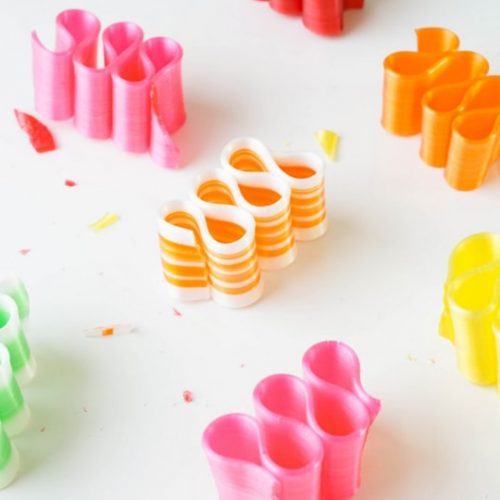
Step 4 – Break the ribbon candy pieces in half, so there are three loops or “humps,” if you will, at the top of each piece.
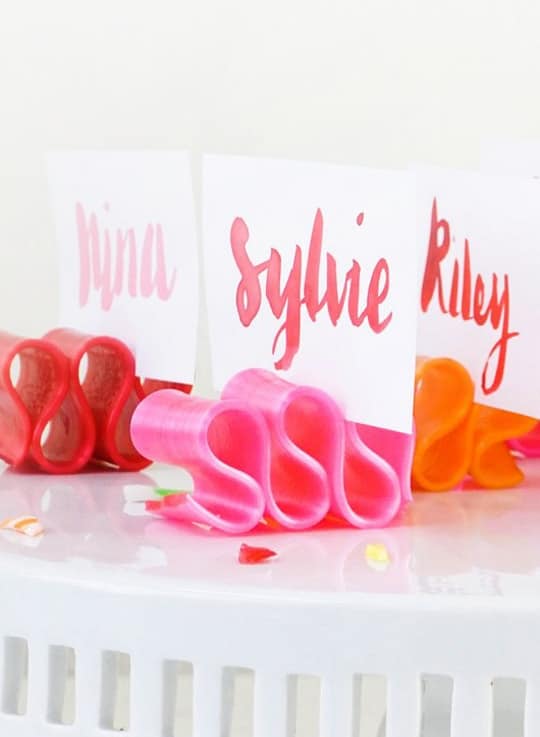
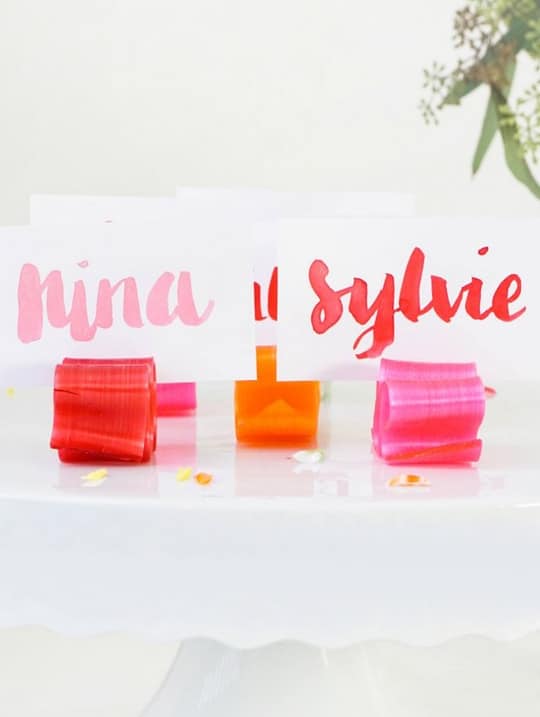
Step 5 – Place the name cards atop the ribbon candy pieces in between the 2nd and 3rd “humps.”

Set the place cards at each seat or on a cake stand at the sideboard for guests to choose their own spot as they arrive. Not only are the place card holders pretty and functional, but they’re a sweet, nostalgic treat too!
Easy Ideas for DIY Name Card Holders
With the number of table settings we put together around here, we’re definitely no stranger to placing cardholder ideas!
These are endless ways to create your own DIY versions or repurpose unexpected items to use as name cards as we did with these ribbon candy holders!
Here are a few of my favorite past projects —
- Faceted Easter egg place card holders
- Clay DIY Geometric place card holders
- DIY Mini mountain photo holders that you could easily repurpose
- DIY candy ribbon place card holders
- Simple pumpkin leaf place card holders
- DIY Colorblock easter table name cards
Fair warning: some of those are oldies, but goodies!
It’s kind of crazy to think that I’ve been blogging for so many years that old photography methods look ancient to me now!
DIY Watercolor Candy Ribbon Place Card Holders
Equipment
- Watercolor paints
- Small round paintbrush
- Paint palette or plate
Materials
- White 2″ x 3.5″ paper cards
- Practice paper — Optional
- Ribbon Candy
- Cup of water
Instructions
- With a brush, letter the names of your guests on the place cards so that they’ll have time to dry before it’s time to top the ribbon candy.The lettering style I’m using here is this: Use heavy lines for downward strokes. (To do so, apply more pressure on the brush). Use thin lines for upward strokes. (To do so, apply less pressure on the brush).If you’re new to hand lettering, take a moment to practice both thick downward and thin upward strokes on a separate sheet of paper as well as the names of the folks you’ll be writing out.
- Wet your brush with water and swirl in the color of your choice to activate the paint. If you’d like, swirl a few colors together on your paint palette creating a new color, all the while mixing in water until you reach the translucency of your liking.
- Then move to your white place cards for the real thing! If it’s helpful, lightly write out the names in pencil first, so you’ll have a spacing guide as you begin brush lettering.Allow place cards to dry and if need be, erase any visible pencil lines, but don’t erase over the watercolor!
- Break the ribbon candy pieces in half, so there are three loops or “humps,” if you will, at the top of each piece.
- Place the name cards atop the ribbon candy pieces in between the 2nd and 3rd “humps.”

Don’t forget to share your DIY Candy Ribbon Place cards with us on Instagram using the hashtag #sugarandclothloves. We always love seeing all of your creations! Looking for more interior design inspiration? You can find all of our home decor tutorials and ideas right here!
Other Photo Decor Ideas for You


Please note that we may earn a commission for some of the above affiliate links. However, products featured are independently selected and personally well-loved by us!
These are seriously adorable!
This is such a cute idea, I love it! Great photography, too.
-Sara
http://www.saradujour.me
Beauty | Fashion | Home Decor | DIY | Food & Drink, and more
Love this idea! Such an easy thing but so pretty!
Super cute!
What a sweet idea! I love these place cards so much.