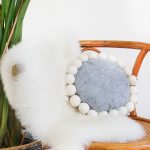
DIY Snowball Pillow
This easy diy project is the perfect way to add some extra cozy textures and shapes to your living room decor.
Cost: $20
Equipment
- Small hand sewing needle for thread
- Larger hand sewing needle for flossing string
- Sewing machine
- Sewing pins
- Scissors
Ingredients
- 20 pieces wool felt beads or balls Our are 4cm in Dusty White. They can be found at local craft stores and online.
- 1/3 yard grey felt fabric
- Coordinating grey thread
- Coordinating flossing string
- Feathers or synthetic stuffing
Instructions
- Cut two identical 11″ circles from the grey felt.
- Pin them together with right sides facing inward toward each other.
- Thread your sewing machine with the coordinating thread and sew around the edge of the circle with a 1/2″ seam allowance.Leave about 5″ of the circle un-sewn. You’ll need this opening to be able to stuff your pillow.
- Turn the pillow right side out, and stuff your pillow with either feathers or synthetic stuffing.
- Then, turn the edges of the 5″ opening inward 1/2″ and pin them together.
- Use a whip stitch to close up the pillow.
- Thread your larger needle with flossing string, double knot the end, and thread it straight through one of the wool beads.Depending on how large your needle is, you may need a tweezer or pliers to help you pull the need through the other side of the wool bead.
- Thread the flossing string through both layers of fabric at the pillow seam.
- Then, thread it back through the wool bead, and pull the wool bead as tight as you can to the pillow.This will keep the beads structured and prevent them flopping all around.
- Lastly, double knot the two “tails” together and trim.Repeat steps 4 and 5 with the remaining wool beads.
