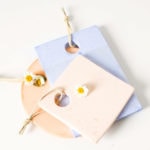
DIY Mini Cheese Board
Learn how to make a stylish DIY mini cheese board with this easy step-by-step guide. Perfect for parties, entertaining, and personalized cheeseboard ideas.
Servings: 1
Cost: $15
Equipment
- Nail polish or bottle cap To create the handle
- Mixing container
- Measuring cup
- Fine sandpaper
Ingredients
- 1 cardboard box for molds: Circle, square and rectangle shapes
- 1 cord optional for hanging
- Petroleum jelly
- Plaster of Paris
- Powdered paint pigment color of your choice
Instructions
- Coat the inside of your cardboard mold and bottle cap with Vaseline. This step helps release your DIY cheese board easily once it dries.
- Place a bottle cap where you want the handle hole on your mini cheese board.
- Prepare the plaster according to package instructions. Mix until smooth and pourable.
- Mix in your paint pigment by combining 1 cup plaster of Paris, 1/4 cup pigment, and 1/2 cup cold water.
- Pour into the mixture into mold and gently tap to remove air bubbles. Let your DIY mini cheese board dry overnight.
- Gently, remove the bottle cap. Peel away the mold. Then, lightly sand edges for a smooth finish.
- Wipe away any dust, then add a cord if desired. For food safety, place a layer of parchment paper on top of the mini cheese board before serving.
Use a paper towel if needed to wipe off any excess Vaseline.
We used a popsicle stick to stir. The plaster should have the consistency of paint or slightly thicker.
Once the plaster dries, the color will appear much lighter, so be sure to add more pigment than it initially seems needed.
To remove the mold, tear the cardboard box apart or flip it upside down and tap it until the cheese board falls out.