DIY Pom Pom Tassel for Your Beach Bag
Add a statement piece to your summer wardrobe with this DIY Pom Pom Tassel Circle Bag!

Is your beach bag feeling a little, well, blah? Maybe it’s seen a few too many sandy adventures and needs a refresh. Or perhaps you’re rocking a brand new tote but it lacks that certain something – a touch of playful personality!
Fear not, fellow beach lovers! Because with a little creativity and some simple supplies, you can transform your beach bag from basic to breathtaking (well, at least breathtakingly cute) with the power of pom poms and tassels!
This fluffy and fun embellishment is the perfect way to add a pop of color, texture, and whimsical charm to your beach bag. Not only are they surprisingly easy to make (seriously, even crafting novices can master this!), but they’re also a budget-friendly way to personalize your beach tote and make it stand out from the crowd.
So grab your yarn, scissors, and a little bit of beachy inspiration. It’s time to unleash your inner DIY diva and create the ultimate beach bag statement piece!
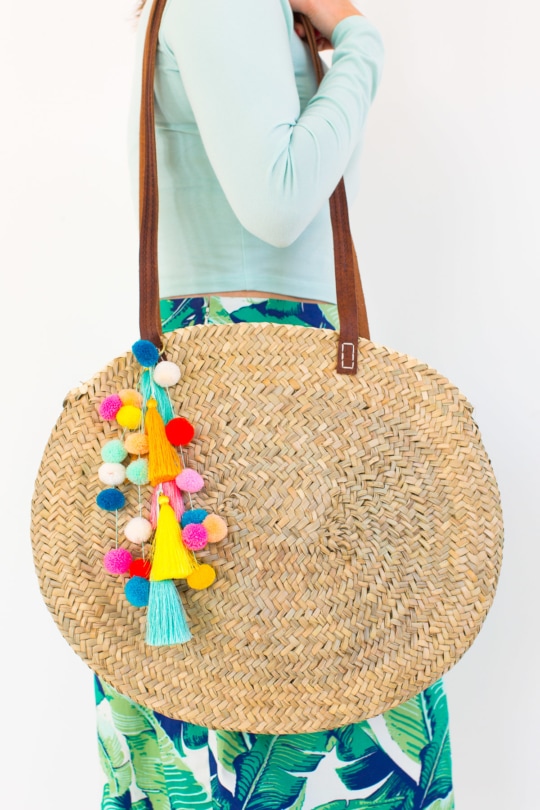
Materials and Tools Needed
- Colorful tassels
- Colorful mini pom poms
- Moroccan woven bag — We’re also loving this similar rattan wicker bag and straw circle bag.
- Twine
- Embroidery needle — Or appropriate size for your twine/thread
- Cording trim
- Scissors
- Gold keyring or clip on version
- Hot glue and hot glue gun
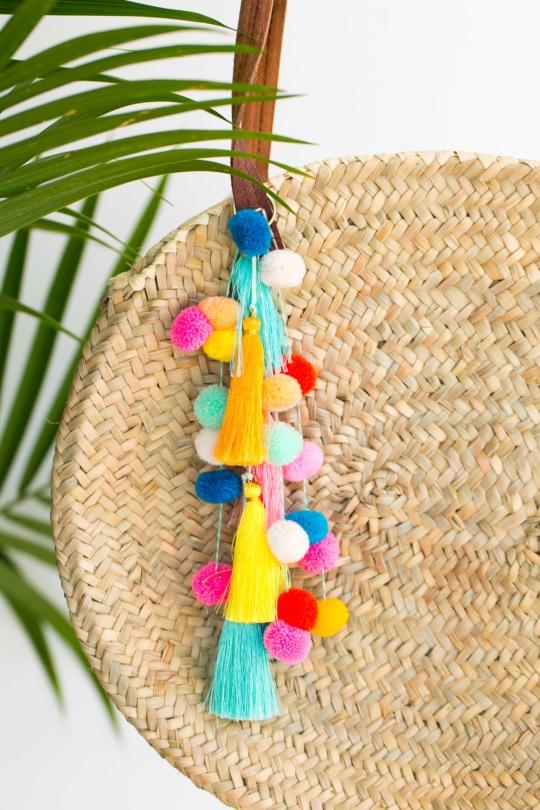
How to Make a DIY Pom Pom Tassel Circle Bag
First, lay out the pom poms and tassels onto your bag to get a general idea of where to string everything so that it lays at varying heights.
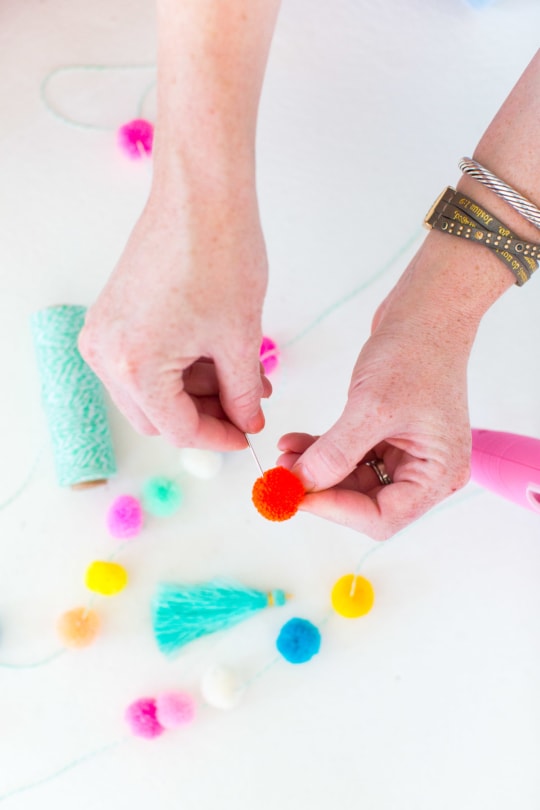
Once you have a good idea of placement, cut three pieces of twine for each strand of pom poms you’ll be making.
Start threading each piece of twine through the pom poms to create a pom pom garland.
Do this for all three strands. And be sure to leave a few extra pom poms unthreaded so that you can hot glue them onto the strand in groups once the rest of the tassel strand is completed.
Keep in mind we’ll also be gluing the loose pom poms to the top and bottom of the finished strand to give it a completed look.
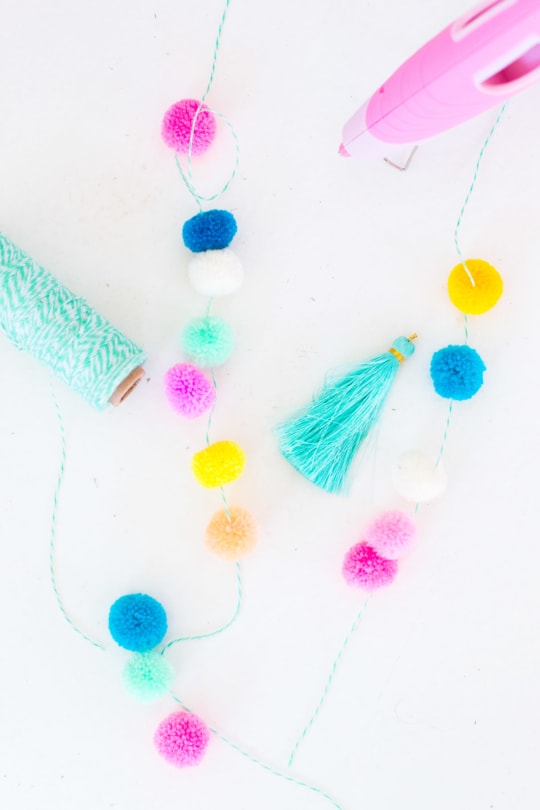
Once you have a finished strand, knot the bottom of the twine tightly around the last pom pom to reinforce the thread so they don’t fall off.
Leave a few extra pom poms unthreaded so that you can hot glue them onto the strand in groups once the rest of the tassel strand is completed.
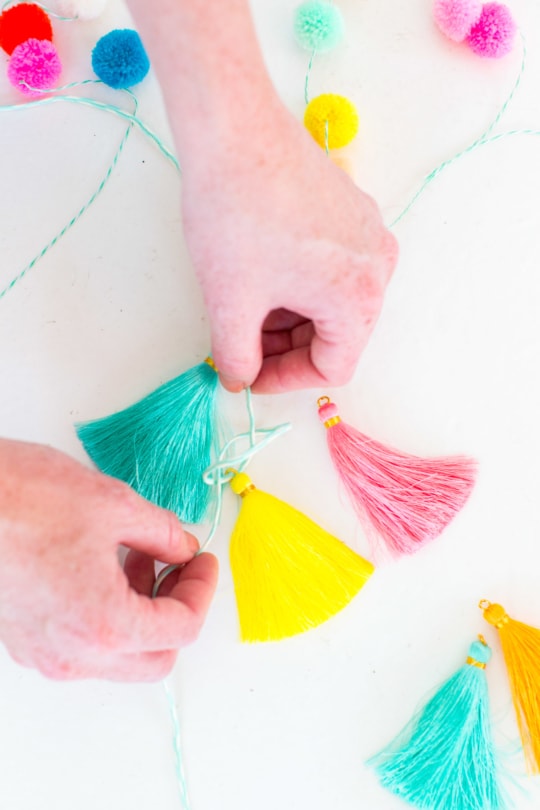
Now, cut a long piece of the cord trim and starting knotting the tassels onto the strand one by one.
Make sure they’re close enough to just overlap one another.
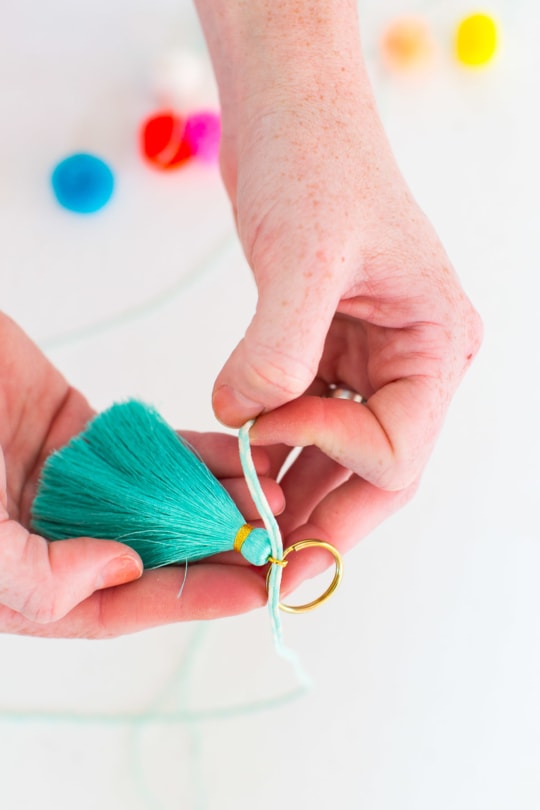
Twist the top tassel jump ring through the gold keyring.
And then, knot the top of the cord trim onto the gold key ring for extra reinforcement.
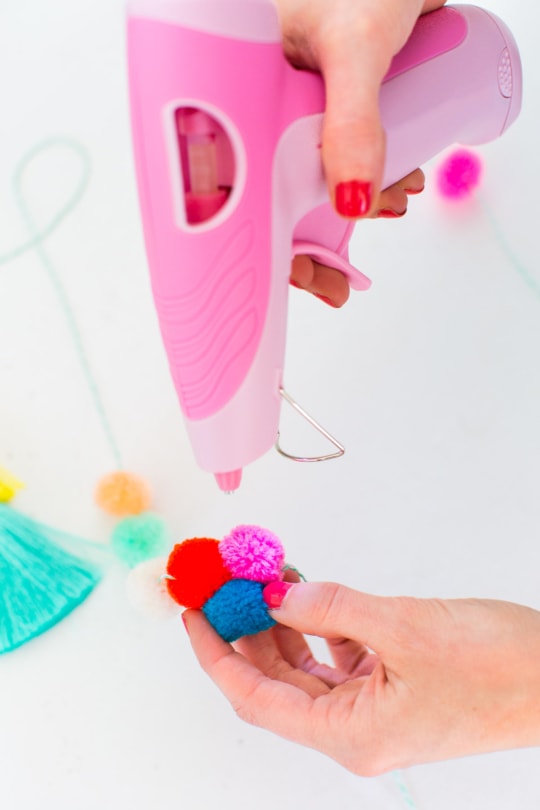
Use the extra loose pom poms to hot glue onto the strand in clusters where needed.
You should now have four different strands that look like this:
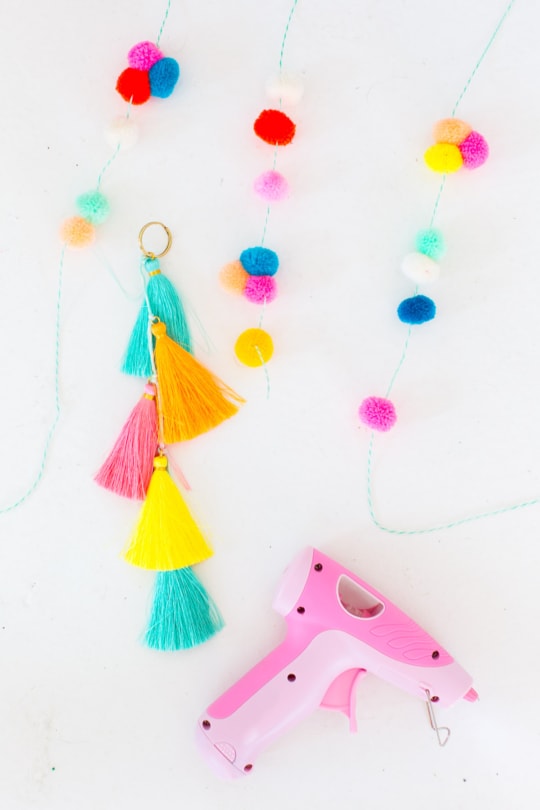
Now, add each of the pom pom strands onto the key ring by knotting them onto the ring one by one.
Once everything is strung, hot glue a pom pom to the top of the knot to hide them near the keyring for a finished look.
You can also do the same with the knot on the last tassel at the bottom.
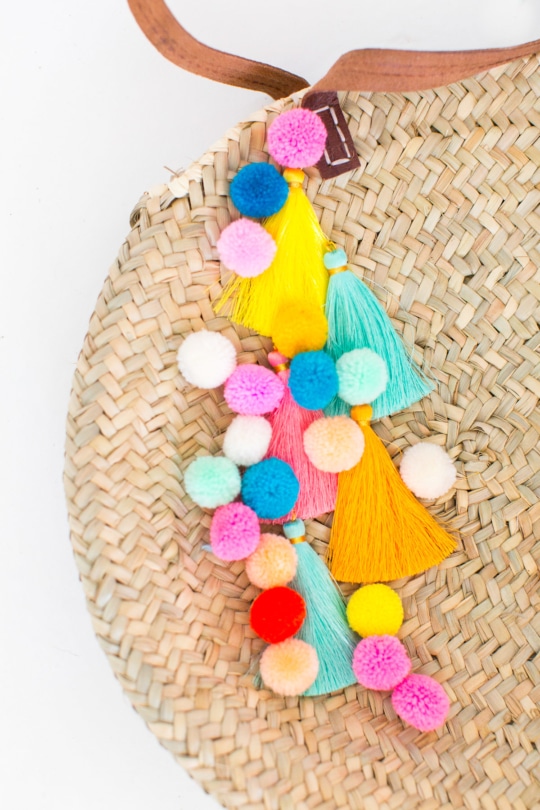
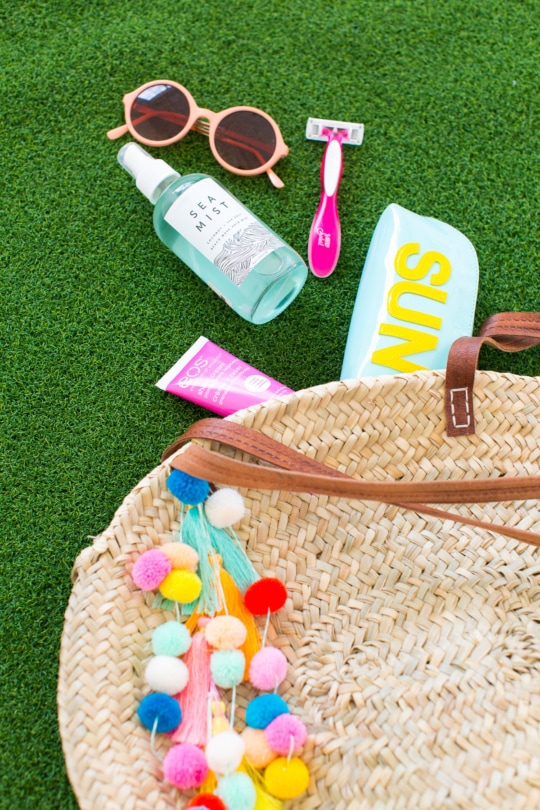
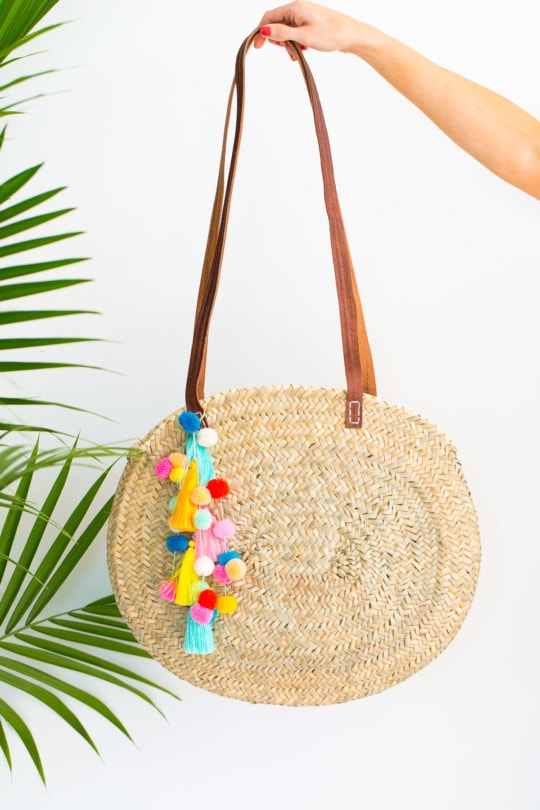
Then, just string your keyring onto your new bag, and you’re all set!
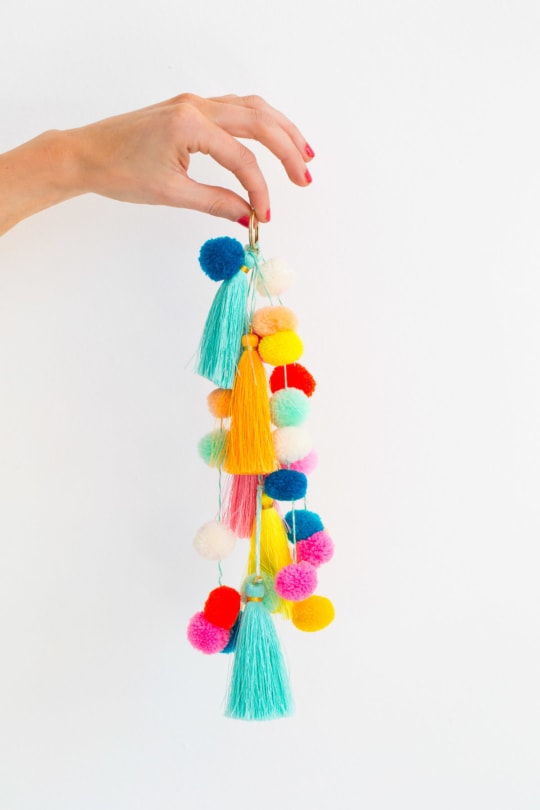
More Tassel DIY’s To Try
And might I add that this colorful bag would go mighty fine with our Spotify summer playlist, and a DIY retro floral floppy hat?! I’m just saying.
Keep an eye out for one more fun post coming up, and in the meantime, stay on the bright side!
And if you’re like us and have a thing for tassels and pom poms, you’ll love some of our other favorite DIY’s below —
- Pom Pom Wall Hang
- Door Handle Tassels: How to Make A DIY Door Handle
- Fluffy DIY Pom Pom Bin
- DIY Pom Pom Scarf
- DIY Tassel Throw Pillows
Please note that we may earn a commission for some of the above affiliate links. However, products featured are independently selected and personally well-loved by us!
I absolutely love this Pom Pom craft! So cute, and your photos are so bright and beautiful.
That’s so sweet Kailee ! Thank you so much !
That DIY project is really clever! I like it.
Thank you Kate ! Can’t wait to see how yours turns out!
I like this DIY tutorial
. I will try it.
Thank you Avril! Can’t wait to see your finished products!
Why haven’t I thought of adding pom poms to tassels before?! This is perfect for a little project I’m working on.
Kate || http://www.housemixblog.com
So glad you like the idea! xo
I love it!! Thank You for sharing. Also, Id love to know where the navy/white bEach towel is from?! It’s beautiful!
So cute! Can you tell me where those sunglasses are from ??
I need to make this, 911! im also super tempted to try BIC after your post series
Super cute, Ashley!
Carrie
http://www.wearwherewell.com
SO fun! Love this!
I am in love with this project! I have been on the hunt for an affordable circle bag for summer and this is it, thanks!
http://www.shopthecoconutroom.com