DIY Pendant Sconce with Wall Mount
Brighten up any corner of your home with this easy Pendant Sconce project using simple store-bought pieces. A budget-friendly way to add style and light to your living room!
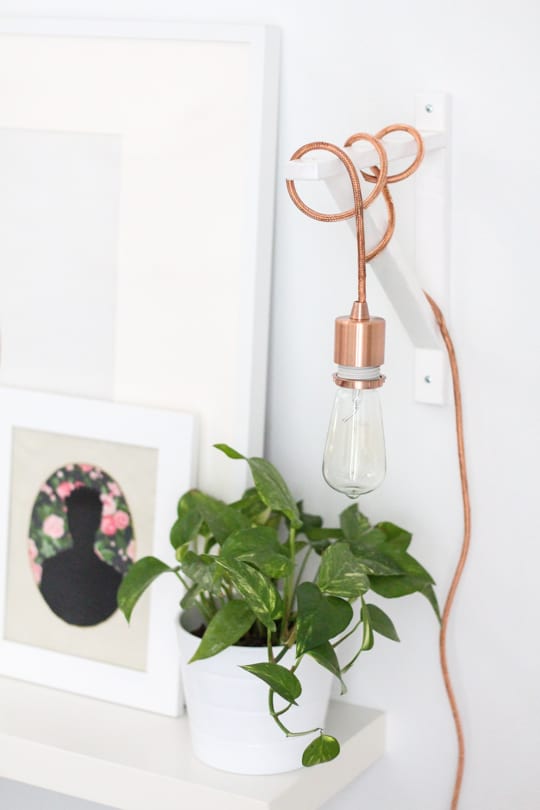
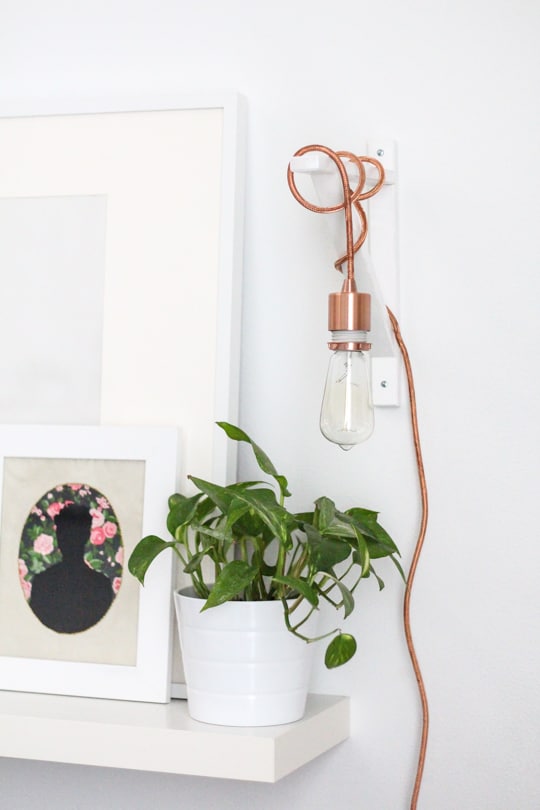
Sometimes the simplest DIY projects can make the biggest impact. We had a corner of our living room that was feeling a little dark and uninspired. So we decided to brighten it up with a hanging metallic pendant sconce. The best part? This project required no complicated tools or skills, just a little creativity and a few store-bought pieces that came together beautifully.
What we love about this project is that it proves not every project has to be from scratch to feel custom. It’s partly an Ikea hack. By mixing and matching an Ikea bracket, a metallic pendant light, and a few finishing touches, we were able to create a stylish wall sconce that looks both modern and timeless. It adds the perfect amount of warmth and personality to the space, all without breaking the bank or spending hours on construction.
This metallic pendant sconce hack is a quick, budget-friendly way to elevate any corner of your home. Whether you want to add a cozy reading nook or simply bring a little more light to your living room, this project is proof that thoughtful details can transform a space with minimal effort.

Materials and Tools Needed
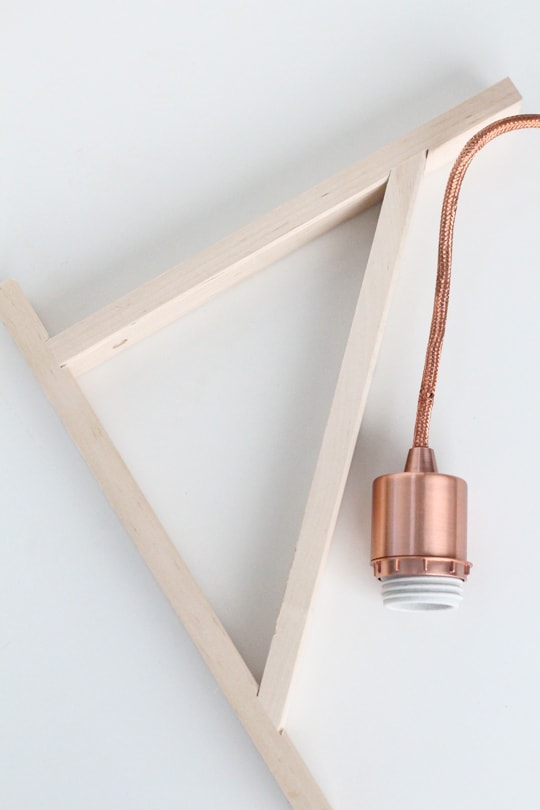
- Shelf bracket: We used an Ikea Ekby bracket. Choose one that fits your style, such as this or . If you’re going for a modern look, try a sleek metal bracket or brass bracket. For a cozier or rustic feel, wood brackets work wonderfully. For something ornate, check out this metal fan bracket. The style of the bracket will completely change the vibe of your sconce.
- Pendant light cord kit or hanging pendant light: Ours is a West Elm metallic pendant. You could also use this gold electric cord swag kit (available in multiple colors and patterns) or this gold rope light kit for a similar look.
- Lightbulb: A vintage-inspired bulb works beautifully for added character.
- Spray paint (optional): Perfect if you’d like to customize the color of your bracket.
- Drill: To securely install your bracket.
How to Make DIY Hanging Pendant Sconce with Wall Mount
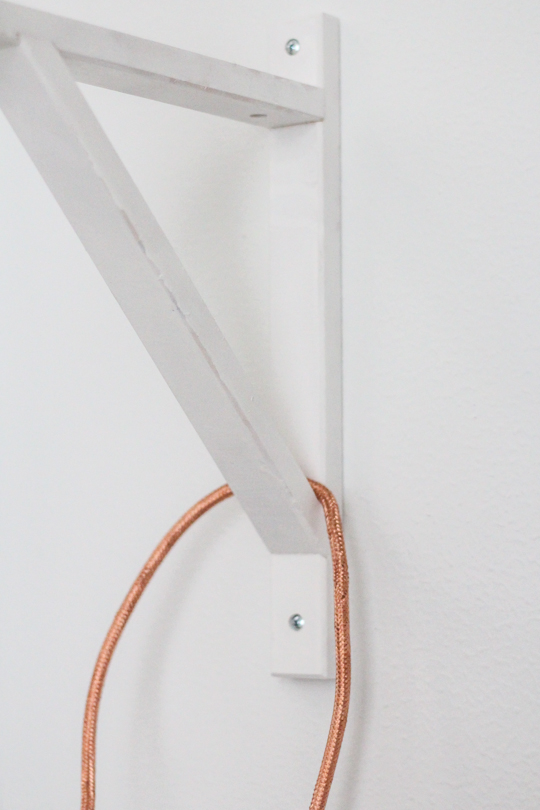
1 — (Optional) Paint the Bracket (Optional): Start by spray painting your shelf bracket in the color of your choice. We used a gloss white for a clean, modern finish, but metallics or bold colors would work beautifully too. Let the paint dry completely before moving on.
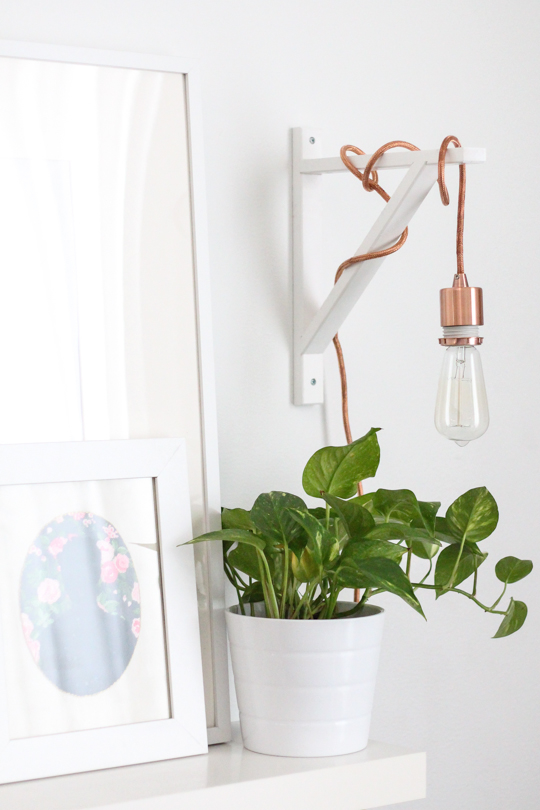
2 — Mount the bracket: Using drywall screws and a drill, mount the bracket securely to your wall. Make sure it’s level and anchored firmly so it can support the pendant light.
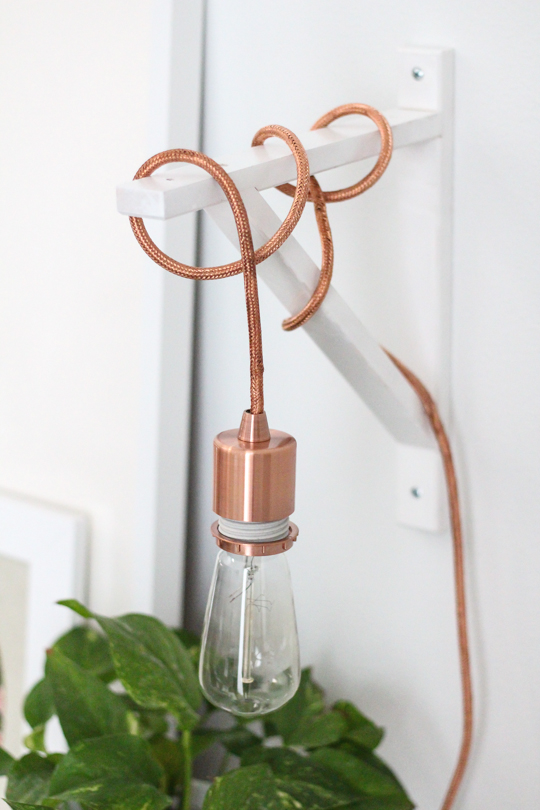
3 — Wrap the pendant cord: Thread the pendant cord through the inset triangle of the bracket. Then, loop it up and around the top bar. Leave enough cord so the bulb can hang at your desired height. You can adjust the number of wraps depending on how long or short you want the pendant to drop. This part is totally customizable!
4 — Add the bulb: Once you’ve styled the cord to your liking, screw in the lightbulb. A vintage-inspired bulb works especially well for adding warmth and character. Flip the switch, step back, and admire your handiwork! This quick and easy DIY creates a stylish metallic pendant sconce that instantly brightens up your space while adding a custom touch.
Tutorial Notes and Tips
- Cord play: Don’t be afraid to experiment with how you wrap the pendant cord. A looser wrap gives a more relaxed, casual look, while a tighter wrap feels structured and intentional.
- Bulb choice matters: A vintage Edison bulb will give off a warm, ambient glow, while a frosted globe bulb provides softer, diffused light. Pick one that suits the mood of your space.
- Spray paint customization: Painting the bracket is optional. But it’s a fun way to tie the sconce into your existing décor. Metallic finishes like brass, gold, or matte black make a big impact.
- Placement tip: Hang your sconce near a cozy chair or reading nook for both function and style. If using multiple sconces, install them at the same height for balance.
- Safety first: Always make sure your bracket is mounted securely into a stud or with the proper wall anchors so it can safely hold the pendant light.
More Lighting Projects to Try
- Battery Operated DIY Patio String Lights
- DIY Candle Holder for Taper Candles
- Battery Operated DIY Patio String Lights
- Before & After of Installing Skylights in Our New House
Please note that we may earn a commission for some of the above affiliate links. However, products featured are independently selected and personally well-loved by us!
I’m going to put up a shelf and I’ll use this idea for the light! Thanks!
Thanks, Susan! Let us know how it turns out!
Thanks for sharing our post!
Beautiful!
http://www.aboutfoood.com
this might be a silly question but you don’t use a pendant light for the ceiling, how/where do you connect it?
Is the bracket the 11″ or the 7 1/8″
THANKS!!
it’s the 11″! :)
THANK YOU!!
This is really very cool!! Sometimes less is more!!!! The bulb is called an “Edison Light Bulb” Thanks for sharing!!
Nice. Looks professional.
that is super cool!
Love this project Ash. Would be a good one to tackle for the weekend.
An accent of copper is always a standout in any room. Love this.
Love this. I did this in my master bedroom a year ago and I still adore them. Such a fun DIY
This is amazingly simple and gorgeous!!
GAH this is perfect! I love it so much!
Ok seriously this is so good, Ash! I’ve always wanted a light like this next to my bed so I will definitely be making this! Love it!
I love this so much I want to marinate in it. As soon as I have $80 to shovel into a bedroom upgrade, these are going to be flanking my bed!! Thank you for the inspiration!
oh wow, this is soooo unique and creative, love the vintage light bulb!!!!
Gotta be one of my favorite DIY projects :)
so gorgeous, and surprisingly inexpensive coming from west elm. thanks ashley!
xo, valerie @ lily on fillmore
Love it!
it’s gorgious, well done. I have saw somthing like your’s but then in an other colour. I like yours much better;-D
thank you for the sharing;-D