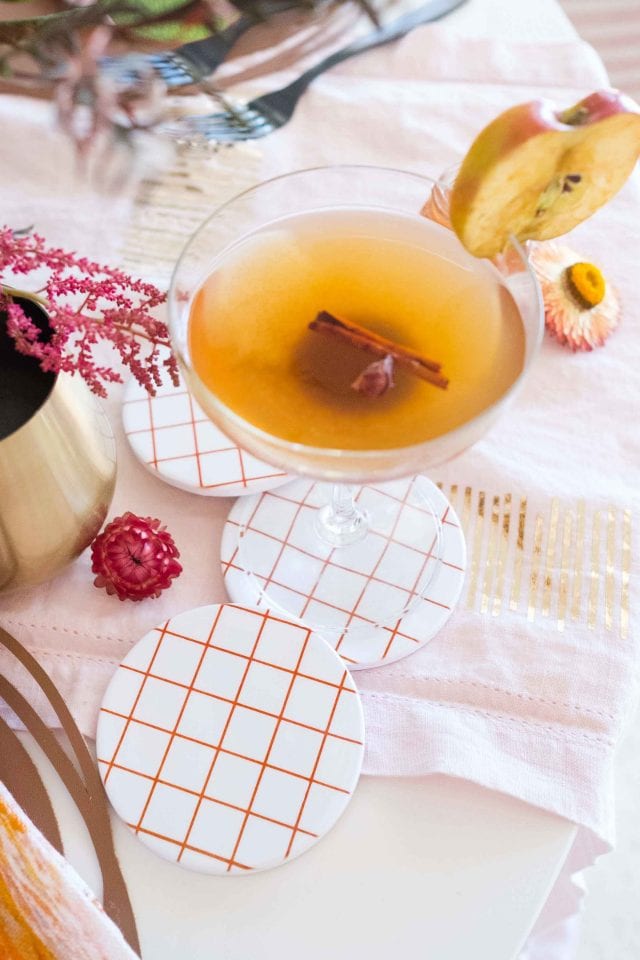
Skip to content
Menu
  • Home
  • About
  • DIY
    • Travel
    • Decor
    • Macarons
    • Style
    • Recipes
    • Entertaining
    • Behind The Blog
    • Videos
    • Printables
  • Shop
  • Events
  • Press
  • Say Hello
  • Pinterest
  • Instagram
  • Facebook
  • Twitter
  • YouTube
MENUMENU
  • Home
  • About
  • DIY
        • Travel
        • Decor
        • Macarons
        • Style
        • Recipes
        • Entertaining
        • Behind The Blog
        • Videos
        • Printables
        • September 24, 2019

          Flying With A Baby: Our Tips + Travel Documents You Will Need

          September 22, 2019

          Travel Guide: A Day at Magnolia Market At The Silos

        • December 4, 2019

          Before & After: Our Wet Bar Makeover

          December 2, 2019

          Office Design Makeover: Our Home Office Giveaway Reveal

        • July 24, 2019

          Easy Halloween Dessert: DIY Ghost Macarons

          March 9, 2018

          Lucky Coconut Mint Chocolate Chip Cocktail Recipe

        • November 14, 2019

          Gifts for Her: 49 Unique Gifts for Women

          November 12, 2019

          Gifts for Couples: 32 Gift Ideas for Couples

        • November 20, 2019

          Apple Cider Drink: Easy Apple Cider Cocktail Recipe

          October 31, 2019

          Thanksgiving Punch: An Easy Pumpkin Punch Recipe

        • November 15, 2019

          Kids Advent Calendar: Colorful Houses DIY Advent Calendar

          November 14, 2019

          Gifts for Her: 49 Unique Gifts for Women

        • December 4, 2019

          Before & After: Our Wet Bar Makeover

          December 1, 2019

          Our Living Room Christmas Decorations + Pink Ornaments

        • September 6, 2019

          Little Sugar & Cloth Gender Reveal! — Baby Number 2 is a…

          September 5, 2019

          Behind The Scenes of a DIY Blog — How to Write A Blog Post (+ Videos!)

        • October 16, 2019

          Pumpkin Patterns: Tips for How to Carve with Pumpkin Stencils

          July 30, 2019

          Fall Decorating Ideas: DIY Fall Table Decor You Can Make!

  • Interiors
  • Life
  • Events
  • Press
  • Say Hello
  • Subscribe
  • Shop
Birthdays + Parties

DIY Coasters: How to Make Coasters Using Cricut Infusible Ink!

10 comments

It’s safe to say that a cute set of coasters is a household staple. Not to mention DIY coasters are also a great housewarming gift in case you’re tired of the regular old candle idea!

While there are a TON of coaster tutorials floating around, this one is a little different than the usual. I’m actually showing you how to make coasters using Cricut infusible ink!

I’m explaining more on what the heck infusible ink is below, but needless to say YOU WILL WANT THESE! They seriously look store-bought once you’re finished!

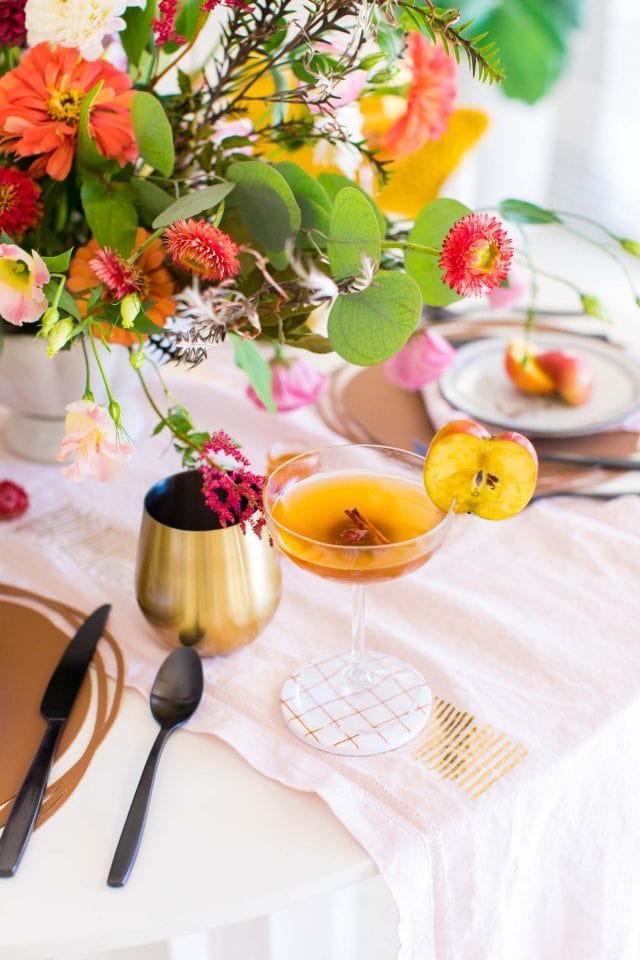
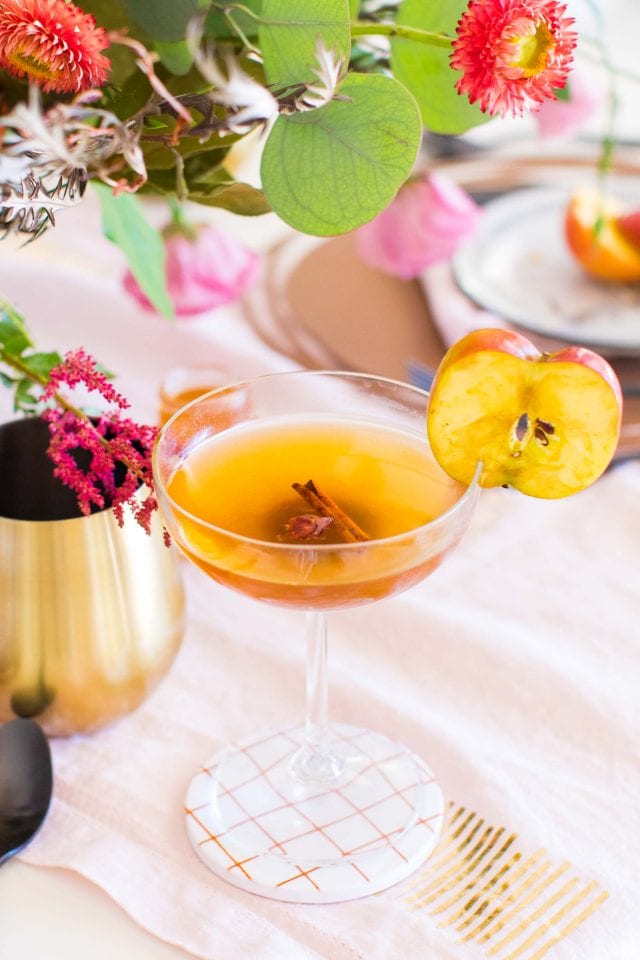
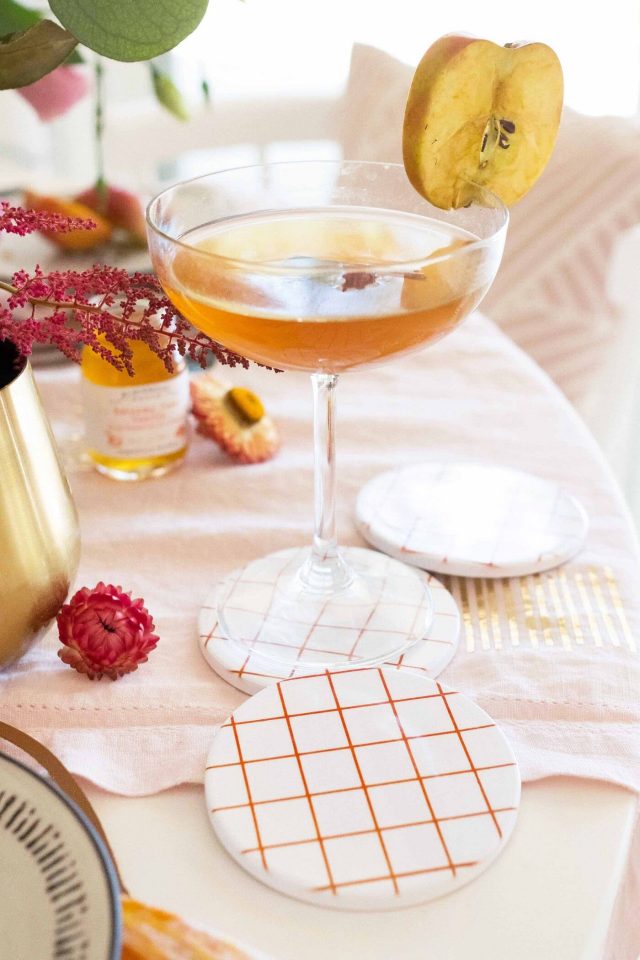
I originally made these as part of my fall table decor post and combined them with this DIY runner and these DIY placemats...

How To Make Easy DIY Coasters

Cricut coasters that are compatible with Infusible Ink, available in square or round

Cricut Infusible ink sheets in the color of your choice

Cricut maker

Cricut fine point blade

Regular card stock, laser inkjet, or scrapbook paper

Cricut EasyPress 2

Cricut medium grip mat

1- Connect your Cricut Maker to your computer and place your fine point blade into side B of the machine.

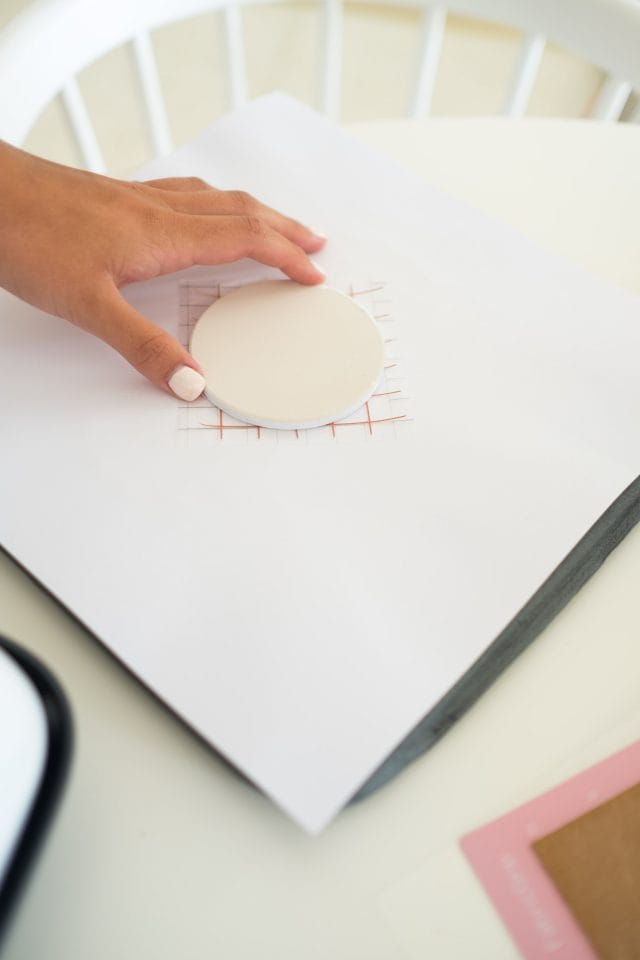
2- Design what you would like on your coasters in the Design Space page. We chose a grid print that we easily designed in Photoshop to upload to DesignSpace, which you can download to use below!

Click here to download the custom grid print pattern for these DIY coasters!

3- Once you are pleased with your final coaster design in the DesignSpace maker page, click “Make It” in the top right corner to begin your project.

3- Select your material which would be “Infusible Ink Transfer Sheets” in this case. Since we wanted a fall vibe for our table decor, we actually used the burnt orange transfer sheets from the Cricut animal print pack for a golden orange grid print on our coasters.

4- Now you should place your ink sheet onto the medium grip mat and make sure it is aligned well. Then load your mat into your Cricut Maker by pressing the double-sided arrow.

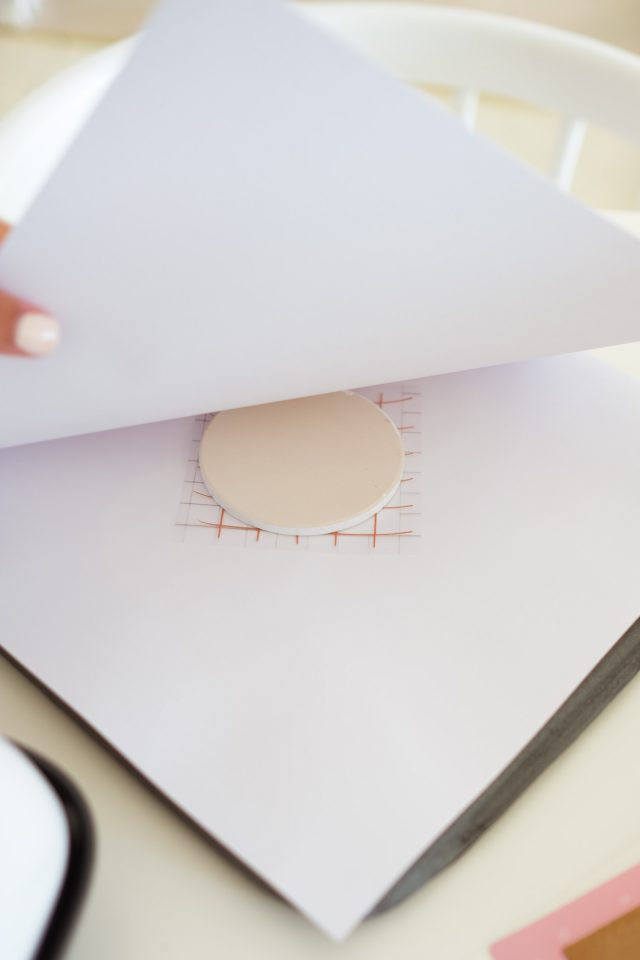
5- When your design is finished, remove the excess paper from around the pattern so that only the grid print that will be infused into your coaster is left.

You’ll need to cut enough patterns for each of the coasters that you’ll be making. The downloadable design above is designed to be for one coaster at a time. In which case, you’ll need to cut four different designs to create a set of four DIY coasters.

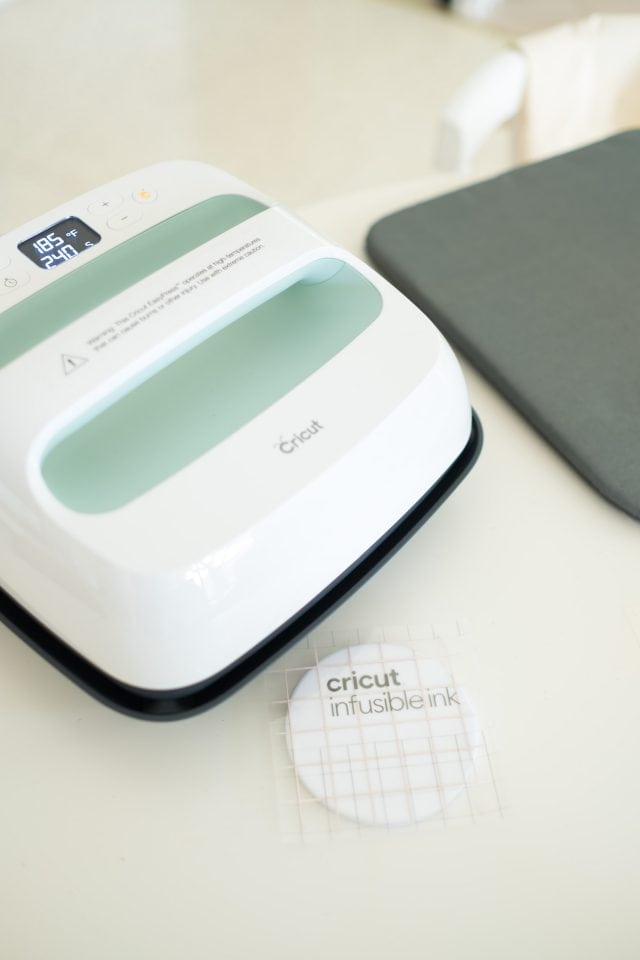
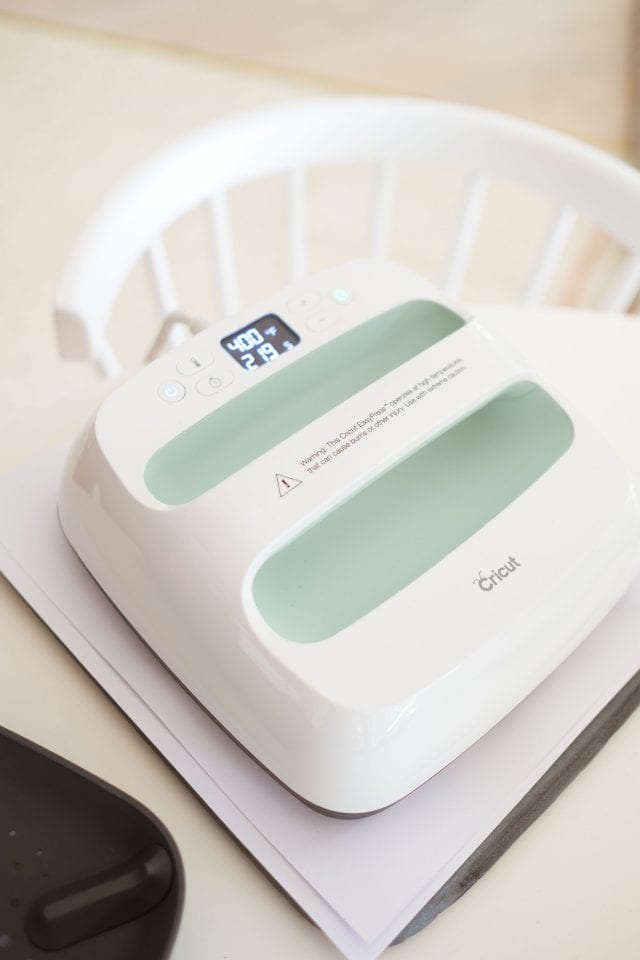
6- Turn on your Cricut EasyPress 2 to 400°F (205° C) and wait until the Cricut symbol turns green, which means it has now heated to the correct temperature. You’ll also set time the to 240 seconds for the EasyPress.

7- Next place a piece of card stock onto your EasyPress heat resistant mat to prevent any ink from messing up the mat over time. Place your design onto the porcelain side of coaster and then place the coaster face down onto card stock.

8- Put a piece of butcher paper over the back of the cork side of the coaster (butcher paper comes with infusible ink transfer sheets. This will serve as an additional safety barrier for your coaster, but do not reuse the same piece of butcher paper in between coasters or projects.

9- You may now place your EasyPress onto your coaster, let it rest on your coaster for the full 240 seconds with no added pressure.

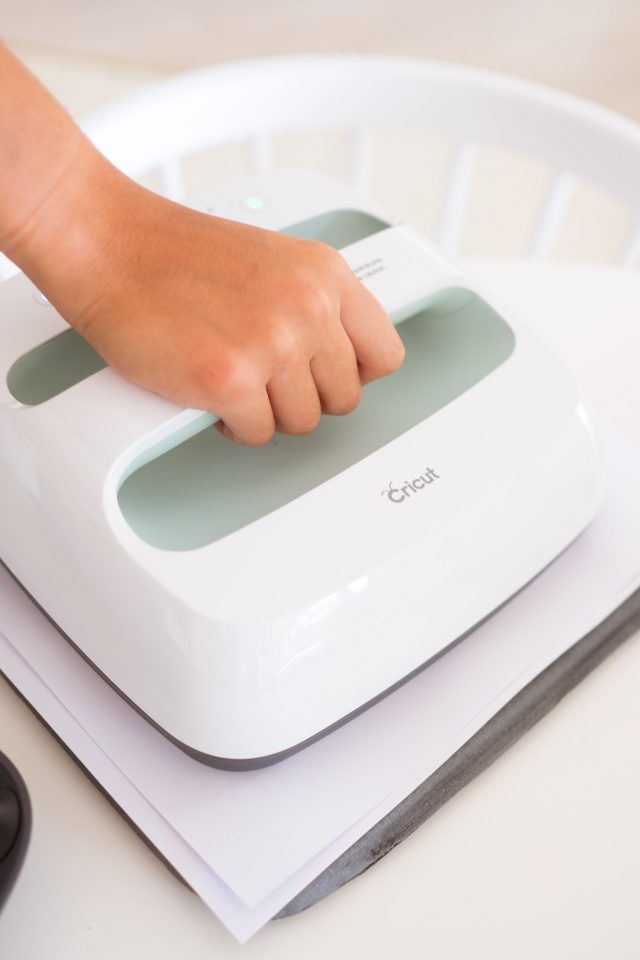
10- After the time has run out remove your EasyPress and let the coaster cool all the way before handling. The coaster will be VERY HOT so please use caution!

10- After the coaster has completely cooled, simply peel off the clear sheet and ink transfer sheet to reveal your design.

11- Repeat this process for the remaining number of coasters that you need for a full set.

A general tip for making your own coasters with Infusible Ink:

  • You can also use the Infusible Ink pens to hand paint or draw your own design to be printed directly onto the coasters as a fun twist on photo coasters or printed photos applied to tile coasters.

Why Is Infusible Ink a Great Idea for Your DIY Coasters?

While the idea of making your own DIY coasters is limitless, a lot of times they don’t hold up very well over time. Even with a giant layer of mod podge or acrylic sealer, they can still look less than stellar as a finished project if you’re going for craft store-bought quality.

The Cricut Infusible Ink process is permanently infused into your base material (as long as it’s a Cricut approved infusible base!). Acrylic paint isn’t archival, so having a permanent ink is a definite win!

The Cricut coaster bases also have a cork coaster/a cork board so that you don’t need felt pads to keep your coffee table safe. The bottom of the coaster is literally as soft as wine corks.

Plus we all know how easily those felt pads can come off over time (hello, hot glue!), which is just frustrating in general.

How to Clean Your DIY Coasters

On account of the fact that these are made with Infusible Ink, they automatically have a permanent design that will withstand wear and tear. That’s definitely a major bonus compared to most DIY coasters!

If you do find yourself needing to clean them up a bit, all you have to do is use a damp cloth and little vinegar and water to sanitize them without using harsh chemicals.

This post is sponsored by Cricut. Sugar & Cloth has chosen to donate 5% of all sponsored campaigns to charity, which you can read more about right here.


« DIY Table Runner Idea: How to Make a Table Runner Iron-On + Download!
•
Leave A Comment
•
10 Comments

Favorites

DIY Retro Camper Gingerbread House and Recipe

Christmas Cookie Ice Cream Shots

An Easy Monkey Bread Recipe with Chocolate and Orange

related

Decor

Before & After: Our Wet Bar Makeover

Decor

Office Design Makeover: Our Home Office Giveaway Reveal

Decor

Our Living Room Christmas Decorations + Pink Ornaments

Be an insider.

Leave a comment Cancel reply

Comments

    • Katie Wyllie says:
      August 1, 2019 at 6:12 am

      This is amazing! What a fun DIY and I love how you can make them to match any type of party! I agree..making them with Mod Podge and other sealers really never turn out the greatest…excited to try this!

      Reply
      • Sugar & Cloth says:
        August 1, 2019 at 12:41 pm

        Thanks, Katie! It’s so true. We love Mod Podge. It’s cheaper but they don’t last as long or look as nice!

        Reply
    • lauren kelly says:
      August 1, 2019 at 9:11 am

      These are adorable! I want to make them for my friend that just bought a new house!

      Reply
      • Sugar & Cloth says:
        August 1, 2019 at 12:40 pm

        Thanks, Lauren! These would be a lovely housewarming gift!

        Reply
    • Toni says:
      August 1, 2019 at 9:39 am

      Thank you so much for the tutorial! This is such a great idea!

      Reply
      • Sugar & Cloth says:
        August 1, 2019 at 12:40 pm

        You’re welcome, Toni!

        Reply
    • Rachael Yerkes says:
      August 1, 2019 at 9:55 am

      These are absolutely darling!!

      Reply
      • Sugar & Cloth says:
        August 1, 2019 at 12:40 pm

        Thanks, Rachael!

        Reply
    • Mallory Lanz says:
      August 2, 2019 at 5:42 am

      These turned out so cute! I love that they’re super useful too.

      Reply
      • Sugar & Cloth says:
        August 6, 2019 at 3:53 pm

        Totally useful! Thanks, Mallory!

        Reply
instagram

sugarandcloth

View on Instagram

Dec 10

Link to display lightbox
Instagram post 2196074503024170723_5311597 Isn’t this a cute gift idea for celebrating New Year’s with friends/colleagues/neighbors even if you don’t make out of the house this NYE?!⁣ ⁣ Because let’s be real, I will 100% only be making a NYE appearance in the form of a @hallmark card this year thanks to newborn baby life!⁣ ⁣ I put some of these together for girlfriends for New Year’s, so tag a friend who’s helping you man the NYE celebrations this year! ⁣ #hallmarkpartner #CardsDoMore #careenough #sugarandclothloves #newyears2019 #confetticlub #colorlovers

sugarandcloth

View on Instagram

Dec 10

Link to display lightbox
Instagram post 2195515625580649404_5311597 Christmas cactus cake seemed fitting when we’ve spent the last few days with gingerbread houses, birthday parties, and me officially eating everything in sight because #holidays and #majorlypregnant. Are you a disciplined holiday eater or no?! #sugarandclothloves #cakesofinsta #cakesofig

sugarandcloth

View on Instagram

Dec 6

Link to display lightbox
Instagram post 2193095478400170582_5311597 GIVEAWAY TIME!! I’m so excited that you all loved the artwork I designed using @picmonkey for the recent office makeover as much as I do! ⁣ ⁣ We’re giving one reader a pair of the 20x40 custom printed and framed art sets just in time for holidays! ⁣ ⁣ To enter, make sure you’ve signed up for your free PicMonkey trial (link in profile if you don’t already have one, plus you get a mega discount with my link if you want an account!) and leave a heart in the comments below! ⁣ ⁣ Bonus entries for tagging a friend in another comment to share the love! ⁣ ⁣ Contest will close this Sunday at 11:59pm CST, not associated with Instagram. #picmonkeypartner #homeofficedecor #giveawaytime #showemyourstyled #abmathome #instagiveaways

sugarandcloth

View on Instagram

Dec 5

Link to display lightbox
Instagram post 2191877427604324858_5311597 SWIPE to see the before and after of our wet bar makeover! It's seriously crazy better, right?! #capitalonepartner⁣ ⁣ I'm sharing all of the styling sources, why we opted to make this space a priority for a makeover before baby comes along.⁣ ⁣ Plus how you can use the @CapitalOne for Capital One Walmart Rewards Card to earn 5% back at Walmart.com or rewards for travel (plus loads of other options, but obvi I long for travel in my life ha!) while you're redecorating too!⁣ ⁣ What do you think of how it turned out?! Click the link in my bio to see the full post!⁣ ⁣ #sugaranclothonthelake #liketkit http://liketk.it/2GQrd @liketoknow.it.home #beforeandafterdecor #myhomestyle #myhomedecor #wetbar
sugarandcloth
  • Press
  • About
  • Contact
  • Sitemap
  • © SUGAR & CLOTH 2019

Be an insider.


No, Thank You

powered by chloédigital