DIY Pom Pom Leather Luggage Tags
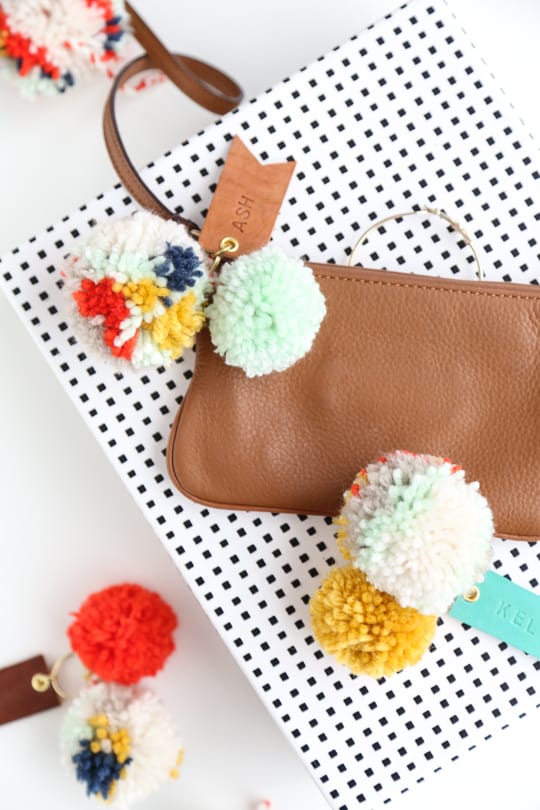
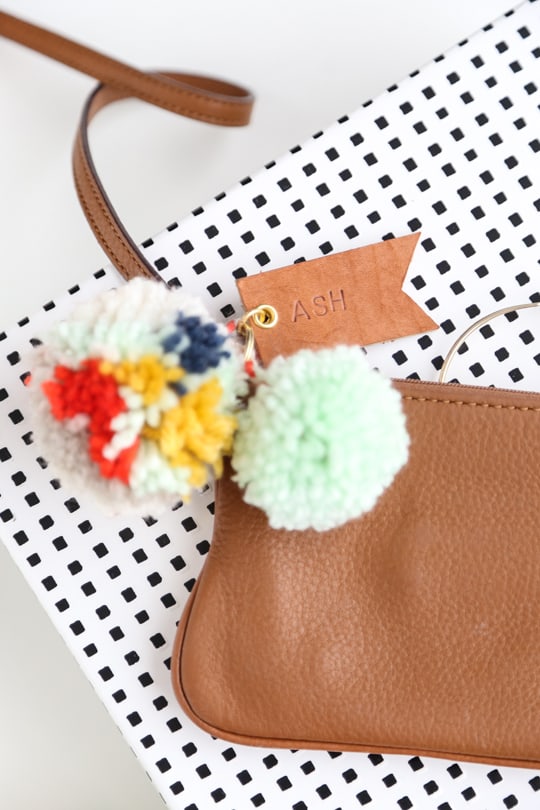
I’m still trying to mad prep for heading out of town the next few weeks, but you know I have to do it with a little DIY style, so I made these pom pom leather luggage tags for my new luggage! For the longest time I had a polka dot ribbon tied to my luggage that my dad put on them years ago to help me notice mine easily, so I wanted to stick with the tradition with the colorful poms, and I’m kind of in love.
In case you’re not the avid traveler type, this would also be a really cute project for kids bags for school, baby bags, clutches, or overnight bags. Plus, they’re a great reason to have a ton of ridiculous colors in one fluff ball, am I right? And don’t let the materials list on this one fool you, it’s not as intimidating as it might sound, especially when you can buy most of these steps pre-made if you’d like.
Leather remnant pieces at least 3×2 inches per flag
Rotary cutter (optional)
Straight edge for cutting (or ruler)
Leather alphabet punch kit
Mallet/hammer
Pre-made pom poms or pom pom maker in two sizes
Yarn of your choice
Leather rotary hole punch
Brass eyelets and setting kit
Brass jump rings
Brass split rings
Round nose pliers
All purpose cement
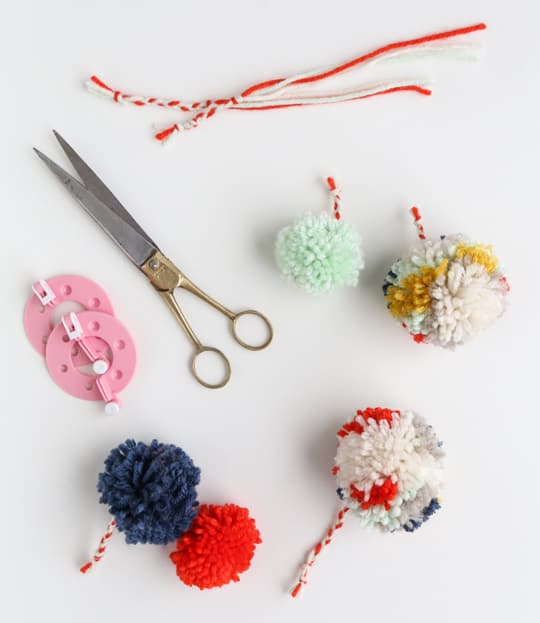
For the pom poms, you can make your own several different ways, or you can buy ones already made (like Etsy). To make these multi-colored ones, I wrapped several different colors of yarn around the pom pom maker, and used braided yarn to tie the poms off so that the string to tie them onto the keyring would have a bit more strength.
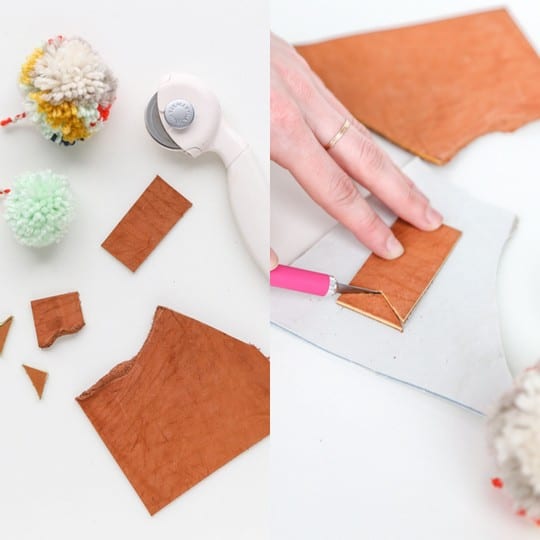
To make the leather tags, use a rotary cutter and straight edge to cut a 1×2.5 inch rectangle. Next, use an Xacto knife to cut a triangle from one edge to create a flag shape.
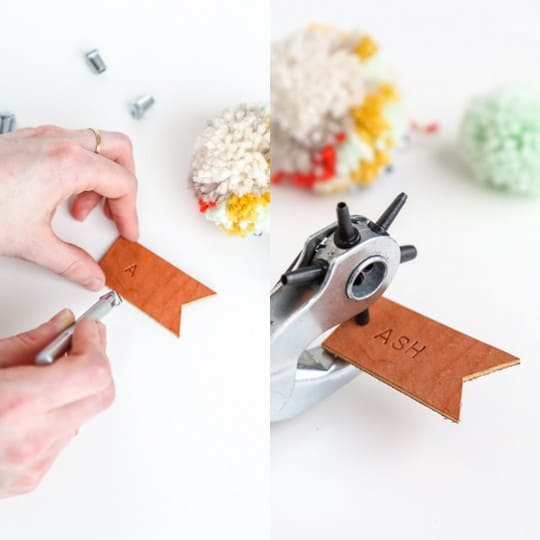
Once the flag is made, use the alphabet leather punch to stamp your name on the tag. To make the circle, choose the rotary setting thats the same size as your eyelets so that it fits snug.
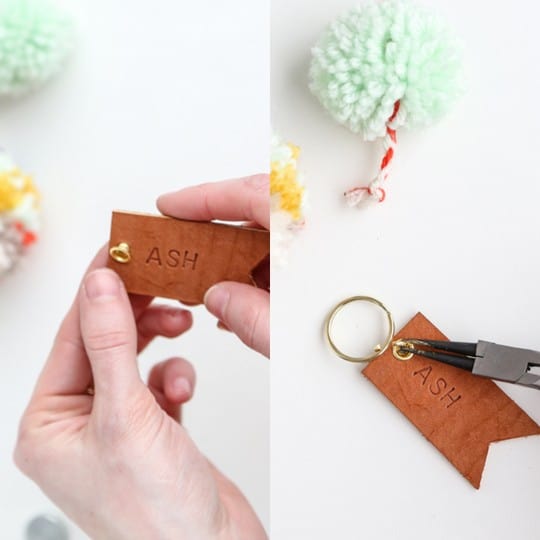
To make the leather tag stronger, insert an eyelet with a bit of glue around it into the circle and set it with the eyelet tool.
Next, use the jump ring to attach the keyring and leather tag together with round nose pliers.

Lastly, make a set of double knots on the end of the yarn string and attach them to the keyring through the braid just beneath the knot, then twist the keyring onto your bag or luggage handle.
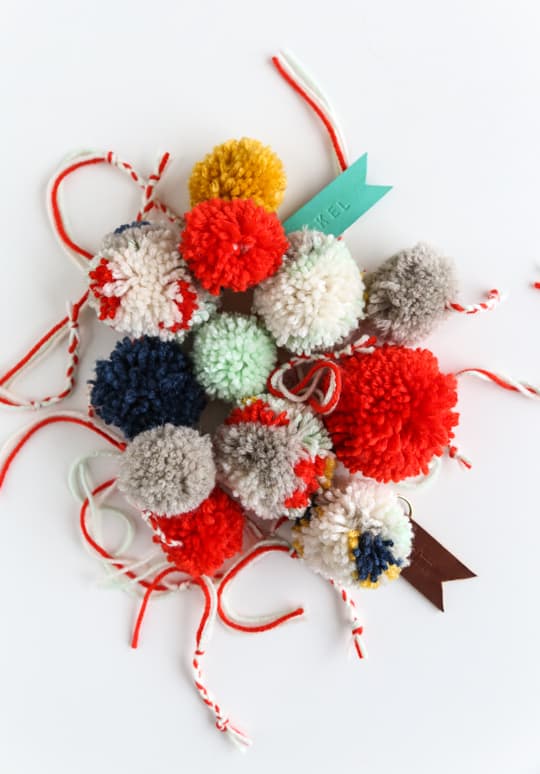
Now all you have to do is make a thousand more for all of your friends… or something like that. As for how well they hold up, I’m not quite sure yet! I’ll let you know on this one after my trip next week.
Please note that we may earn a commission for some of the above affiliate links. However, products featured are independently selected and personally well-loved by us!
Super Cute! Love tassels!
Thanks, Eden! xo
Those aRe so cute!! Do you guys sell them?
That’s such a great idea, and it’s so pretty!
They look so charming and working with pompons is something I love to do. I’m going to try this!!
These are FAB!!
Oh, so, so cute! I am pretty sure this is the first time that I really loved the look of the pom pom, and then the mixed with the leather…!!! I love it! Running to get more leather supplies now….
so glad! xo
AHHHHH soooo cutttteeeeee! i absolutely LOVE colorful stuff hehe :p Too bad i’m only 12 lol, or i would buy my own supplies! of course im gonna save it under my “future” to do crafts though once my mean mom boosts my allowance up! lol! :) Thx a lot for the idea!
haha, love it!
These are the cutest! I gotta start doing some leather working. It always looks so amazing!
XOXO
Becca | Ladyface Blog
oh yes! :)
I think these pompom luggage tags aren’t just cute and unique, they can be pretty useful too in identifying or personalizing the look of our luggages, especially useful when baggage pick-up at the airport. Overall a functional and lovely idea ♥
I think these pompom luggage tags are not just cute and unique, they can be pretty useful too in identifying / personalizing how our luggage looks, especially during times like luggage pick-up at airports. Overall a functional and lovely idea ♥
thanks Stefanie!
SUPER cute!
I love this. So adorable! But your supplies list includes all purpose cement; what is that for?
It’s for securing the eyelet, by coating it in a bit of glue before inserting it into the tag! :)
This is SO perfect. I can never find luggage tags that I like. How can you NOT love a colorful pom-pom?!
that’s what I’m saying!
So cute!
Super cute & creative! Thanks for sharing!
A Styled Life Blog
glad you like it, Laura!
brilliant idea
I love all the colors, so cute!!!
What a cute idea! Makes me wish I had more leather supplies… :)
Allison Katelyn @ http://simplesilverlinings.blogspot.com
You can buy premade leather tags! ;)
Ah! This is the cutest! I want to make some ASAP!
So glad you like them!