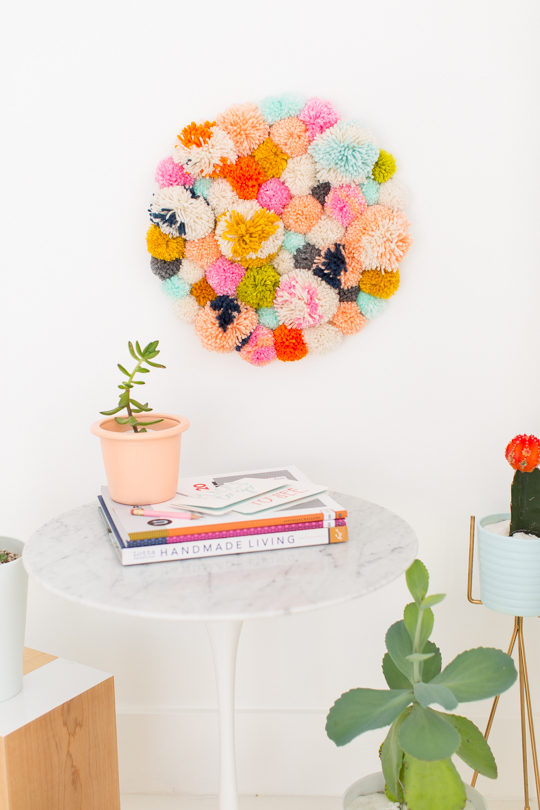
DIY Pom Pom Wall Hanging
Craft a cozy and colorful addition to your home with a DIY Pom Pom Wall Hanging!
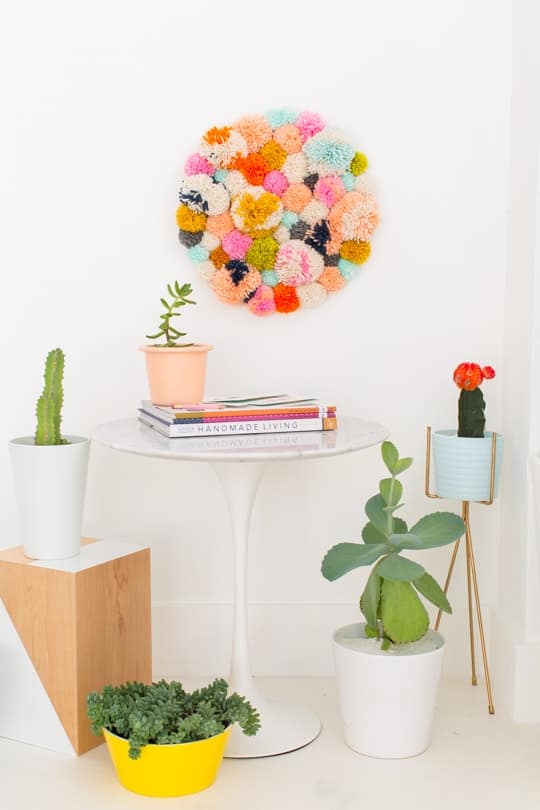
Spruce up your space with a touch of whimsy! This DIY Pom Pom wall hanging is the perfect way to add a pop of color and texture to any room, and the best part? It’s surprisingly easy to make, even for crafting beginners.
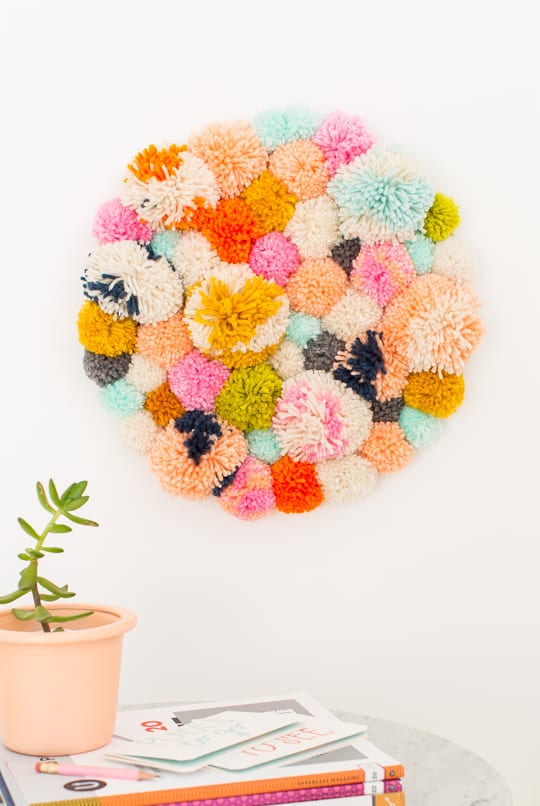
Skip the time-consuming step of creating pom poms yourself. This tutorial uses pre-made ones, allowing you to focus on the fun part – designing your one-of-a-kind wall art. Whether you prefer a minimalist approach with a few perfectly placed pom poms, or a vibrant explosion of colors and textures, this project lets you unleash your creativity and personalize your space.
We’ve always wanted one of the woven wall hangs that are popping up everywhere. But the honest truth is that we can’t really swing purchasing wall art in that price range at the moment.
In just a few simple steps, you’ll transform readily available materials into a gorgeous statement piece. So, grab your favorite pre-made pom poms, gather a few household items, and get ready to create a delightful and eye-catching wall hanging that reflects your unique style!
Materials Needed
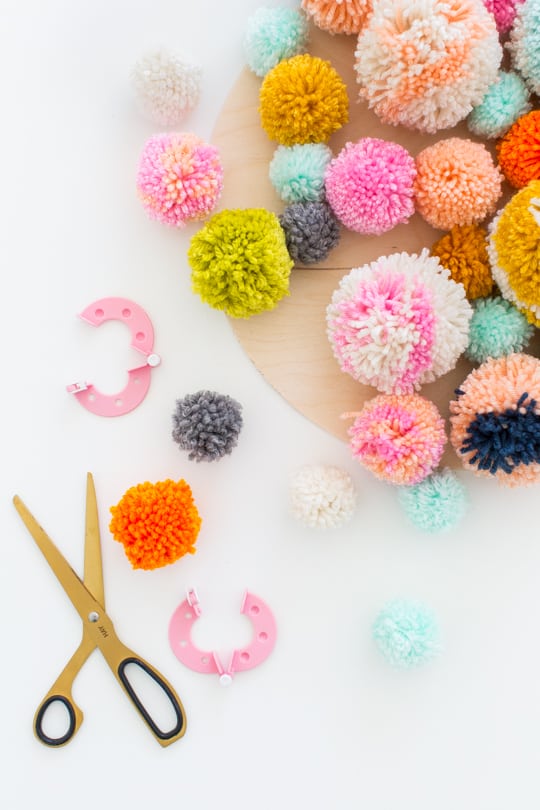
- Yarn pom poms — You can buy them pre-made or make your own with a pom pom maker in various colors and sizes. Choose according to your design vision.
- Wood round
- Picture hanger
- Hot glue gun and glue sticks
How to Make a Pom Pom Wall Hang
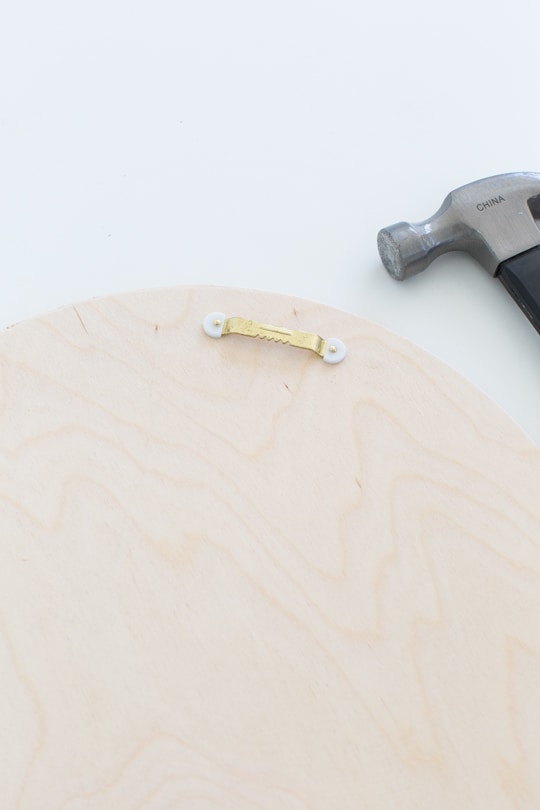
1 — Attach the picture hanger to the back of the wood round according to the manufacturer’s instructions.
Depending on how thick the wood is, the nails might extend slightly past the wood. But don’t worry, they won’t be visible once the pom poms are glued on.
2 — Plan your design. Consider spacing, color combinations, and any patterns you might want to create. You can even arrange the pom poms directly on the wood round to see how it looks before gluing. This step is important because once you hot glue them down, they aren’t coming off!
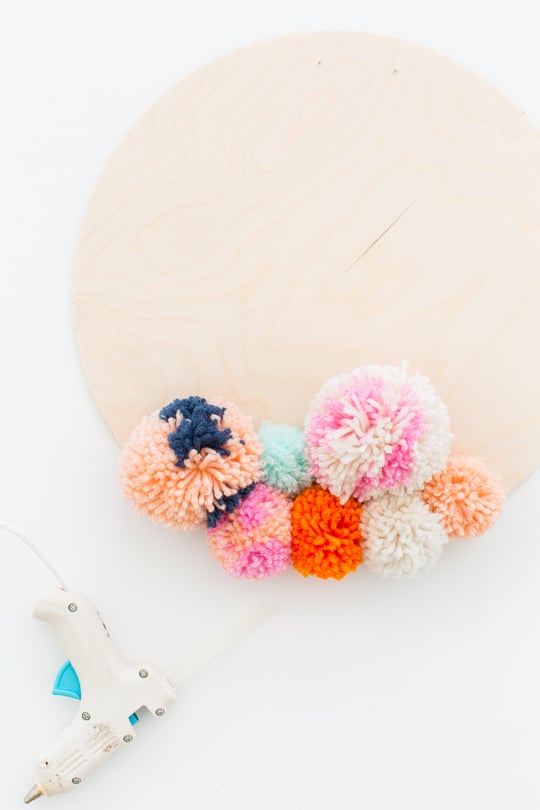
3 — Now comes the fun part – attaching your pom poms! Using the hot glue gun, carefully apply a generous amount of glue onto the wood and to the center underside of a pom pom. Quickly press it onto the wood round in your desired location. Repeat this process for all your pom poms, following your design plan (or going freestyle!).
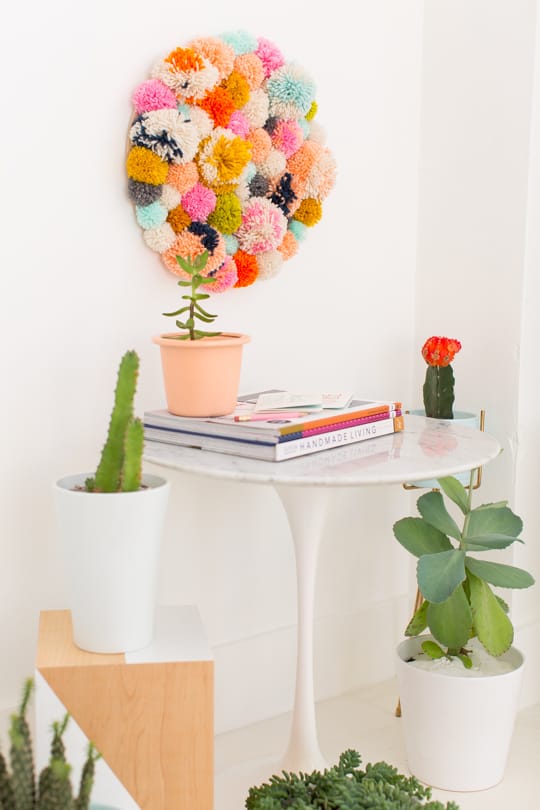
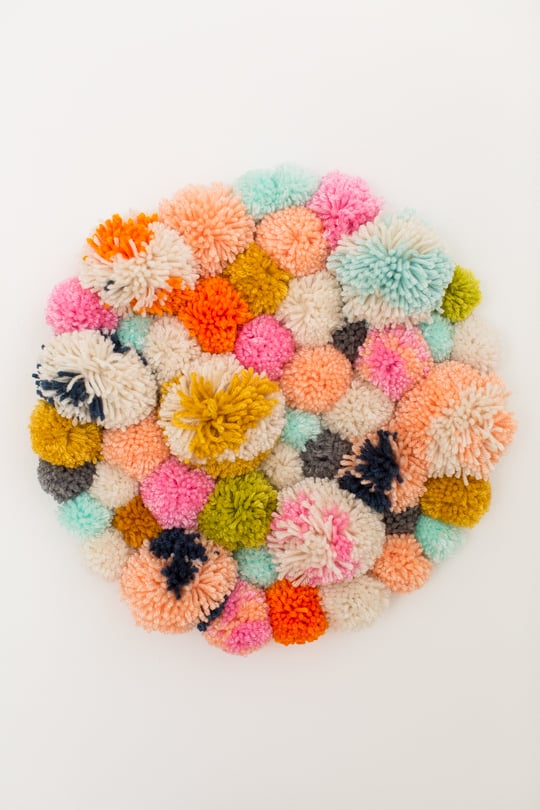
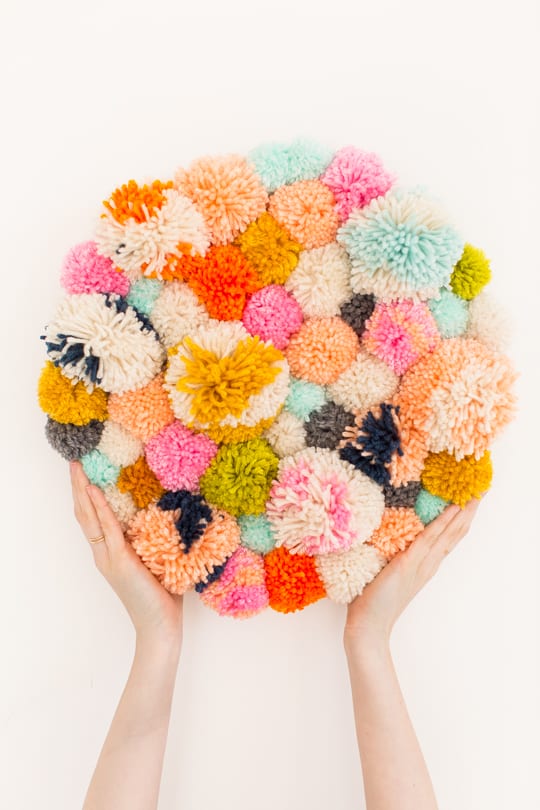
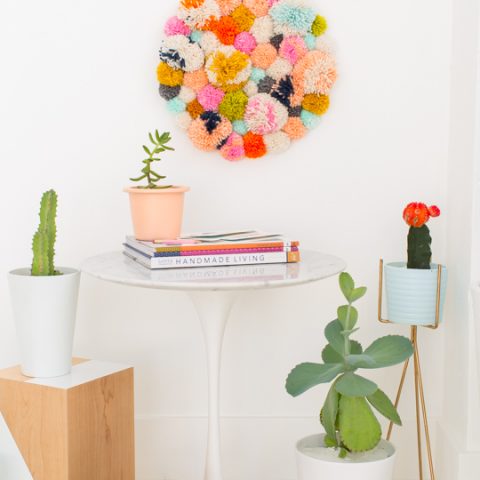
Your delightful pom pom wall hanging is complete! Simply find the perfect spot in your home and hang it using the attached picture hanger.
Tutorial Notes and Tips
- Experiment with different yarn textures for a unique look. Combine fluffy, chunky yarn with smoother varieties for added visual interest.
- Use a color palette that complements your existing décor or create a vibrant statement piece with contrasting colors. You can always go with more neutral colors.
- Opt for a different shape besides a round wooden piece!
- Consider making multiple wall hangings in various sizes and color combinations to create a cohesive theme throughout your home.
More Fun Pom Pom Projects to Try
- DIY Pom Pom Christmas Tree Idea
- Colorful DIY Fabric Wall Hanging
- DIY Pom Pom Tassel for Bags
- DIY Pom Pom Leather Luggage Tags
Equipment
- Hot glue gun and glue sticks
Materials
- Wood round
- Picture hanger
- Yarn pom poms You can buy them pre-made or make your own with a pom pom maker.
Instructions
- Attach the picture hanger to the back of the wooden round.Depending on how thick the wood is, the nails might actually be a bit longer than the wood and so will stick out on the other side, but no worries!You’ll be gluing the pom poms to the from anyways, so it won’t be noticeable or hazardous once you’re finished.
- Get a general layout of where your pom poms will be placed on the wood, because once you hot glue them down, they aren’t coming off!
- Now that you have a good idea of placement, start hot gluing them into place one by one by and applying a generous amount of glue on the wood in a given area so that they aren’t hanging on by a single thread.Finish adhering them until the wood round is fully covered, and you’re all set. Now just to style and hang!
Notes
- You can always go with more neutral colors or a different shape besides a round wooden piece

Please note that we may earn a commission for some of the above affiliate links. However, products featured are independently selected and personally well-loved by us!
Hi! Do you know what brand of yarn was used? These colors and combos are exactly what I’m looking for but have not seen yarn these colors! Did you blend colors yourself or were they multicolored skeins? Thx!
Hi Ashley, I am struggling to get nice thick pom poms, I use the clover pom pom makers. Do you have any handy tips? Cheers!
I love these, great DIY tutorial.
What fiber did you use for pompoms? Acrylic, cotton, ect?
Love this! Thinking about making one for my baby’s room. Expecting our first child at the end of this month! Hopefully, I’ll have enough time! What size wooden circle did you use? Thank you!
Hi Angelique, congratulations on baby! :) We used a 14 inch wooden circle. xo
Nice tutorial! But Where did you get your pom-poms? I was looking on etsy but didn’t find something similar, yet as COLORFULL. Thanks!
I pay a visit each day a few web pages and websites to read
articles or reviews, but this weblog presents feature based writing.
I love pompoms!!
Ps.. Where’s the tulip table from? I want one! :)
It’s from Dot & Bo!
Hiya, was hoping you could tell me the size of the largest Pom Pom? I’m just trying get get an idea of scale. Can’t wait to try this, it looks amazing!
The pompom are really great. Especially the colorsI
Ps. I really love that table. Where can I find that?
do you top your plants off with white sand?
Yep!
Where did you get your pom poms? These are the colors of my studio and I would love to use a similar pallete.
Omg, I love that! Pompoms are the jam.
Finally got around to reading this post after seeing this pompom cuteness on your IG – holy smokes it’s so cute but also wonderfully do-able! I can’t wait to try this. Great project, Ashley!! Xo
Where is that table from? Love this idea!
This is incredible! I adore this! Absolutely stunning!!!
Beaut! I really want to do this now :D
Totally making this for my craft room!
Hello again!
Ignore my above question…I just saw a YouTube video on how to do it. I’m off to Jo-Ann Fabrics tomorrow to get my supplies! Let the pom-pom making begin! :)
Definitely want to make this…it’s incredible! This may be a stupid question, but how do you make the pom-pons with the multiple colors on it? Thanks so much!
This is so brilliant! I’ve wanted a woven wall hanging for ages now as well but they’re just so expensive. I’d never even thought of this, it’s such a creative yet simple idea. Definitely going to make one in greys, whites, browns and black. Thank you for sharing this with us :) x
This is so pretty….love this idea… definitely making one of these
I absolutely love this, Ash! The colors are so cheerful. I am totally going to make one of these!
This looks so cute! You just wanna touch it, when you see something like this on the wall! I love it!
WritingMonique
Love it!
Ashley! This is so adorable. Love it.
Carrie
http://www.wearwherewell.com
Yesss! Pom poms forever! Love this.
Where do I get a Pom pom maker and a wood round? This is the coolest idea ever.
CAN YOU PLEASE TELL ME WHERE I CAN FIND A WOOD ROUND, I’VE LOOKED ONLINE WIHT NO LUCK, MANY THANKS
You may have to visit your local home improvement store, then! They’re in the lumber accents section :)
I love pompom projects (last year I made 2 pompom rugs, a wreath and a garland) so I will definitely consider this wool hanging option next :) xx
This is so completely wonderful! I love making pompoms and this is such a creative way to use them (I already have too many pompom garlands dotted around my house!)
Hannah x
http://crafternooncabaretclub.com
Ashley…just wanted to say…i look forward to your posts, visually they are wonderful eye candy and they are wittily written as well!
Love this idea! I had the exact same thoughts as you….so great to see something different
Live this idea! I had the exact same thoughts as you….so great to see something different