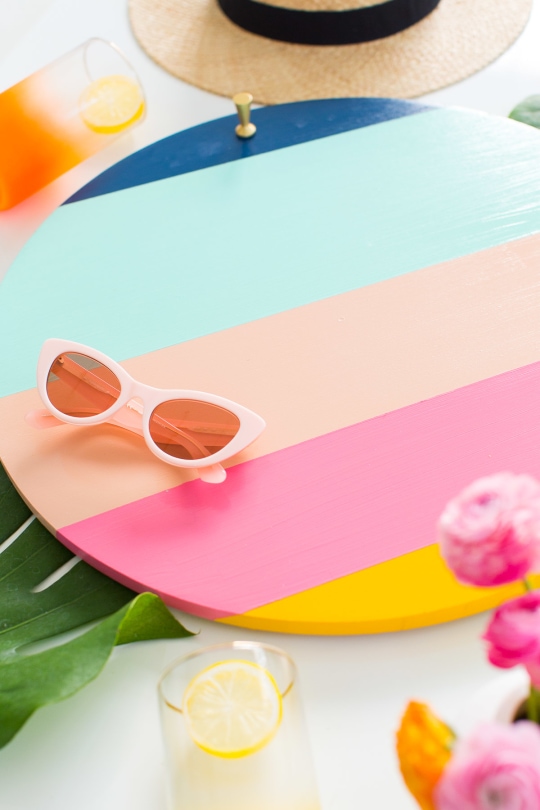
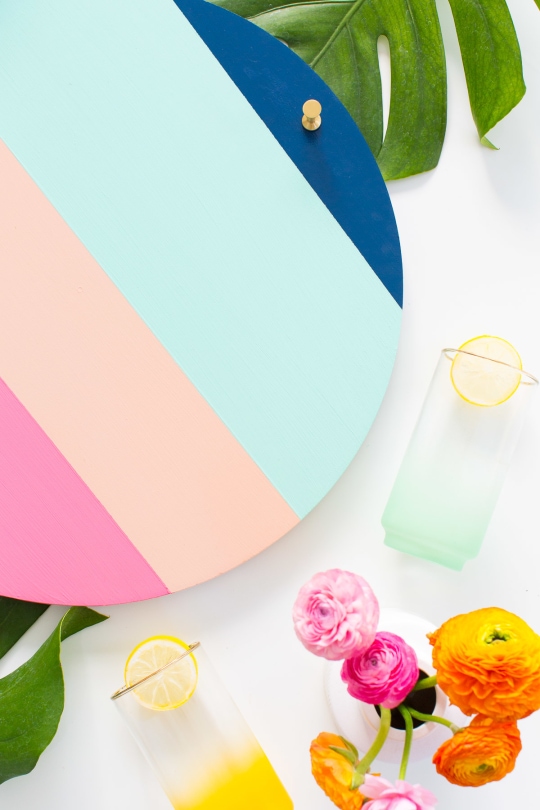
Retro DIY Lazy Susan
Transform your dining experience with our easy-to-follow DIY Lazy Susan tutorial. This rotating centerpiece adds functionality and a touch of charm to any table setting.
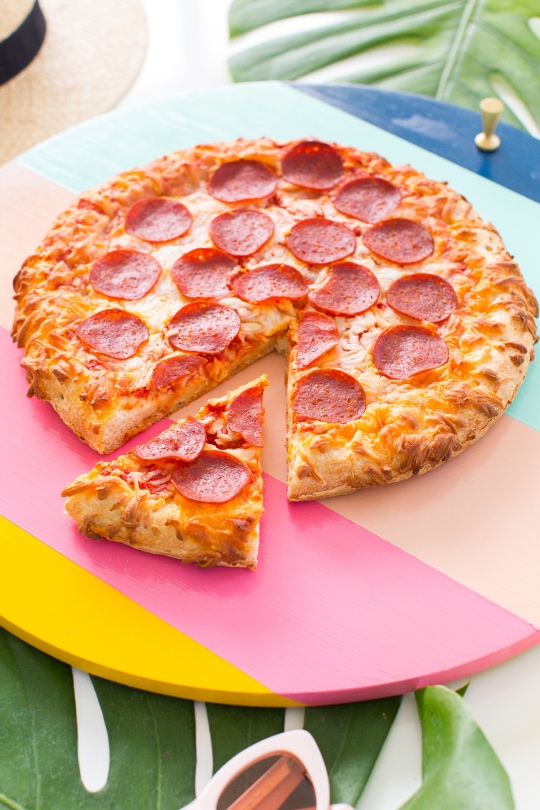
What’s better than a traditional pizza night with friends? One that you can put your own spin on! And in this case, we’re talking a Retro DIY Lazy Susan. (See it spin, get it?!)
So maybe we’re not exactly a natural born comedian. But we can definitely DIY with the best of them. Plus, the more items that are easy to self-serve, the more time you’ll have to spend with guests instead.

Materials and Tools Needed
- 18″ wood or MDF round circle
- Drill and drill bits
- Small wood screws
- Painter’s tape
- Foam brushes
- Non-toxic paint in the colors of your choice
- Lazy Susan hardware
- Non-toxic clear spray shellac — To serve as a food-safe sealant for the finished board.
- Brass knob of your choice — We used this one. But this step is also optional! Having a knob at the edge of the DIY Lazy Susan, gives it an added retro effect.
How to Make a Retro DIY Lazy Susan
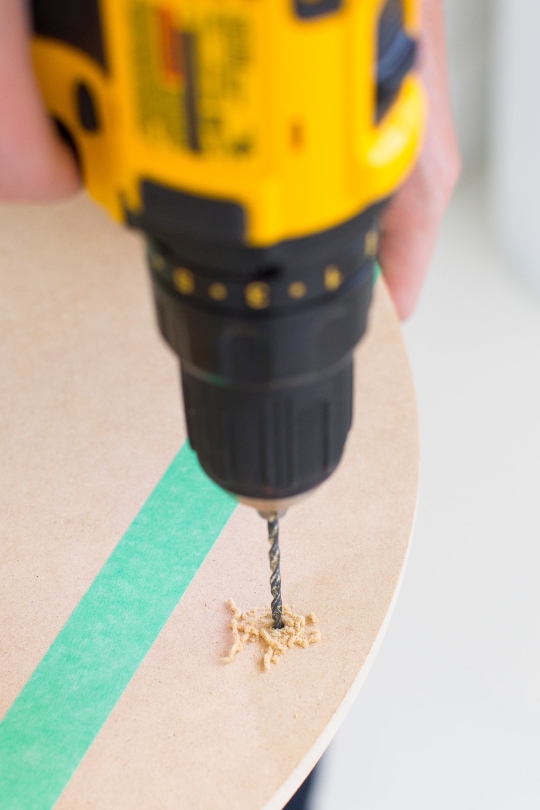
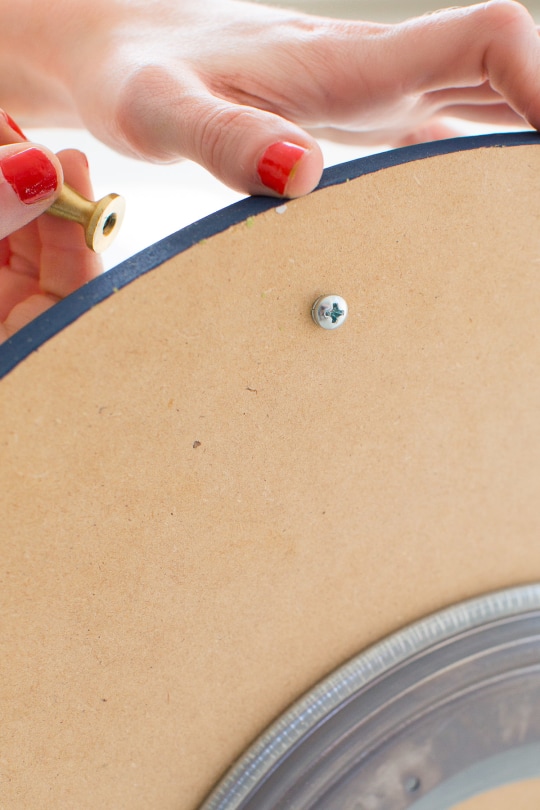
1 — If you’re opting for a knob, mark and drill a hole big enough for knob hardware. This way you will know where paint your strips.
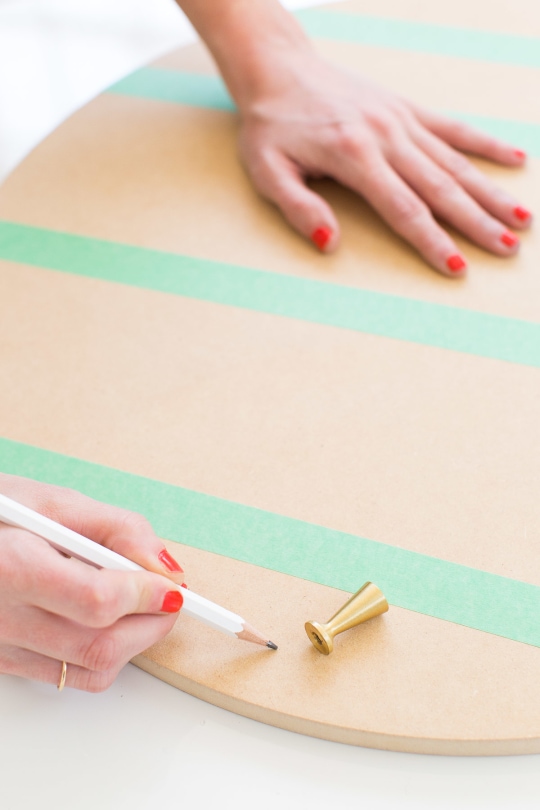
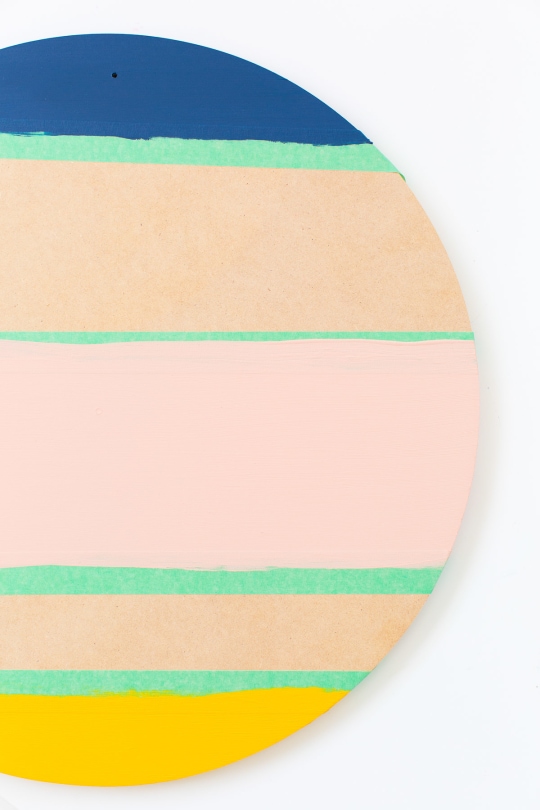
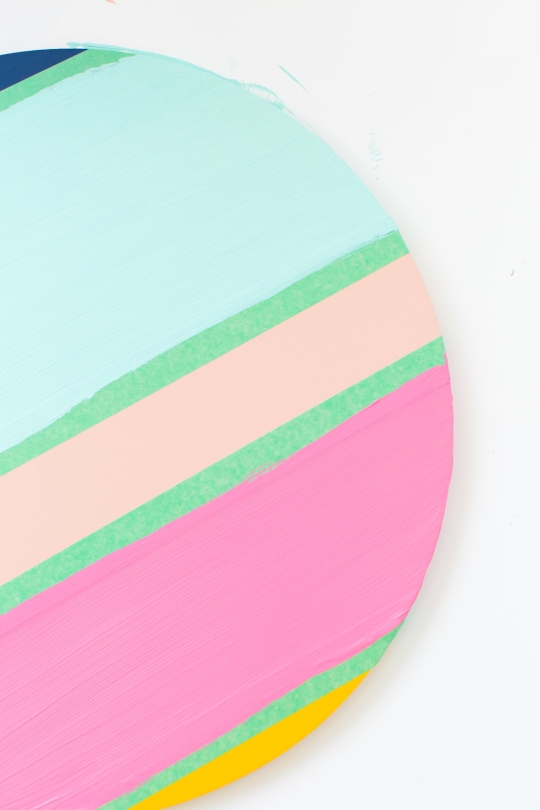
2 — Using the painter’s tape, make the 3-4 stripes at different widths across the wood round.
Then, paint your first few stripes and let them dry completely.
3 — Remove the painter’s tape from the wood round. Place new tape on the edges of what you’ve already painted to create clean lines for the remaining colorful stripes. Let the last of the paint colors dry completely.
4 — Give the entire surface a generous coat of the non-toxic shellac spray sealant to create a food safe surface that’s easy is to wipe down when it’s time to clean up.
Let the sealant cure for 24 hours before moving on to install the lazy Susan hardware.
Installing The Lazy Susan Hardware
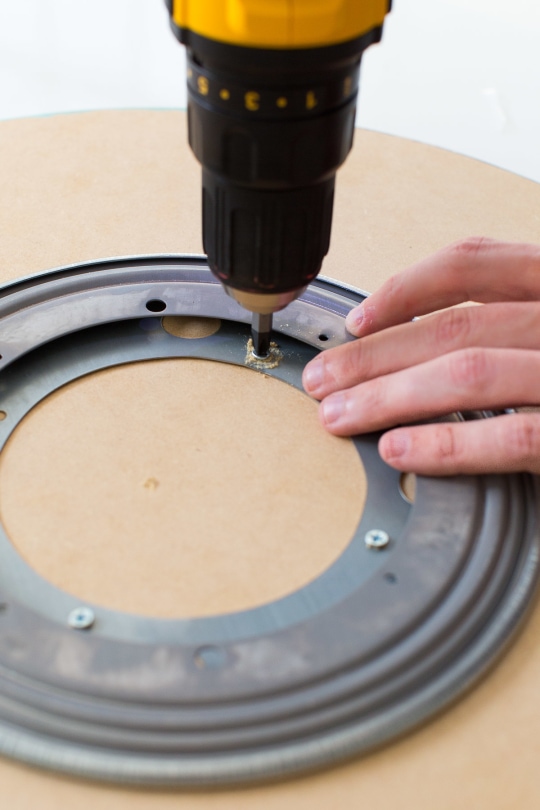
5 — After your sealant has dried completely, turn the painted wood round over and place the lazy Susan bearing directly in the middle.
Using a drill and the small wood screws, screw the swivel plate in place with four wood screws. Make sure to not drill in too far to where the screws will poke through the other side!
6 — Insert your knob hardware for a completed look. And you’re all set for styling your pizza gathering for guests.
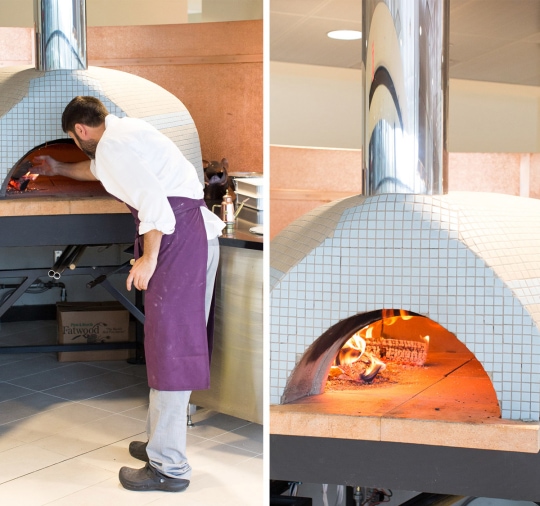
Rise To The Occassion | Behind the Scenes Of the DIGIORNO Pizza Immersion Event
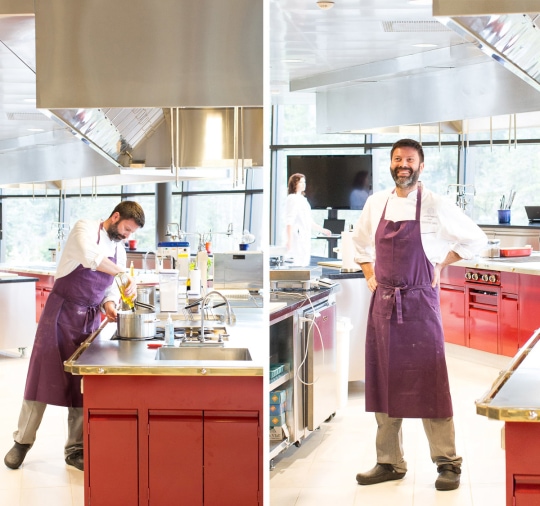
Speaking of guests, we got to attend the DIGIORNO pizza immersion event as part of our entertaining series with them. And he wanted to share a few photos from our trip to the HQ!
Being a pizza lover and diehard fan since…forever, we were eager to get to see how they go about creating their tasty pizza.
Let’s just say the experts at DIGIORNO pizza, like Chris Zelch. Chris is a fifth generation baker, are very passionate about putting only the best ingredients into their pizzas, and (our personal favorite) the dough rising crust
This starts with their heritage of 20 years of baking expertise. Without getting into too many technical details, there are many processes that they go through on a daily basis to ensure their pizza is of the finest quality.
From the creative process of conceptualizing new recipes, to the testing phase, which includes multiple taste test panels. (Sign us up!). The team really values the importance of carefully crafted pizza.
Our favorite part of the whole experience was getting to take part in the creative process that goes into making new flavors. We even got to create my very own pizza with the help of the culinary experts there.
Being inspired from our home state of Texas, we created a diamond shaped (because why not?!) BBQ chicken style pizza that was garnished with a Sriracha sauce.
It might not have won any Chef Choice Awards since we’re a kitchen newbie. But it was pretty tasty!
Thank you to DIGIORNO pizza for partnering with us on this post! You can find more entertaining ideas on their Facebook, Twitter, and Pinterest pages!
Please note that we may earn a commission for some of the above affiliate links. However, products featured are independently selected and personally well-loved by us!
Cutest lazy susan ever.
LOVE this easy summer party idea! such a fun trip, great to meet you!
Those colOrs!!! Perfect!
This is the cutest DIY!!