Tree Topper Idea and DIY Christmas Ornaments with Martha Stewart
For all of our Christmas lovers that like to get started early, we’re sharing a DIY Tree Topper and our holiday space with Martha Stewart!

Christmas is our all-time favorite holiday!
If we decorate for nothing else the entire year, we will still go ALL OUT in December.
Admittedly, it’s not quite as picture-perfect as this holiday setup when our cat thinks he’s a jaguar climbing a tree in the wild with the tree topper being his prey.
But one can pretend, right?
That said, when Martha Stewart wants you to style a Christmas setting with their line of holidays products at Home Depot, you bust out all of the stops!
Naturally, it wouldn’t be Christmas around here without a little DIY or two.
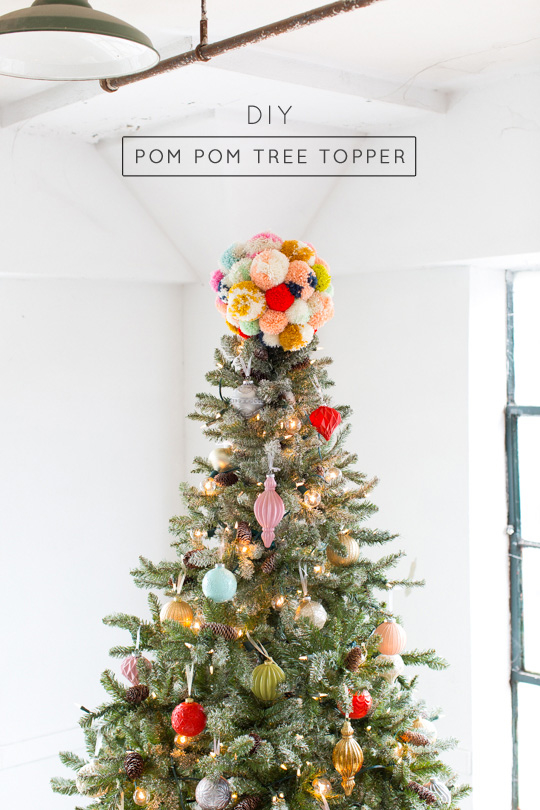
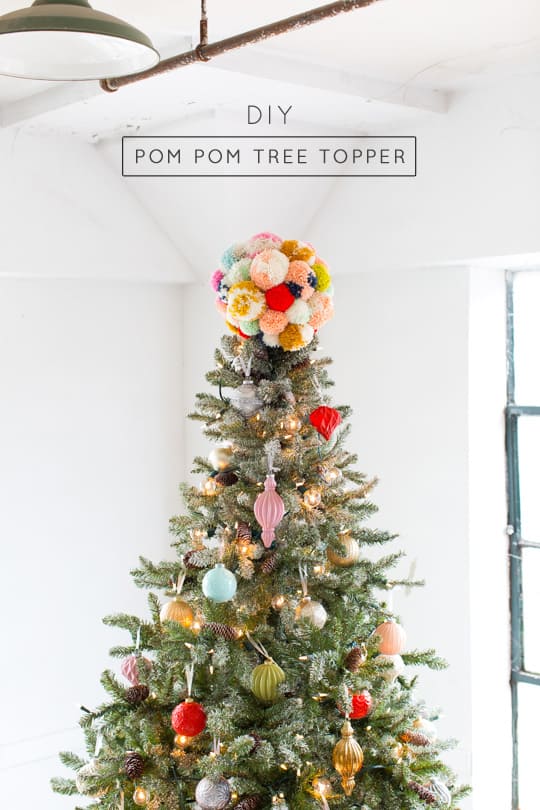
So we made a giant Pom Pom DIY Tree topper for our holiday corner inspired by this DIY Pom Pom Wall Hang!
It’s actually super easy to make.
And it goes perfectly with the retro Martha Stewart ornament designs.


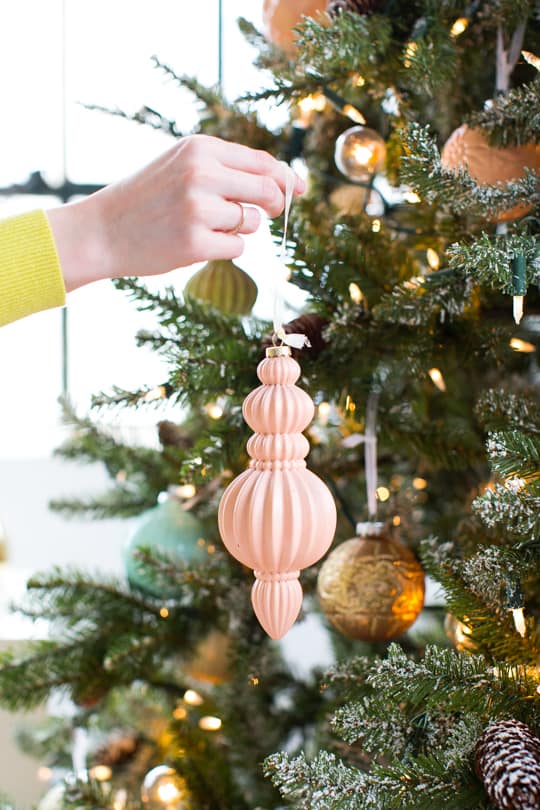
How to Customize Christmas Ornaments
To make the ornaments a little more “us” and to add a little pop of color on the frosted faux tree, we spray painted these blown glass shapes in some of our token Sugar & Cloth colors.
We love the way it turned out!
Plus, it really ties in the color scheme from the room decor and the pom pom topper.
We never afraid of a little extra color.
But we also loved the Martha Stewart frost garland and ornament series by just as they are too.
Plus, they double as SUPER cute keepsake Christmas gift tags and gift toppers!


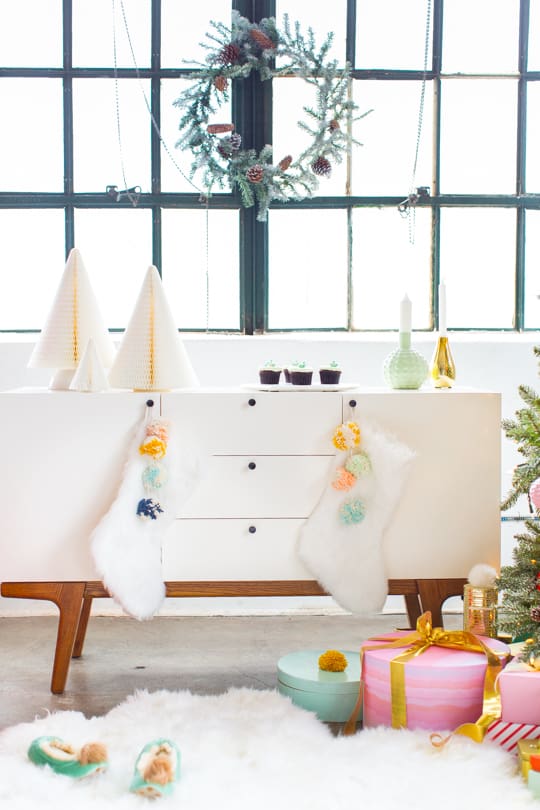
Ideas on How to Customize Stockings
We left the wreath pretty simple so there were some natural elements to the space.
And we added fun textures with the stockings and colorful pom pom adornments.


Materials and Tools Needed to Make a Pom Pom DIY Tree Topper
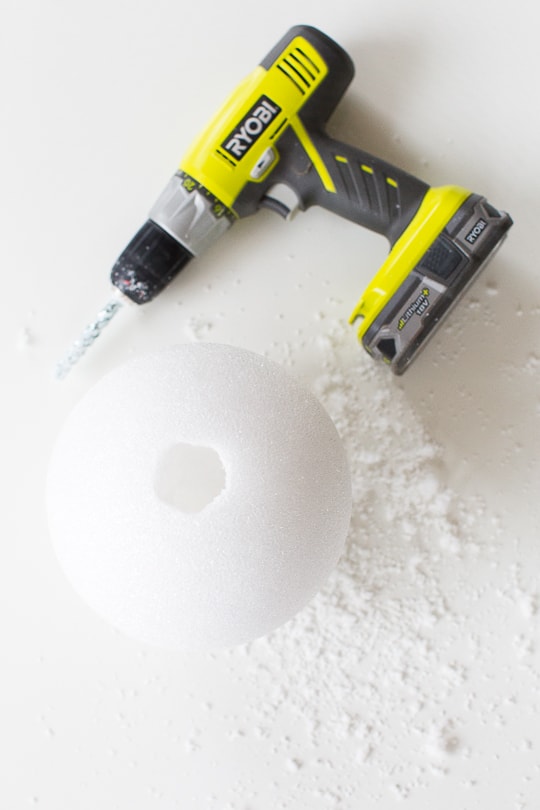
Styrofoam sphere — We used a 6″ ball. But you can make it as big or as small as you want.
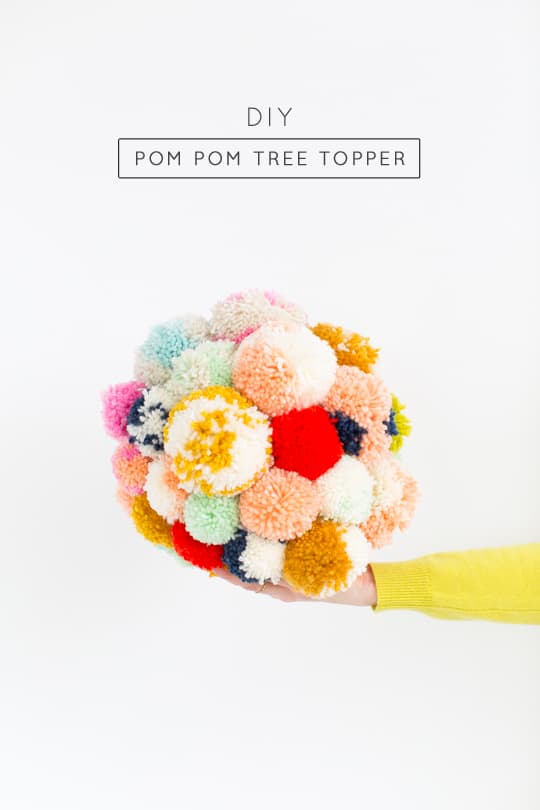
Yarn pom poms — We made custom colors for ours. But you can buy them pre-made here.
Drill and large drill bit
How to Make a Pom Pom DIY Tree Topper
This is definitely a simple project.
But admittedly, it’s going to take you some time depending on how many pom poms you’re making to cover a giant sphere!
1 — All you have to do is drill a sizable hole 1/3 of the way through the styrofoam, making sure that the hole is big enough for the top of the tree to easily fit.
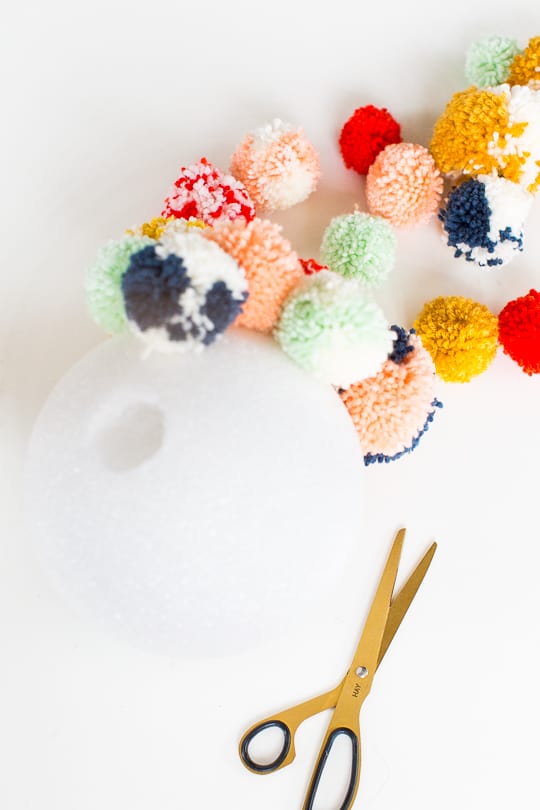
2 — Once you have the hole, you can start hot gluing the pom poms all the way around until it’s nice and fluffy.
Then, you’re all set!

I’m pretty particular about faux trees looking very naturally.
And I have to say, this snowy fir totally fits the bill!
It’s tall, the perfect color green, and not too snowy.
We love it!

All in all, we think it turned out to be the perfect retro inspired Christmas nook, don’t you?
We’re also all about rounded gift boxes this year, who’s with us on bringing those back?!

Holiday Decor Sources
Allison White Area Rug from All Modern
Metallic gold pouf and blue throw from Lulu & Georgia
Clothing from Boden — See all of the pieces here
Modern Buffet Credenza from West Elm
Ikea hack chair with our DIY Gold Legs
Asher Bar Cart from World Market
Orange storage stool from Target
Pastel gift wrap from LLK&C
Tree, ornaments, wreath, string lights, and gift wrap ribbon by Martha Stewart for Home Depot

Pom Pom DIY Tree Topper
Equipment
- Drill and large drill bit
- Hot glue gun and glue sticks
Instructions
- Drill a sizable hole 1/3 of the way through the styrofoam, making sure that the hole is big enough for the top of the tree to easily fit.
- Once you have the hole, hot glue the pom poms all the way around the ball until it’s nice and fluffy. Then, you’re all set!

A big thanks to Tout Suite for letting us use their studio space! This post is made possible by Martha Stewart. Thank you for supporting the brands we love that keep bigger and better DIY’s and even sweeter sweets coming straight to your inbox!
Please note that we may earn a commission for some of the above affiliate links. However, products featured are independently selected and personally well-loved by us!
I love this Xmas flower
Comment from https://boxnovel.online
This article has suggested many new ideas for me. Hope you can continue to contribute your talents in this field. Thank you for sharing this great article.
mapquest directions
ABSOLUTELY LOVE THIS TREETOPPER! I CAN’T SEEM TO FIND YARN POM POMS LIKE THIS–DID YOU MAKE YOURS OR PURCHASE THEM?
Hi Aryn! We made our pom poms – if you search the website, you’ll find a our tips!
My brother recommended I would possibly like this website.
He was totally right. This submit actually made my day.
You cann’t consider simply how much time I had spent for this info!
Thanks!
So glad you enjoyed reading! xo
Thanks for a marvelous posting! I quite enjoyed reading it, you are a great author.
I will ensure that I bookmark your blog and will often come
back in the future. I want to encourage that you continue your great writing, have a nice evening!
You are so cool! I do not suppose I have read a single thing like that before.
So great to discover someone with some original thoughts on this subject.
Seriously.. many thanks for starting this up. This
site is something that is required on the web, someone with a little originality!
Awesome post.
Yay for Martha collaborations!! And I love that you gave her ornaments just a little S and C color love.
I love this idea! And I absolutely love the entire color palette here! So festive and pretty.
This is adorable, Ashley! As is everything you do. :)
Carrie
http://www.wearwherewell.com
SO lovely!
I love your tree! It’s gorgeous!
Paige
http://thehappyflammily.com
You nailed the retro look! It looks classic but still colorful and fresh. Really love it :)
This is seriously STUNNING Ash. You did such an amazing job! The tree topper is my favorite.
Ah — Ashley, this came out wonderful! Lol I remember you telling me about the pom-pom discovery. Great job on this post!
Absolutely gorgeous! I love everything!