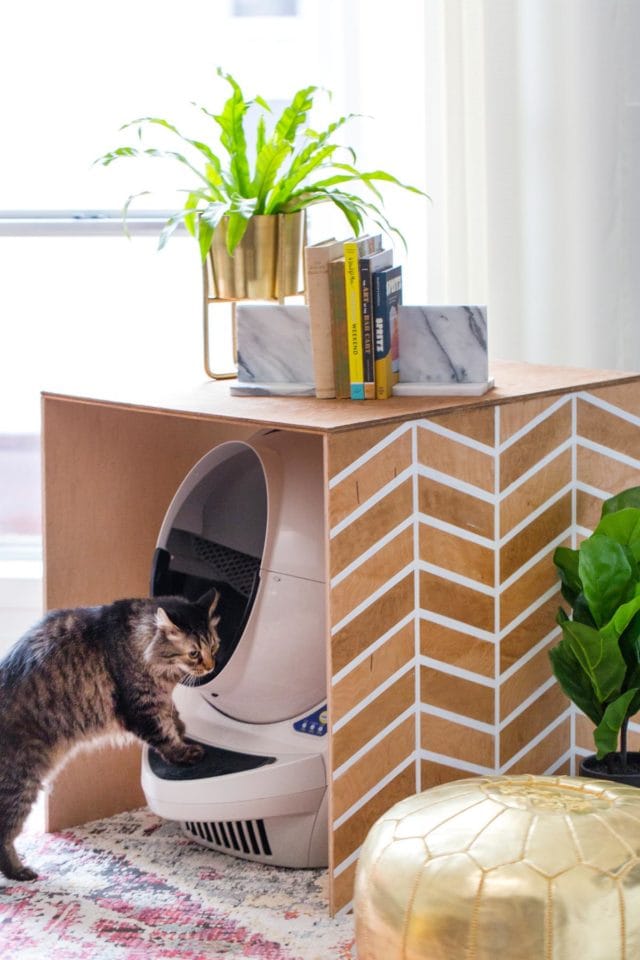
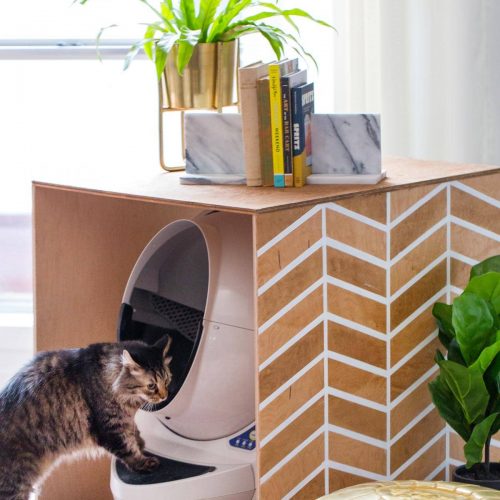
Patterned DIY Litter Box Cover
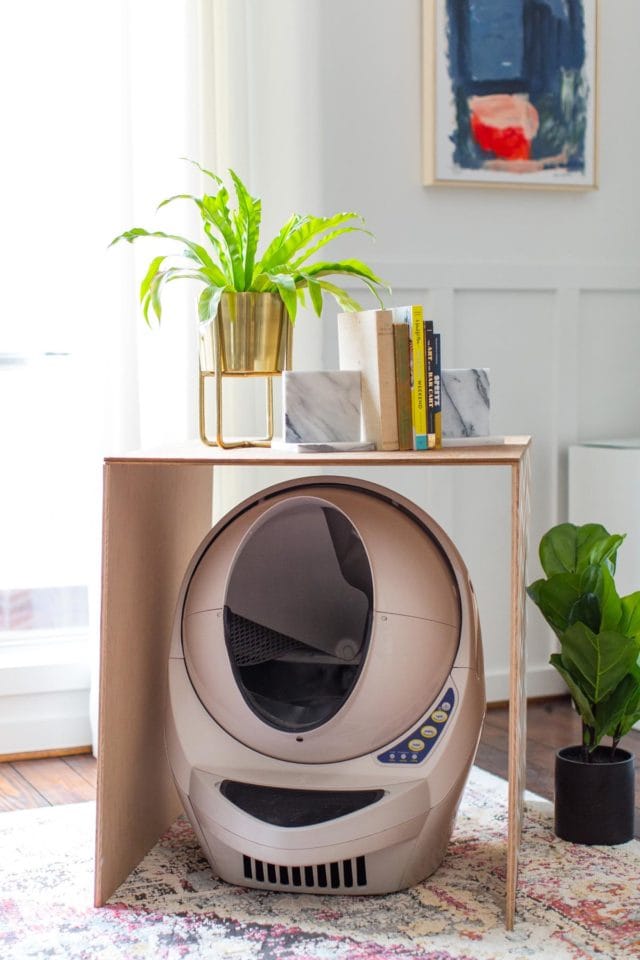
Nothing says welcome home like a clean litter box right? We’re sharing this Patterned DIY Litter Box Cover for hiding the unwanted.
We don’t know if you all are as plagued by litter box issues as we are. But we think we’ve finally found our heaven sent solution!
We love our fur child, Thomas like an actual pageant mom. But we’ll be darned if he’s going to ruin our brand new wood floors and rugs in the townhouse living room with his spiteful litter box tendencies after all of this renovation madness.
Plus, nothing ruins a well-decorated room quicker than a dirty bathroom box. Many of you were asking about our Litter Robot after we shared it on our Instagram stories a little while ago. So here’s our quick summary. It is AMAZING.
We know that a few of you mentioned the price tag on it. And we can absolutely relate. But literally, we would pay any amount of money for it.
It’s the only box that our cats use without fail. Thomas is so freaking particular about having an immaculately clean space. If we don’t scoop every day or multiple times a day, he’ll spitefully go outside of the box. Let us just tell you that is our worst nightmare, especially after installing new floors with a far heftier price tag than a litter box.
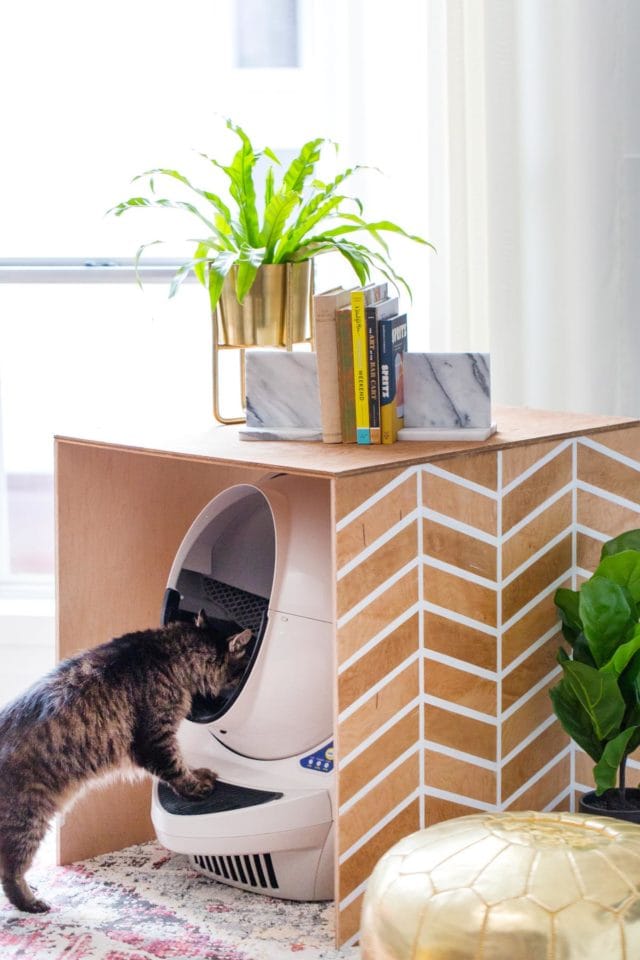
We haven’t had a single out-of-the-box issue since we got them. (We’ve been using 2 on different floors of the house). Since it’s our new best friend, we decided to dress it up with a Patterned DIY Litter Box Cover that fits our design style.
Materials and Tools Needed
- Plywood: Cut down to one piece that’s 29″ x 26″and two pieces that are 29″ x 29″. Most hardware stores will cut this down for you for free!
- Wood screws 1 1/2 inch long
- 4 metal “L” brackets
- Painter’s tape
- Foam brushes
- Wood stain — In any two colors of your choice
- Fine sandpaper
- Paint — In the accent color of your choice for the lines
- Ruler
- Drill
How to Make a Patterned DIY Litter Box Cover
1 — Prep the wood: Sand all edges and flat surfaces of each plywood piece until smooth. This helps the stain and paint go on evenly.
2 — Stain the top panel: Stain the 29″ × 26″ piece of plywood. This will be the top of your litter box cover. Choose a solid color or wood-tone stain for a polished finish.
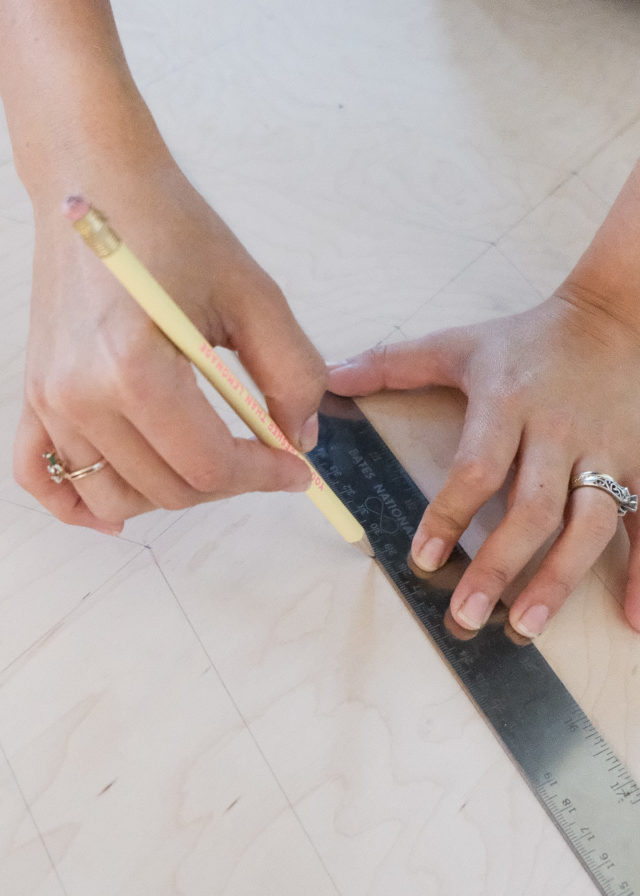
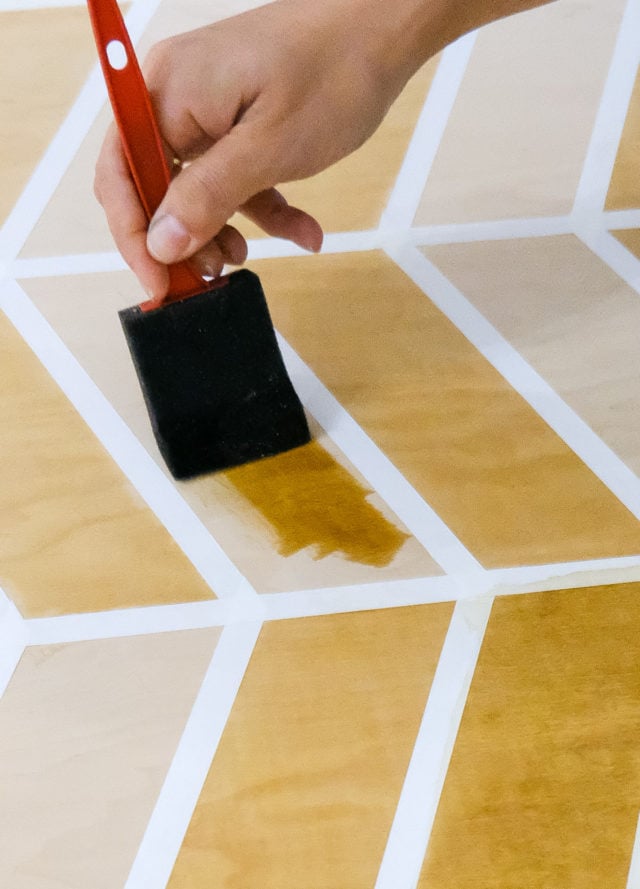
3 — Create the side patterns: For the two 29″ x 29″ side panels, use a pencil and ruler to draw your desired pattern. Tape off the lines to define your design.
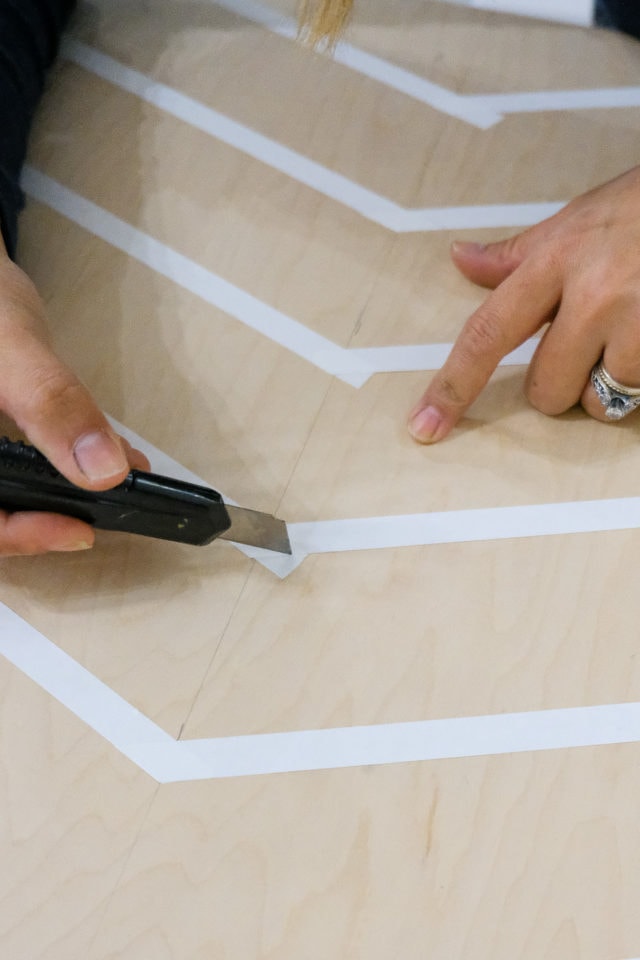
Using a dry foam brush, lightly apply alternating stain colors. Use a different brush for each color and apply thin coats to prevent bleeding. Allow to dry completely.
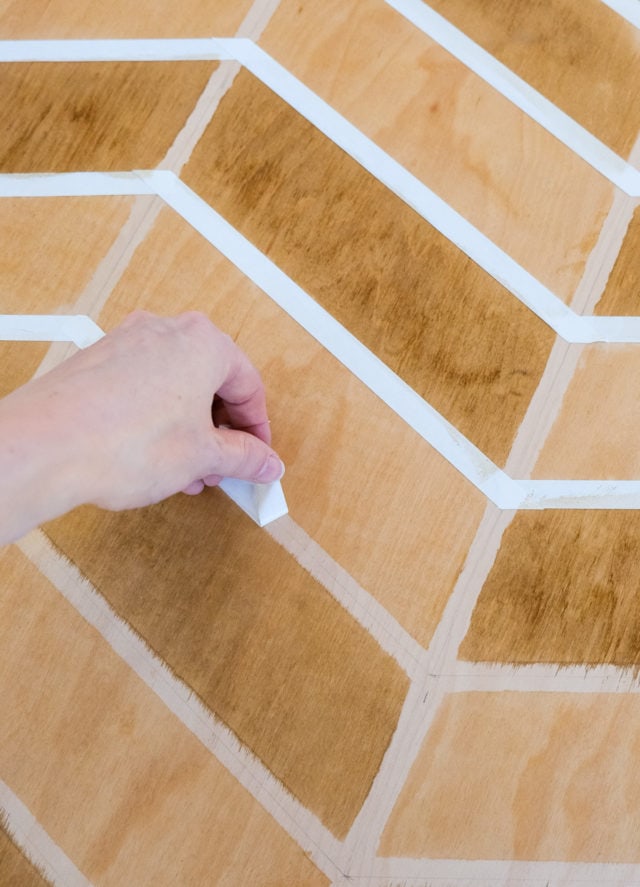
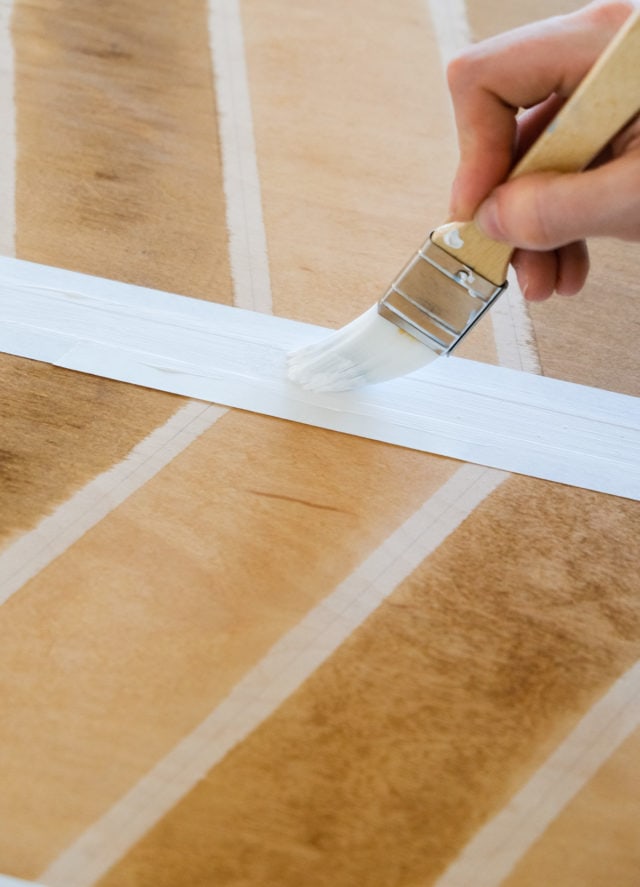
4 — Add accent Lines: Once the stain is dry, remove the painter’s tape and retape the opposite edges.
Paint your accent color (we used white for a clean, modern look). Apply multiple thin coats for a solid line finish.
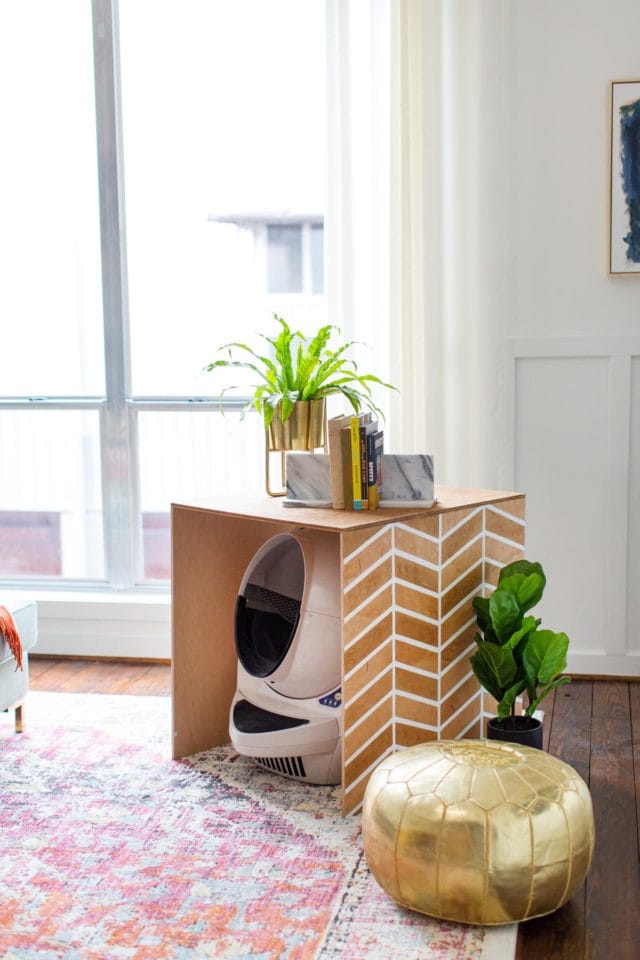
5 — Assemble the box: Using your L-brackets and wood screws, attach the side panels to the top piece. Drill the brackets on the inside corners for a seamless, polished look.
More Gifts for Pets
Now here’s to hoping Thomas keeps his spiteful habits at bay! So far, so good and we couldn’t be more thankful! Do you all have any litter box tips and tricks that you live by? For more pet related posts, check our a few of our favorites from the archives —
- Paw-some Gifts for Dog Owners
- The Ultimate Guide to Choosing the Perfect Pet Gifts
- DIY Cat Trinket Dish
- Inspiring Ikea Kallax Hacks for Every Room including a hack to add cat cubes.
Patterned DIY Litter Box Cover
Equipment
- Drill
- Ruler
- Pencil
- Foam brush
- Fine sandpaper
Materials
- 1 29" x 26" plywood
- 2 29" x 29" plywood
- 4 metal "L" brackets
- 16 wood screw 1 1/2" long
- 2 wood stain any color
- Paint any accent color of your choice for the lines
Instructions
- Sand all edges and flat surfaces of each plywood piece until smooth.
- Stain the 29" × 26" piece of plywood. This will be the top of your litter box.
- For the two 29" x 29" side panels, draw your desired pattern. Tape off the lines to define your design. Using a dry foam brush, lightly apply alternating stain colors. Use a different brush for each color and apply thin coats to prevent bleeding. Allow to dry completely.
- Once the stain is dry, remove the painter’s tape and retape the opposite edges. Paint your accent color (we used white for a clean, modern look). Apply multiple thin coats for a solid line finish.
- Using your L-brackets and wood screws, attach the side panels to the top piece. Drill the brackets on the inside corners for a seamless, polished look.

Affordable Wall Art: 54 Stylish Prints Under $200
Looking for affordable wall art that still makes a big…
Continue Reading Affordable Wall Art: 54 Stylish Prints Under $200
Easy IKEA Billy Hacks Anyone Can DIY at Home
Get inspired by clever IKEA Billy hacks for living rooms,…
Continue Reading Easy IKEA Billy Hacks Anyone Can DIY at Home
43 Top Amazon Wall Decor Ideas for Every Room in Your Home
Find gorgeous Amazon wall decor that makes a big impact…
Continue Reading 43 Top Amazon Wall Decor Ideas for Every Room in Your Home
28 Decorative Wall Mirrors You’ll Wish You Bought Sooner
Looking for the perfect wall mirror? Explore our roundup of…
Continue Reading 28 Decorative Wall Mirrors You’ll Wish You Bought Sooner
Please note that we may earn a commission for some of the above affiliate links. However, products featured are independently selected and personally well-loved by us!
I am soooo glad i came across your website! I was thinking of making one of these for our litter robot. Couple of questions before i attempt to build this …. What type of plywood did you use? Also, what was the thickness of the wood? Did you go to Lowes or Home Depot? I want to make sure i don’t look clueless when i walk into the store lol.
Hi! We just used regular pine plywood. Unfortunately, we don’t remember the thickness of the wood. The thicker the better though. We didn’t go as thick because we knew that the box would sit on a rug. But we recommended something thicker than 1/2″. Thomas, our cat passed away so we don’t have the box any more to measure. All of our cat belongings are now gone. :( We went to Lowes but honestly, Home Depot is just as similar! Both stores have helpful employees. Hope this helps!
Try to remember that your cat isn’t going to the toilet outside their litter box to spite you, even if it might feel like that. Their brains just don’t work like that.
Don’t worry! We know he’s not! Even though it feels like he is at the moment. :)
You’re welcome!
Is this the only type of cabinet that anyone can make for the litter robot? I’ll admit that the robot is an attractive litter box, I’d rather look at an attractive piece of furniture.
Hi Brenda! I’m pretty sure you can make anything around the liter box. Not sure about finding a furniture piece that’s already pre-made but it should be hard to construct one around the box like we did.
Thanks for the tip! This will be a great weekend project!
Good luck! Please share a photo when you’re done! We’d love to see how it turned out!
Is the cover you made sturdy? I am thinking of following your lead but I am concerned that plywood wouldn’t hold up.
Hi Susanna! Yes, it’s pretty sturdy because of the L brackets. Ours have held up without any issues. Keep in mind that we have ours on top of a rug. If you plan on placing it on a non-carpeted floor, you could add a base bottom to it. If you have any doubts, you could go with a thicker plywood to be safe too! Hope this helps!
You are one of the best sites Thank you for publishing this post
Thank you, Juhn! This made our day!
asdasd
That litter robot is so cool!! Gonna make this litter box cover for my cat. I’m thinking about decorating the litter box cover with some string lights :) Thank you for the tutorial!
It’s lovely. Thanks for sharing this post.
thank you! xo
I made a DIY cat house last year over our regular litter box. My babes refused to use it. Granted, they have an option to go outside so they can cheat, but the idea that there was something around their litter box was disbelieving. I think this robot would make matters even worse! At least someone is modern enough to understand simplicity is not always best. Super cute!
no kidding! it’s hard to make litter boxes appealing! haha