DIY Letter Green Foliage Sign
Create a beautiful DIY Green Foliage Sign with this easy step-by-step tutorial. Learn how to make a custom wire word wall decor using faux greenery. Perfect for home decor, parties, or bar styling.

Looking for a simple way to elevate your home decor? This DIY Green Foliage Sign is an easy and affordable project that adds a fresh, modern touch to any space. Whether you’re decorating a bar area, kitchen, or party setup, this foliage wall sign DIY is a creative way to bring greenery indoors.
During this time of year I, Amaryllis, always want to be outside. And if the weather doesn’t allow it, I like to bring some spring spirit into the house by adding flowers, moving planters… and basically just adding green anywhere! This project is beginner-friendly and completely customizable. choose any word, phrase, or quote to match your style.
Why You’ll Love This DIY Foliage Sign
- Adds natural greenery without maintenance
- Perfect for home decor, parties, or entertaining spaces
- Fully customizable with your favorite word or phrase
- Budget-friendly and beginner-friendly
Supplies You’ll Need
To make your own DIY greenery wall decor sign, gather the following:
- 14-gauge steel wire
- Faux greenery: Lightweight faux foliage works best for shaping around letters. You can use real plants, but faux greenery is recommended for durability and low maintenance. We used a vine garland similar to this.
- Leaves and flowers (optional): Choose high-quality faux leaves for a realistic look.
- Thin wire: Jewelry wire will work fine to connect the letters.
- Hot glue gun and glue sticks
- Scissors
- Pliers
- Wire cutters
- Paper
- Sharpie

Step-by-Step: How to Make a DIY Green Foliage Sign
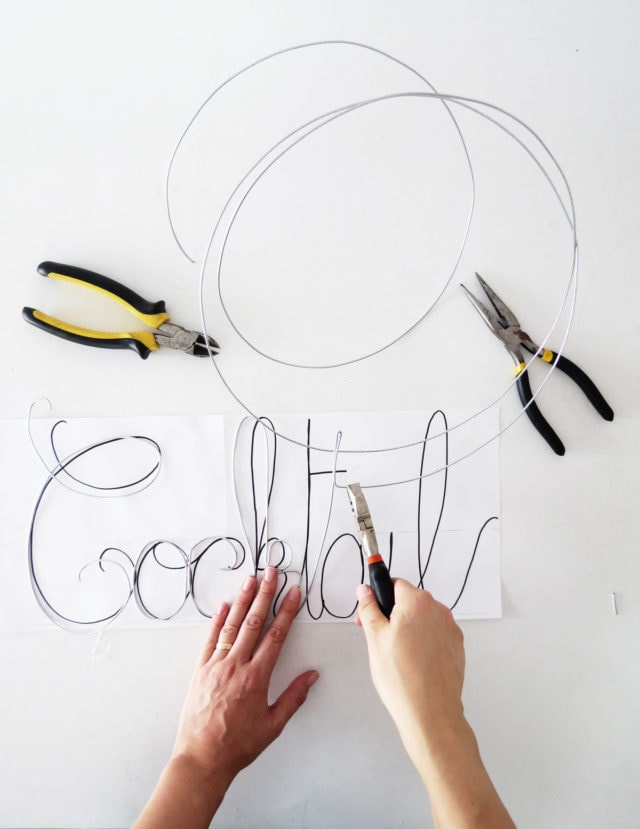
1 — Choose and Sketch Your Word
Write your desired word or phrase on paper using a marker. Short cursive words are easiest to shape and look the cleanest. For best results:
- Use cursive fonts for smoother wire bending.
- Keep spacing consistent.

2 — Shape the Wire Letters
Cut a long piece of wire and begin bending it along your sketch. (About 4 feet of wire works for a word like “cocktail”.)
- Use your hands for simple curves.
- Use pliers for tighter bends.
- Keep letters connected in one continuous piece.
- Wear gloves when bending wire.
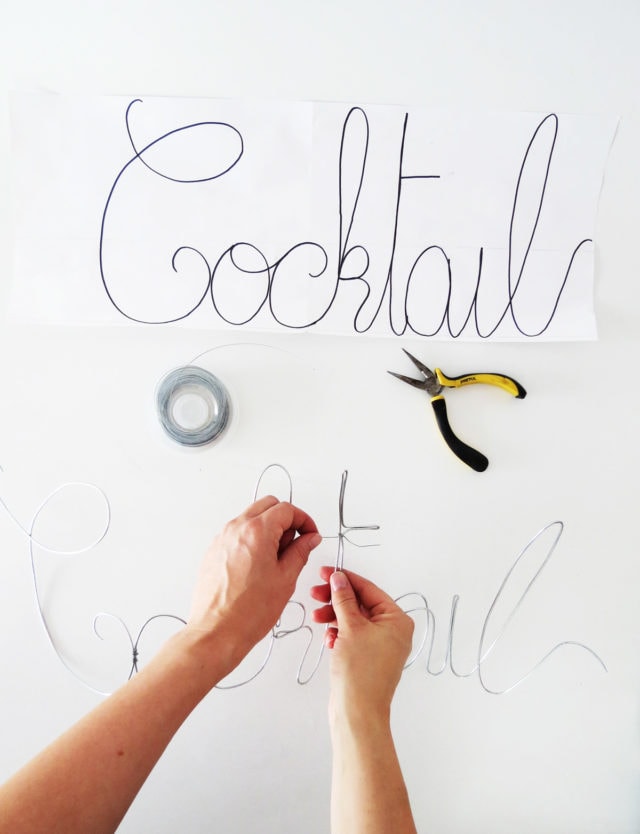
3 — Reinforce the Structure
To keep your DIY wire word sign sturdy:
- Ensure the word lays flat. So once your word is created, you may have to tie some layers of wire together.
- Add small loops where letters connect.
- Use thin wire to secure intersections. For example: attach the letter L at the base of the loop.
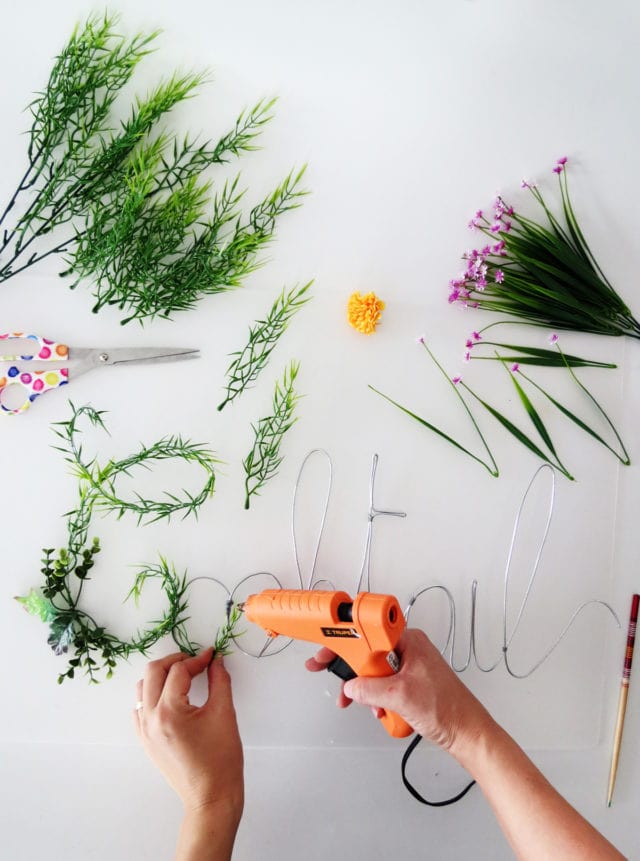
4 — Attach the Greenery
Now for the fun part, turning it into a foliage sign DIY. Take your time. This step creates the final polished look:
- Cut faux greenery into small pieces.
- Hot glue along the wire letters.
- Layer leaves to fully cover the wire.
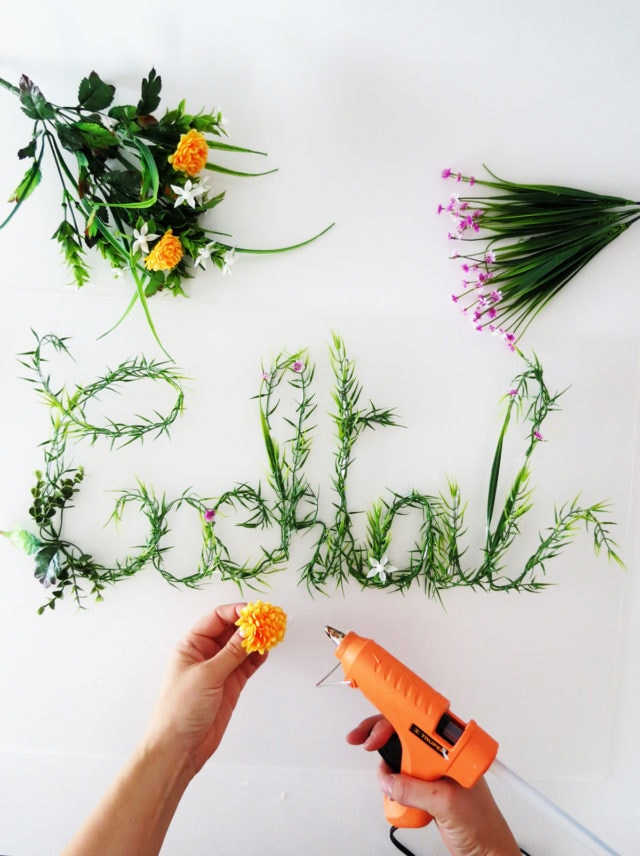
5 — Add Decorative Touches
Enhance your DIY plant wall sign with:
- Small flowers for color
- Extra leaves for fullness
- Seasonal accents (optional)
6 — Hang Your Foliage Sign
Use clear push pins or hooks to mount your sign on the wall. Perfect placement ideas:
Styling Ideas for Your DIY Greenery Sign
This type of decor works in any room and instantly adds a fresh, lively feel. Make your DIY foliage wall sign unique by trying:
- Words like Gather, Cheers, or Welcome
- Seasonal phrases (Spring, Bloom, Celebrate)
- Minimalist all-green designs or colorful floral accents
More DIY Decor Ideas You’ll Love
- DIY Floral Punch Bowl Wreath
- How to Use Dry Ice in Cocktails
- DIY Floral Embroidery Ring Backdrop
- Creative Mimosa Bar Ideas for a Refreshing Celebration


DIY Green Foliage Sign
Equipment
- Hot glue gun and glue sticks
- Scissors
- Pliers
- Wire cutters
- Marker
Materials
- 14-gauge steel wire
- Paper
- Faux greenery
- Faux leaves optional
- Faux flowers optional
Instructions
- Write your desired word or phrase on paper using a marker. Keep spacing consistent
- Cut a long piece of wire and begin bending it along your sketch. Keep letters connected in one continuous piece.
- Reinforce the structure and ensure the word lays flat. Add small loops where letters connect. Use thin wire to secure intersections.
- Cut faux greenery into small pieces and hot glue along the wire letters. Layer leaves to fully cover the wire.
- Fill gaps with leaves and add optional flowers for extra detail.
Notes
- How long does it take to make a DIY foliage sign? About 1–2 hours depending on word length and detail.
- Can I use real plants? Faux greenery is recommended for durability and low maintenance.
- What words work best? Short cursive words are easiest to shape and look the cleanest.


Please note that we may earn a commission for some of the above affiliate links. However, products featured are independently selected and personally well-loved by us!
I tried making a foliage sign like this last spring, and it really did brighten up my living room—choosing a short quote made it feel more personal. As someone new to DIY decor, I love how simple it is to customize.
This is incredible. I need to do this for my next cocktail party. Your blog is truly inspiring. There is so much creativity in everything you do.
http://www.livingfromjtoz.com
Hi, i would love to make this! is there a way you can post the direct link to the foliage that you used? I’m having a hard time finding that grass you used.
Hi Carrie! I think it was most similar to this fake foliage. I hope that helps!
This is so cute! I want to try to make this for my patio area.
Yes, that’s such a cute idea! :)
Clever and pretty! How long did it take you to make and how long did your greenery last?
Hi Joann! Time depends on your DIY experience, but I believe a couple of hours! The greenery should stay green for at least a few days as well. Perfect for a special event!
So classy! What a beautiful project!
http://www.windlasse.com
So glad you like the project!