DIY Mini Patterned Side Table
Who wouldn’t want a cute DIY mini patterned side table to add to their living room decor? I, Teri, definitely do! You may glance at this project and be filled with dread at the thought of power tools galore.
I can assure you it’s easier than it looks, Plus, it’s totally power tool free for all you girly girls out there, just like me.

Different Uses For The Side Table
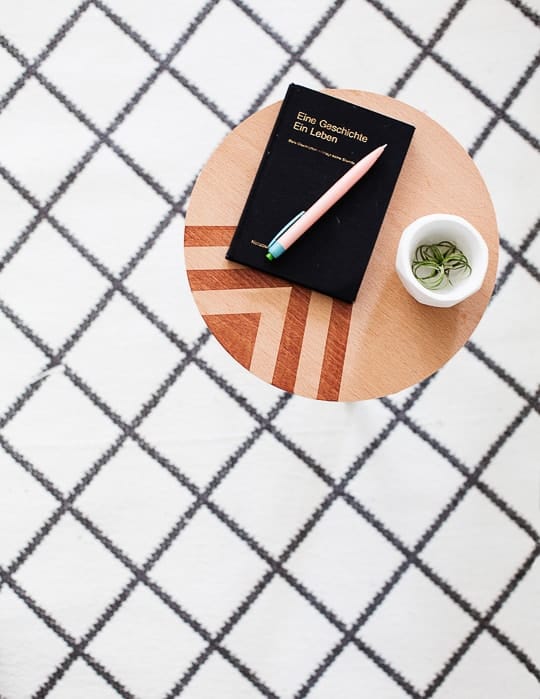
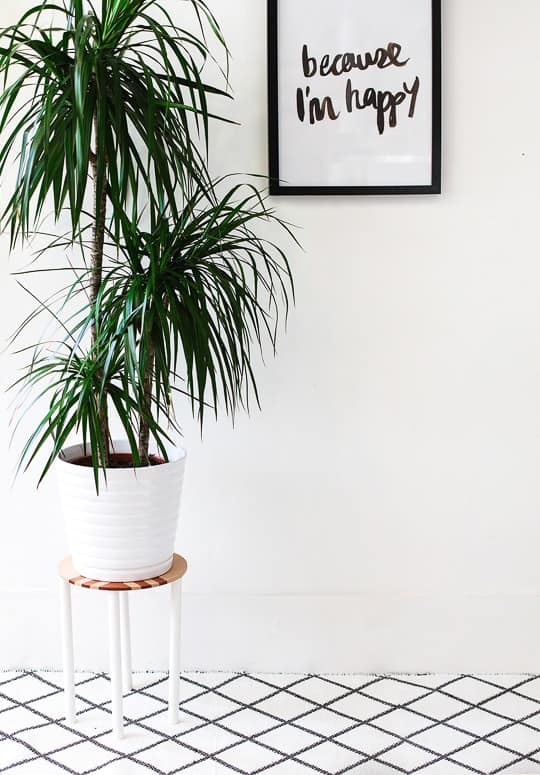
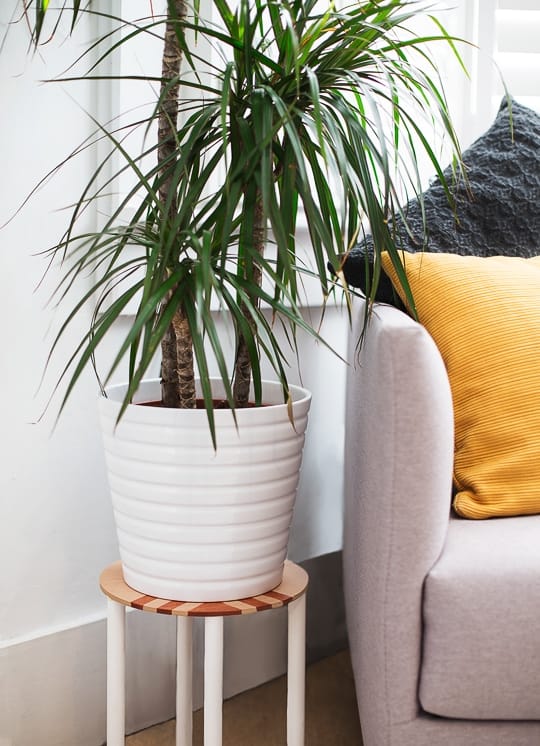
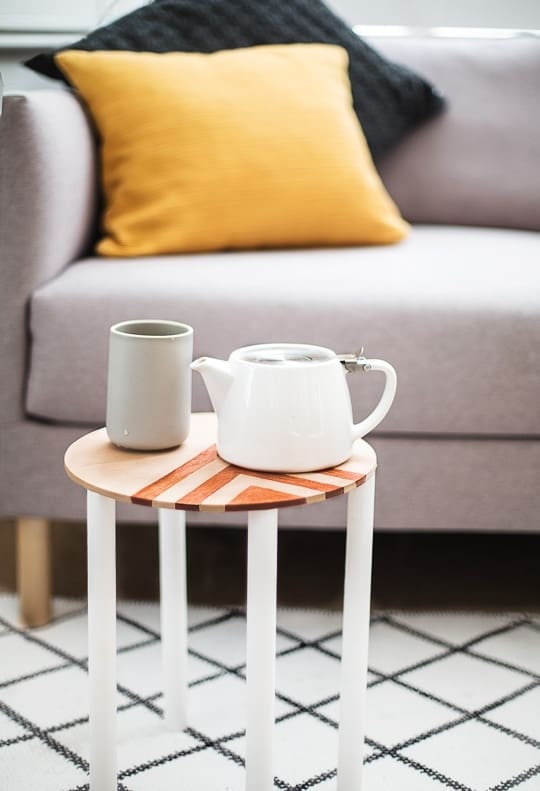
This DIY Mini Patterned Side Table can double duty to be able to perch your snacks and drinks while you chill out on the sofa. Or alternatively, use it as a stylish pot plant stand to raise up your greenery.
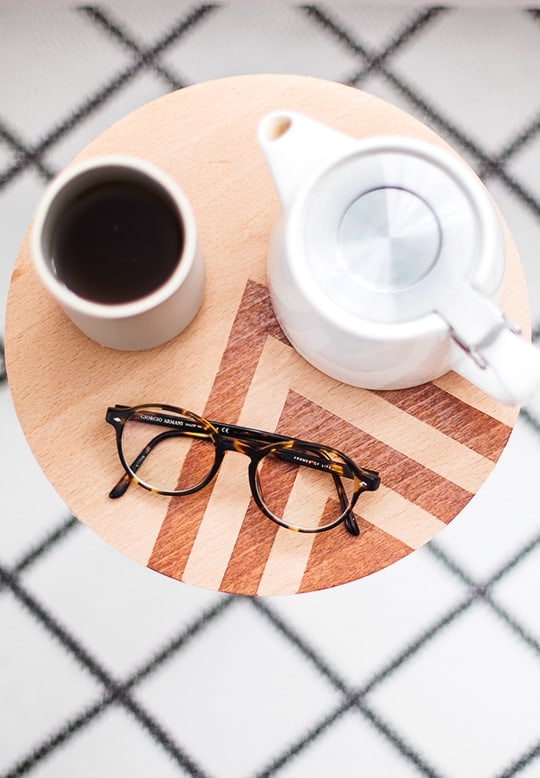
The mid century style varnished pattern gives this little table added personality. You can pick the varnish shade to match your home decor.
Gone are my days of balancing drinks on the floor whilst reading on the sofa, with frequent catastrophic consequences. Okay. Maybe I’ll still have those every now and then..
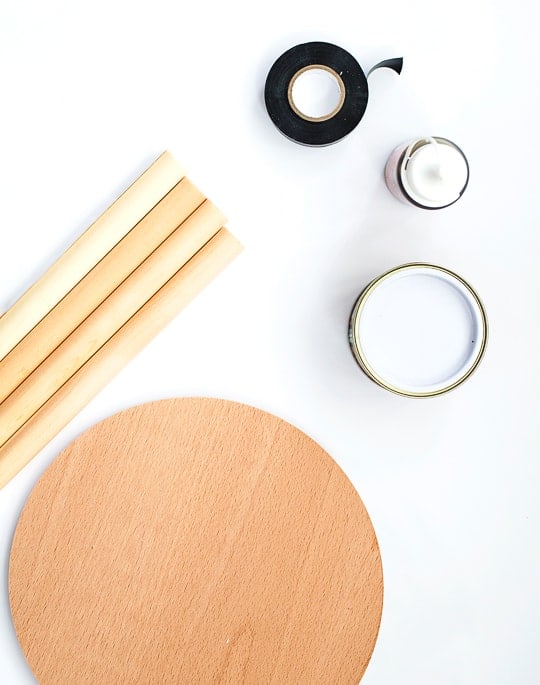
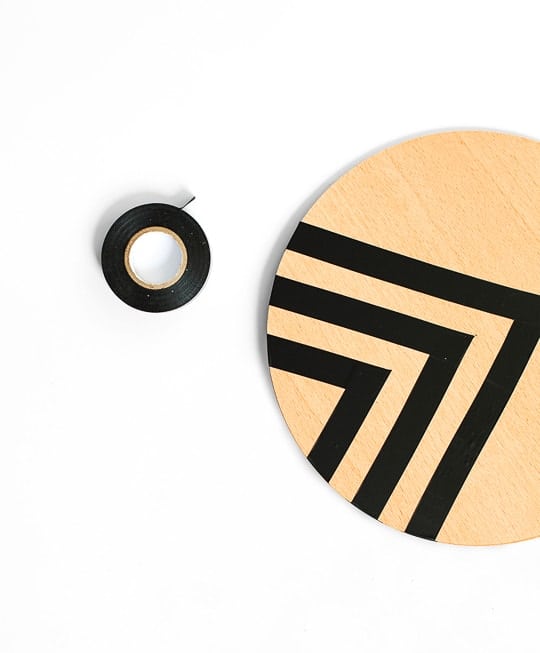
sandpaper
varnish in colour of your choice
old cloth
duct / wire tape
scissors, 4 x 12” wooden dowel rods
white wood paint
strong wood glue
tape measure
ruler
pencil
How To Make The DIY Mini Patterned Side Table
Start by sanding down any rough edges on the wood, whether that’s around the edges or on the main surface of both the disc and the legs.
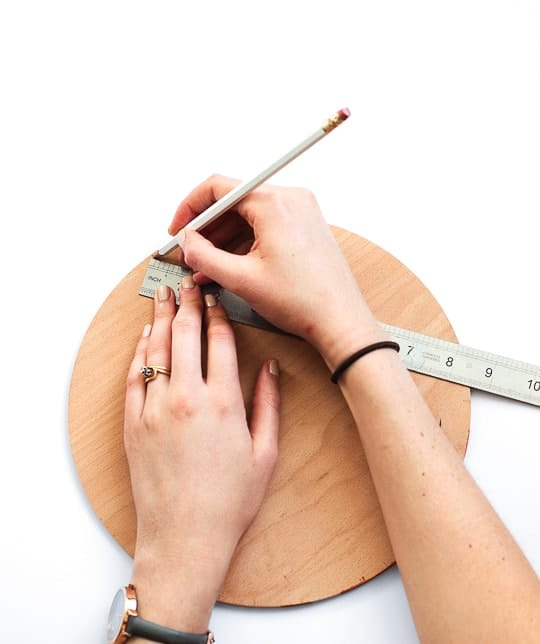
Measure the half way point on the MDF disc with your ruler and pencil. Then, measure about an inch above this point to get the arrow head of the pattern. Lastly, Measure down to find the corresponding halfway point along the bottom edge.
Use your tape measure to measure out 4 inches either side of the point along the bottom and mark. You now have the triangle shape in pencilled points!
Creating the Side Table Pattern
Duct/wire tape between these points to create the triangle shape and smooth down so its flush against the wood. Then, you can work your way inside the shape with two more tape triangles, leaving a gap roughly the same width as the tape between each. You can measure that if you feel it’s safer, but it’s relatively easy to do it by eye.
The Side Table Varnish
Once you have worked your way to the smallest tape triangle, you can get varnishing. Pour a small amount on the cloth, and rub gently into the gaps between the tape.
Don’t over saturate the wood otherwise it may bleed. Better to do two thinner coats to get the colour you want rather than one heavy coat. Leave to dry.
The Side Table Legs
In the mean time, you can get to work painting the table legs. Do one thin coat on each, leave to dry and then add another for good coverage. Make sure these are totally dry before moving on or things could get messy!
Once dry peel the tape away to reveal your varnished pattern on the wood disc. Turn it over and measure the central point once again.
Use the tape measure to measure the circumference and divide that number by 4. Mark these points for the legs to make sure they’re evenly spread.
Check that the first point (your front leg) corresponds with the centre of the smallest triangle on the other side. This will make it look neater.
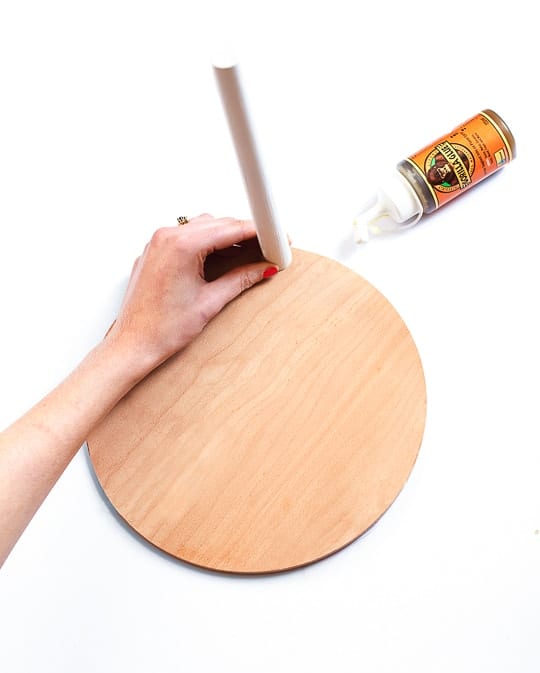
Lie the wood disc on the table (wrong side up) and use the wood glue to stick each leg down in turn. You don’t want to be too generous with the glue otherwise you could find it creeping out the edge.
Hold the leg down for a few minutes, until it’s becoming tacky and then prop anything like a book, bottle, etc against it to keep it straight as it dries. Do this with all four legs and leave to dry, preferably over night.
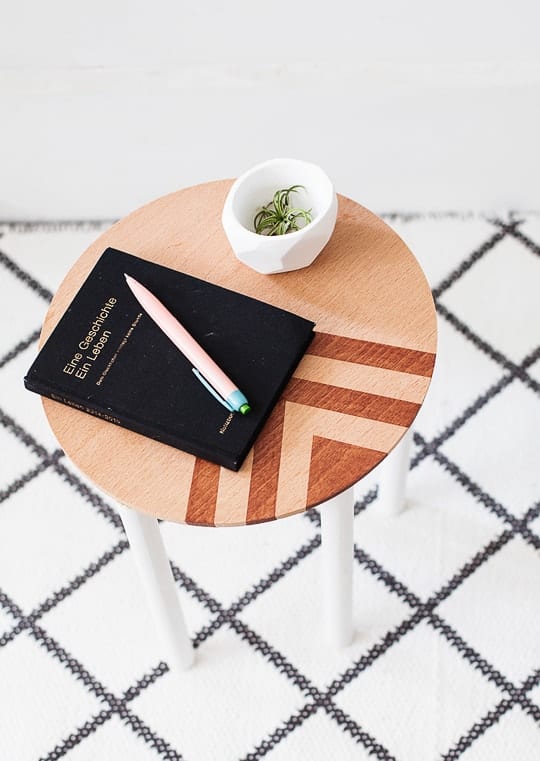
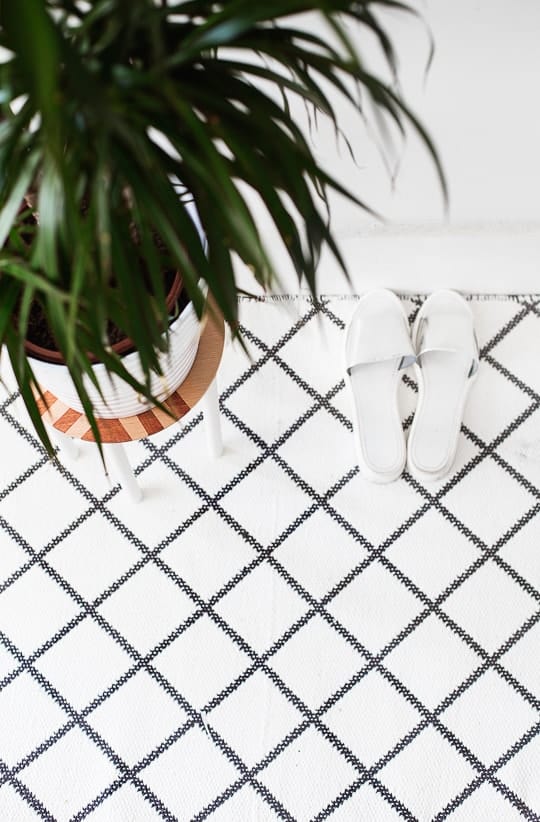
Now your mini side table is good to go! Flip over and start putting it to use. You could even make a few in varying heights to create a cluster of tables or plant pot display.
Who knew making a tablecould be so simple?! If you need me, I’ll be lounging on my sofa, sipping tea from my new table and dreaming up new DIY projects.
 Teri is a designer, illustrator, stylist, crafter. Originally trained in print and surface pattern design, she has since had five years experience designing in-house for a greetings card company, and now creates The Lovely Drawer full-time from her little London flat.
Please note that we may earn a commission for some of the above affiliate links. However, products featured are independently selected and personally well-loved by us!
Thanks for sharing this amazing but simple tip on making different patterned side tables. I love the colors and size and your selection of burnish based on living room colors.Side tables are representatives for individuals personality for the guest and this is very essential and useful parts beside sofa and in the bedroom beside just bed for keeping snacks and papers. It would be used at the corner of the room for holding beautiful pot tree plant.I work with bingorella promo codes as advisor you could check over here for discovering information, recommendation, inspiration-you could for the people who loves to have most effective tips to win.. Thanks for sharing wonderful ideas for enhancing living room decor and I will try to make it soon
Such a great idea – looks super simple!
Looks fantastic! What a stylin’ accent. I must do!
LOVE IT!