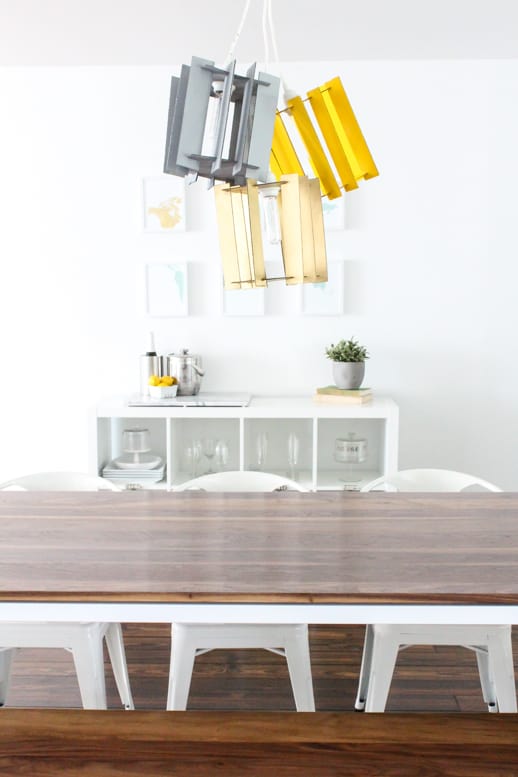
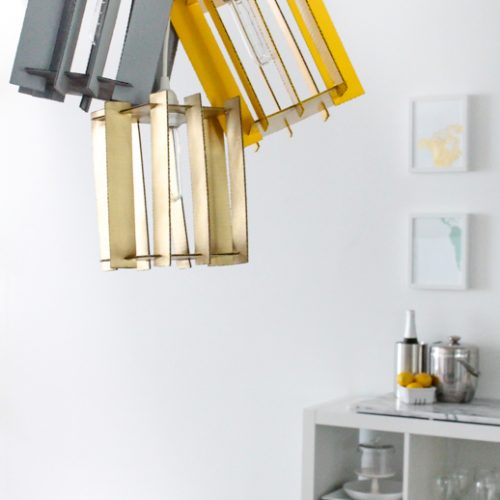
DIY Recycled Cardboard Pendant Light
Brighten up your space on a budget with this eco-friendly DIY Recycled Cardboard Pendant Lights tutorial. Learn how to transform a simple cardboard box into a stylish pendant light using just a few basic tools and a light kit.
If you love eco-friendly projects and budget-friendly décor, this DIY Cardboard Pendant Light is the perfect weekend craft. Not only does it give new life to materials you probably already have lying around, but it also creates a modern, stylish piece of lighting that looks far more expensive than it actually is. It’s a great way to bring personality and sustainability into your home without spending a fortune.
This project was originally inspired by an Ikea DIY event themed “recycle, reuse, recraft,” and it checks all the boxes. The design is simple enough for beginners to tackle, but still has an eye-catching, geometric shape that feels unique. With just a cardboard box, a pendant light kit, and some optional spray paint, you can transform scraps into a statement piece.
Top it off with an Edison-style bulb for that warm, vintage glow, and you’ve got yourself a pendant light that’s as eco-friendly as it is stylish. Whether you’re sprucing up a kids’ room, a home office, or just experimenting with sustainable DIY, this project is a fun way to flex your creativity while keeping things green.
Materials Needed
- Cardboard box or cardboard sheet: Medium sized
- Pendant light kit: Ours is an IKEA light and cord set.
- 25-watt light bulb (max wattage for safety)
- Paper cutter: Or scissors or X-ACTO knife
- Ruler
- Pencil
- Spray paint: Optional
- Electrical tape: Optional
How to Make a DIY Cardboard Pendant Light
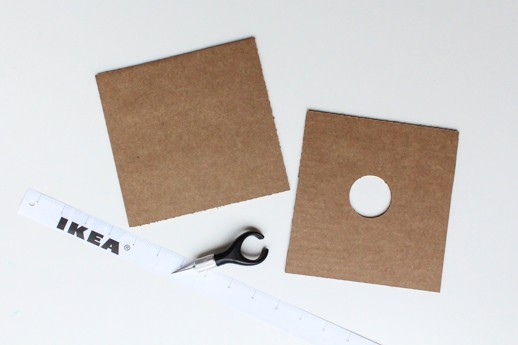
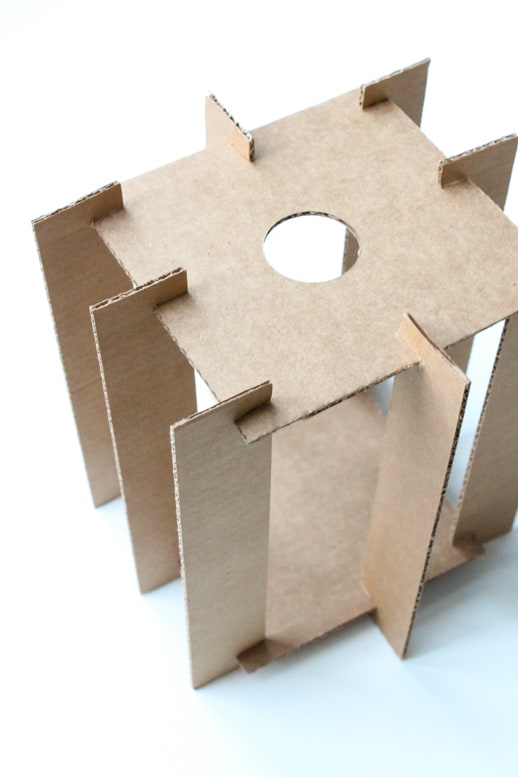
1 — Cut the top and bottom panels:
Start by cutting two 6″ x 6″ cardboard squares. In the center of each square, cut a circle about 1.5″ wide. An X-ACTO knife makes this easier, but you can also cut an “X” in the middle and punch the light cord through. These will form the top and bottom of your pendant.
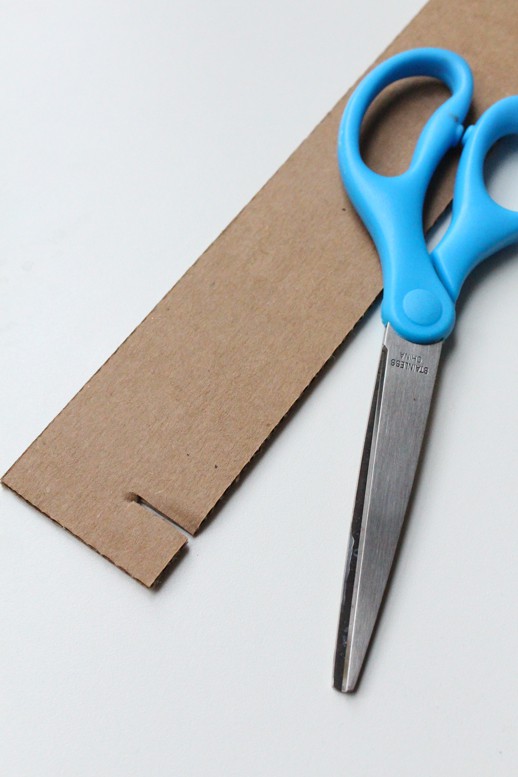
2 — Make the side panels:
Cut 8 strips of cardboard, each measuring 1 3/4″ x 9 1/2″. On each strip, measure 3/4″ from both the top and bottom edges. Then, cut a thin slit about 1/2″ long. These slits are where your strips will slot into the top and bottom panels. Use the first strip as a template so they’re all identical
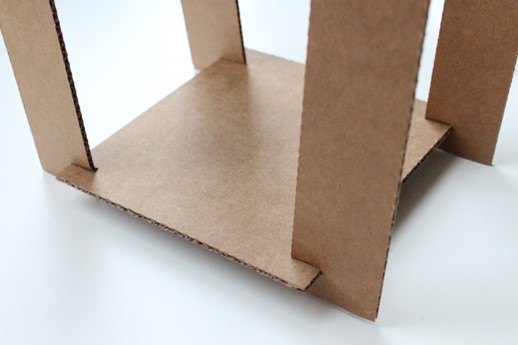
3 — Assemble the frame:
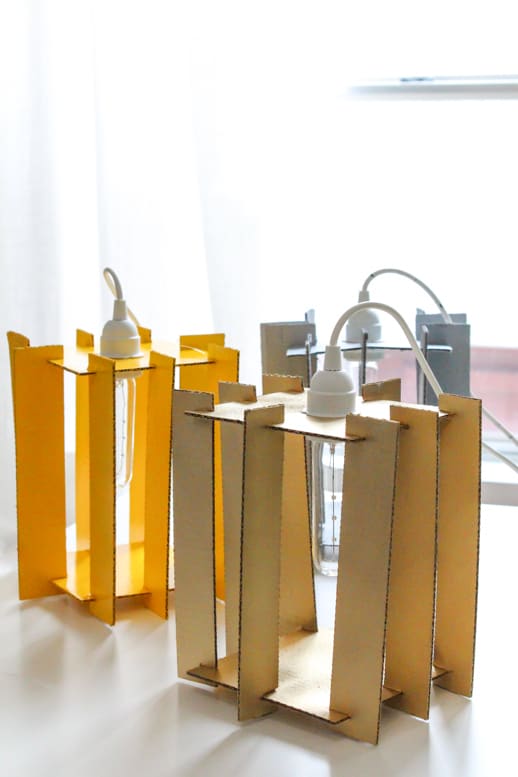
Lay one square panel flat on your table. Insert the strips into each side, sliding them into the slits you cut. Then, carefully place the second square on top and fit the strips into its slits as well. You should now have a lantern-like cube with vertical cardboard sides.
4 — (Optional) Customize :
Spray paint the exterior for a polished look. Metallics like gold or copper give it a chic vibe. You can also wrap the edges of the light cord with electrical tape for extra durability and contrast.
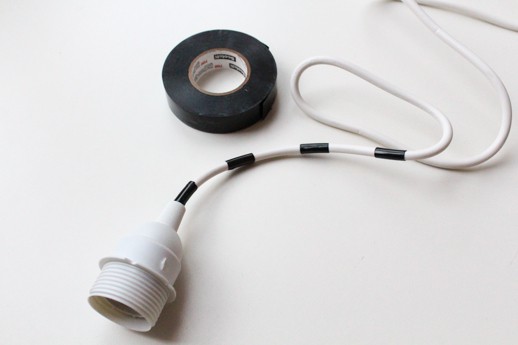
5 — Insert the light kit:
Thread your light cord through the hole in the top panel, pulling it through until the socket sits snugly. Secure it by threading the safety loop on the other side.This will keep the pendant in place and will be strong enough to hang from. Make sure you use a 25-watt bulb or lower to avoid overheating the cardboard.
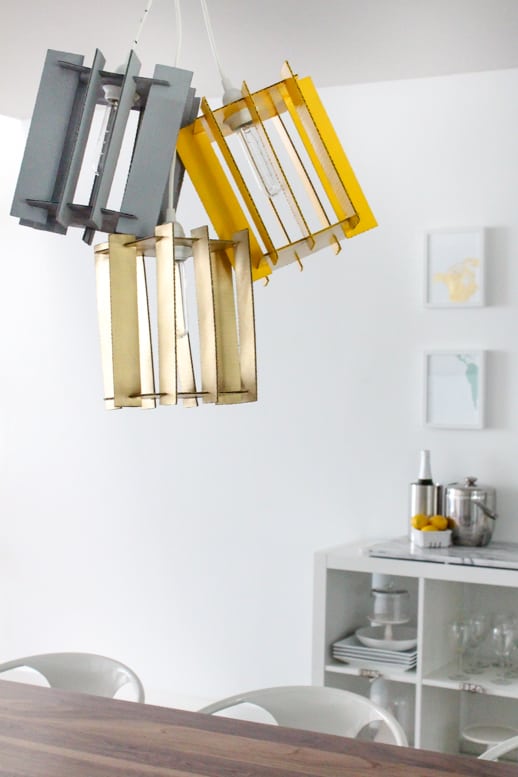
6 — Hang and enjoy:
Attach the pendant to your ceiling following your light kit’s instructions, add your bulb, and switch it on. You’ll have a modern, eco-friendly pendant lamp made almost entirely from recycled cardboard!
Tutorial Notes and Tips
- Safety first: Always use a low-wattage bulb (25W max) to prevent overheating.
- Paint smart: You can also spray paint before assembly.
- Extra support: Add a dab of hot glue to each slit for a sturdier frame.
- Style Options: Metallic spray paint gives a chic look, while bold colors make it playful for kids’ rooms.
- Eco bonus: Use double-wall cardboard for a stronger lamp that lasts longer.
DIY Cardboard Pendant Light
Equipment
- X-Acto knife or scissors
- Ruler
Materials
- 1 cardboard box or cardboard sheet
- 1 pendant light kit
- 1 light bulb 25-watt
- Spray paint optional
- Electrical tape optional
Instructions
- Cut the top and bottom panels: Start by cutting two 6" x 6" cardboard squares. In the center of each square, cut a circle about 1.5" wide.
- Make the side panels: Cut eight strips of cardboard, each measuring 1 3/4" x 9 1/2". On each strip, measure 3/4" from both the top and bottom edges, then cut a thin slit about 1/2" long. These slits are where your strips will slot into the top and bottom panels. Use the first strip as a template so they’re all identical.
- Assemble the frame: Lay one square panel flat on your table. Insert the strips into each side, sliding them into the slits you cut. Then, carefully place the second square on top and fit the strips into its slits as well. You should now have a lantern-like cube with vertical cardboard sides.
- Customize: Spray paint the exterior for a polished look. You can also wrap the edges with electrical tape for extra durability and contrast.
- Insert the light kit: Thread your light cord through the hole in the top panel, pulling it through until the socket sits snugly.
- Hang: Attach the pendant to your ceiling following your light kit’s instructions, add your bulb, and switch it on.

Please note that we may earn a commission for some of the above affiliate links. However, products featured are independently selected and personally well-loved by us!
This is intresting, thanks for sharing this precious information with us.
You’re welcome, Kimmy!
awesome! we are really into light fixtures right now–and these are fabulous!
I get so jealous of you sometimes, your talent is crazy
These are so cool! I can’t believe something so cute came from cardboard!
xo Becky
Seductive Mania
Look at you miss clever, those are fantastic!
How cool- they’re totally transformed into something chic! Fun!
This gives a whole new meaning to recycling– I love it!
Definitely funky, but i like them! Can’t believe it’s cardboard