DIY Monogrammed Ornament Gift Tags
Learn how to repurpose an ornament into a DIY Monogrammed Ornament Gift Tag, a simple, creative Christmas gifting idea that doubles as a keepsake.

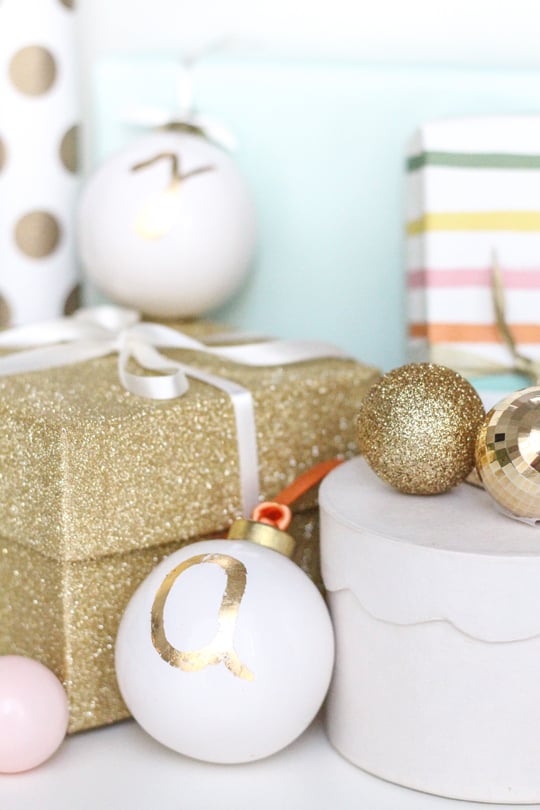
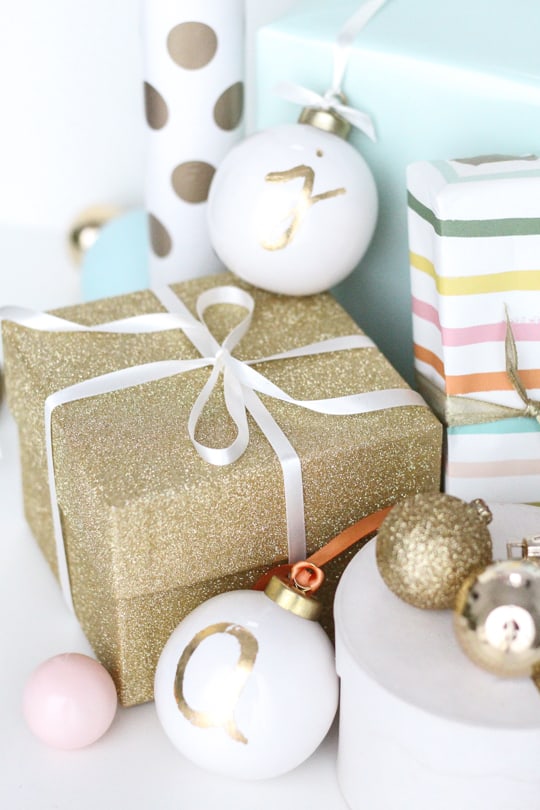
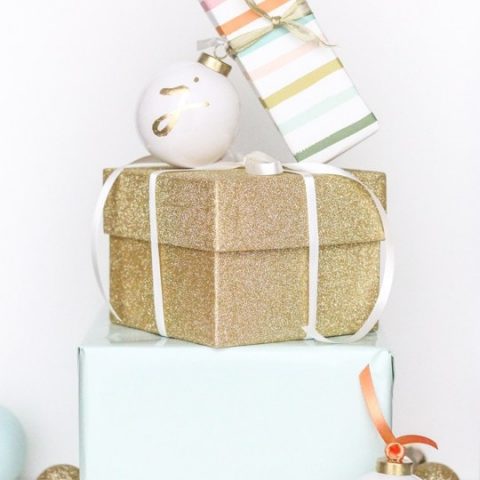
Beautiful gifts deserve beautiful presentation. There’s just something magical about gold accents and festive details, especially when they’re as charming as this DIY Monogrammed Ornament Gift Tag idea.
This creative gift wrapping idea strikes the perfect balance between cute, personal, and totally normal. By repurposing simple ornaments, you can create custom Christmas gift tags that double as ornaments your recipient can enjoy year after year.
Materials & Tools You’ll Need
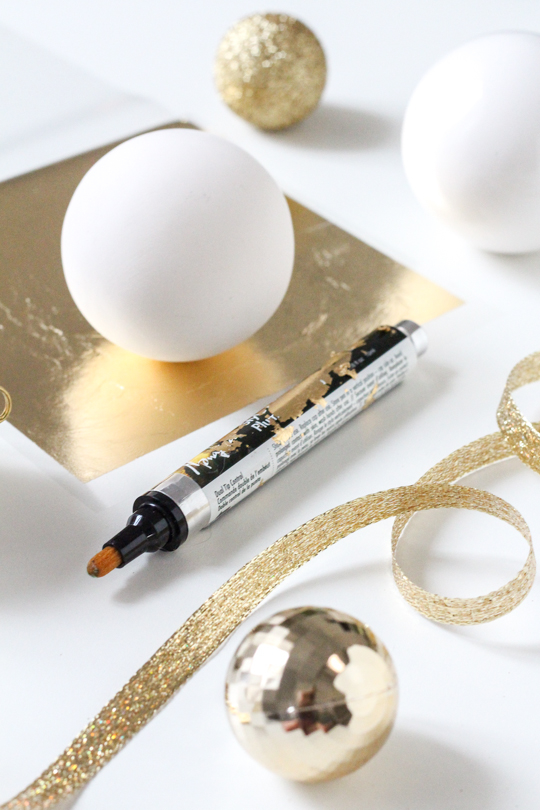
- Plain ornament: Any smooth, simple ornament will work. (We found ours for $1.99 at Hobby Lobby, but you can easily source similar styles online.)
- Gold leaf sheet: For that luxe, holiday shine. Handle gold leaf carefully: It’s delicate so use clean, dry hands and avoid drafts.
- Gold leaf adhesive pen: This makes drawing letters and monograms super easy.
- Ribbon: For attaching your custom ornament to each gift.
How to Make DIY Monogrammed Ornament Gift Tags
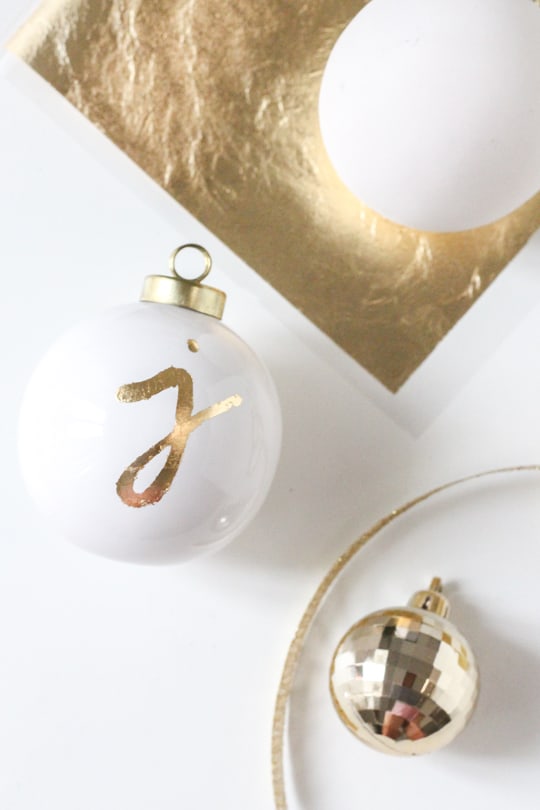
1 –- Write your monogram: Use the gold leaf adhesive pen to draw a letter, name, or short message directly onto the ornament. Let the adhesive dry for about 5 minutes, or until it becomes tacky.
2 — Apply the gold leaf: Gently lay a sheet of gold leaf over the adhesive. Press and rub lightly with your fingers to help it adhere to the design.
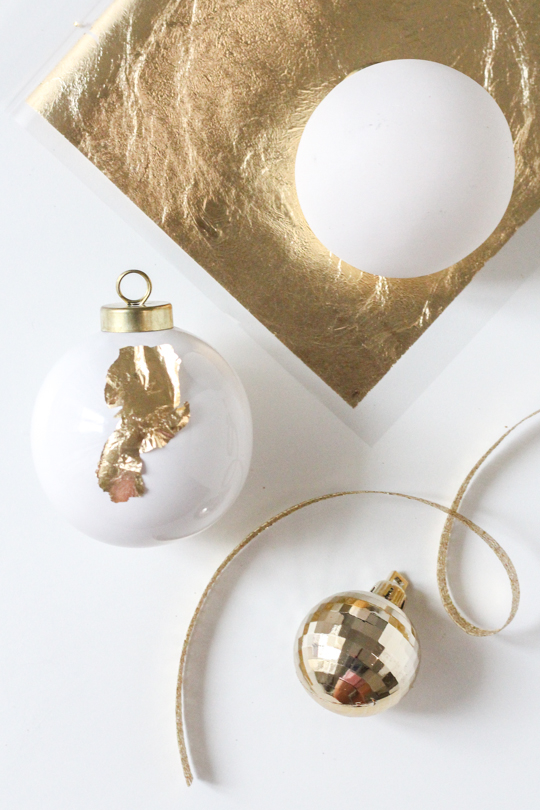
3 — Reveal the design: Carefully lift the gold leaf sheet away. Use a soft brush or your fingertip to dust off any excess leafing, revealing your shiny monogram.
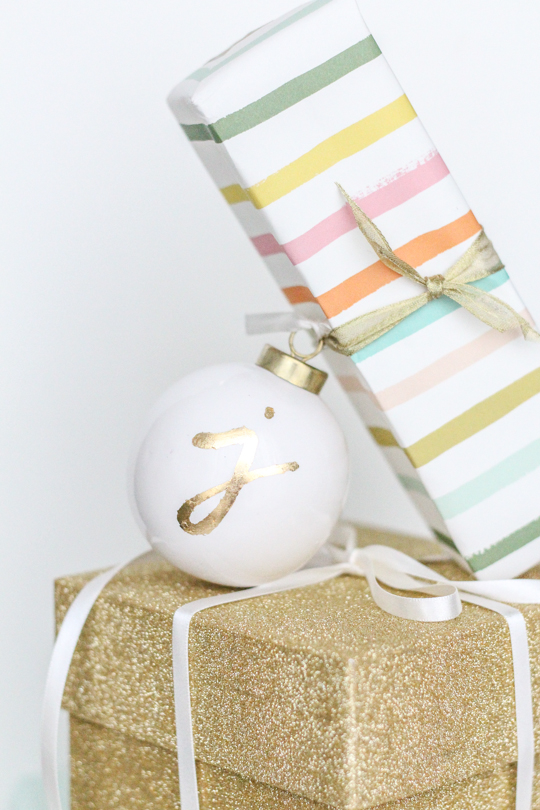
4 — Add ribbon and attach to gifts: Thread a piece of ribbon through the ornament’s loop and tie it onto your wrapped gift. Instant charm! You now have a personalized Christmas gift tag that doubles as a keepsake ornament.
Tutorial Notes & Tips
- Practice first: If you’re new to gold leaf, practice writing letters on paper to get a feel for the adhesive pen.
- Let the adhesive get tacky: Applying gold leaf too early may cause smudging; waiting the full drying time makes a huge difference.
- Custom ribbon lengths: Longer ribbon adds a more dramatic, decorative look, while shorter lengths keep it simple and functional.
- Add greenery: Pair the ornament with a sprig of cedar or eucalyptus for an elevated, natural touch.
More Gift Tag Ideas
For more DIY monogram ornament ideas, you might want to check out our related posts below –
- Free Printable DIY Accordion Gift Tags
- DIY Wood Veneer Confetti & Gift Tag Flags
- Christmas Cocktail Ornaments
DIY Monogrammed Ornament Gift Tags
Equipment
- Gold leaf adhesive pen
Materials
- 1 ornament
- 1 gold leaf sheet
- Ribbon
Instructions
- Using the gold leaf adhesive pen, draw your initial, monogram, or a short holiday message onto the ornament. Allow the adhesive to dry for about for about 5 minutes, or until it becomes tacky but not wet.
- Lay a sheet of gold leaf over your design. Press gently with your fingers to help the gold leaf cling to the adhesive.
- Slowly peel the gold leaf sheet away. Use a soft brush or your fingertip to dust off any loose flakes.
- String a piece of ribbon through to tie it onto your gift, and you’re all set!
- Thread your favorite ribbon through the ornament’s top loop. Tie it onto your gift box or gift bag handle.

Don’t forget to share your ornament gift tags with us on Instagram using the hashtag #sugarandclothloves. We always love seeing all of your creations! Looking for more interior design inspiration? You can find them all of our home decor tutorials and ideas right here!


Please note that we may earn a commission for some of the above affiliate links. However, products featured are independently selected and personally well-loved by us!
i learned and done. 80% like you
XOXO
Thank you so much! I’m totally going to try this!
You’re welcome! Let us know how they turn out!
<3 thanks u very much <3
You’re welcome!
so cute :D I Love it very much
Yay! We’re glad that you do!
Beautiful and simple, Thanks
So glad you like the DIY! xo
I cannot wait to try this D.I.Y! thanks for sharing!
cettedame.com
Great idea! Where is the striped paper from?
I just bought gold leaf with no particular craft project in mind. but these are great! I got to get the adhesive pen now and I’ll be good to go :) cute idea!
Really want to make these for presents this year but can’t find any nice white baubles with gold tops in the UK (they only do silver in the shop near me)! May have to try it on clear glass baubles instead – although not sure it will look as good as yours.
Not even sweet as a gift tag .. also great idea for the tree!
thanks for sharing this with us :)
Where are those fabulous glitter boxes from???
Just want to say, I am new to your blog and am SO in love with it already. Simply beautiful. Keep it up :)
xx -b.
A gold leaf pen!! I never knew that existed! I’m absolutely going to do this. I’m crazy about saving beautiful wrapping as well. Sometimes it’s too good to let go of it :).
What a cute idea! I’ll have to try this!
-Becca
Ladyface Blog
Oh my gosh how cute is this?! I am so stealing this idea! Thanks girlie!!
Love! I’m totally going to try this!
This is such a great idea, I’ve been doing something similar with felt decorations, but this is so simple that I’ll definitely be giving this a go!
Claire @ theowlintheteacup.blogspot.co.uk
Beautiful! I think I will give this a try. Lovely blog!
Beautiful and simple, I love it!
These are adorable Ash! I love ’em. And I can agree that everyone needs a few gold disco balls in their life…Christmas or not. :)
Thank you so much for this DIY. It’s such a neat way to dress up a present, and the person gets two gifts in one! I can’t wait to try this out!
Monique, The Flair Society