DIY Felted Soap
Discover the artful and practical craft of DIY felted soap in this step-by-step tutorial, where colorful wool transforms ordinary bars into luxurious, exfoliating works of functional art.
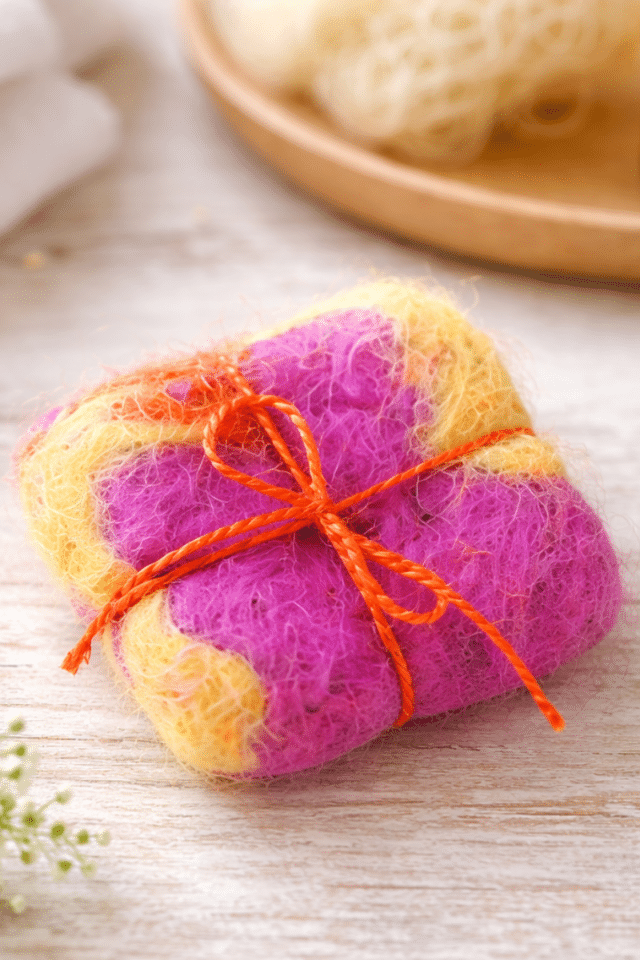
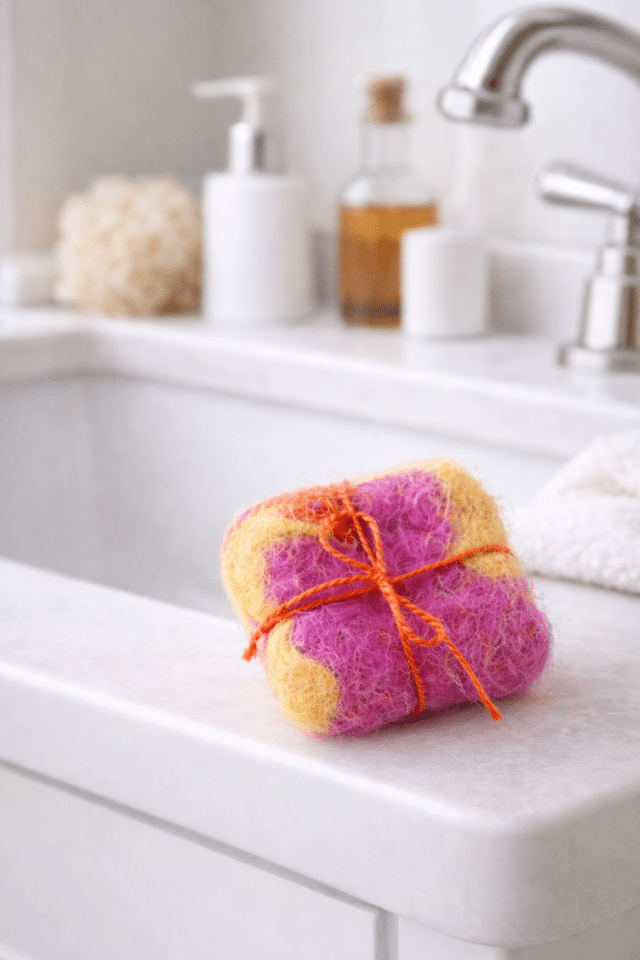
Welcome to our DIY felted soap tutorial. We will take you through the creative and enjoyable process of making your own felted soaps. They’re a delightful fusion of crafting and practicality that results in unique, beautiful, and gentle exfoliating bars that are perfect for personal use or as thoughtful handmade gifts. Three good reasons to make felt soap of your own. It has a built-in washcloth. It’s simple and cheap, and it’s almost too pretty to use!
What is Felted Soap? What is the Purpose of Felted Soap?
Felted soap is just what it sounds like. It is felted wool wrapped around a bar of soap. The wool functions a washcloth or shower puff that makes your soap last longer. Wool is used since it is antibacterial. Plus, like sugar scrub, it works as a great exfoliant for removing dull, dead skin.

Things You’ll Need to Make a DIY Felted Soap Bar
- Soap bar: Unscented, natural soap bars (castile or glycerin work well)
- Wool roving in various colors: Use 100& wool. Synthetic fibers won’t felt properly. Merino or alpaca wool is ideal if you want quality wool. Fine wool felts faster and smoother. You can use a single color or create a marbled effect by combining different colored wool strands.
- Bowl of hot water
- Scissors
- Dish/extra bowl to catch water
- Towel: For drying
- String/twine: Optional if gifting

How to Make a DIY Felted Soap Bar
1 — Prepare the wool.
Cut a strand of wool that is both long and wide enough to fold over and cover your bar of soap, approximately 6-8 inches long.
2 — Wrap the soap.
Spreading and fold the wool to cover all areas of the soap. Begin by covering one side of the soap, then wrap the other side, making sure the entire soap is encased in a thick layer of wool.
3 — For a marbled rainbow effect, add colors.
Cut other colors and lay over base to create a design or texture. Don’t get too attached to this step because it won’t keep it’s shape too much in the end.
4 & 5 — Wet the wool.
Dampen the wrapped soap with hot water. Use your hands to gently press the wool, making sure it adheres to the soap and starts to hold its shape. Repeat this step until it is entirely soaked through.
6 — Shape the wool.
Begin squeezing the soap gently to the contours of the soap (Kind of like you would to mold clay) while keeping your hands and the soap wet.
You’ll keep forming the wool until it is felted enough to keep its shape on its own. (We shaped ours for about 10 minutes just for good measure.)
7 — Lather and massage.
Once your wool is no longer rippled and has formed a smooth and sturdy layer over the soap, quickly submerse the soap in hot water. If the wool is tight enough to wash your hands with, then the finished product will be secure enough to hold up.
8 — Start felting.
Carefully remove the soap from the fabric and continue to gently massage and roll the soap between your hands. Begin gently smoothing the wool with small circular motions for several minutes to get a really tight layer. The heat, friction, and soapy water will cause the wool fibers to interlock and felt together.
9 & 10 — Dry the felted soap.
Place the felted soap on a soap dish or towel to dry. Pat soap with a towel to get rid of excess water and let air dry thoroughly. It will take a day or two to dry completely, depending on the humidity in your area.
11 & 12 — Wrap with twine and gift.
Tutorial Tips
- Make sure the soap is completely covered: Cover edges and corners well so the soap doesn’t poke through later.
- Trim any loose fibers: Use scissors to clean up stray wool pieces for a polished look.
- Use felted soap as a built-in washcloth: The wool creates gentle exfoliation and helps the soap last longer.
More Self Care Ideas
- 5 Easy Dirty Hair Hairstyles
- Cinnamon Coffee Sugar Scrub
- How To Create an Easy Braided Updo Hairstyle
- Sand Art DIY Sugar Scrub


DIY Felted Soap
Equipment
- Scissors
- Medium mixing bowl
Materials
- 1 soap bar
- Wool roving in assorted colors of choice
Instructions
- Cut a strand of wool that is both long and wide enough to fold over and cover your bar of soap.
- Spread and fold wool to cover all areas of the soap.
- Cut other colors and lay over base to create a design or texture. Don’t get too attached to this step because it won’t keep it’s shape too much in the end.
- Dribble hot water over the wool.
- Repeat until it is entirely soaked through.
- Begin squeezing the soap gently to the contours of the soap (Kind of like you would to mold clay) while keeping your hands and the soap wet.You’ll keep forming the wool until it is felted enough to keep its shape on its own. (We shaped ours for about 10 minutes just for good measure.)
- Once your wool is no longer rippled and has formed a smooth and sturdy layer over the soap, quickly submerse the soap in hot water. If the wool is tight enough to wash your hands with, then the finished product will be secure enough to hold up.
- Begin gently smoothing the wool with small circular motions for several minutes to get a really tight layer.
- Pat soap with a towel to get rid of excess water.
- Air dry thoroughly before use.


Please note that we may earn a commission for some of the above affiliate links. However, products featured are independently selected and personally well-loved by us!
Cool!!! I sounds easy enough to be my very first “wet” felting project.
I like easy! Thanks.
You’re welcome, Lisa! XOXO
i love it! great idea!
Thanks :)
This is Hilary, by the way….super cute soaps!!!
how does the wool hold up after scrubbing your hands several times?
Well! You just have to make sure that you’ve rubbed the wool into felt for a long enough period of time to create a secure casing. As long as the wool is tight enough to be used when its being felted, then it will be even tighter once it dries. It’s better to start with large soaps so that after the initial felting, you to still have quite a bit of soap to work through before it becomes to small for the felt to stay on.
Realky cute & neat idea!
Thanks, Regina!
wow, how adorable and affordable…