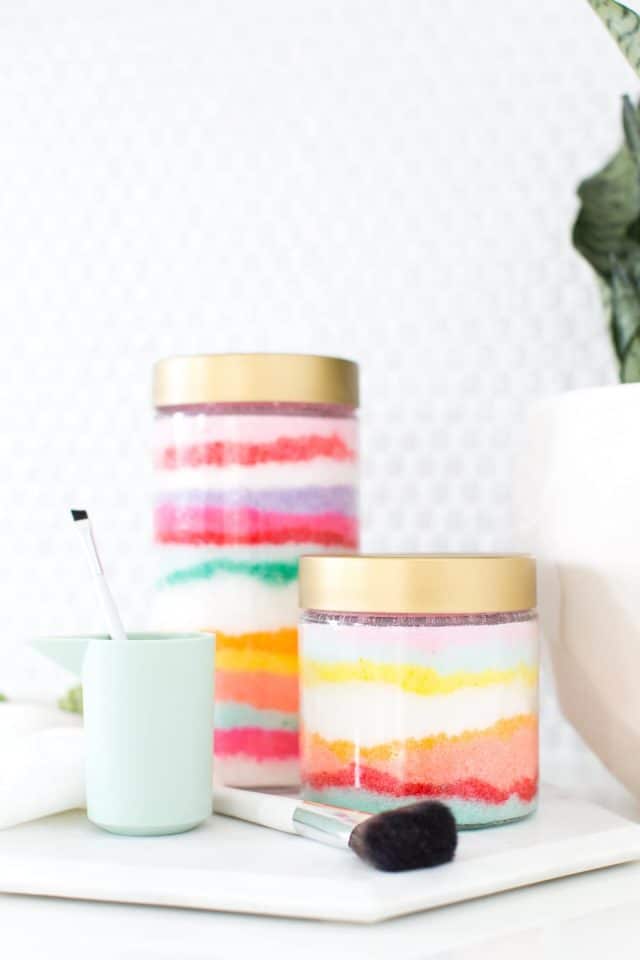
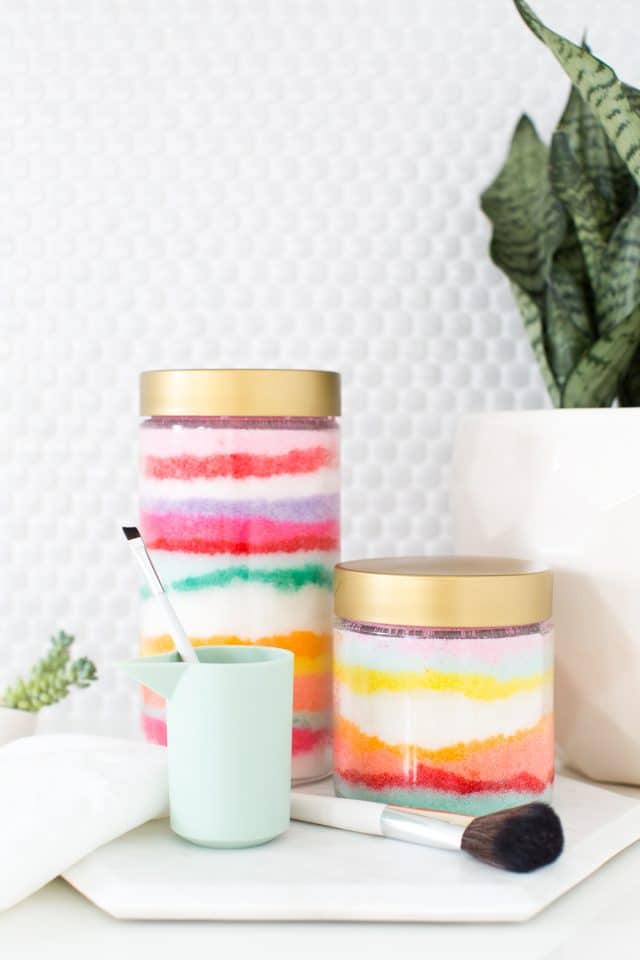
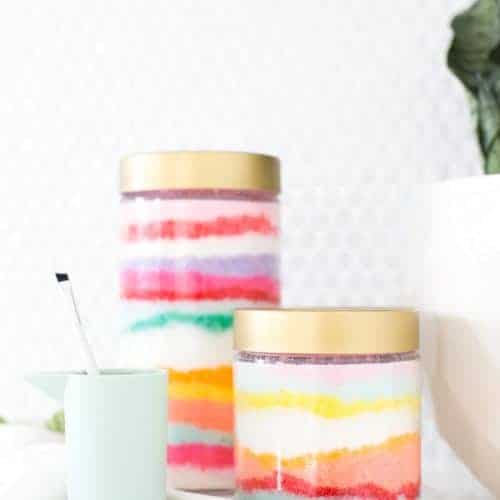
Sand Art DIY Sugar Scrub
Keep your skin smooth and your bathroom counters cute with this Sand Art DIY Sugar Scrub! One for you and one for your friend, everyone will smell delicious!
We are definitely no stranger to whipping up our own sugar scrub recipes. They’re our favorite homemade shower must-haves (along with our citrus sugar scrub and coffee sugar scrub).
Not to toot our own horn or anything, but we may be just a teeny tiny bit obsessed with this Sand Art DIY Sugar Scrub! We never thought our inner eight year old self would be shining through all of these years later with a whole new love for sand art. But never say never!
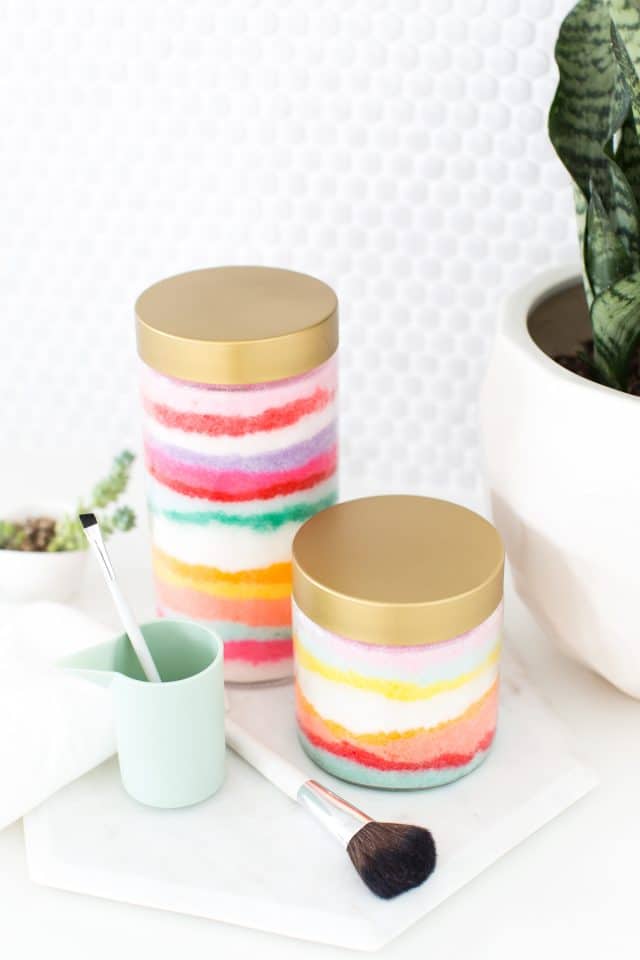
Don’t get us wrong, we probably won’t be adapting any sand art themes into our home decor or anything. But it’s fun in small colorful doses (especially tucked away in the shower), don’t you think?! Plus, they make for pretty gifts.
What is a Sugar Scrub?
Sugar scrubs are a natural way of exfoliating and moisturizing your skin. It’s a less harsh treatment compared to a sea salt scrub. The main components of sugar scrubs are sugar, an oil (typically coconut oil or olive oil) and aromatic hydrating essential oils.
Sugar scrubs are beneficial to your beauty routine since by exfoliating your skin it is removing all your dead skin. Because this treatment is so gentle, it’s especially ideal for sensitive skin. Plus, you can use sugar scrubs for your face and body.
Goodbye dry skin! Sugar scrubs leave your skin feeling silky, smooth, glowing (and not to mention smelling wonderful).
Ingredients and Materials Needed to Make Homemade Body Scrub
- Granulated white sugar
- Coconut oil
- Gel food colors
- Optional — Your choice of essential oils for scenting
- Airtight container for storing: We purchased these glass jars locally and spray painted the lids gold. You can even use mason jars or food storage canisters.
Best Essential Oils for Sugar Scrubs
There are so many essential oils to choose from when making your homemade sugar scrub. But these are some of our favorites due to its skin benefits —
- Chamomile oil – Perfect for reducing redness in your skin. The sweet aroma also relieves stress.
- Coconut mint — Mint contains a cooling effect which is beneficial for irritated skin.
- Lavender oil — Its healing and calming properties soothes and relaxes your skin.
- Peppermint orange –– Used for energy boosting.
- Tea tree oil — Great for acne prone skin since it is natural astringent. Use tea tree sparingly as the scent is strong.
How to Make Your Own Homemade Sugar Scrub
Making sugar scrub is really simple. And you can’t really go wrong with a recipe for it.
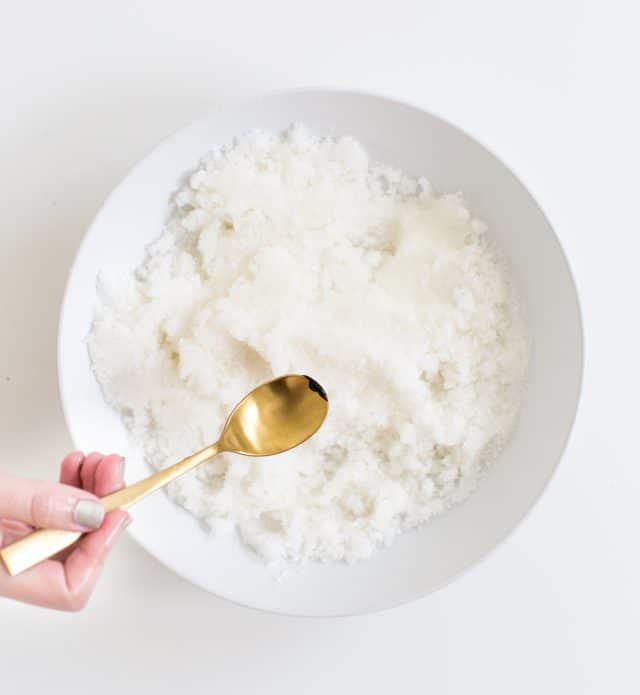
We used 3 parts cup of sugar to 1 part coconut oil (with a few drops of essentials oil) as a general rule of thumb.
If you like your scrub to be a bit creamier, just mix in extra coconut oil.
We left our scrub unscented since we wanted to use it more as an exfoliator in addition to our usual soaps. But some of my favorite essential oil combinations are peppermint orange and coconut mint!
You can add as much of as little essential oils as you’d like for scenting the scrub. It won’t hinder the outcome of the consistency.
Coloring Your Scrub to Make it Look Like Sand Art
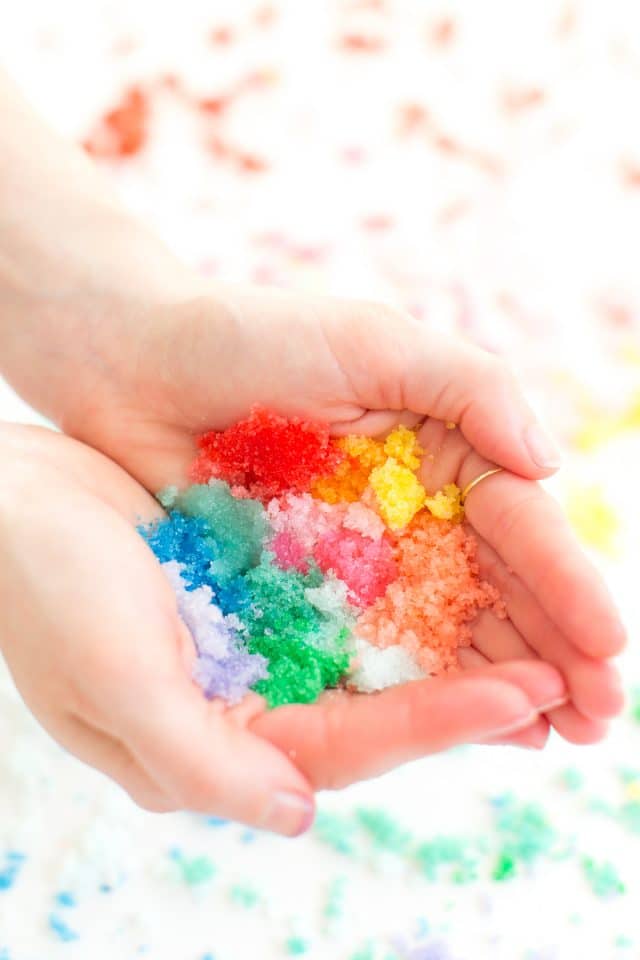
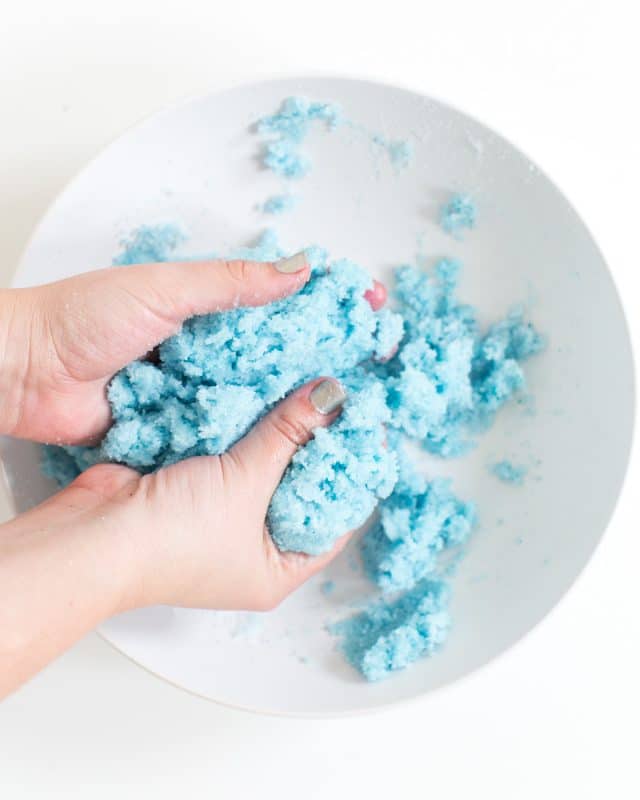
Once you’ve made the base scrub, you can start coloring the scrub. Spoon in gel food coloring and mix in the color with your hands.
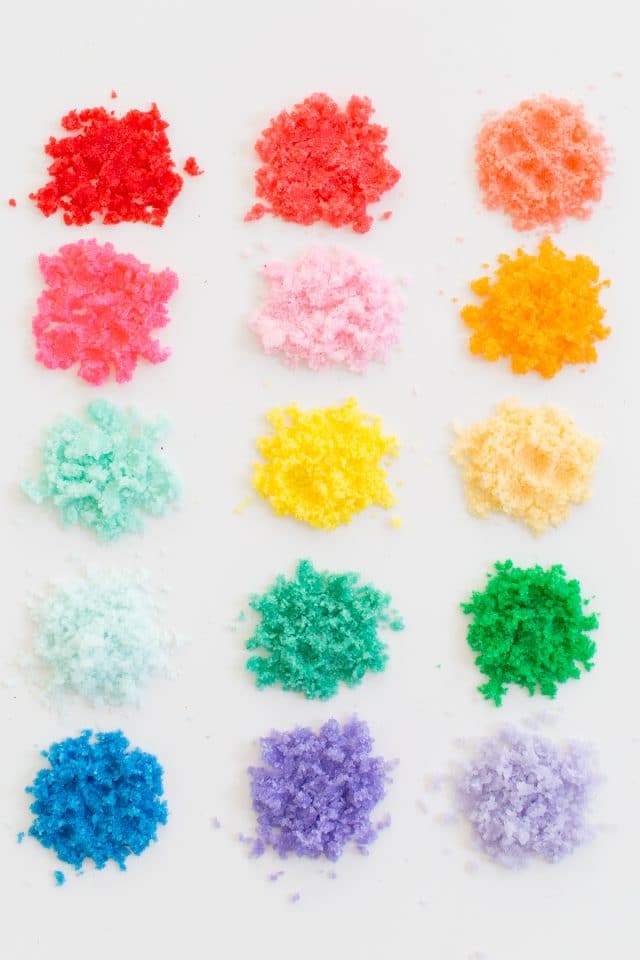
We created LOTS of different colors to have a little bit more room to play with when it comes to the sand art formations. However, you can make as little or as much as you want!
For the light colors, we just used a very modest amount of a color. And for the more vibrant ones, we used a generous amount of food color. You can also mix and match colors to get a certain shade you’re looking for, etc.
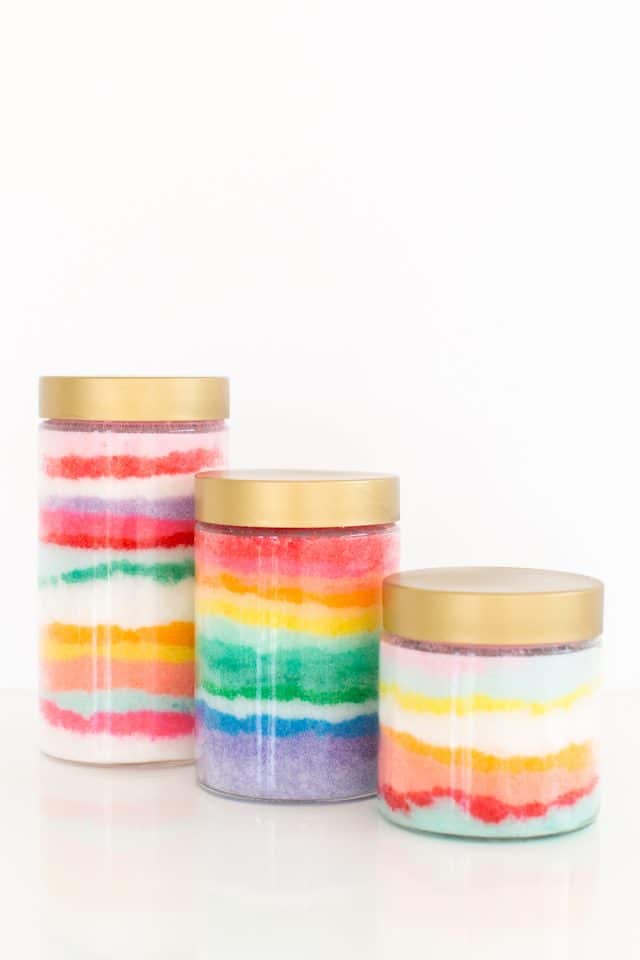
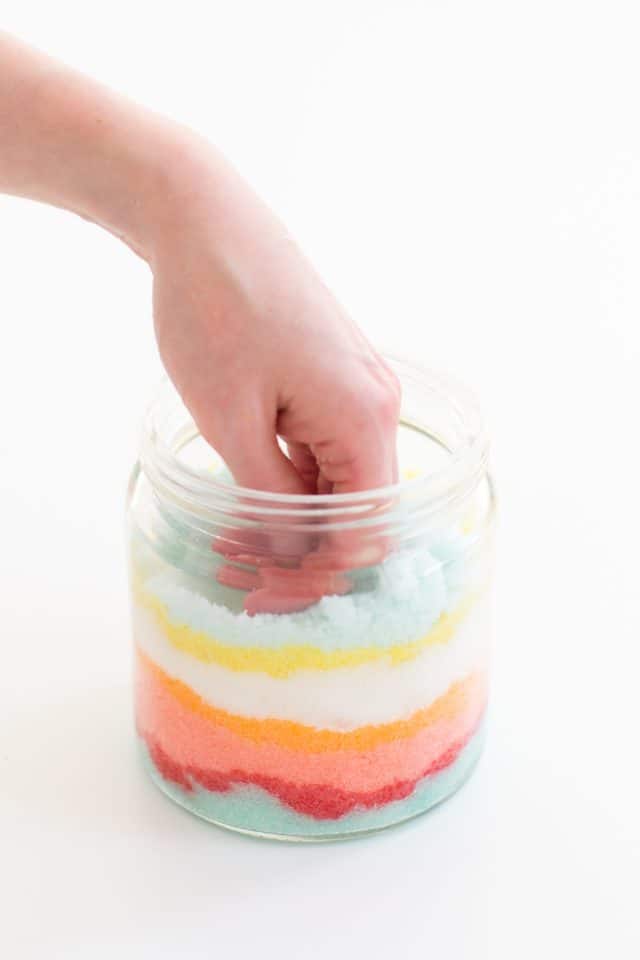
Once you’ve made all my my colors, spoon each color into a glass container. Firmly press the sugar for each color into place before moving onto the next one.
I left mine sort of messy and uneven like sand art would usually be. And we love the way it turned out!
As you can see, we started to get a little addicted to making different color schemes and patterns. You could make these all day!
Especially after seeing how intricate some sand art forms are!
How to Use Sugar Scrubs in Your Beauty Routine
Use sugar scrubs as you would with any exfoliator. It’s that easy!
When using on your face, apply a small amount of sugar scrub to clean dry skin. Wet your finger and gently massage your face in a circular motion. Then, rinse with lukewarm water and pat dry.
For an allover body treatment, scoop out some sugar scrub on clean wet skin. Gently rub your skin in a circular motion.
Next, rinse with lukewarm water. Finally, pat dry with a soft towel. There’s no need to use additional body soap or gel if your sugar scrub includes essential oils.
For extra hydration, let the scrub sit on your skin for a few minutes. Use one to three times a week, depending on the sensitivity of your skin.
How to Store Homemade Sugar Scrub
Store your sugar scrubs in an airtight container at room temperature for a longer shelf life. Over time, the sugar and oil may separate. This is completely normal! Simply remix the sugar scrub with your finger.
If you want to leave the scrub in the shower, choose a waterproof container also. We do recommend that you store sugar scrubs on the counter away from water. Because this all natural DIY sugar scrub does not contain any water, it requires no preservatives.
But any contact of water can cause your sugar scrub to eventually mold. And because sugar is involved, you want a sturdy container to also keep ants away!
This would also make a perfect mason jar gift if you’re looking for a bulk gift idea or party favors.
More Easy Beauty DIY’s
What do you think?! We’re seriously considering making these as DIY Christmas and birthday gifts for friends this year! Who would’ve ever thought our childhood sand art obsession would be making a come back this late in the game?!
Homemade sugar scrubs are so fun and affordable to make. For more easy beauty diy’s for yourself or to gift, check out at few of our favorites from the archives —
- DIY Bath Sachet Gift Set
- Leather Hexagon DIY Vanity Tray
- Concrete DIY Vanity Mirror
- Cinnamon Coffee Sugar Scrub

Sand Art DIY Sugar Scrub
Equipment
- Large mixing bowl
- Small mixing bowl
- Spoon
Materials
- 3 cup white granulated sugar
- 1 cup coconut oil
- Gel food colors any color of your choice
- Essential oils optional for scenting
Instructions
- To make the base of your sugar scrub, evenly combine the sugar, coconut oil and essential oils (optional). If you prefer a creamier texture, just mix in extra coconut oil.
- To prep for the color mixing, seperate the sugar scrub base into small mixing bowls. (One for each color of your choice.)
- Spoon in the gel food coloring and mix in the color with your hands. For the light colors, use a very modest amount of a color. For vibrant colors, use a generous amount of food coloring. You can also mix and match colors to get a certain shade you’re looking for.
- Once you’ve made all the colors, spoon each color into a glass container. Firmly press the sugar for each color into place before moving onto the next one.
Notes
- The amount of sugar and coconut oil you use depends on how many different colors you want your DIY Sand Art Sugar Scrub to have. If you want to use lots of colors, you may want to increase your measurements. The key is to use 3 parts sugar to 1 part coconut oil.
- Store in an airtight container for up to a month.


Please note that we may earn a commission for some of the above affiliate links. However, products featured are independently selected and personally well-loved by us!
Do yo have any natural ideas for coloring the sugar scrub? Love this idea but this is for an all natural organic friend! Thanks
Hi Nancy! Great question. There are some some brands like Supernatural Store that sell vegan plant based food coloring that do not contain artificial dyes. For instance, their red gel coloring is made from beets. Here’s a link: https://amzn.to/3VYiDG2
Hi Ashley,
I have a nonprofit where I work with young adults and I am always on the lookout for activities for them. I LOVE this idea, however…I have a respiratory allergic reaction to coconut, so…does it HAVE to be coconut oil??? Is there another way to make such beautiful gifts???
Thank you,
Cynthia
Hi Cynthia! This sounds like such a fun activity! We are sorry to hear about our coconut allergy. One of our team member’s son use to be allergic to coconut. That being said, coconut oil is typically want is found in most homemade scrubs but we think it is mainly because it’s easy accessiblity, price point and wonderful smell. However, you can definitely try other nut free oils like sunflower oil, sweet almond oil, jojoba oil, sesame oil, walnut oil, grapeseed oil, olive oil, squalane, argan oil, etc. Out of all these choices, we think squalane, argan oil, jojoba and sweet almond oil are best for your skin. Hope this helps!
Does liquid food coloring work? Or will it water it down too much
Hello Galadrielle! It could work but you won’t get the vibrate colors from gel based food coloring that is more concentrated. You would need to use a lot of liquid food coloring. The colors would also immediately “wash off” quicker once you get a little wet. Hope this helps!
Do you use the coconut oil in its solid form or do you heat it so that it turns liquid?
Hi Karen! That’s a great question. Coconut oil at room temperature has a lotion-like form which makes it easy to mix. There has been time where my coconut oil is in a solid form and in the summer, my coconut oil has turned into liquid. You can use it in any form but the “lotion” form is best. I know that some people prefer the liquid form just so they can really get a good mixture in. If you decide to start with a liquid form, refrigerate the sugar scrub for about 30 minutes so that the sugar doesn’t fall to the bottom. I definitely wouldn’t recommend using the oil when it’s in a solid block state. Hope this helps!
Do you use the same coconut oil that is sold for cooking? Or is there another form I should be looking for? I have no idea where to purchase coconut oil. Thanks.
Hi Sandy! Yes, you can use the same coconut oil as for cooking. Just make sure it’s pure coconut oil… which that’s how it is typically sold. We included a link on where we purchased ours in the post. You can find coconut oil at most grocery stores in the cooking aisle with the other oils or in the beauty aisle. They even have them at Target and Costco. Good luck!
Hi! I was wondering what kind of gel food coloring you used? I just want to get something that won’t stain! :)
I would love this project for my 7 year old to make for gifts this holiday season. You mention the Method soaps but how is it used in the recipe? This is my first time making a sugar scrub so I need a bit more detail. Thank you.
Hi Ann! Sorry for the confusion! This sugar scrub is meant to be used with the Method soaps (or even any soap)! We were just inspired by the Method soaps and their scents!
love this idea! and they’re so beautiful! how long do you think they will keep for? i’d like to start making them now for christmas gifts, but don’t want the colors to mix or it to go bad or something!
thanks for sharing this beautiful idea!
Hi Jacey! If stored in a tight container, then the scrubs should keep for up to 6 months. Once it’s open and any moisture gets into it, sometimes it will last 1 month. It really depends if someone is storing it in the shower or away from water. We definitely think you can start making them now for Christmas. Will you be using essential oils? If you are, depending on the oils, you may want to make them in the beginning of December just so the fragrance are bold and strong when opened. Hope this helps!
Thank you so much for sharing this! I am collecting ideas for crafts to make for my son’s school’s craft sale this fall. This will definitely be one I make! I may even let my son and daughter make some. ;)
You’re welcome, Lydia! I hope your kids will be able to sell a lot! XOXO
Hi, not sure if I missed it, but how exactly is the method body wash used.
Hi Stacy! Sorry that it wasn’t more clear! The Method Body Washes inspired our scrubs and we use the different colors and incorporated the colors of the scents into the scrubs so each different color represents the different washes. The sugar scrub is to exfoliate your skin on top of also using the wash. As we mentioned, you don’t have to make the scrub with essential oils if you like the scent of the soap. We didn’t for ours (even though essential oils is listed as an option). Hope this helps!
When you say parts does that mean tablespoons? Sorry if that’s a stupid question I’ve never made a sugar scrub before but I think they would make lovely gifts for my family!! 😍
I just did this with my classroom of 3rd graders. They loved it, even my boys who normally think things are boring and dumb! We made small sample sizes for Mother’s Day gifts. I left out the essential oils (didn’t have any on hand and didn’t want to purchase any) so when my kiddos asked if it they could taste it at the end, I was comfortable telling them yes. Lol. Definitely something I’d do with my kiddos again, with a little more planning, but for a quick throw together, it went really well! Only downside was Mother’s Day and Florida heat…don’t go together so well. We had to get creative to keep it from melting, even in the classroom with our afternoon sun. I hope the gifts made it home okay! Bahahahaha.
I definitely feel ya on the heat here in Houston! Coconut oil is almost never solid here lol. I love love that you tried this out with your kids!!! My favorite thing to hear :)
This looks so fun. I have a group of girls who would love this. How much does the above recipe make ? Enough for x amount of size x jars ?
Hi Elizabeth! The recipe makes about 4 cups of sugar scrub. It really depends on the size of your jars and how much you want 1 cup is 8 ounces. You can use larger 12 ounce jars like these: https://amzn.to/4a3SEnp. That would make about 2 1/2 gifts. Hope this helps!
great post !!!
thank you
Hello there!
Your beautiful DIY has been featured on mu blog! http://bellacomeunfiore.blogspot.it/2015/12/6-beauty-idee-per-i-regali-di-natalema.html
Than you so much!
Sarabì
Where do I find how much Method soap to put in?
I never would have thought to add color with soaps! And layering…genius! I wonder if I can layer this recipe I found: https://stampington.com/Citrus-Rose-Scrub-Project. The recipe is scrumptious, but I would love an infusion of color so that I could leave it out on the bathroom counter.
where is that amazing little blue pitcher from?
Love! And that little mint pitcher…I need it in my life!
This are so pretty! Such a great idea!
These are the absolute cuteness! I am totally making these for friends this year!
Love this idea!!! Where are the containers from? Please share
I just got them from Hobby Lobby and sprayed the lids gold with metallic gold spray paint :)
Good to know!
This is so clever, Ash. I love it!
Oooh this looks too cute! I love the idea of making body scrubs! I always make more than I need and they are always great gift ideas for friends. I’ve made a lemon sugar body scrub and coffee body scrub too. I am pinning this for future reference. Thanks!
yay, glad you like it!
What a great idea! Fabulous photos, J.
Carrie
http://www.wearwherewell.com
Beautiful! Any experience using the colored scrub? Does the color stick around on skin or in the bathtub? Does it turn muddy in the jar once you start using it?
It definitely does not stain, it’s a verrrry small amount of food coloring so no issue there! I haven’t had mine turn weird colors yet, but I’ve only used with dry hands when I scoop some out, so I think it depends on how much your adding water to the mix!
Fun! I love making homemade body scrubs too. :)
this is SO fun and colorful, love!
dear i love you every DIY and i am sad because many time can not comment :( but when i comment it’s from my heart love you sister :)
This is so darling! I’ve never heard of foaming body washes before (only hand soaps), but I’ll have to try it out!
Let me know how you like it!