DIY Branch Clothing Rack
Learn how to create a stunning and functional DIY branch clothing rack! Transform natural branches into stylish, eco-friendly storage for your wardrobe. Perfect for minimalist and rustic decor.
Looking for a creative and eco-friendly way to organize your wardrobe? A DIY Branch Clothing rack is the perfect blend of functionality and style, offering a unique storage solution with a natural touch.
Whether you’re working with limited closet space, love rustic decor, or simply want to showcase your favorite outfits, this easy project adds a charming and earthy vibe to any room!
Plus, it’s a great way to repurpose fallen branches and bring a piece of nature indoors. And if you know us, we love repurposing scrap wood. Remember our Ombre DIY Stump Side Table?
This DIY tutorial is beginner-friendly and requires only a handful of tools and materials. With a little effort and creativity, you’ll have a custom-made clothing rack that’s as practical as it is aesthetically pleasing.
Whether you use it in your bedroom, entryway, or even as a display piece for a boutique or event, this branch clothing rack is a conversation starter. So, roll up your sleeves, grab a branch, and let’s bring your vision to life!
Tools and Materials Needed
- Sturdy branch — Choose a branch that is sturdy, straight (or slightly curved for character), and about the length you need for your clothing rack. Make sure that it is dry and free of bark or pests. Sand it down to remove rough edges and splinters, and optionally apply a clear varnish or paint for a polished look.
- Hanging picture wire — These will act as the suspension lines for your branch. Opt for one that can support at least 40-pounds.
- Wire cutters
- “S” hooks — For easy hanging
How to Make a DIY Branch Clothing Rack
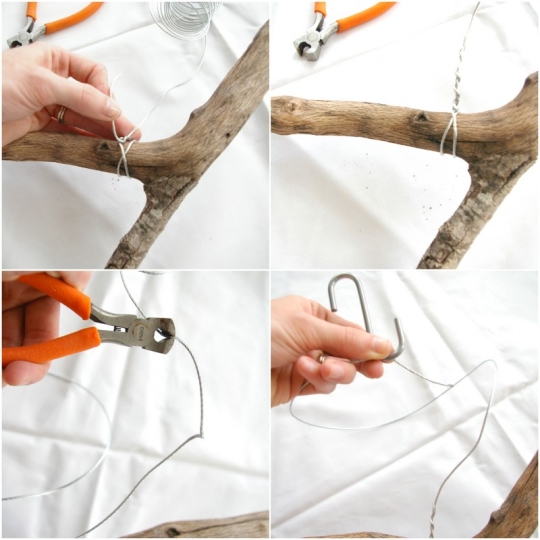
1 — Prepare the picture wire: Cut 2 equal lengths of picture wire using your wire cutters. A good rule of thumb is to cut them slightly longer than you think you’ll need. You can always trim the excess later.
2 — Attach the wire to the branch: Knot one end of the wire securely around one end of the branch. Wrap the wire tightly to prevent slipping. Repeat on the other side, ensuring both wires are equal in length for a balanced rack.
3 — Hang Your Branch: Knot the free ends of the picture wire onto the S-hooks. Once hung, gently pull on the branch to ensure it is secure and can support the weight of your clothing. Adjust the knots or wire length as needed.
Project Tips and Tricks
- Extra support: If you plan to hang heavier items, consider doubling up the picture wire or adding a third suspension point in the center.
- Finishing touches: Wrap the ends of the wire with twine for a more rustic look or use decorative beads to hide the knots.
- Placement: Hang your branch in an area with enough clearance for long items and away from moisture to prevent warping.
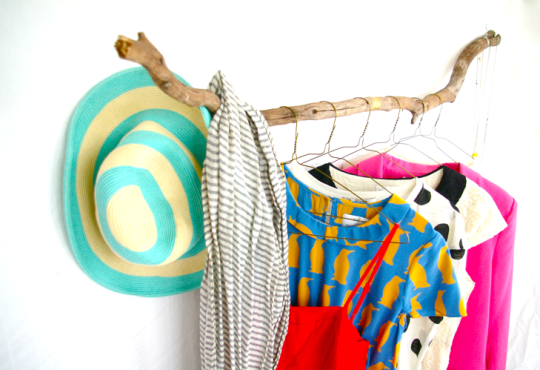
- Multi-purpose use: Add small hooks to the branch for hanging accessories like scarves, hats, or bags.
- Hooks: Another option to use are screw-in hooks that are screwed directly into the ceiling or a sturdy beam. Swag hooks are often used for hanging planters or light fixtures. Eye bolts screwed into the ceiling can work as anchor points for tying picture wire.

DIY Branch Clothing Rack
Equipment
- Wire cutters
Materials
- 1 tree branch
- 2 S hook optional
- Picture hanging wire
Instructions
- Cut 2 equal lengths of picture wire using your wire cutters.
- Knot one end of the wire securely around one end of the branch. Wrap the wire tightly to prevent slipping. Repeat on the other side, ensuring both wires are equal in length for a balanced rack.
- Knot the free ends of the picture wire onto the S-hooks. Once hung, gently pull on the branch to ensure it is secure and can support the weight of your clothing. Adjust the knots or wire length as needed.

25 Best Clear Stadium Bags for Concerts, Sports & Events
Stay stylish and compliant with the best clear stadium bags…
Continue Reading 25 Best Clear Stadium Bags for Concerts, Sports & Events
31 Best Beach Bags for Your Summer Essentials
From tote bags to straw bags, stay organized and chic…
Continue Reading 31 Best Beach Bags for Your Summer Essentials
Our 41 Favorite Amazon Women’s Swimsuits
Get ready to hit the beach or pool in style…
Leather Hexagon DIY Vanity Tray
Keep yourself organized and in style with this Leather Hexagon…
Please note that we may earn a commission for some of the above affiliate links. However, products featured are independently selected and personally well-loved by us!



I get pleasure from, lead to I discovered just what I
used to be having a look for. You have ended my four
day lengthy hunt! God Bless you man. Have a nice day.
Bye
2. ed. Curado Paulo: Auditoria dos Tribunais. http://off2.net/comoevitaraejacula-aoprecocenaturalmente49799
I don’t understand how you attached it to the wall! Help! I really want to do this
Just came across your site today. I love this idea! Don’t know if others have noticed this but the 1st picture that has clothing, etc on the branch, one end looks like a hand. I’ve retitled your picture as “The Helping Hand Clothing Branch Rack… LOL
Unfortunately, this is an idea I can’t use myself but I do intend to pass this creative idea along to friends and family. Now I’m off to look at all the other ideas you’ve shared. I know I’ll find something I can create…. =)
Do you mind if I quote a couple of your posts as long as I provide
credit and sources back to your weblog? My website is in
the very same niche as yours and my users would really benefit from
some of the information you present here. Please
let me know if this ok with you. Cheers!
I really love the creative yet functional idea of creating recycled branch to make a clothing rack! Really cool! :)
Love the branch idea. Very decorative. My question is, after assembly and after attaching the S hook, does this hang from the ceiling?
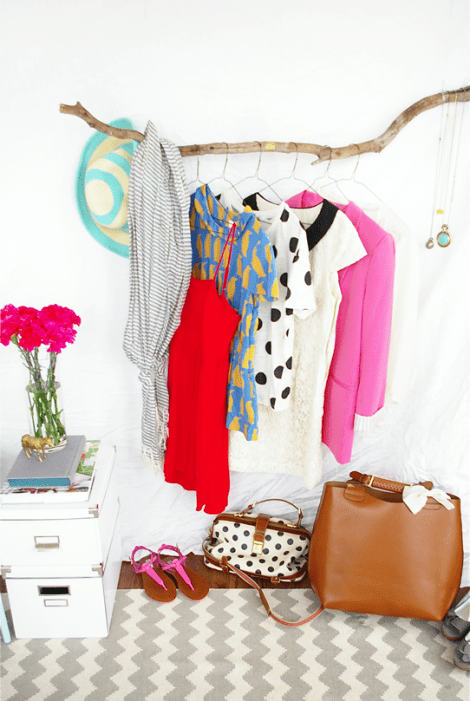
Love it! and the poka dot bag, where is it from?
Hey Kaley! It’s an Anthropologie back from last year :)
I LOVE IT!!!so beautiful and natural!!!xoxo! great idea!!
Thank so much :)
This awesome, this would look great as a rack right next to my outdoor shower. Thanks for the idea!!!
I LOVE YOUR BLOG!!!! I’m following you on Instagram. I’m @young_fashion. I LOVE YOUR DIYS just keep on being awesome and keep on blogging!❤❤❤❤❤❤❤❤❤❤❤❤❤❤❤
Thanks Zoe! So nice of you! :)
LOVE! It looks great in that room!
Thanks, Nikki!
I imagine the branch under Torr looked liked this too. ; ) This is awesome Ash!
Haha! Shh..
I am so glad that you decided to share how you made the branch clothing rack. I stared and stared at the branch on yesterday’s post to try and figure out what you used to hang it, and now i know!!!!
Brilliant idea! Great DIY
What a beautiful and original clothing rack – I love it.
just kidding, i read a little further and found it!
:)
i love it!!!!! and i NEED that polka dot bag. where is it from?
Love this! Did you have to treat the branch with bug killer or anything?
I can also picture doing this for a hanging chandelier (i.e. using a wood branch and some big glass baubles/mason jars).
THat’s a brilliant idea! You need to make that happen :)
Oh my god! what a great idea you gave us again! thank you so much for your beautiful shares! (the rug is perfect, too can you tell us where did you found it?)
Awesome! I’m glad to hear it! And the chevron rug is from Urban Outfitters for like $30 or something crazy, sweet deal huh?