DIY Faux Brass Drawer Fronts
Give any space a quick and shiny makeover with these DIY Faux Brass Drawer Fronts!
We seriously want to gold foil ALL THE THINGS. It’s a problem. We hope that we don’t look back at these years and have the same feelings as we do when we look at old middle school photos of ourselves with our over-plucked eyebrows and massive braces.
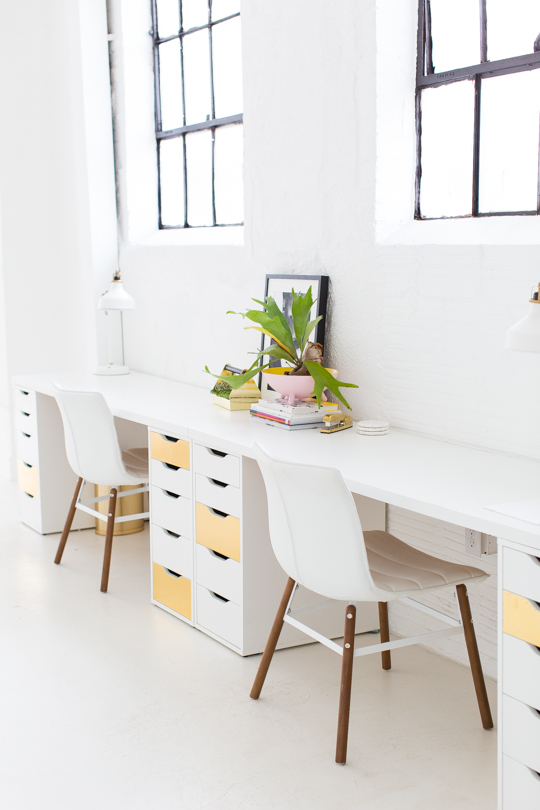
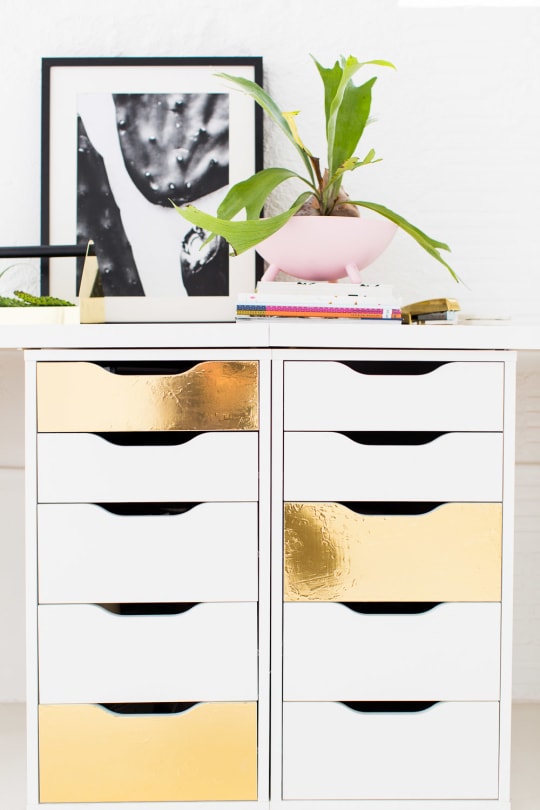
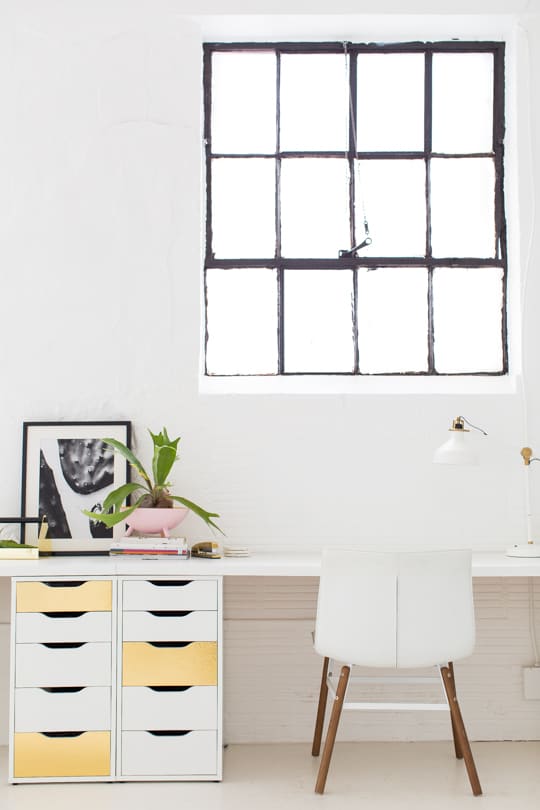
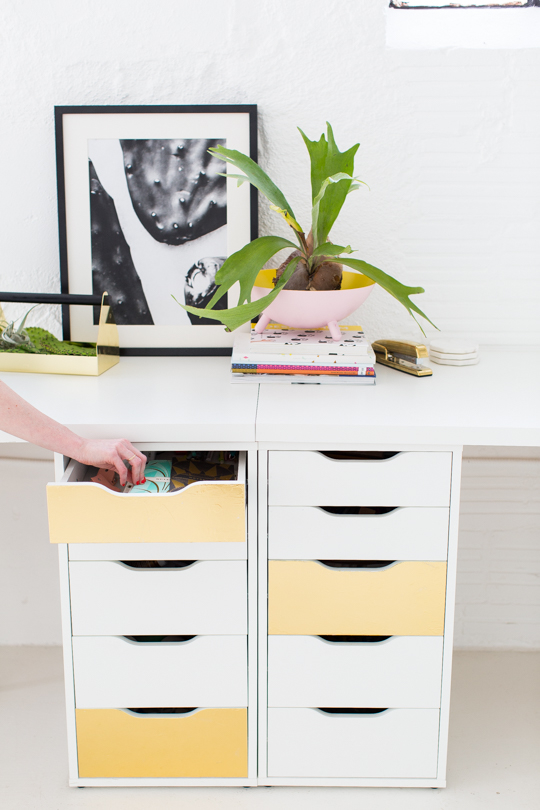
You know, the kind of feeling when you wonder why no one stepped in to save you from yourself. In this instance it may be too late. Because now we’ve gone and created DIY Faux Brass Drawer Fronts on all of our desk drawers in our Sugar & Cloth studio.
We can’t help it, especially since we discovered this new metallic gold foil that’s only feeding our habit. A ) It’s only $10! B) You now get a giant roll of it that’s actually big enough to cover lots of things (which previously did not exist in our world)!
We hope you guys have prepared yourselves for gold madness around here with this quick and easy Ikea desk hack (that honestly, can apply to any drawer)!
Materials and Tools Needed
READER NOTE! Just a fair warning that we’re not using transfer paper in it’s usual setting here. Some of you gold foiling pro’s may cringe. But this is what works for this particular project in a manner that’s easy for a wide variety of skill levels to do at home.
- Reactive gold foil — You can also just use metallic adhesive gold vinyl to be able to skip the glue step!
- Craft foil adhesive
- X-ACTO knife
- Craft squeegee
- Foam brushes
- Drawer — Ours is an IKEA Alex drawer unit. This DIY works with cabinet!
- Scissors
How to Make Faux Brass Drawer Fronts
1 — Go ahead and cut a small piece of foil that’s just about 1-2 inches bigger than your drawer fronts on all sides so it’s easier to work with when adhering.
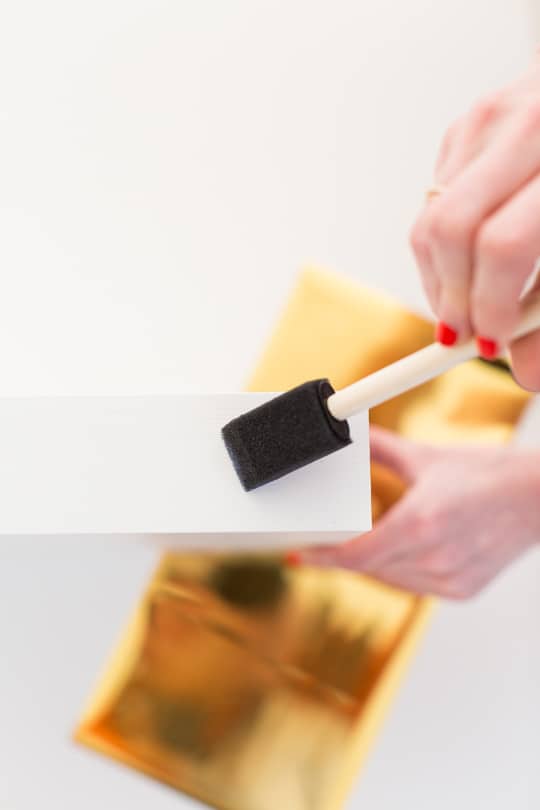
2 — Next, use a foam brush to brush on a thin layer of the screen adhesive. But DON’T let it dry before applying the foil as the bottle states.
3 — Go ahead and immediately lay the gold foil (gold side up, obviously) on the adhesive and use the craft squeegee to push the bubbles out.
(THIS is what I meant by not using the foil as you usually would in order to make it easier for most people, if you’d like to attempt this the pro way, more power to you!)
NOTE: If you’re pressing too hard or if the glue is too tacky/dry before apply the foil, it will pull the foil away from the surface, so be gentle with it. Also don’t freak out if it’s not perfect, you actually won’t even notice most imperfections! Mine had lots from trial and error, and you don’t even notice them in real life.
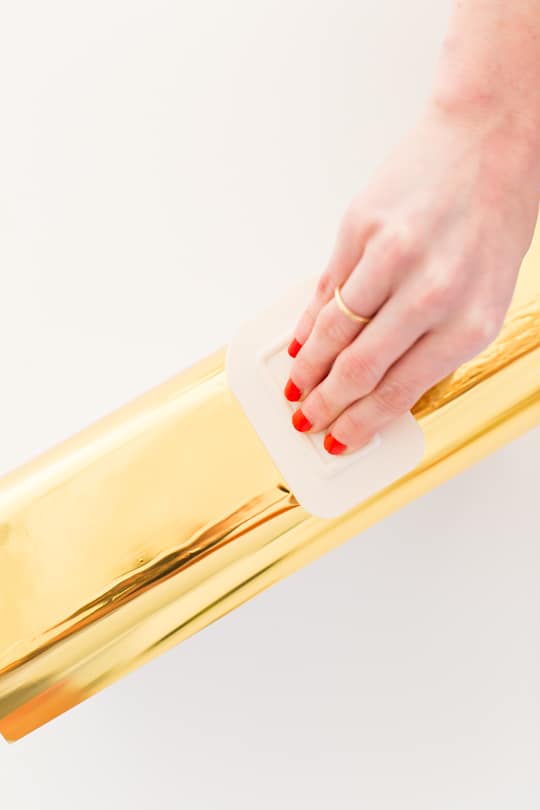
4 — Once it’s nice and smooth, flip the surface face down and use an X-ACTO knife to trim away the excess foil.

5 — Now just install the drawer fronts and you’re ready to glimmer, er… something like that.
Now we’re just trying to decide on a cool DIY plant stand idea for in between the windows above our desks. What do you think? We really want a retro vibe to it. But we’re going to leave the touches of gold as-is, I’m officially cutting myself off from gold in this corner!
Easy IKEA Billy Hacks Anyone Can DIY at Home
Get inspired by clever IKEA Billy hacks for living rooms,…
Continue Reading Easy IKEA Billy Hacks Anyone Can DIY at Home
DIY Ikea Play Kitchen Hacks to Make it One-of-a-Kind
Take your child’s pretend play to the next level with…
Continue Reading DIY Ikea Play Kitchen Hacks to Make it One-of-a-Kind
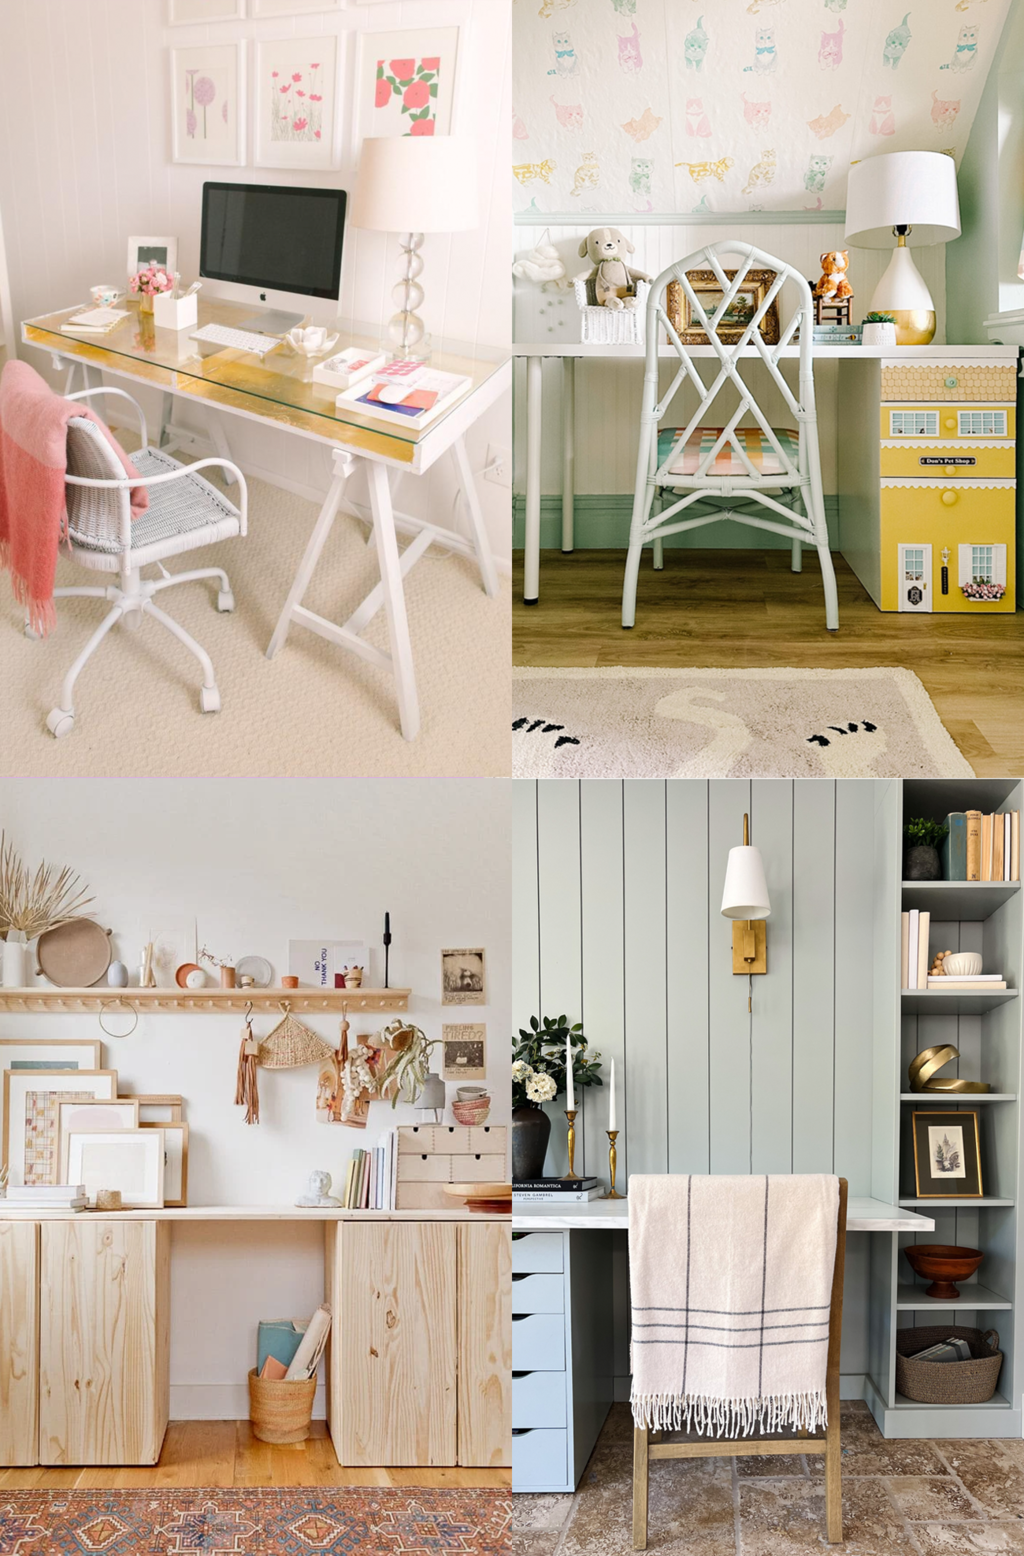
16 Genius Ikea Desk Hacks You Need In Your Life
Discover the ultimate IKEA desk hack guide for a stylish…
Continue Reading 16 Genius Ikea Desk Hacks You Need In Your Life
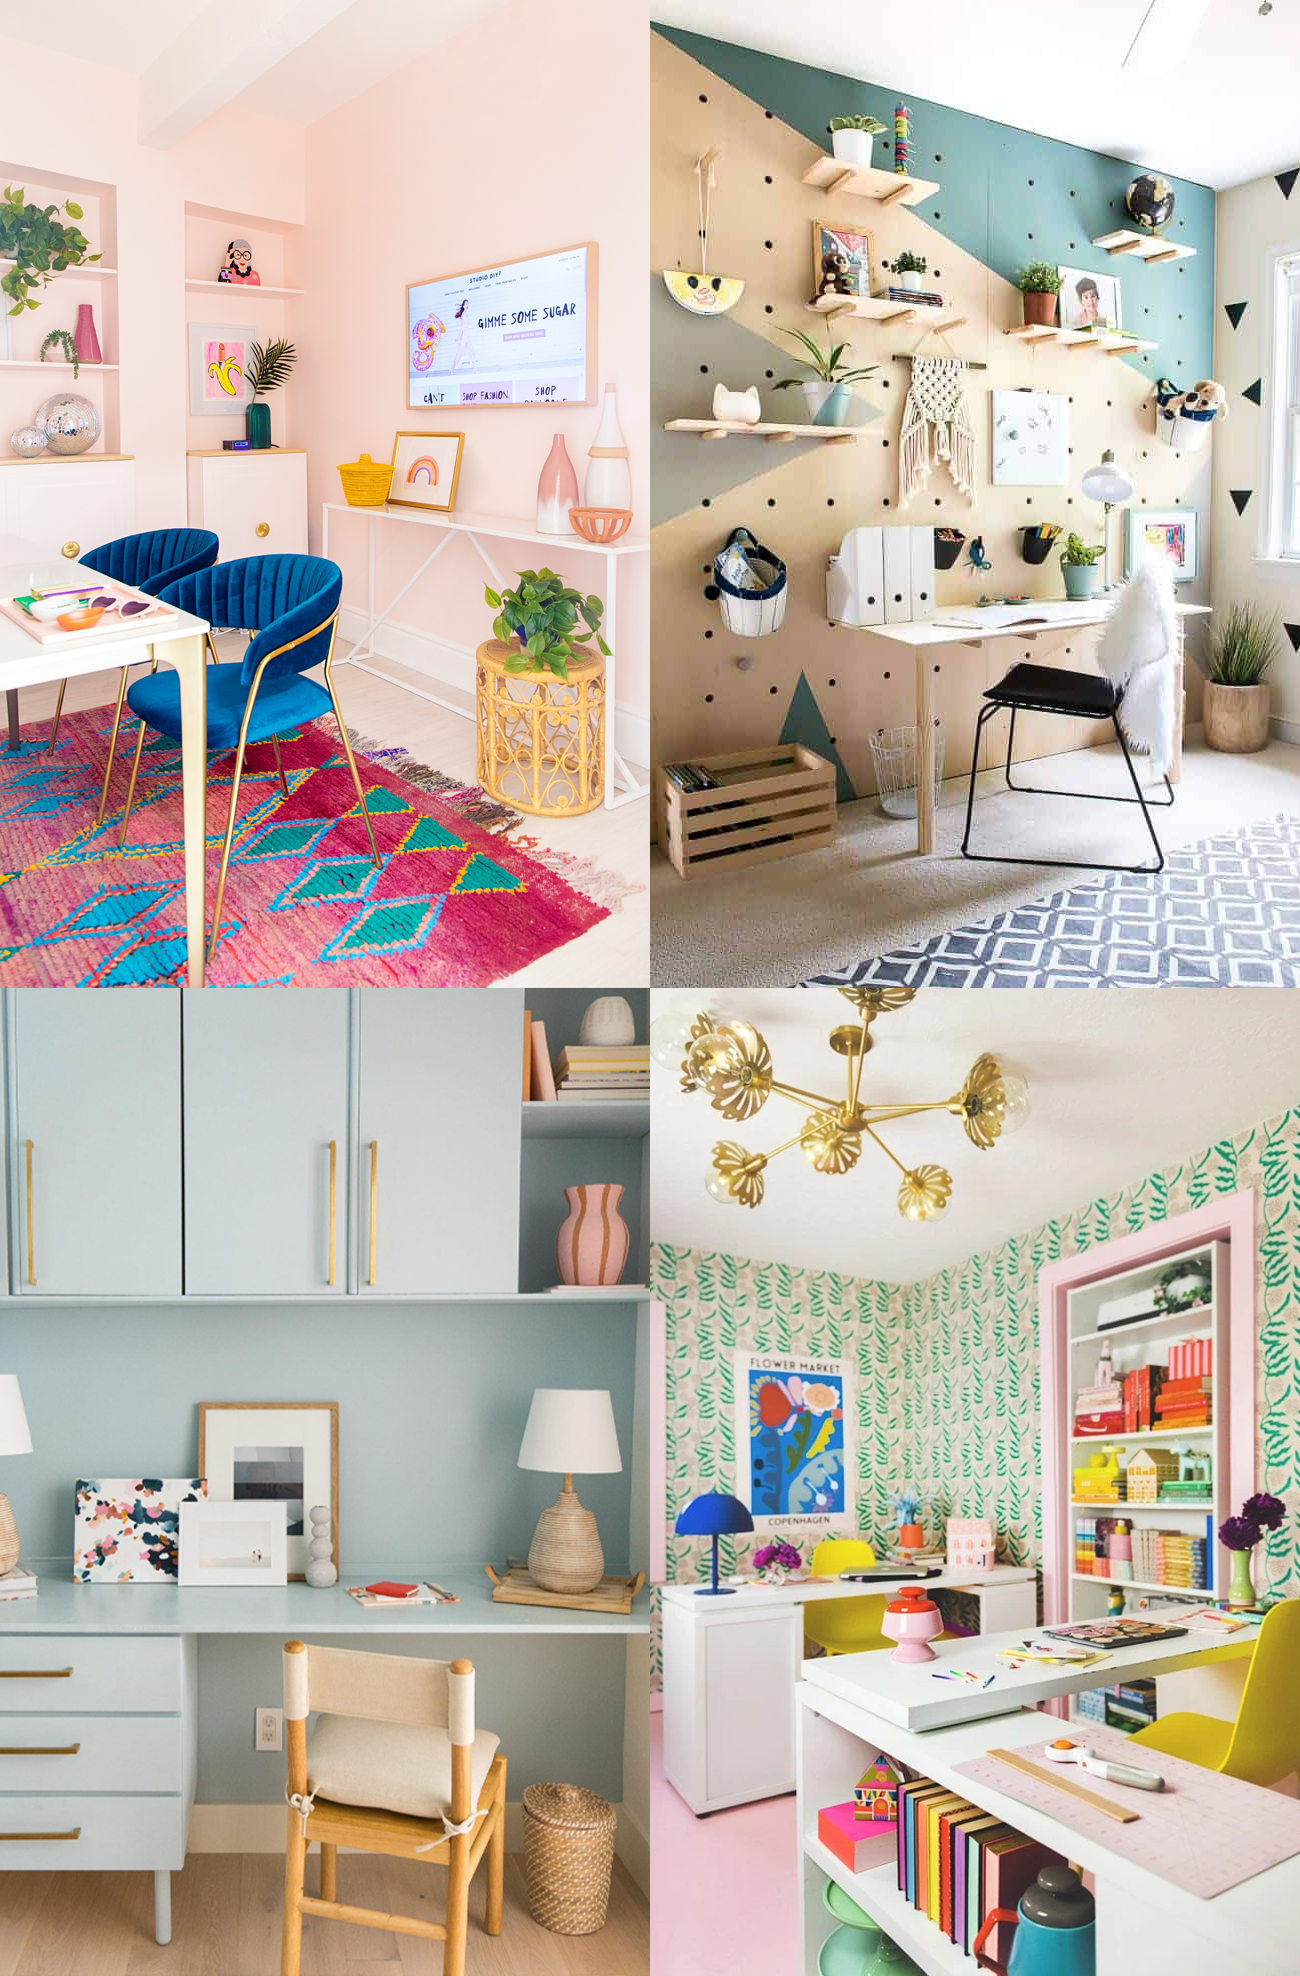
22 Home Office Ideas that Promote Productivity & Creativity
Tired of the same ol’ 9-5 grind? These home office…
Continue Reading 22 Home Office Ideas that Promote Productivity & Creativity
Please note that we may earn a commission for some of the above affiliate links. However, products featured are independently selected and personally well-loved by us!
thank you for sharing the information with me
Love this! I followed your links and ended up with foil that is only 6×12 not the roll you described. Can you point me to the larger cut sizes? Thanks!
Hello it’s me, I am also visiting this website on a regular
basis, this web site is in fact pleasant and the
users are actually sharing nice thoughts.
So glad you enjoy our DIY’s!
Hi, I absolutely love this and wanted to know where i can purchase the white drawers from?
They’re from Ikea :)
Hi there, i have just moved into my first apartment in NYC, i LOVE your set up! i have the alex drawers, just wondering what tabletop you used for it? thanks you xo gi
We used the long unlacquered table tops from Ikea :)
What size table top did you use and how did you attach it?
Hi. Where dos you buy your desk? The drawers I think on ikea and the top? You dos your large desk? How do you calculate the measurments so it can fit your space? Does it comes on a standard measirment the top or they prepare the me asirme y you need? Thanks
This looks so great!! I also have a similar IKEA desk setup. How do you keep the desktop from sliding around. Did you attach it to the drawers? Thanks in advance.
Thanks for this idea. We have the exact same desk and drawer set in our office/computer room and we have blue curtains in there. The furniture is too white now, lol. I might get a blue and pink foil to do random fronts for my kids drawer and black for myself. Don’t know if all those colors will complement or not. I have B/G twins and they will be using it as computer room too. Cool idea. Of course, I am nervous to try as I have never done anything like this. Where did you get that foil from?
Hi – I also have a similar IKEA desk setup. How do you keep the desktop from sliding around. Did you attach it to the drawers? If so, what did you use?
Thanks!
Marla
We got legs for them. The table is still very light and is slightly moving. We have it all set up in L shape. I plan to use velcro between table ends to make them stick together. You could use velcro between top and bottom to make it stay together or Get those drawer liners (the ones with mini holes) and place it under the table top and on top of the drawers which might prevent it from sliding. Some inexpensive suggestions besides glueing it together :). HTH.
is this easy to take off??
Where did you get your foil from?
Love this look! Where are the white chairs from? I’m assuming ikea but can’t find them on their website. Please help me out!! :))
Where do you buy the big pieces of the gold foil and do they have it in silver too?
I was just about to post the same question – I need that chair! It’s kinda Eames-esque, which I love, but it looks comfier, which will placate the hubster….
I also want to gold foil my entire life, but PLEASE tell me where that white desk chair is from before I lose my entire mind. I’ve been searching for the perfect chair and oh my god, you have it! Please don’t say you made it, or thrifted it back in 1992 on a trip to Guam!
did we ever find out where these chairs are from!?
Ah! Love this!
I’m looking forward to gold foiling everything in my office now and I hope I don’t look back at it in a few years and think the same thing! Thanks for the inspiration!
Lynda
http://www.LyndaontheHudson.com
I have those same drawers and they could DEFINITELY use some brass action. That reactive gold foil is blowing my mind!! Love it, Ash!
Ha! You are too funny, Ashley. Super cute.
Carrie
http://www.wearwherewell.com
But it does not peels off on the sides anyways? Idk, I guess once you know it peels off then it feels wrong if you dont…
Ou, but it has to be completely dry, if it is not then only where is dry will stay, and that creates a cracked cool look as well
If you try it that way, let me know if you find a secret to getting the bubbles out! I could only get it to work this way! xo
You do not cut the excess of foil!!! You have to peel it off!!! The reactive foil has a transparent protection on top… Once is dry you can pull (from the excess foil) and that protection will go away and it looks 2000 times nicer and shinner and better incorporated to the surface.
Hey Gemma! This is actually different than if you were applying it to fabric or applying heat to make it set, it’s just gluing it down as is. If you peel the excess away it will leave a marbled/missing gold effect, but you’re welcome to try it and see if you like that better! The way the tutorial states makes it sturdier for everyday use. We haven’t had any pieces scratch or tear as of yet! Hope this helps! ;)
Gorgeous. Love how it looks especially on white furniture!
Thanks Hannah!
Looks awesome, Ash! I’m definitely going to have to try some of that reactive gold foil. Love the other colors its comes in too!
Give me your tips when you use it!
this looks so pretty!
Glad you like it! xoxo