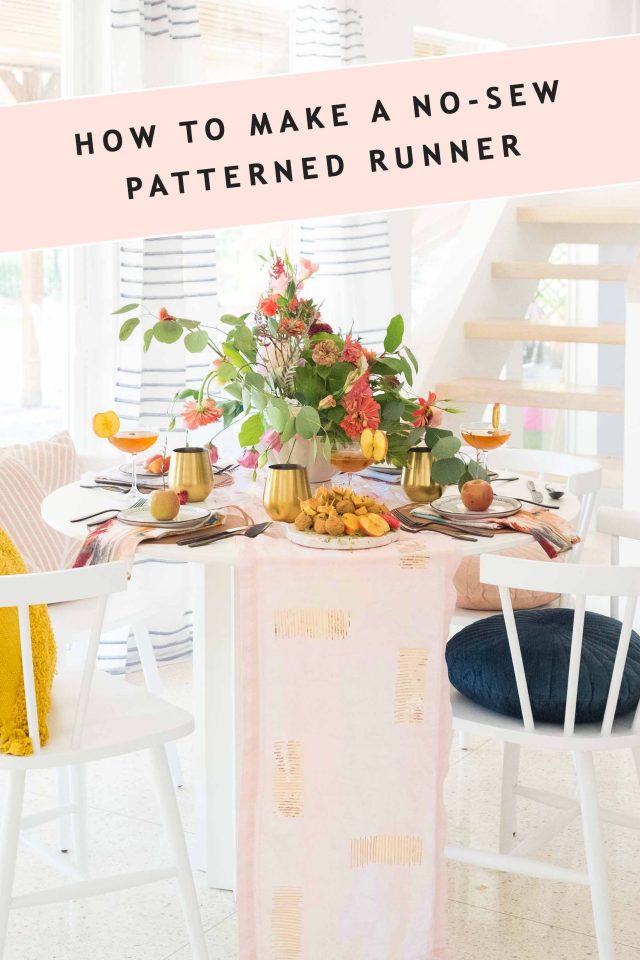
DIY Table Runner Iron On
I’m all about creating a statement dining table, especially during the holiday season! I’m not exactly styling our weekly dinners at home on a daily basis, but this DIY table runner is still worth adding to your table decor arsenal!
It’s super simple to make and you can easily customize it to match your other table linens, too. I originally came up with this DIY to go along with my decorating ideas in this fall table decor post with Cricut, but it’s also versatile year-round.
You can pair it with easy DIY placemats and custom DIY coasters, or use it by itself for adding texture to a simple kitchen dining setup.
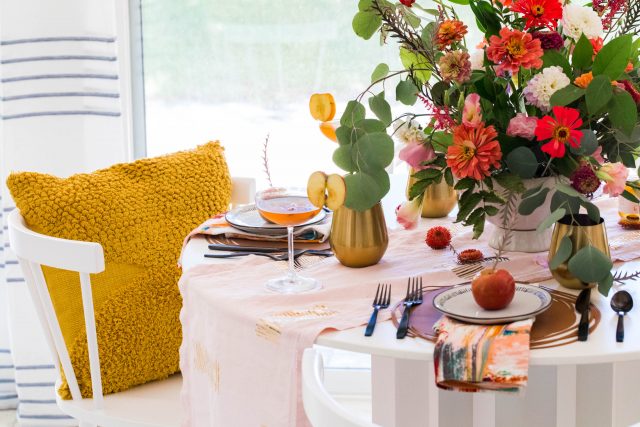
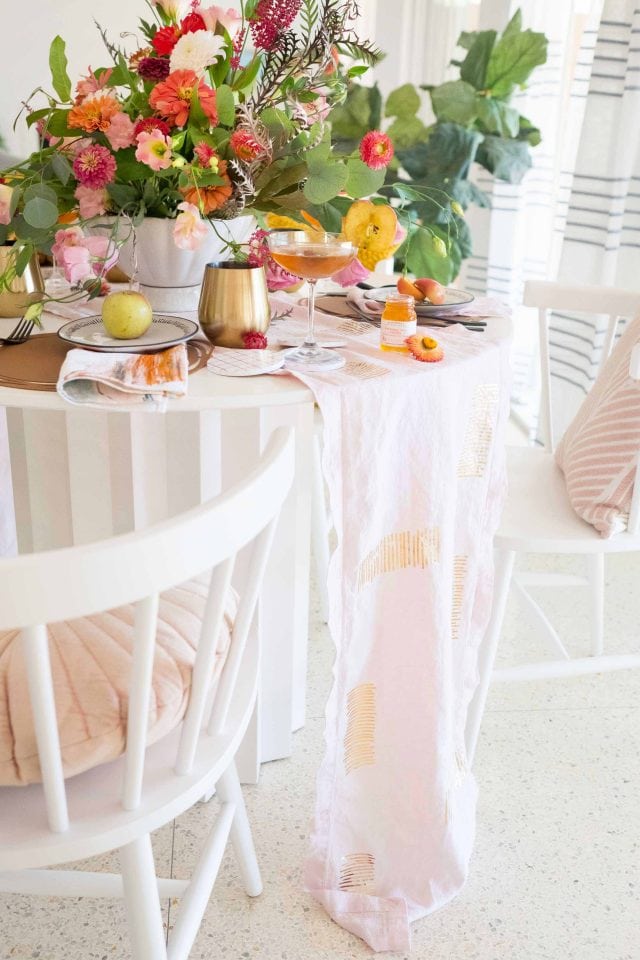
While you can actually make this no-sew table runner in any color combination, I also love this blush pink and gold look as wedding table decor, bridal shower decorations, and even a modern take on Thanksgiving table decor…
MATERIALS
- CRICUT MAKER FOR CUTTING THE IRON-ON DESIGN
- CRICUT EASYPRESS 2 FOR APPLYING YOUR IRON-ON DESIGN
- CRICUT FINE POINT BLADE
- CRICUT IRON-ON VINYL IN THE COLOR OF YOUR CHOICE. I USED THE CRICUT METALLIC GOLD FOIL.
- FABRIC OR RUNNER OF YOUR CHOICE, I USED A LINEN ONE IN BLUSH PINK.
- CRICUT MEDIUM GRIP MAT
DIY Table Runner Idea | How To Make a No-Sew Table Runner
1- Connect your Cricut Maker to your computer and place the fine point blade into side B of the machine.
2- Design what you would like as your table runner design, or download my custom design template below to upload to the Cricut Design Space.
I wanted a simple line design to go with my table setting, so I designed a custom one in photoshop.

3 – With your design uploaded, click the “Make It” button in the top right corner in Design Space.
4- Select the material you are using, which in our case was “Foil Iron-On”. Now place your material face down onto the medium grip mat and load it into your machine.
Pro-Tip: Make sure your image is being sent mirrored (do so on the left side of the screen in Design Space). It doesn’t matter in the case of simple lines, but if you don’t cut it on the “mirrored” setting, when you cut words they would come out backwards when pressed onto the fabric.
5- Once your mat is loaded with your iron-on material, you are ready to cut! Once completed, peel off any excess vinyl so your final design is the only thing left on the sheet.
6- Turn on your EasyPress 2 to head up to 295° F (155° C) and set on “30 seconds” for the timer. Wait until the Cricut logo is green which means the machine is now at the proper temperature.
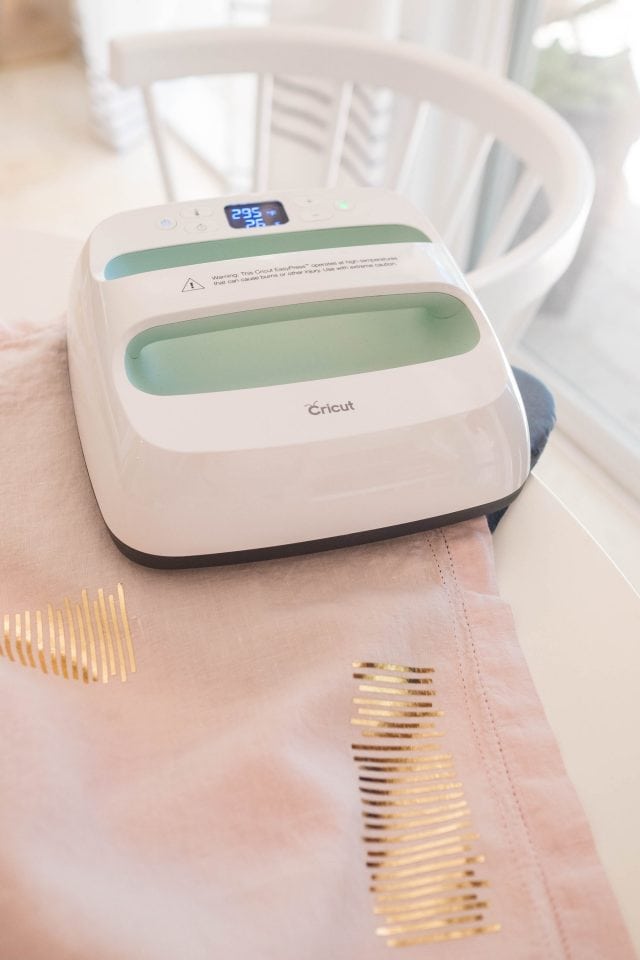
7- Place your design onto your fabric where you want the transfer to be. In our case, we cut small strips of the iron-on design to place randomly throughout the runner for an abstract look.
For the best results, preheat your runner material for 5 seconds before you place the design on it. You’re going to sandwich your fabric and iron on between the EasyPress and the heat resistant mat. Place the heat resistant mat down first, then your fabric of choice, then place your iron-on design on top of the fabric, then press your EasyPress at the proper temperature on top for 30 seconds with light pressure.
8- Leaving the iron-on design in place, flip over your runner fabric and repeat pressing the EasyPress onto the fabric to reheat for another 30 seconds to make sure both sides have been properly heated.
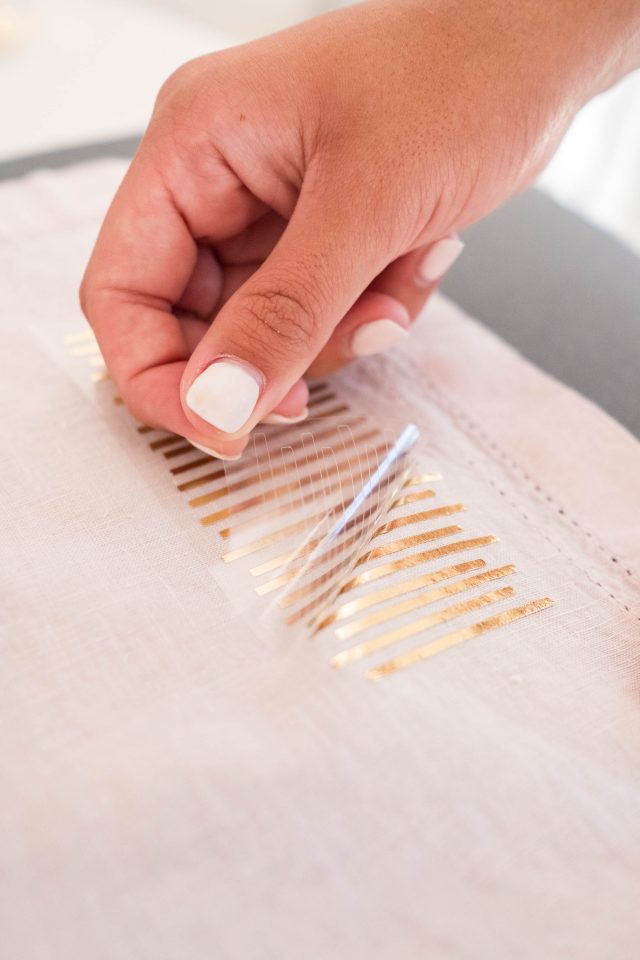
9- Now let the design cool and peel off the clear sheet from the iron-on design carefully. If the design starts to come up with it place it back down and apply more heat until the transfer has fully adhered to your fabric.
10- Repeat the process as necessary to fill your design on the completed DIY runner.
How to Wash A DIY Runner with Iron-On Designs
It can get a little tricky to keep your iron-on designs in good condition, especially when they’re made with metallic gold accents like this one. That said, it is going on a dining table after all so naturally, you’re going to run into a few messes!
It’s always best to handwash delicate designs and fabrics in instances like these. If you have a heavy-duty stain on your hands, use a spot treatment and clear the stain by hand using cold water in the sink.
When it comes to letting the material dry, lay it flat on a surface to air dry to minimize the number of wrinkles.
Inevitably there will be instances when your runner becomes wrinkles, in which case it’s best to use a steamer on the backside of the runner (opposite of the design), or use an iron on the low heat setting with a towel or barrier in between the iron-on fabric and the iron itself.
How to Store Your DIY Table Runner
Call me lazy, but I’m all about being able to pull out quick table decorations without having to iron anything. One tip for storing your runners, table linens, and even a lace table runner is to roll them up as if you were mailing a portrait and store them in a bin.
I particularly love the idea of storing them in a clear bin like this one as an easy organizational idea because it not only keeps them from getting wrinkled or spoiled, but you can also glance in from the side to choose from your options easily.
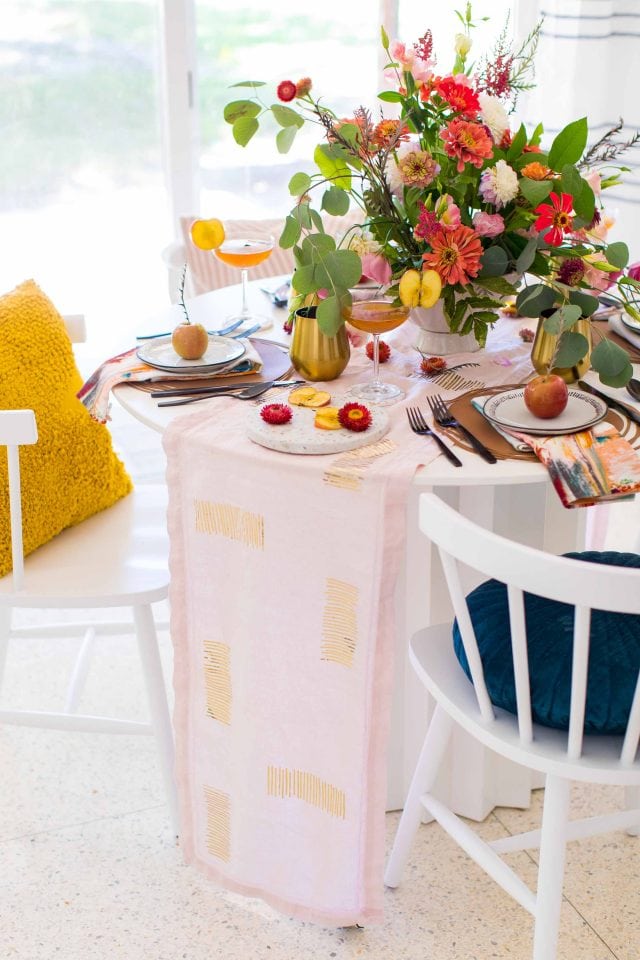
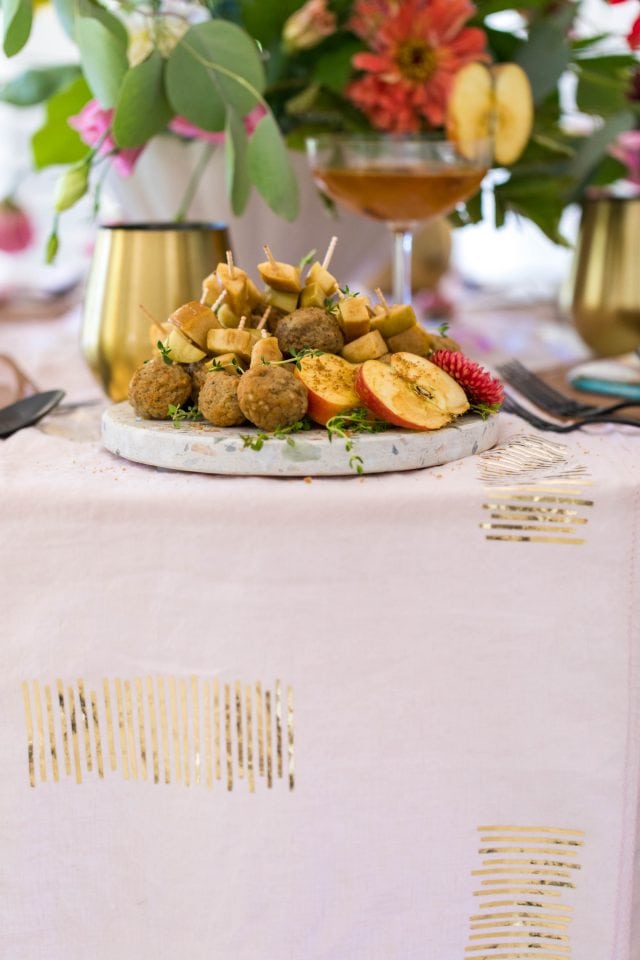
To complete your table setting, be sure to check out my full fall table decor post here that includes my apple cider vinegar cocktail recipe, easy crockpot meatballs recipe, and the rest of my table decor DIY’s!
This post is sponsored by Cricut. Sugar & Cloth has chosen to donate 5% of all sponsored campaigns to charity, which you can read more about right here.
Please note that we may earn a commission for some of the above affiliate links. However, products featured are independently selected and personally well-loved by us!
What a great idea! I always get inspiration from your posts; I’ll have to give this a try!
Thank you for the wonderful compliment, Beth! XOXO
I LOVE this!! Simple, yet so pretty!!
And so easy to make! Thanks, Kristyn!
This is so cute! Thanks for sharing!
Thanks, Krissy!
Doing this has been a life saver for me! Love your party table.
Seriously a lifesaver with the Cricut! XOXO
I LOVE the pink with the gold detail. So cute! I like how you used the runner without a table cloth under it. It’s thick enough to be an accent by itself! Thanks for sharing!
Thanks, Ashley! We were trying to keep it slightly minimal… and honestly opted for only this awesome runner and no table cloth (since a full table cloth isn’t baby friendly)!
How can you make this without a circuit?
IT to so beautiful!
Hi Liz! You can but we prefer using a Cricuit because it’s easier and faster. You also will never burn your item versus using a regular iron.