Homemade Reed Diffuser
This easy 5-minute DIY reed diffuser is the perfect budget-friendly way to keep your house smelling naturally fresh! Even better, it’s made from simple household items for a quick weekend DIY project!
Aromatherapy is all the rage these days! And it just so happens that there’s a double bonus of making your house smell great and feel cozy along with it.
We’ve been known to go a little overboard when it comes to filling our home with smelly good things. We realized it was a problem when a friend politely mentioned that our cat smelled like perfume. After that, we jumped on the essential oil bandwagon very quickly for a more natural alternative.
What is a Reed Diffuser and How Does It Work?
A reed diffuser is typically a decorative container filled with fragrant oil. It includes long, slender reeds made of natural materials like rattan or synthetic materials like polyamide.
Reed diffusers can provide a continuous, subtle fragrance for weeks or even months, depending on the size of the diffuser and the refill frequency. The number of reeds you use can affect the strength of the fragrance. You can start with a few reeds and add more for a stronger scent.
While there are a ton of aromatherapy diffuser options floating around, it’s just as easy to make yourself a DIY Reed Diffuser for a super budget-friendly version.
Essential Oil Diffuser Ideas & Options
One of the most popular aromatherapy diffuser options is the electronic version. They usually have cool mist settings, a water capacity, led lights, a night light, automatic shut off and run time. They also make versions with a large water tank to help fill large rooms, too.
We love our electronic diffusers (shout out to Amazon reviews)! A nebulizer diffuser (or ultrasonic diffuser) is another electronic option that’s ideal if you can afford one! They’re very similar to traditional aroma diffusers except that the nebulizer requires no water tank. It simply diffuses pure essential oils into the air without needing water to create a mist.
BUT it’s also convenient having a simple reed diffuser for small spaces. They’re perfect for places like the bathroom, entryway or home office where you don’t want to have one plugged in at all times.
This DIY Reed Diffuser uses no electricity like the nebulizer. And it lasts a lot longer than the time in between needing to refill the water tank of a traditional electronic version. What it lacks in lighting options, it makes up for in being easy to use! Reed diffusers require minimal maintenance. Simply flip the reeds occasionally to refresh the scent and refill the oil as needed.
No matter which option you choose to go with, the essential oils will only spread over so many square feet. So keep that in mind!
Materials to Make Your Own DIY Essential Oil Diffuser
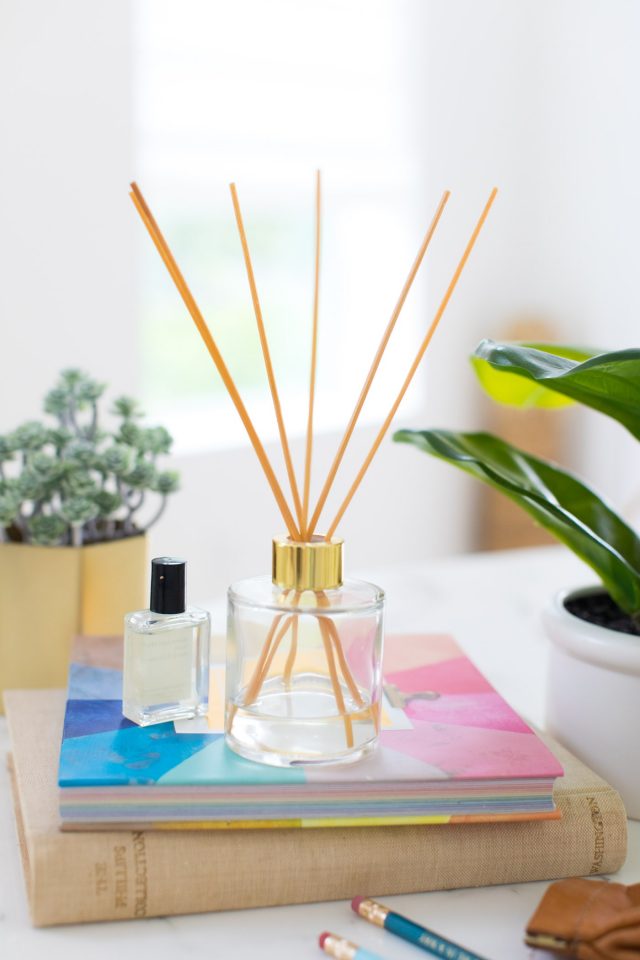
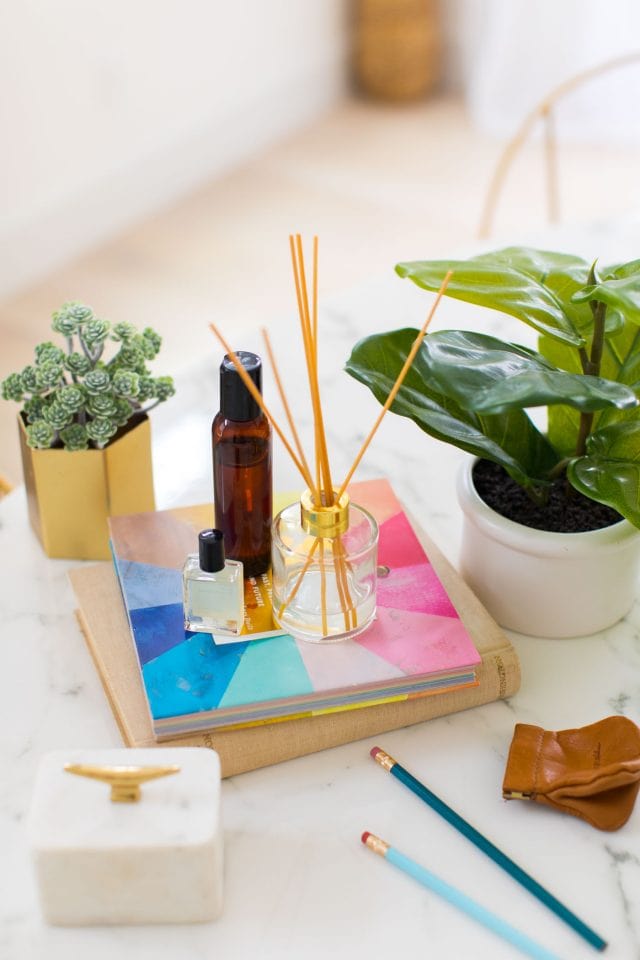
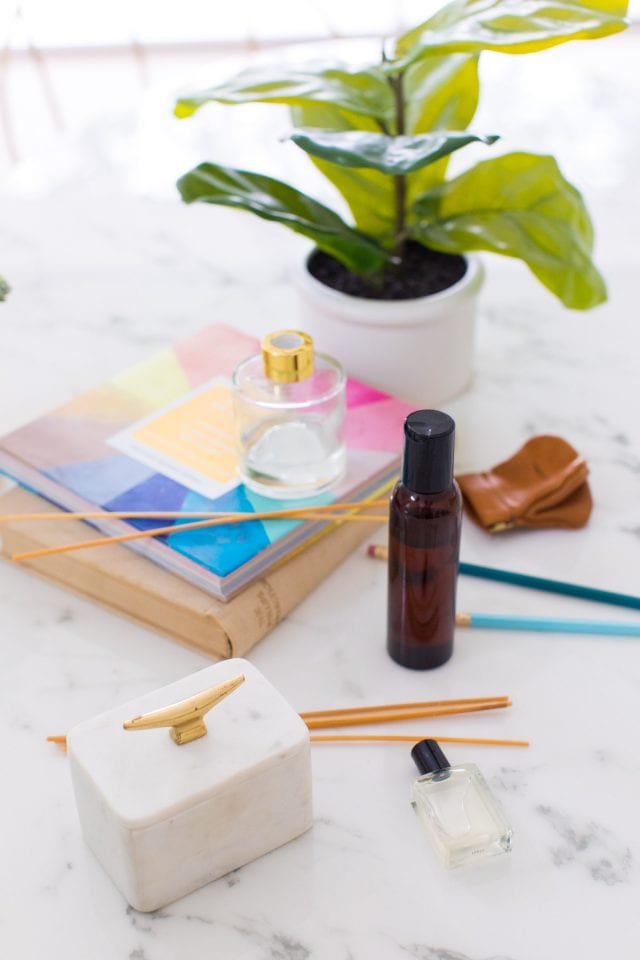
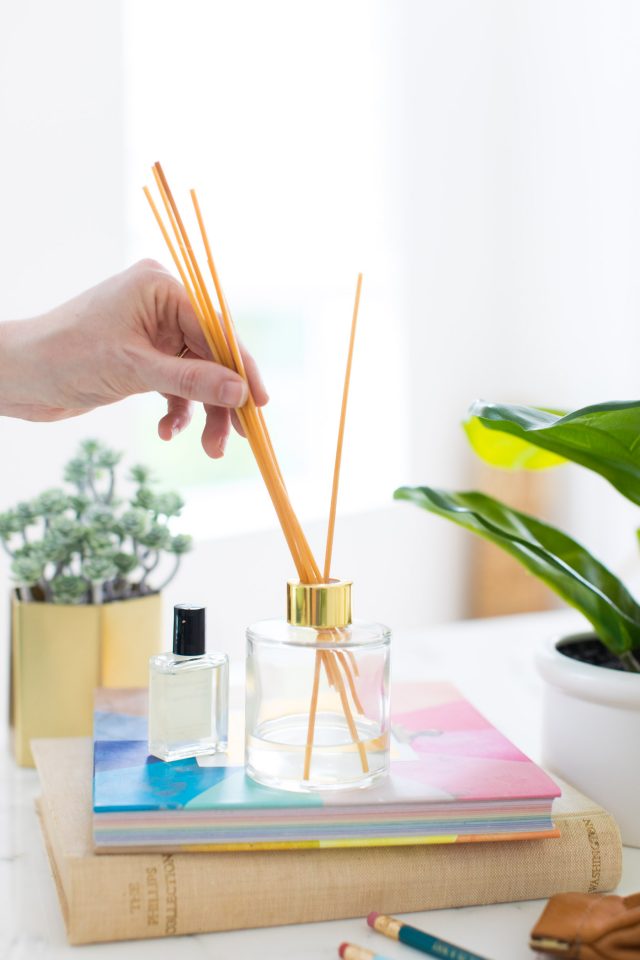
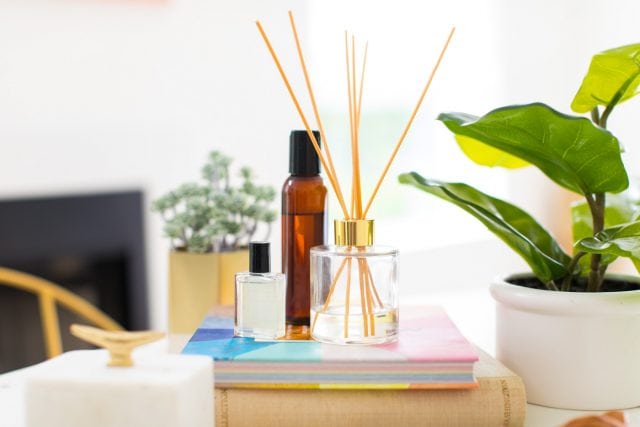
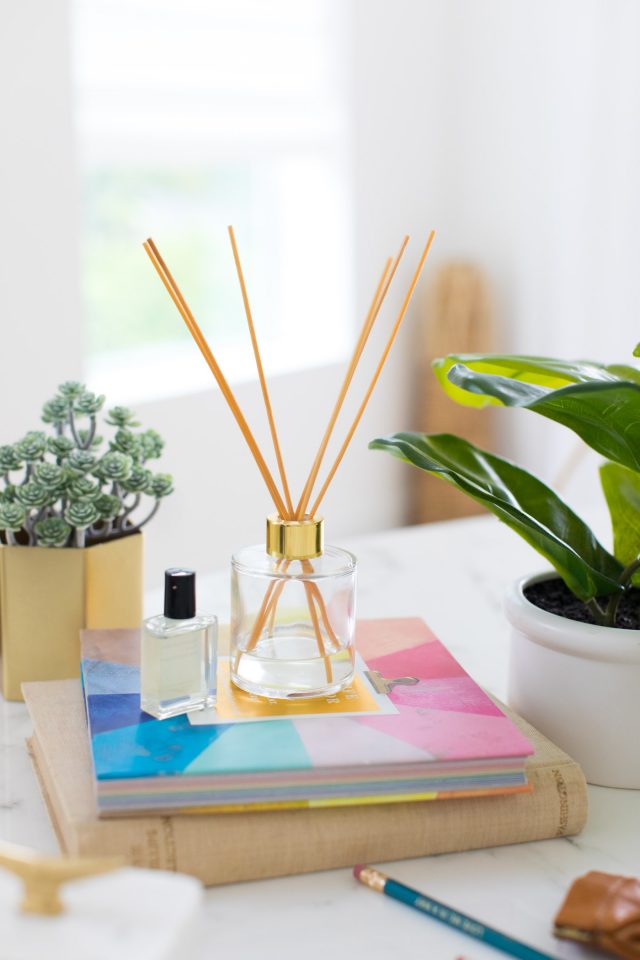
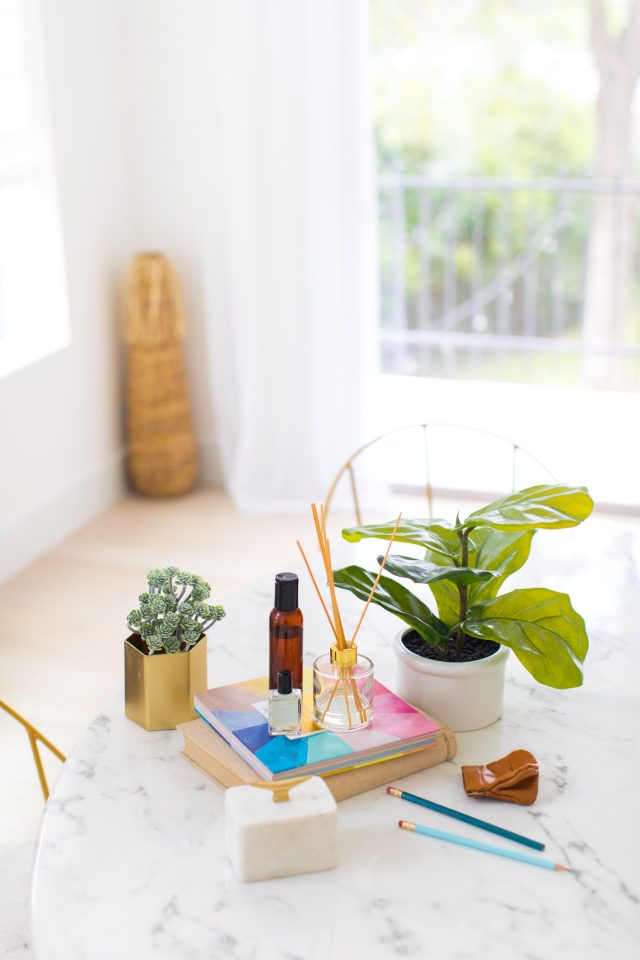
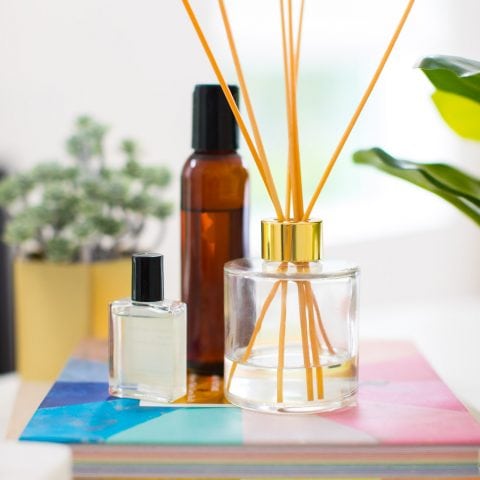
- Diffuser bottle or vase — When it comes to making your own reed diffuser, you only need a vase or vessel to use as a diffuser bottle, a carrier oil, your choice of essential oils, and reed sticks. You can make your diffuser bottle as fancy or as simple as you’d like. We opted to use a clear and gold diffuser bottle, but you could use wood grain, matte black, clear, or any other small vase.
- Pure liquid coconut carrier oil — For diluting stronger oils. Use fractionated coconut oil if you don’t want the coconut scent. You may also opt for sweet almond oil, safflower oil, jojoba oil, grapeseed oil or even baby oil.
- Your favorite essential oils combinations of your choice
- Rattan reeds for reed diffuser sticks — They resemble bamboo skewers. However, reed sticks are porous and absorb the essential oil, allowing it to evaporate and release the fragrance into the air. The number of sticks will also influence the scent strength. More sticks will release more scent.
- Funnel — Optional if your vessel has a narrow opening
How to Make a DIY Reed Diffuser
Once you have all of your reed diffuser materials, you can make them into an essential oil diffuser super quickly!
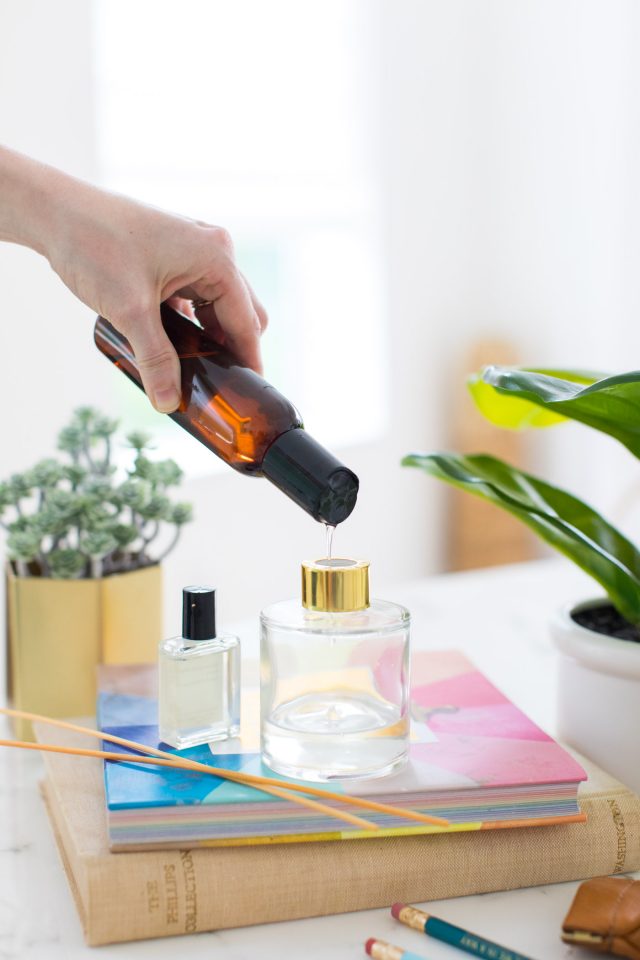
1 — All you have to do is fill your diffuser vase with 3 1/2 ounces of liquid carrier oil.
2 — Next, you’ll add 3 to 5 drops of your favorite essential oil blend to the vase.
3 — Now you’ll insert 5 to 7 of the rattan reeds into the vase, and you’re all set!
Since there is no timer on a reed diffuser like the electronic aromatherapy diffusers have, you don’t want to add too much of the essential oil.
Essential oils have a chemical base and you want to be sure to not risk overexposing yourself, pets, children, or anyone else to too many oils. Before making your own essential oil diffuser at home, be sure to read up on potential toxic essential oils and proper usage.
What are the Benefits of an Essential Oil Diffuser?
Whether you’re making an oil reed diffuser or using another alternative, there are several benefits to using essential oils.
Essential oils provide a boost to the limbic system to enhance relaxation and anti-anxiety benefits, along with respiratory disinfection, clearing toxins in the air, and more.
There is still some controversy over just how much essential oils have an effect on your body and mind. But they’re undoubtedly great for making your living room smell good!
Regardless of how you find some of the health benefits to be, there’s no denying that having an essential oil diffuser in the room gives a relaxing aroma that you can customize with any number of essential oil combinations.
What Combination of Essential Oils Should I Use
The sky is the limit when it comes to choosing what essential oil diffuser combinations to use. There are also a lot of essential oils that you can buy already mixed for certain purposes. For instance, you can purchase essential oil blends for relaxation, immune support, better sleep, energy, or mood-boosting.
Our favorite essential oil diffuser blends —
- Soothing citrus oil blend: Combine 1 drop of lavender, 1 drop of ylang-ylang, and one drop of wild orange
- Sleep oil blend: Combine 2 drops of bergamot and one drop of patchouli
- Immunity oil blend: Combine 1 drop of tea tree, 1 drop of eucalyptus, 1 drop of sweet orange, and one drop of frankincense
- Good mood oil blend: Combine 2 drops of lavender and 2 drops of lemongrass
You can use these same combinations when making your own homemade candles or homemade sugar scrubs.
Tutorial Tips
- Flip the sticks regularly: To ensure even scent diffusion, flip the oil reed sticks every few days.
- Add more oil: If the scent starts to fade, you can add more essential oil to the container.
- Consider the room: The size of the room will also affect the scent diffusion. A larger room may require more oil.
- Avoid direct sunlight: Direct sunlight can cause the oil to evaporate more quickly, reducing the scent’s longevity.
More Candle and Aromatherapy DIY ideas
Needless to say, you’ll likely get hooked when you realize just how easy it is to make your own essential oil diffuser. Especially when it costs less than $25 to make them for multiple rooms in the house! In case you’re looking for a few other candle and aromatherapy DIY ideas, here are some of my favorites from the archives —
- How to make wax candles with rosemary and grapefruit
- DIY faux wood candle holder
- DIY copper candle holder
- Rainbow DIY taper candle holder
- Wooden taper candle holder
- DIY citronella candles
Below is a full printable tutorial for how to make a DIY reed diffuser for every room in your house.
DIY Reed Diffuser
Equipment
- Spoon optional
Materials
- 1 diffuser bottle or vase
- 3 ½ oz pure liquid coconut carrier oil
- Rattan reeds for reed diffusing sticks
- Essential oil combinations of your choice
Instructions
- Fill your diffuser vase with 3 1/2 ounces of liquid carrier oil like coconut oil.
- Add 3 drops of your favorite essential oil blend to the vase.
- Insert 5-7 of the rattan reeds into the vase.
Notes
- Since there is no timer on a reed diffuser like the traditional aromatherapy diffusers have, you don’t want to add too much of an essential oil and accidentally overpower the room.
- Essential oils have a chemical base and you want to be sure to not risk overexposing yourself, pets, children, or anyone else to too many oils.
- Be sure to read up on potential toxic essential oils and proper usage before making your own essential oil diffuser at home.

Please note that we may earn a commission for some of the above affiliate links. However, products featured are independently selected and personally well-loved by us!
No matter how much oil I use can’t smell it unless I put the reeds right up to my nose.
Hi Linda! We are so sorry to hear. Do you mind telling us what type and brand of carrier oil and essential oils you used so that we can troubleshoot to why you aren’t able to smell anything?
Hi,
I cannot use essential oils as we have two cats, please can anyone tell me what I can use instead?
Many thanks
Hi Rose! We found this article that may be helpful: https://www.forbes.com/advisor/pet-insurance/pet-care/essential-oils-for-cats-and-dogs/
I was looking for a blog that can help me gain some knowledge about Essential Oils and found this. Really loved the Blog! It is very well written and explains every point. It cleared all my doubts. Below i am sharing link for some blogs that you guys will find useful.
https://arksutra.com/blog/
Your article has brought great value to me.
Who doesn’t love smelly good things, am I right? Anyway, great recipe and an even better article. Loved it!
Niiiice crafts!
Where do you get the reed diffusers?
Wow, had not idea that this could take literally a couple minutes! Super cool article. Thanks for the share.
How long did it take your diffuser to start making your room smell good? I read one tutorial that said it took several days for theirs to start spreading the smell of the oils, & I was wondering if this one took the same amount of time.
Either way this is so cute, & I’m headed to the store now!
So happy to hear, Michaela! It definitely took a couple of hours, but the more potent the oil, the more it will smell! Would love to hear what you think of it when you try it out! xo
Thanks for this quick and creative diy project. i like to do things fast and i think this reed diffuser is worth a shot. Thanks for the share.
Agreed, I love a quick and easy DIY! Glad you enjoyed it! :)
This diffuser is very nice and not too expensive. I love homemade products. Thank you. I must make it myself.
Thanks for the tips. I am by no means an expert on using reed diffusers, but since I couldn’t afford the fancier ones, I did some research before buying my reeds. Everything I read said that bamboo reeds or skewers do NOT work well for diffusing because they are solid.
I purchased the diffuser oils, but I enjoyed the homemade products so I’ve followed your instructions !!! great it is easy to do and cute
Wow it’s so adorable!!! This diffuser is not only really easy to make but also too cheap!! I’ve bought many diffuser because I love using essential oils to relax and refresh my room,but it did cost me a lot of money! I can’t believe that it can be made at home and it’s so so cute!! Thank you so much!! Better try it right away!!
It’s awesome to pay a visit this web page and reading the views of all friends concerning this
paragraph, while I am also zealous of getting familiarity.
Be careful using essential oils around cats. Many of them have chemicals that cats can’t process, and they accumulate in the kitties and can lead to serious health issues.
I did not know skewers can be used in this home made diffuser, as I have been using bamboo reeds for this purpose for a long period. Using baby oil as base oil is another new idea, earlier I used sweet almond oil for this purpose.
Just made mine with Pine oil, thanks for the tutorial!
Using baby oil, do you get that smell also? Or is there a non-scented kind of baby oil??
as long as you use enough of the scent, you don’t smell it at all :)
Super late, but quick question – what if you dont have baby oil? Any other carrier oil that you would recommend?
To be honest, I’m not really sure. Mineral oil might work just as well, but I’ve personally only tried the baby oil. Good luck!
I have read that you could use safflower oil, grape seed oil or sweet almond oil.
This is so neat! With the holidays around the corner, I’m excited to try this out for gifts. Thanks for posting!
You want to use Rattan not bamboo:
Rattan has an inner core with many hollow tubes that cover the length of the reed. This is what allows the oil to soak up the reeds. Bamboo is also hollow, but it contains nodes or knots in the middle that will block the flow of oil. Bamboo and other types of wood are not porous enough to absorb and diffuse oil.
Read more: About Reed Diffusers | eHow.com http://www.ehow.com/about_5101688_reed-diffusers.html#ixzz1jNifgvZX
Pinterest seriously impedes on my work ethic at this point, haha
Thanks for the tip, Michele! Rattan (or regular reed diffusing sticks) are better for allowing the scent of the diffuser to travel farther, but I’ve been using the bamboo sticks and still get the sweet smelling benefits. This DIY is mostly to show how easy it can be to recreate them with easily accessible ingredients that are very inexpensive, and can stick look just as pretty, or better, than store bought diffusers (without the bad chemicals). I’ll add a note to make sure people are more aware of the rattan as a premium option. Thanks for reading!
thank you for the idea!but, a little question:if you fill the vase with oil, how will you clean it when the oil is over?usually this vases(and mine)has a small hole
That’s a great question! I actually haven’t cleaned mine yet because the oil seriously lasts forever, but I do have some experiences with the concept of cleaning them from my DIY Oil & Vinegar Pourer post. Both of the pourers have small openings, but I just use a degreasing spray (Greased Lightning is what I chose). Just spray a generous amount into the bottle with a tiny bit of water and dawn dish soap and let it soak for a few hours. From my experience it should rinse clean and let it air dry.
Hi there! I use a quick trick to clean vases and other things with small openings…I keep bird gravel or coarse sand on hand, and just put a teaspoon of it in the container with a couple of drops of dish soap, then fill half full with hot water and shake. Rinse and it’s usually sparkling clean!
Approximately how much essential oil and baby oil do you put it? Thanks for the great idea!
The amount of baby oil just depends on how large or small the case your using is. The oil needs to come just past halfway on the reeds. As far as the essential oils, you can use however much you want to get the strength you’re looking for. I used a whole bottle of essential oil. Hope this helps!
This is such a simple and great tutorial. I need to give this a try!
You totally should! You can use the ingredients for more than one batch, so it’s super economical
This is really cool! I’ve always liked reed diffusers but never bought them cause I didn’t know what kind of chemicals were in them. This way I can just make my own! Thanks!
I know! I thought the same thing once I read an article about the wall outlet diffusers having harmful chemicals.
Ive been paying $39.00 for a nice diffuser(the ones that use bamboo sticks because they hold the scent unlike the cheap sticks) and now I can make my own for only $10.00???
I had no idea how easy and inexpensive it is to make my house smell wonderful without the harsh chemicals from air freshners and plug-ins.
LOVE THIS DIY POST!!!
oooh. this is fun.
this is so pretty! i love your photos!
thanks so much!
This is fanastic! i have been looking for a practical way to cut back on cost of air freshers. I am on this inner quest to have every room in my apartment smell nice. I have been using airwick plugs for about a year now and am tired of paying so much for so little time(about 3 weeks on low settings) the cost air adding up! i even began looking at waxs melts.. While their are different scents, again if your spending $4 every 3 weeks the cost add up. Not the mention the warmer itself. I am excited to try this at home. Question: Do i ha ve to have vase that has a small opening or can i have a standard bigger opening and it still work the same. 2) do you have to change the ratten stick? Thank you for the links, Ps i JUST discovered Waspi tape!:)