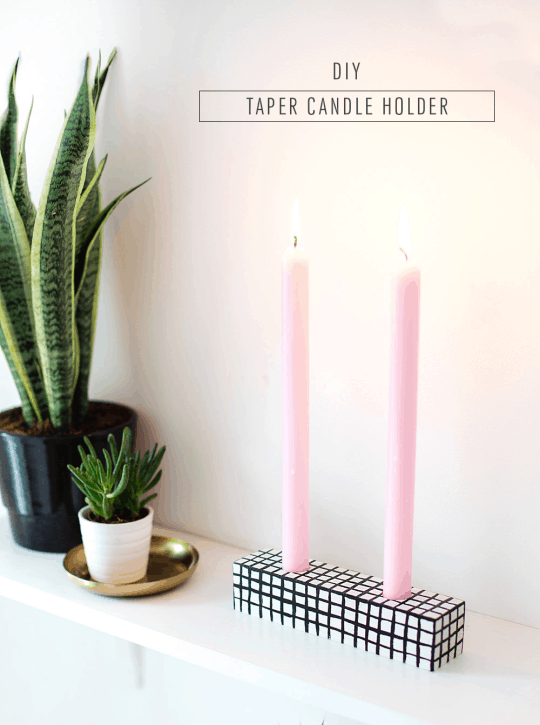
Patterned DIY Candle Holder
This Patterned DIY Candle Holder has just the perfect touch of pink for Valentine’s Day. Plus, you can mix and match colors for every holiday.

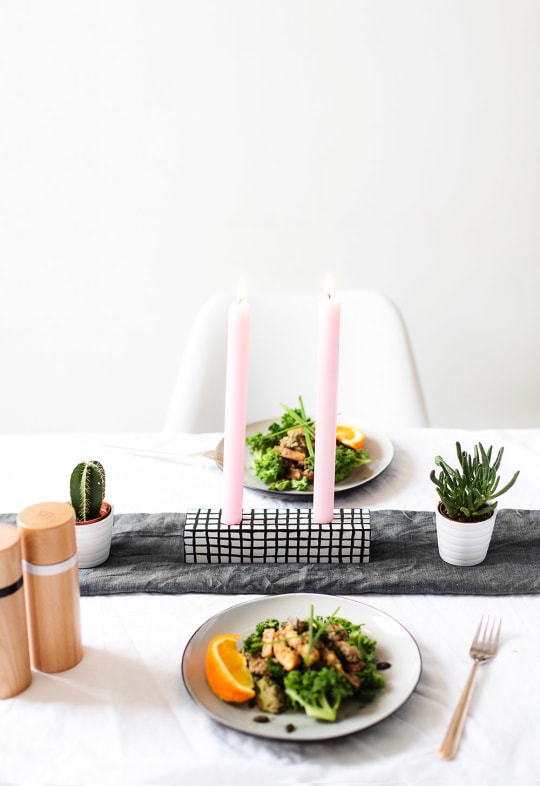
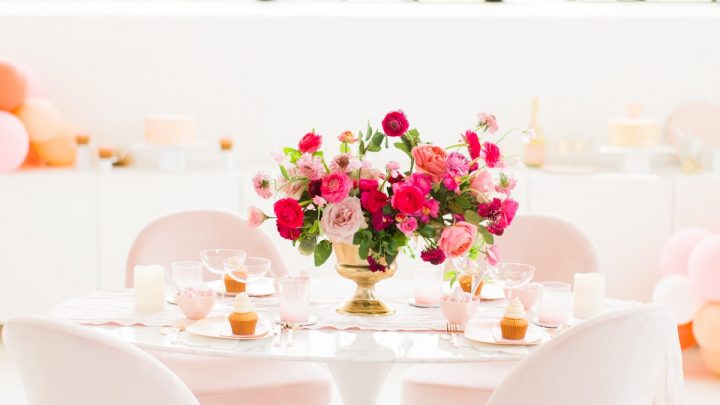
I love having people over for meals. And I’m definitely a magpie for anything that will add some fun to the table.
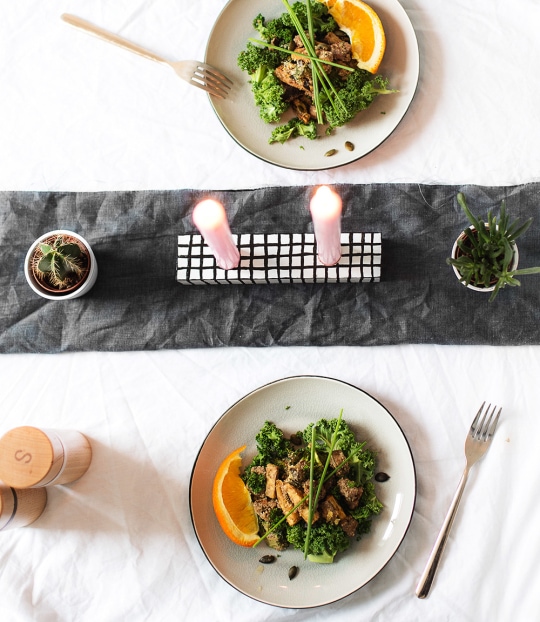
From breakfast to dinner, making a bit of a styling effort every now and again with some flowers, cute placements, a runner… or in this case, a Patterned DIY Candle Holder, will always set the tone.
Moreover, for more Creative DIY Candle Holder Ideas To Give Your Home A Burst Of Color & Scent, these will help you add a distinctive element to your home while creating an inviting atmosphere.
It immediately makes things feel just a little bit more special and indulges my inner stylist. This DIY is also super simple to make.
And even though it does involve some painting, I, Teri used the easiest pattern ever. (It looks even better when it’s not 100% perfect!).
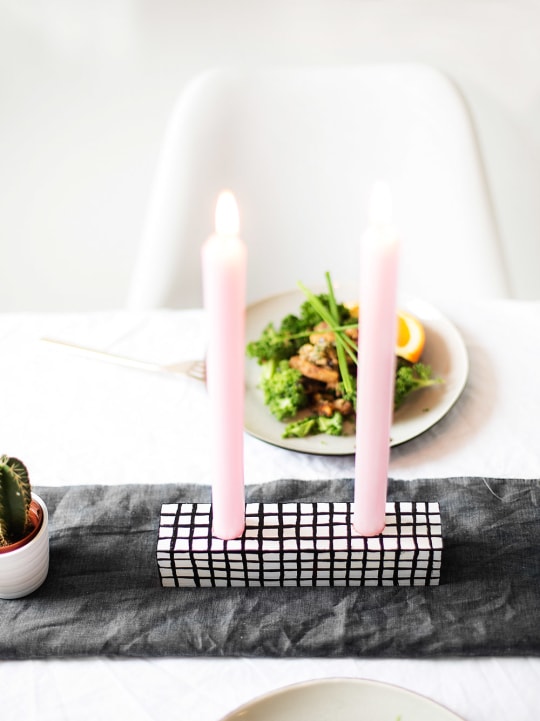
With this monochrome base, you can change your candle colors to fit your mood or table colors (like pink for Valentine’s Day)!
You may also want this DIY Paper Color Block Table Covering which is a perfect and quick solution for covering your tables in lieu of a traditional tablecloth.
Or even try adding some gold or copper candles for an extra luxe look…
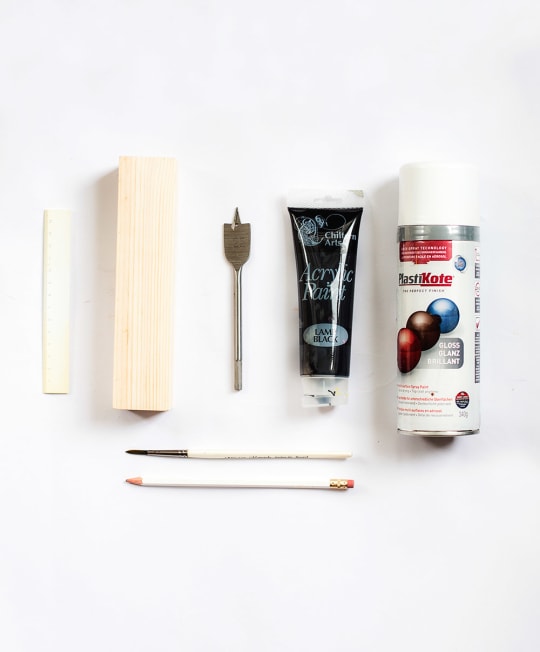
Materials And Tools Needed To Make A Patterned DIY Candle Holder
Block of Balsa wood— Or any relatively soft wood for easy drilling. Using soft wood made drilling a lot easier for a weak girly girl like myself. However, you can use any type of wood.
Paintbrush
Wide drill bit to fit the candles
Pencil
Ruler
How To Make A Patterned DIY Candle Holder
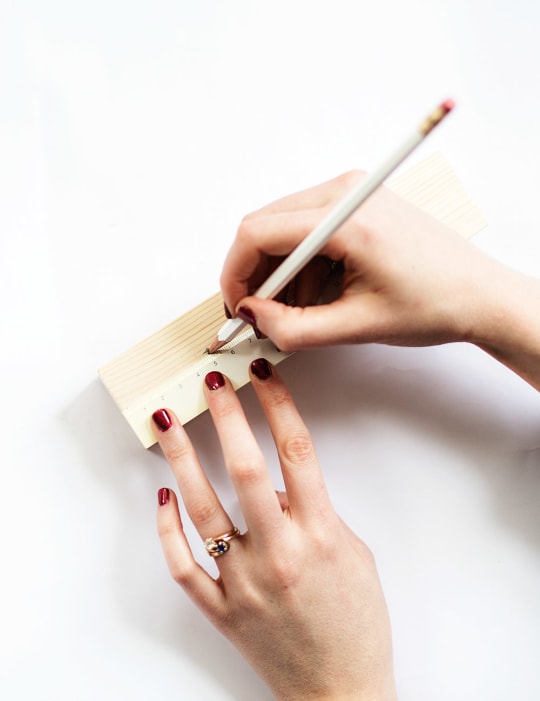
1 — Measure the center of your piece of wood, and then divide the distance from each long end to the middle in half again.
2 — Mark that point with the pencil, in line with the middle point.
If the middle was 10 cm, I’d be measuring 5cm in from either end.
This marks where your candles sit.
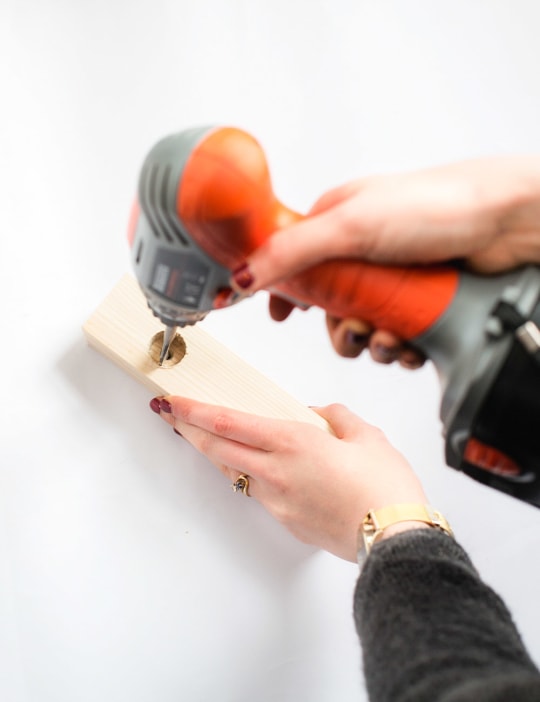
3 — Attach the correct drill bit to your drill. Holding the wood steady with one hand, drill directly into the wood from above, guided by the two pencil marks you’ve made.
Keep drilling until you’ve created enough depth for the candles to sit in firmly.
If there are any rough edges you could just sand them down.
Painting Your DIY Candle Holder
4 — Next, spray the wood white.
Place the wood on a protected surface and cover it with two or three light coats. Allow each coat to dry in between.
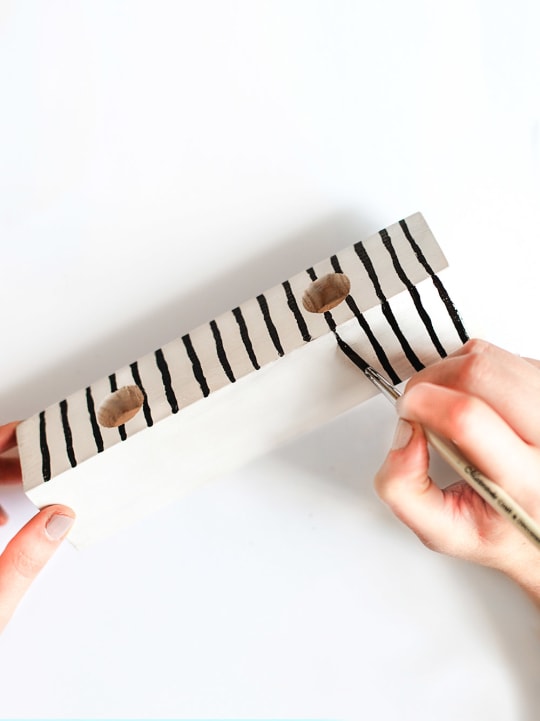
Now for the grid.
5 — Start by painting lines across one side and the top, leaving the other side free to hold. Try to keep the lines relatively evenly spaced, but there’s no need to measure.
I did this by starting with the middle line on each side and working out from there. A bit of unevenness and rough brush strokes add to the effect.
When those two sides are dry, paint the other side and then go back over with lines in the opposite direction.
Don’t forget the sides but there’s no need to bother with the bottom. Make sure you’re matching up the black lines on all sides to get the continuous pattern.
Your candles may need to be shaved slightly at the sides to fit in the holes. But after that, you’re good to go!
More Candle And Aromatherapy DIY Ideas
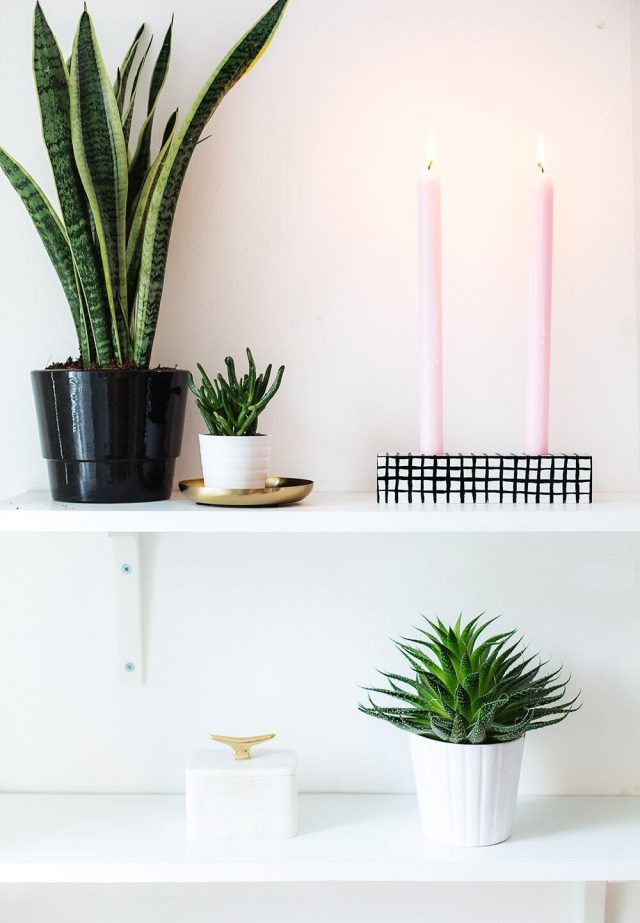
I love the final effect as a centerpiece. So when you’re not using it as a table center, it makes a great addition to any assorted shelf.
I’m already thinking this will be perfect for a certain upcoming Valentine’s dinner together a simple and chic galentine’s table just in time for some Valentine’s party inspiration.
In case you’re looking for a few other candle and aromatherapy DIY ideas, here are some of my favorites from the archives —
- Essential oil candles: How to make wax candles with rosemary and grapefruit
- How to make an essential oil diffuser: DIY Reed Diffuser
- DIY Faux Wood Candle Holder
- DIY Copper Candleholder
- Rainbow DIY Taper Candle Holder
- DIY citronella candles

Patterned DIY Candle Holder
Equipment
- Hand drill
- Paintbrush
- Pencil
- Ruler
- Wide drill bit to fit the candles
Materials
- White spray paint
- Black acrylic paint
- Candles
- Block of Balsa wood
Instructions
How to Make a Patterned DIY Candle Holder
- Measure the center of your piece of wood, and then divide the distance from each long end to the middle in half again.
- Mark that point with the pencil, in line with the middle point.If the middle was 10 cm, then I’d be measuring 5cm in from either end for instance.This marks where your candles will sit.
- Attach the correct drill bit to your drill. Holding the wood steady with one hand, drill directly into the wood from above, guided by the two pencil marks you’ve made.
- Keep drilling until you’ve created enough depth for the candles to sit in firmly.
- If there are any rough edges you could just sand them down.
Painting Your DIY Candle Holder
- Spray the wood white.
- Place the wood on a protected surface and cover with two or three light coats. Allow each coat to dry in between. Now for the grid.
- Start by painting lines across one side and the top, leaving the other side free to hold. Try to keep the lines relatively evenly spaced, but there’s no need to measure.
- When those two sides are dry, paint the other side and then go back over with lines in the opposite direction.
- Don’t forget the sides but there’s no need to bother with the bottom. Make sure you’re matching up the black lines on all sides to get the continuous pattern.
- Your candles may need to be shaved slightly at the sides to fit in the holes. But after that you’re good to go!

Don’t forget to share your DIY Candle Holder with us on Instagram using the hashtag #sugarandclothloves. We always love seeing all of your creations! Looking for more interior design inspiration? You can find all of our home decor tutorials and ideas right here!


Please note that we may earn a commission for some of the above affiliate links. However, products featured are independently selected and personally well-loved by us!
Love this! This is so cute!
Thanks, Caro! :)
This is so cute! It looks fabulous with those light pink candles!
Thanks, Kasie!!
This looks not just really pretty but also ridiculously easy. I love DIYs like this, thanks for sharing!
Thanks, Anna! :)
That candle holder is so cute! I love it!
Paige
http://thehappyflammily.com
Thanks, Paige! Teri did a great job with this project :)
Love this! This is such a great idea & so customizable! My future center pieces thank you!! (:
Thanks, Andriana! Hope you enjoy the project! Let us know how it turns out :)