Marble DIY Tabletop Clock
Add a touch of glam to your tabletop or shelf decor without breaking the bank with this Marble DIY Tabletop Clock.

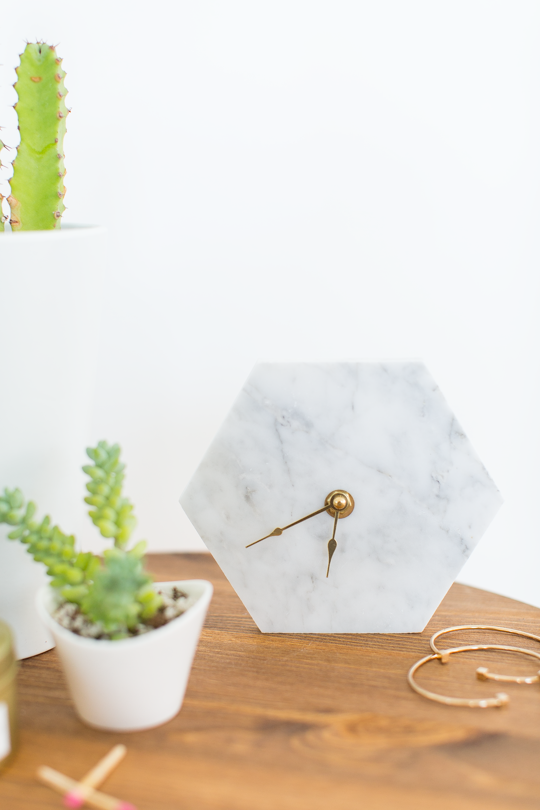
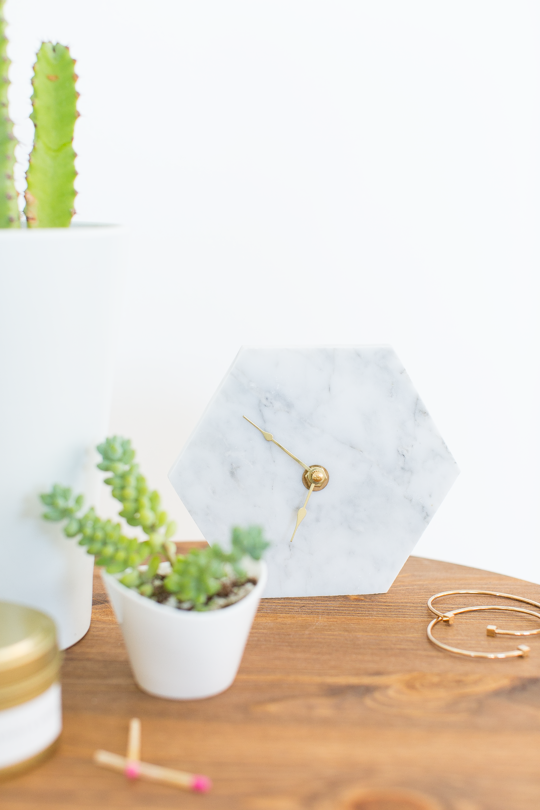
If you’re a fan of sleek, modern decor and love adding personalized touches to your home, then this Marble DIY Tabletop Clock is perfect for you! Marble exudes timeless elegance and sophistication, making it an ideal material for crafting a chic and functional piece of art. It will look perfect on just about everything, shelves, desks, countertops, and even the dinner table.
This simple project combines the beauty of natural stone with the practicality of a functional clock, all while elevating your home decor. Whether you’re a beginner or seasoned crafter, this DIY tutorial will guide you through the steps of transforming a plain marble tile into a stunning centerpiece that adds style and function to any room. Let’s get started and create your very own elegant marble clock!
Materials and Tools Needed
- Marble tile — Choose a size and shape that suits your style. We went with a unique hexagon tile.
- Drill — For making the necessary holes in the tile.
- Regular drill bit — To create a starter hole for the ceramic drill bit.
- 5/16″ ceramic drill bit — Specifically for drilling through the marble tile.
- Small wall clock mechanism movement kit
- Painter’s tape — To secure the tile and mark your drilling points.
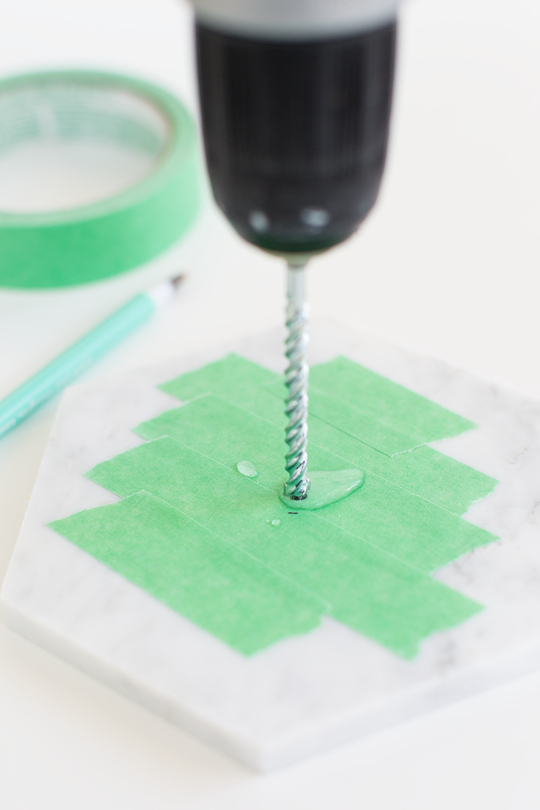
- Water squirt bottle — To keep the drill bit cool while drilling through marble
- Paper towel — For cleaning up any water or dust while drilling.
- Super glue — To attach the clock mechanism to the marble tile.
How to Make a Marble DIY Tabletop Clock
1 — Drill the hole: Start by drilling a hole at the center of your marble tile. Use painter’s tape across the surface of the tile for extra strength, which will help prevent chipping or breaking the marble during drilling.
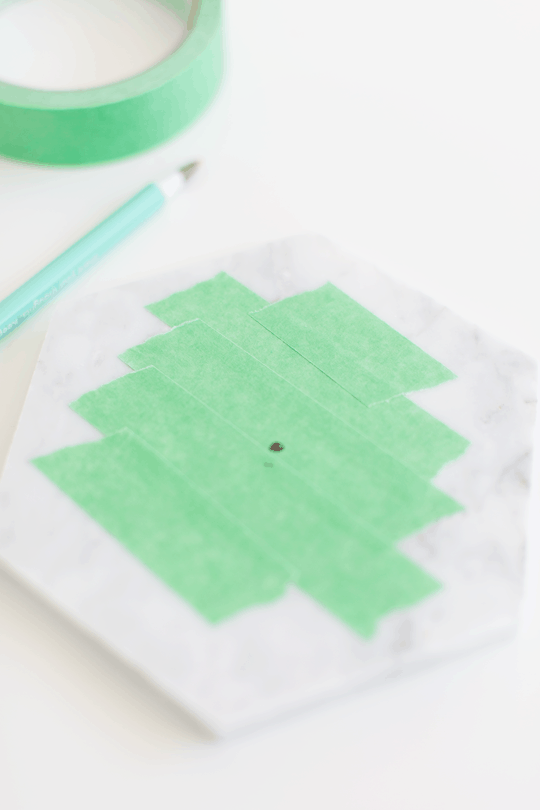
2 — Create a groove: Begin with a regular drill bit to make a small groove at the center. Drill just enough until you see ceramic dust. Then, switch to a 5/16 ceramic drill bit for the main hole. Make sure to spritz water on the area while drilling to keep the marble cool and avoid excessive friction. he drilling process may create some mess, so use a paper towel to dab away any excess water and dust. Once the hole is drilled, remove the painter’s tape and wipe the surface clean.
3 — Secure the mechanism: Next, test the clock mechanism by inserting the battery part through the hole to check for a proper fit. If the clock mechanism doesn’t fit snugly, apply a thin layer of super glue around the back of the battery mechanism, avoiding the hand shaft to ensure it can still rotate freely. This is necessary because the marble is too thick for the hex nut to clip onto from the front side, so it needs to be held in place on its own. Insert the mechanism through the hole, holding it in place until the glue fully sets.
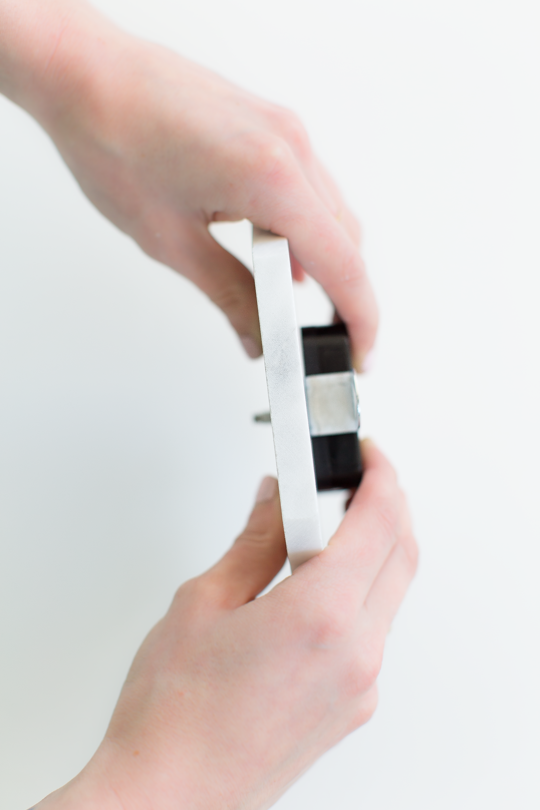
4 — Add the washer and hex nut: After the mechanism is secured, slide the washer over the shaft, followed by the hex nut. You can glue the washer and hex nut in place to ensure they stay securely fastened.
5 — Attach the clock hands: Follow the instructions provided with your clock kit to attach the clock hands to the mechanism. Make sure everything is properly aligned.
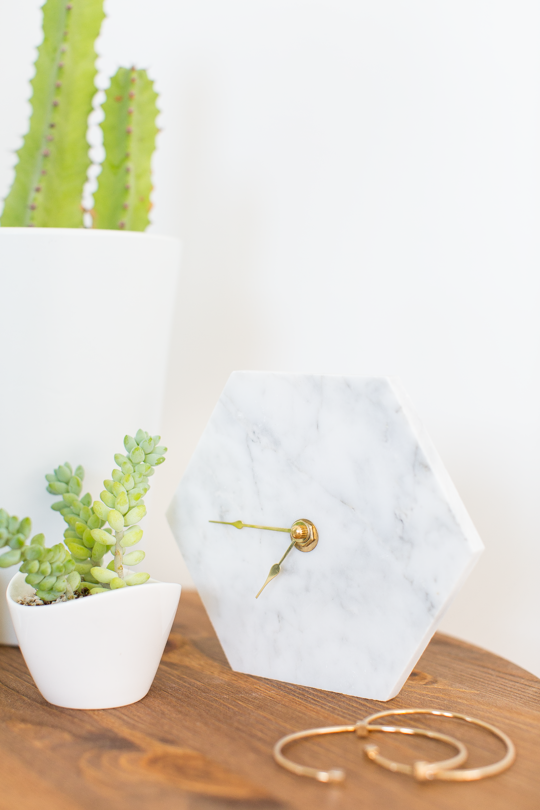
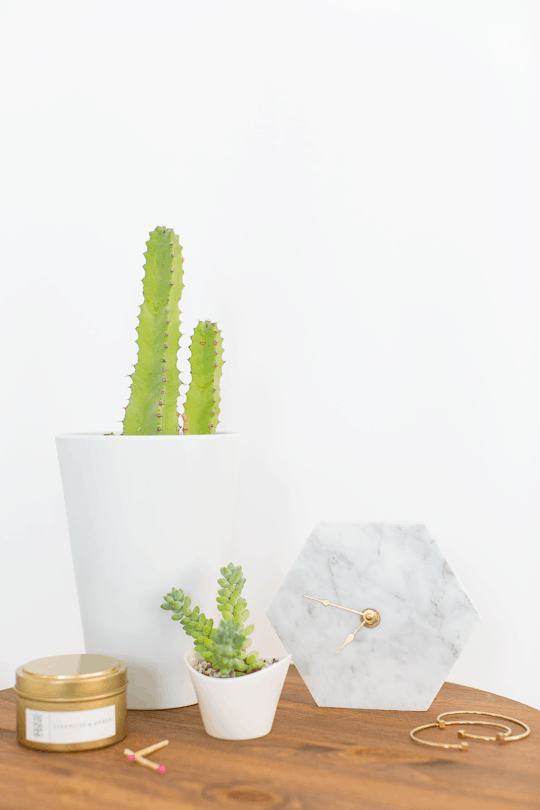
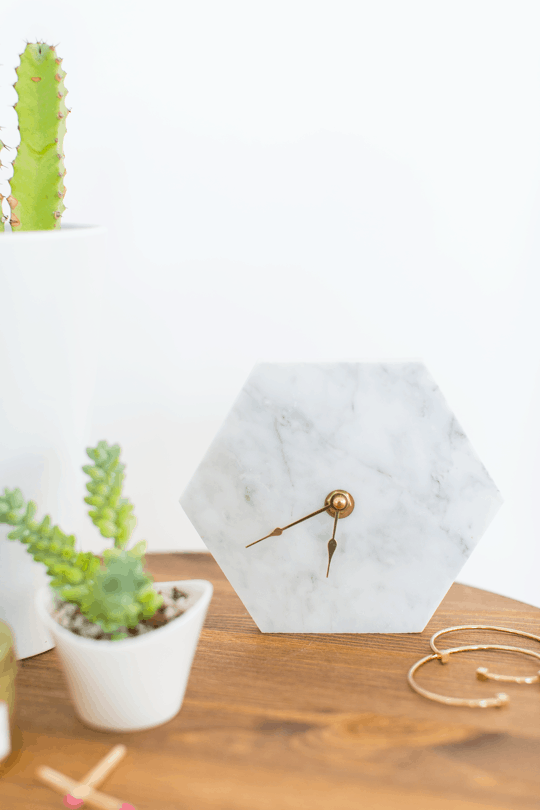
Your marble clock is now ready! The tile is sturdy enough to stand on its own, or you can hang it from the opening on the back of the clock mechanism. Alternatively, lean it or stack it for a stylish display in your space.
More Chic Clocks
Marble DIY Tabletop Clock
Equipment
- Drill and drill bit and screws
- 5/16" ceramic drill bit
- Super glue
Materials
- 1 marble tile
- 1 clock movement mechanism kit
Instructions
- Drill the hole: Start by drilling a hole at the center of your marble tile. Use painter’s tape across the surface of the tile for extra strength, which will help prevent chipping or breaking the marble during drilling.
- Create a groove: Begin with a regular drill bit to make a small groove at the center. Drill just enough until you see ceramic dust. Then, switch to a 5/16 ceramic drill bit for the main hole. Make sure to spritz water on the area while drilling to keep the marble cool and avoid excessive friction. he drilling process may create some mess, so use a paper towel to dab away any excess water and dust. Once the hole is drilled, remove the painter’s tape and wipe the surface clean.
- Secure the mechanism: Next, test the clock mechanism by inserting the battery part through the hole to check for a proper fit. If the clock mechanism doesn’t fit snugly, apply a thin layer of super glue around the back of the battery mechanism, avoiding the hand shaft to ensure it can still rotate freely. This is necessary because the marble is too thick for the hex nut to clip onto from the front side, so it needs to be held in place on its own. Insert the mechanism through the hole, holding it in place until the glue fully sets.
- Add the washer and hex nut: After the mechanism is secured, slide the washer over the shaft, followed by the hex nut. You can glue the washer and hex nut in place to ensure they stay securely fastened.
- Attach the clock hands: Follow the instructions provided with your clock kit to attach the clock hands to the mechanism. Make sure everything is properly aligned.


19 Unique & Easy Houseplants that We’re Loving
Looking for unique house plants? Dive into our guide to…
Continue Reading 19 Unique & Easy Houseplants that We’re Loving

60 Amazon Bedroom Decor Picks to Revamp Your Room
Discover the best Amazon bedroom decor items to create a…
Continue Reading 60 Amazon Bedroom Decor Picks to Revamp Your Room

Marbled Clay DIY Incense Holder
Learn how to create a beautiful and functional DIY Incense…
DIY Flip Photo Album
This DIY Flip Photo Album tutorial shows you how to…
Please note that we may earn a commission for some of the above affiliate links. However, products featured are independently selected and personally well-loved by us!
Love the clock! I am thinking about making one, and am wondering how thick the marble is, and how you get it to stand up without falling over if the table is lightly bumped? Thanks!
Hi Donna! There’s a link in the blog post on the exact marble piece that we used. You can also find it on Amazon here. (Keep in mind that’s the price for 100 pieces!) It’s 3/8″ thick. The tile is wide enough to stand up on its own, but it can also be hung from the opening on the back of the mechanism, or stacked/lean in place for styling. We’d lean it if it’s prone to being bumped or you can make a wood block cutout holder. Hope this helps!
What a great idea! I applied this concept to a larger scale and created a 12″ round marble wall clock. Take a look: https://www.youtube.com/watch?v=VsVxco3Bj9s
I Jason, we’re glad you were inspired by our work, but we ask that you not recreate our project in sharing the exact step by steps. You should have at the very least crediting us for inspiration, as I’m sure you wouldn’t want another Youtube account to recreate your work without crediting you either :)
Hi! Do you know anywhere that I can purchase the mini wall clock kit? The link above did not work. Thank you!
Try Michaels, Hobby Lobby, or Amazon.com
Wow, this idea is so wonderful and beautiful and I too love the look of marble. I will definitely be trying this in the future.
In my blog, I made a DIY Marble Tray… take a look here and add it to your marble collection.
http://www.endevourly.com/home?tag=Marble%20Tray
Was the 3/4″ mini clock kit you linked in this project the one you actually used? Because I bought the marble tile and the clock kit you linked and the shaft on the clock is wayyyyyyyy too long. It sticks out a good half inch from the front of the marble and does not look cute. I’m going to see if I can add some wood or something to the back between the battery box and the marble so the hands aren’t sticking a half inch away from the tile on the front. Just wanted to comment to prevent other people from encountering the same trouble I did if you’re actually going to try this project!
whoa must be a coincidence but there is a poketo clock that looks similar! http://www.poketo.com/products/marble-wall-clock
so clever! you guys are killing it with the marble tile diys.
The marble tile link isn’t working :(
It’s the prettiest thing that I’ve seen for a long time! Great DIY!
http://cojograab.blogspot.co.uk
Absolutely love this! We’ve wondered what to do with some extra marble in the garage beyond a few dozen cheese plates! I’m getting my ceramic drill bits now. :) thanks for the inspiration. Jen @ http://www.satsumadesigns.com – just found you on BH&G – sending my vote now!
Ash! You are KILLING me with these marble projects lately! This one might be my fave! I might need a collection of marble clocks now. So cute! Have a great weekend!
thanks lex! xoxox