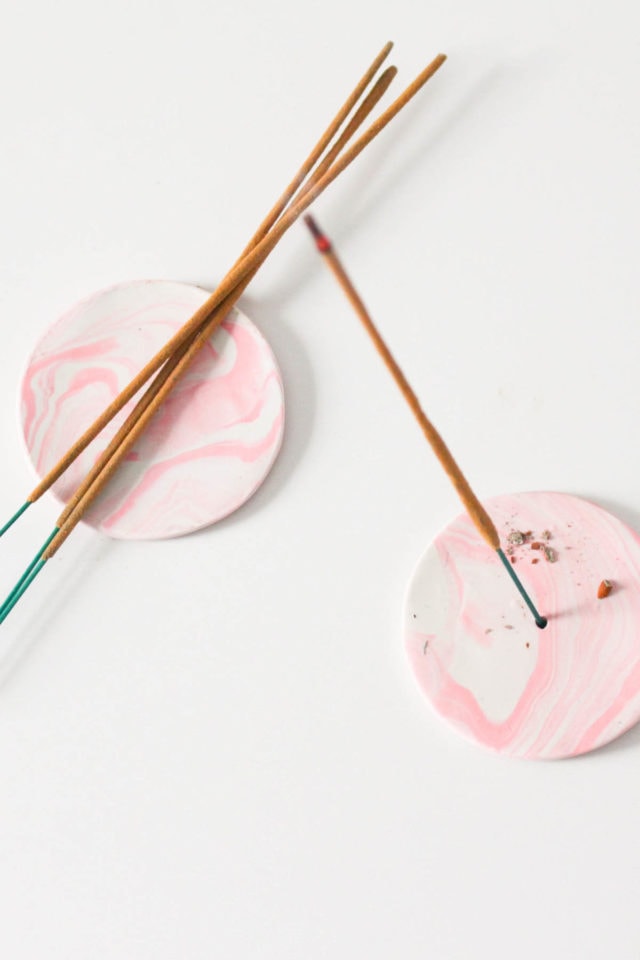
Marbled Clay DIY Incense Holder
Learn how to create a beautiful and functional DIY Incense Holder using polymer clay in this easy tutorial.

We’re always looking for ways to make our home more warm and inspiring, more “hygge”. So when it’s too cold to open a window, burning incense has become our go-to for giving our home a refresher.
It’s the easiest way to get a natural, earthy scent and clear out old musky smells minus the cold draft. To hold your incense sticks, I, Anusha recommend this Marbled DIY Incense Holder crafted from polymer clay!
Our easy-to-follow tutorial will guide you through the process of creating a one-of-a-kind holder that complements your décor and captures your unique style. It’s a simple project perfect for beginners, allowing you to personalize your incense ritual with a touch of handmade charm. Plus, you can’t go wrong with good pink marble design.
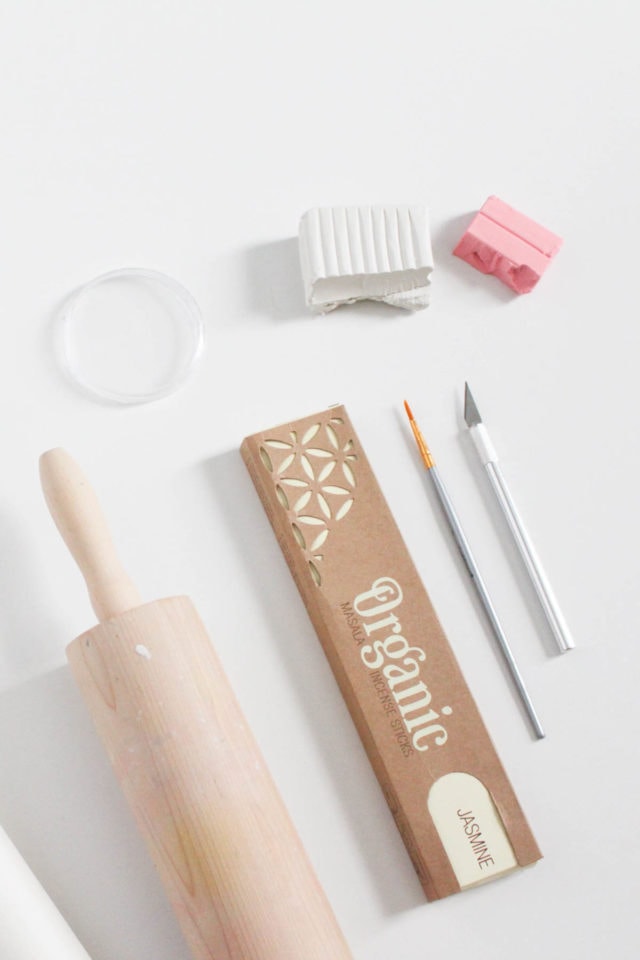
Materials and Tools Needed
- Polymer clay — For the marbled look, choose 2 or more contrasting colors, at least 1/4 block each. We chose rose pink and white. We love polymer clay for its versatility and how easy it is to to work with. Any remaining clay can be used to make clay sculptures, speckled keychains, photo holders and more.
- Rolling pin
- Parchment paper
- Circle cookie cutter or lid — Choose a size that comfortably fits your incense stick.
- X-acto knife
- Poking tool (like a blunt end of a paintbrush)
The incense holders look great without a sealer. But if you would prefer one, remember to use a polymer varnish so that the clay doesn’t get sticky over time.
How to Make Marbled DIY Incense Holder
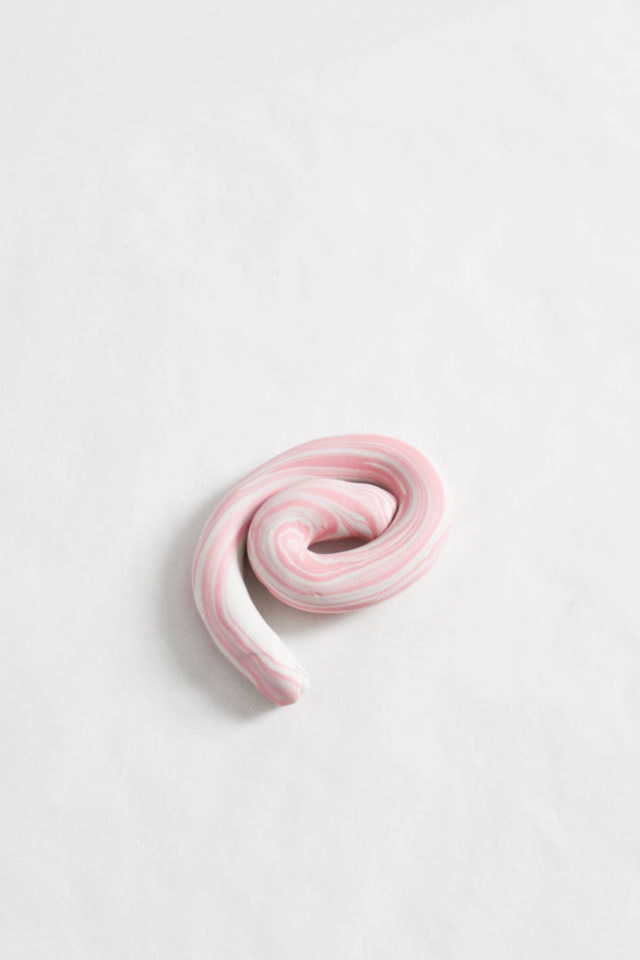
1 — On a clean work surface, divide each block of clay into roughly equal portions based on your desired marbling intensity. Condition your clay by gently warming it in your hands until pliable. Then, roll and mold each color into cylinder rope-like shapes.

2 — Combine the 2 colors of clay by rolling them together.
3 — Twist and swirl layered clay into a circle.
4 — Carefully roll out the swirl with your rolling pin, pressing down evenly to create a cohesive marbled design. The thickness should be around 1/4 inch for good incense stick stability.
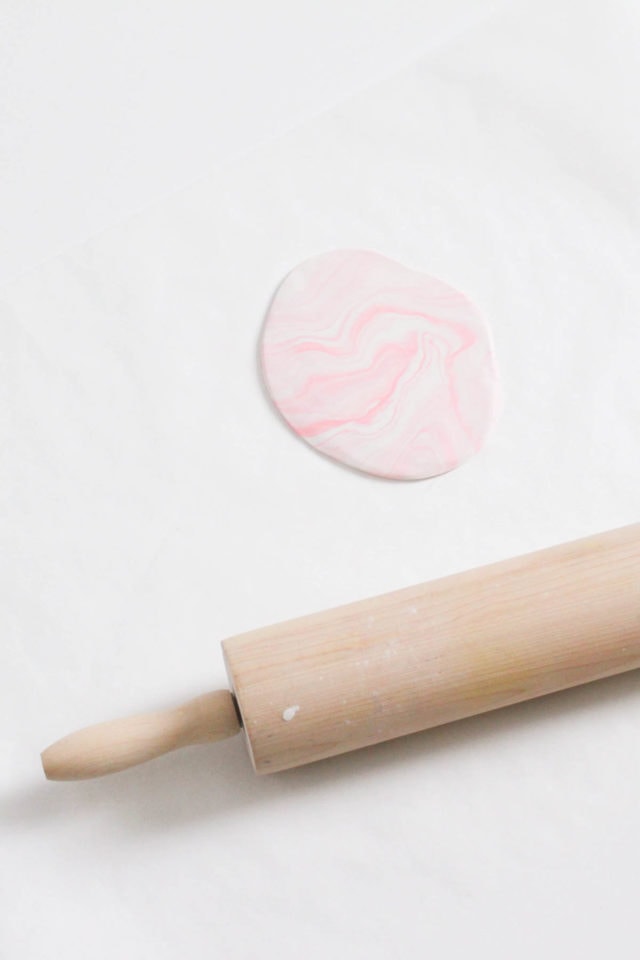
5 — With a circle cookie cutter or a lid, stamp out a circle from the rolled out clay. Trim any excess clay off the edges with an X-acto knife and smooth the edges with your fingers. Pull the edges of the circle clay up a bit with your fingers to create a shallow bowl.
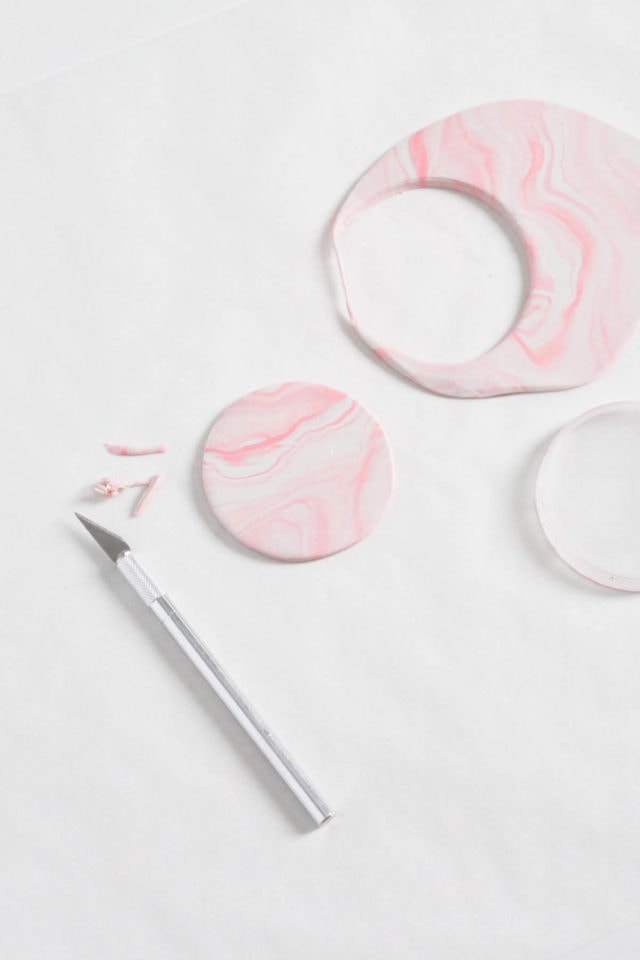
6 — Using your poking tool, carefully create a hole in the center of your clay circle. Ensure the hole is large enough to accommodate your incense stick securely.
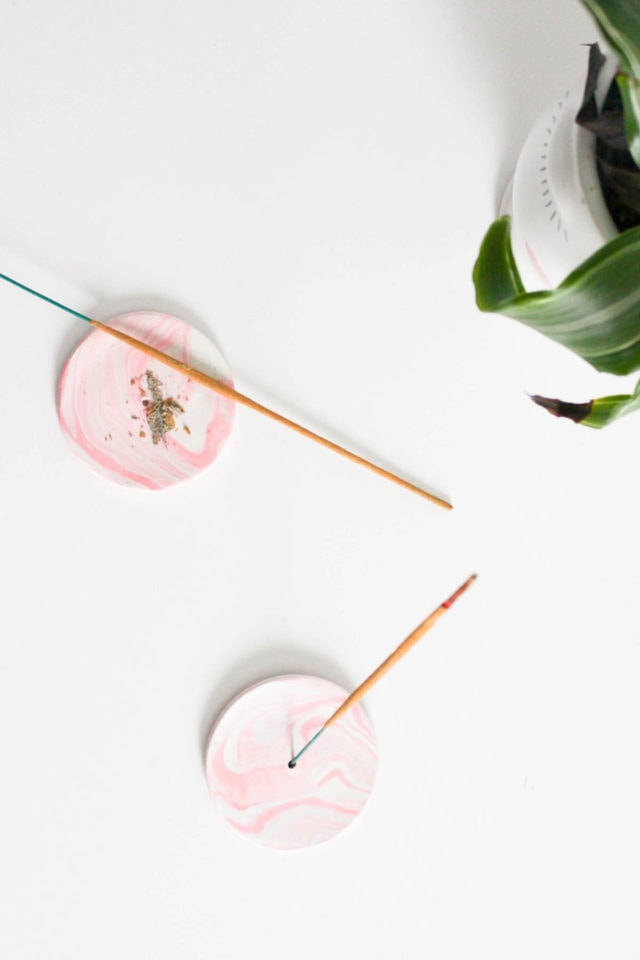
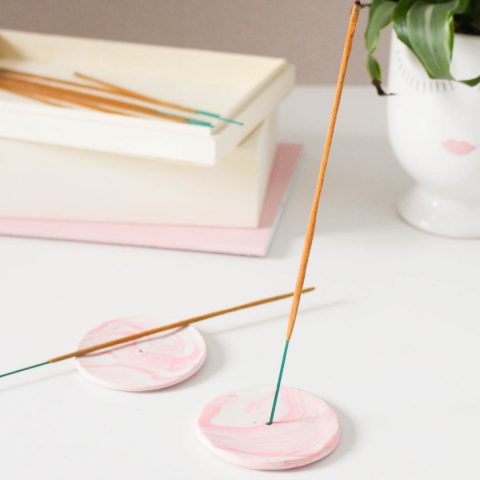
7 — Carefully transfer your shaped holder to a baking sheet lined with parchment paper. Following the baking instructions on your specific polymer clay packaging, bake your creation in the oven until cured.
We baked ours in the oven at 200º F for 6 minutes. So it takes little time to make! Once cool, your incense holder is ready to use!
Tutorial Notes and Tips
- Experiment with different color combinations to create unique marbled effects.
- If your clay becomes too sticky while working: Pop it in the refrigerator for a few minutes to firm up.
- Conditioning polymer clay: Polymer clay can be stiff and difficult to work with straight out of the package. To make it more pliable and easier to manipulate, gently warm it up in your hands for a few minutes. You can also use a hairdryer on a low, cool setting for a quicker warm-up.
- Marbling clay: Stop swirling or folding the clay layers once you achieve a pleasing marbled pattern. Overworking can result in muddy-looking clay.
- For extra shine and protection: Consider applying a coat of varnish suitable for polymer clay after baking (optional).
- How to put out incense sticks: Water is the most effective technique to extinguish incense. A simple spray bottle or a bowl of water will do the trick.You can also use a wet cloth. Just place it over the incense and press down firmly to ensure that all of the embers have been extinguished.
More Apothecary and Aromatherapy DIY’s
Looking for more easy ideas to freshen up your home? Your search is over! If you love our DIY Incense Stick Holder, then check out some of our favorite apothecary projects below —
- Homemade Candles Using Essential Oils
- Balloon Dipped DIY Citronella Candle
- Organic Citrus Sugar Scrub
- Homemade Reed Diffuser
- Cinnamon Coffee Sugar Scrub
Marbled Clay DIY Incense Holder
Equipment
- Rolling pin
- Parchment paper
- X-Acto knife
- Poking tool like a paintbrush
- Circle cookie cutter or lid
Materials
- 2 polymer clay in colors of choice
Instructions
- On a clean work surface, divide each block of clay into roughly equal portions based on your desired marbling intensity. Condition your clay by gently warming it in your hands until pliable. Then, mold each color into cylinder rope-like shapes.
- Combine the 2 colors of clay by rolling them together into one long rope.
- Twist and swirl layered clay into a circle.
- Carefully roll out the swirl with your rolling pin, pressing down evenly to create a cohesive marbled design. The thickness should be around 1/4 inch for good incense stick stability.
- With a circle cookie cutter or a lid, stamp out a circle from the rolled out clay. Trim any excess clay off the edges with an X-acto knife and smooth the edges with your fingers. Pull the edges of the circle clay up a bit with your fingers to create a shallow bowl.
- Using your poking tool, carefully create a hole in the center of your clay circle. Ensure the hole is large enough to accommodate your incense stick securely.
- Carefully transfer your shaped holder to a baking sheet lined with parchment paper. Following the baking instructions on your specific polymer clay packaging, bake your creation in the oven until cured.

Tiled Backyard Patio Before & After
Patio before and after inspiration! See how we transformed a…

Fringe DIY Balloon Tassels
Learn how to make DIY Balloon Tassels with this easy…

Easy IKEA Billy Hacks Anyone Can DIY at Home
Get inspired by clever IKEA Billy hacks for living rooms,…
Continue Reading Easy IKEA Billy Hacks Anyone Can DIY at Home

Your Guide to Hosting the Perfect Outdoor Movie Night
From DIY projectors to cozy seating arrangements, explore the best…
Continue Reading Your Guide to Hosting the Perfect Outdoor Movie Night
Please note that we may earn a commission for some of the above affiliate links. However, products featured are independently selected and personally well-loved by us!
I absolutely loved this DIY tutorial! The step-by-step instructions are clear, beginner-friendly, and easy to follow. The marbled clay incense holder looks elegant, and the photos make every step simple to understand. I also appreciate the helpful tips and material recommendations, which make the project even more enjoyable. This is the kind of creative content that inspires people to try something new. As someone who also manages more ideas
apkdo.com.pk, I really admire the quality and effort you’ve put into your content. Keep up the fantastic work, and I’m looking forward to more amazing DIY ideas!
Making this marbled clay incense holder was such a satisfying and creative project, and it adds the perfect touch of handmade charm to my home! It is incredibly relaxing to work with polymer clay and create something unique that fits my style perfectly. Whenever I need to clear my mind and recharge with some high-stakes fun, I love visiting https://foxslotsonline.com/ to enjoy a premium online casino experience. It is the ultimate spot to spin top-tier slots and test my luck from home!
150Vip Game is a mobile gaming application that brings together a wide range of casual, card, and casino style games on a single, easy to use .
Easy!
Love this one!
Thanks, Andrew! xo
Wow thats really neat, Anusha!
She did such a great job! Love her first DIY for Sugar & Cloth!
Love the marble effect! I did one of those about a year ago but sadly it was too small the burned incense would fall outside the little holder ahah well.. lesson learned!
oh no! Seems like it’s time to give it another try :)