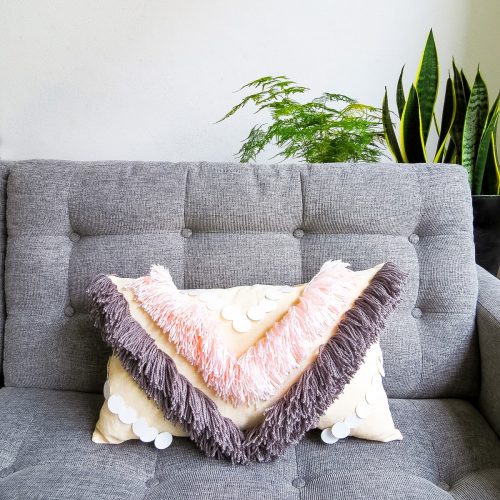
DIY Yarn Fringe Pillow
An easy and customizable DIY Yarn Fringe Throw Pillow. The great thing about weaving is that you can choose your own color yarn and design!
There’s a weaving craze that has taken over the internet these past few years. So weaving is definitely having a moment right now. You most likely have seen it as a wall hang, on Pinterest, hanging on your door or maybe you have already had some woven decor of your own. Weaving is so much fun because it can come in so many different forms.
For example, you can hang a nice tassel chandelier, lay a woven rug or (our personal favorite) add a fringe onto a throw pillow. I, Amaryllis am a throw pillow fanatic so it was only a matter of time that I combined the two together! I’m so excited to share with you this DIY Yarn Fringe Throw Pillow.
It’s so easy and customizable. And you don’t actually need to use a crochet hook or noodle to achieve the woven fringe look. You can use any color yarn you like to match your room decor and easily create different designs. You can even make yourself a whole set of throw pillows with different designs!
Materials and Tools Needed
- Fabric: We chose a linen fabric for our cushion cover.
- Acrylic knitting yarn
- Sewing thread: If you’d like, you can purchase thread that matches your yarn. However, the seams will barely be noticeable.
- Cardboard: To create your template design that you will be weaving around
- Pillow fiber foam filling: To stuff your throw pillow
- Sewing machine
- Scissors
- Razor knife or cutter:To cut your cardboard template out
- Ruler
How to Make a DIY Fringe Throw Pillow
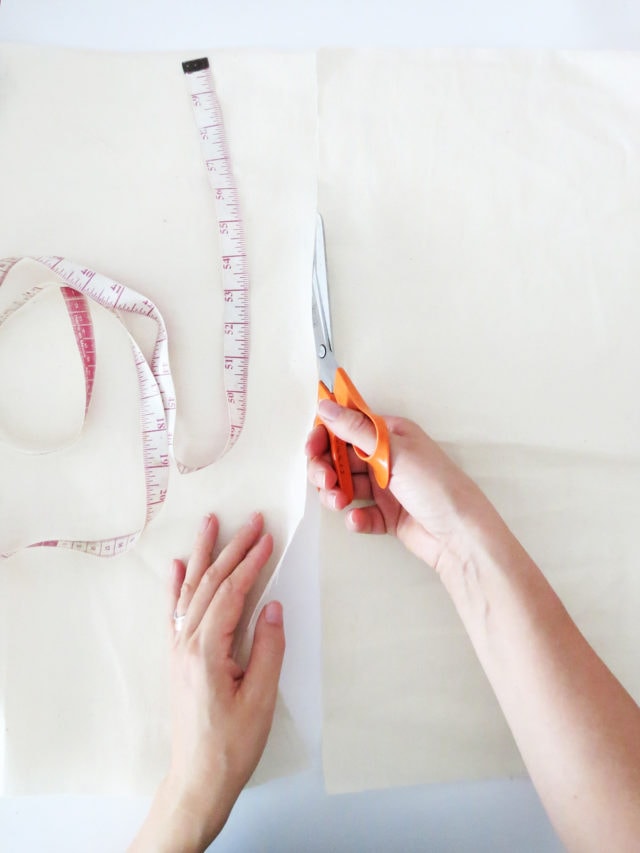
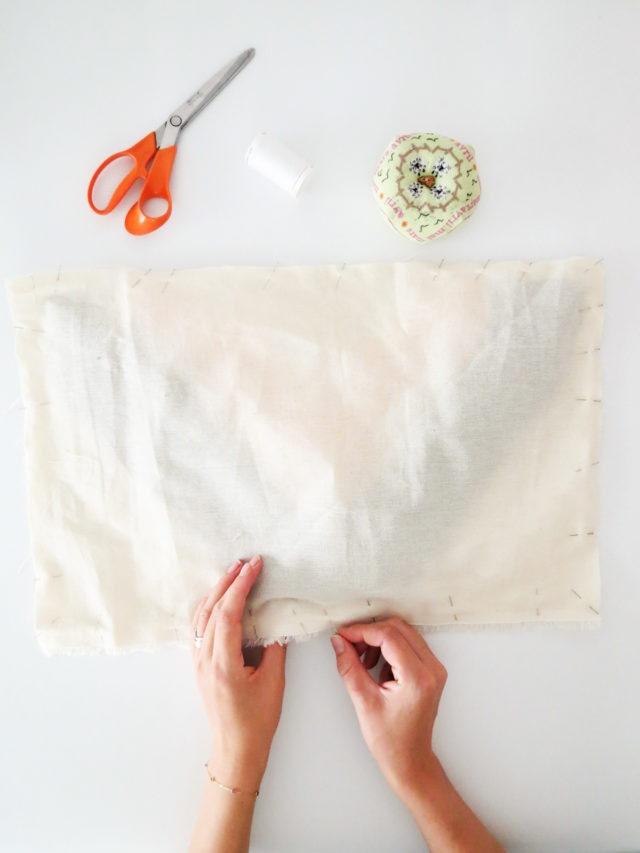
1 — Cut out two rectangles shapes (measuring 12″ x 20″ each) from your fabric that will form the cushion.
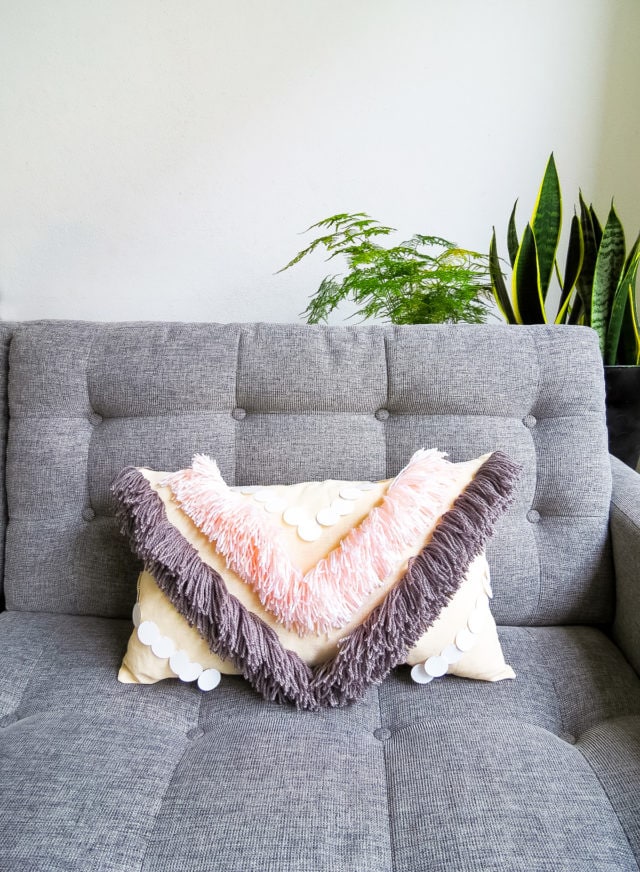
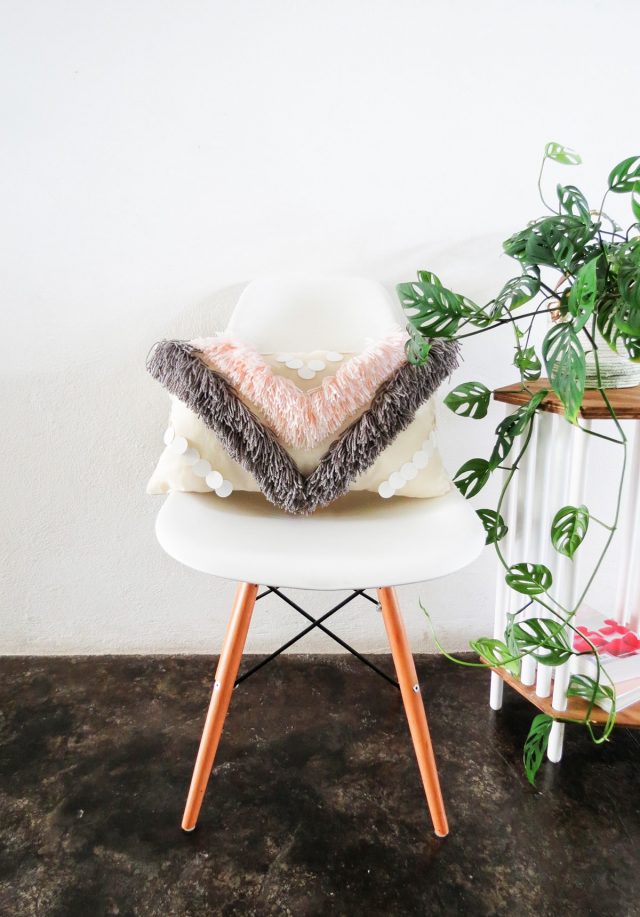
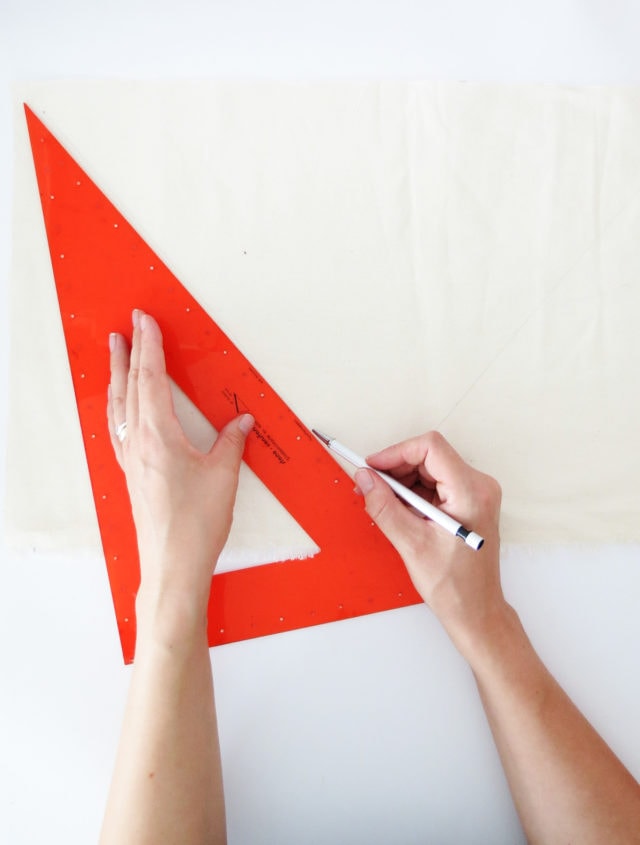
2 — On the fabric piece that will be the front of the cushion, trace a line where you want to sew the yarn fringe.
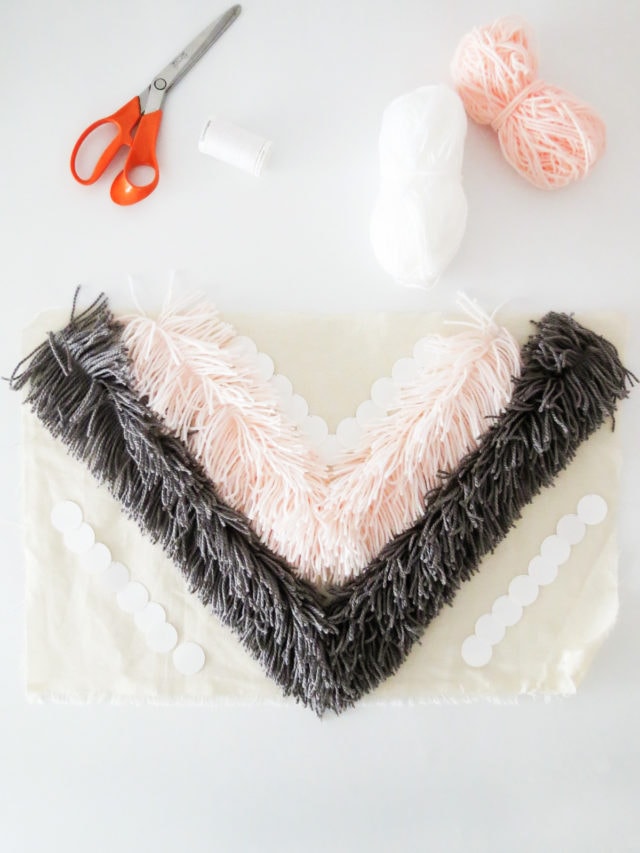
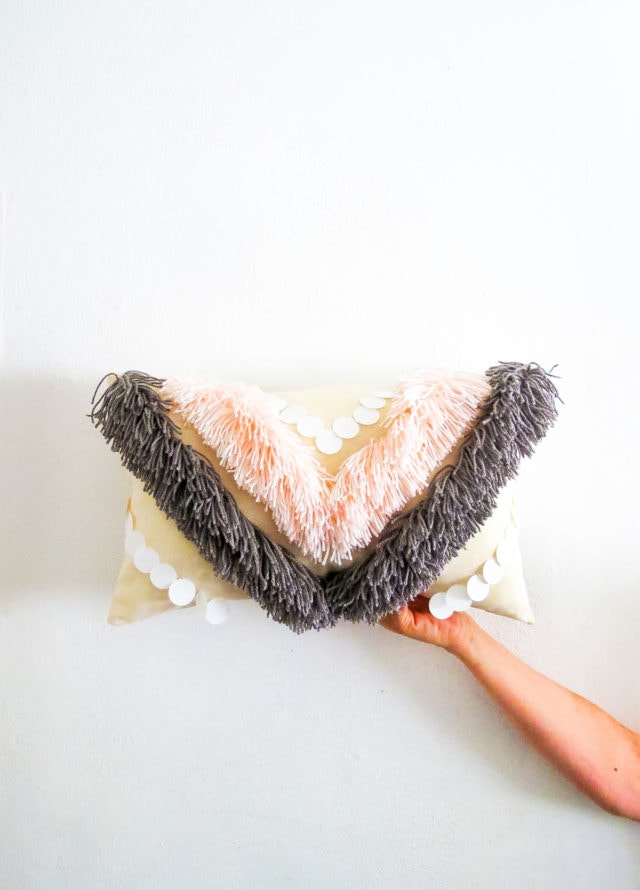
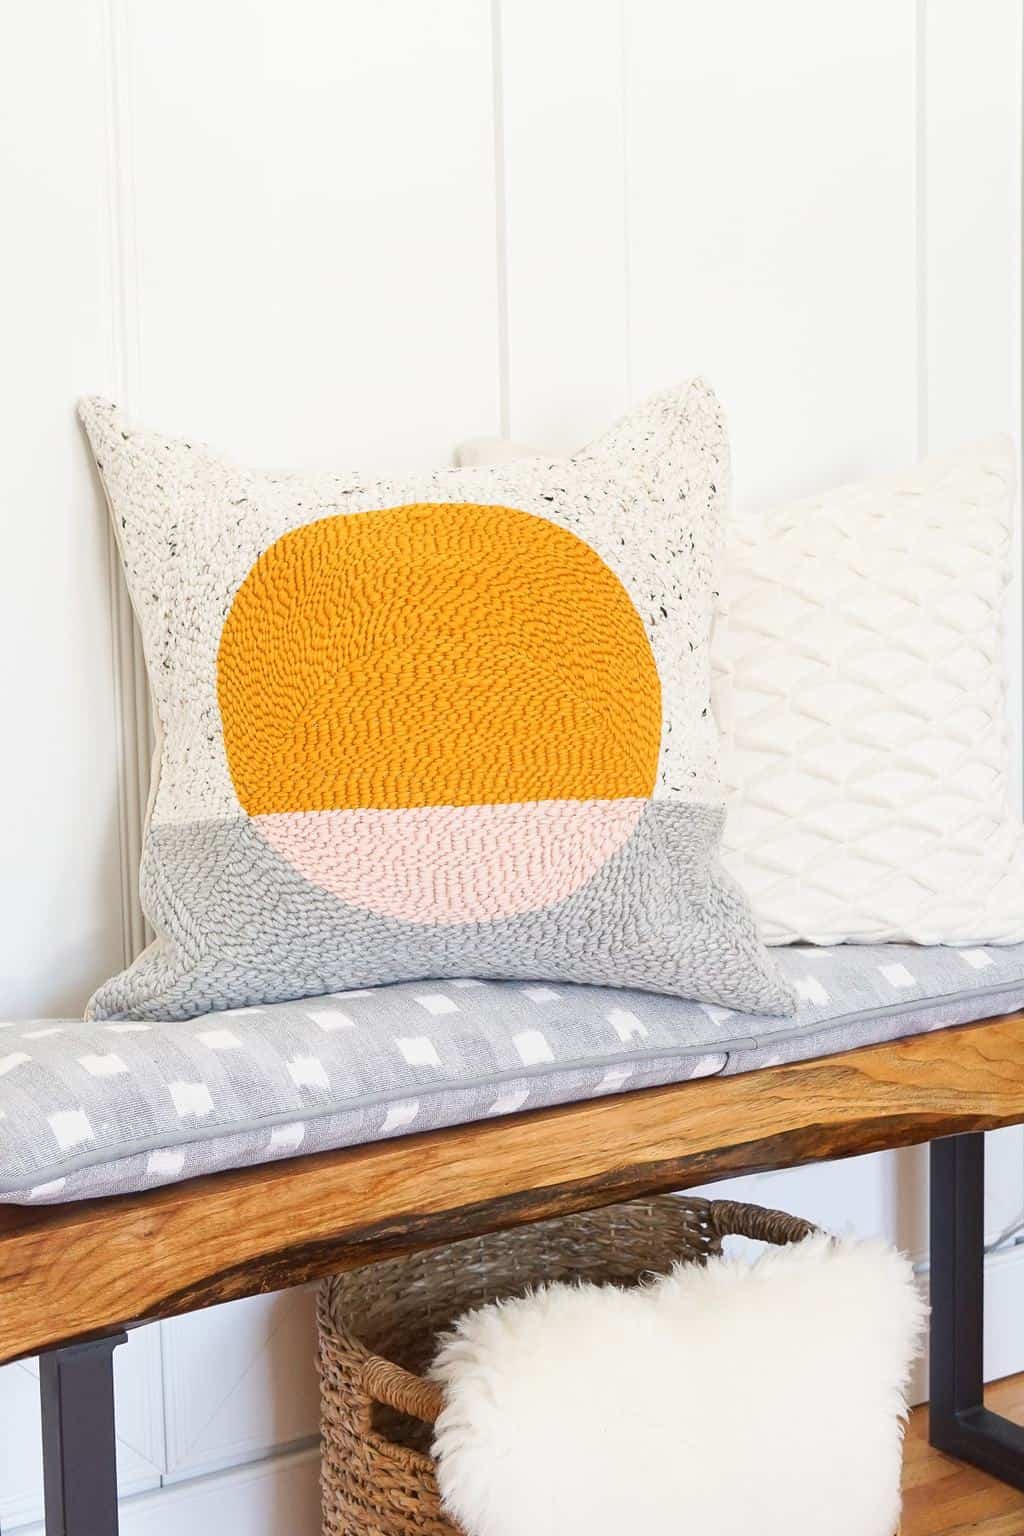
We made a V-shape centered in the fabric rectangle.
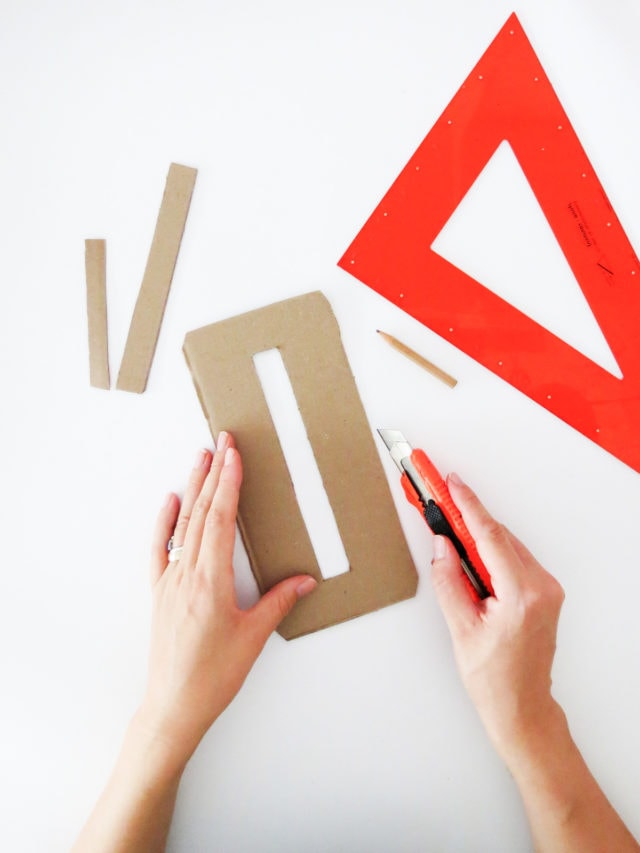
3 — To easily make fringes with the yarn, you need to create a template with the cardboard. Cut a rectangle out of the cardboard measuring 9″ x 4″. And in the center, make a slit that is 7″ x 1″.
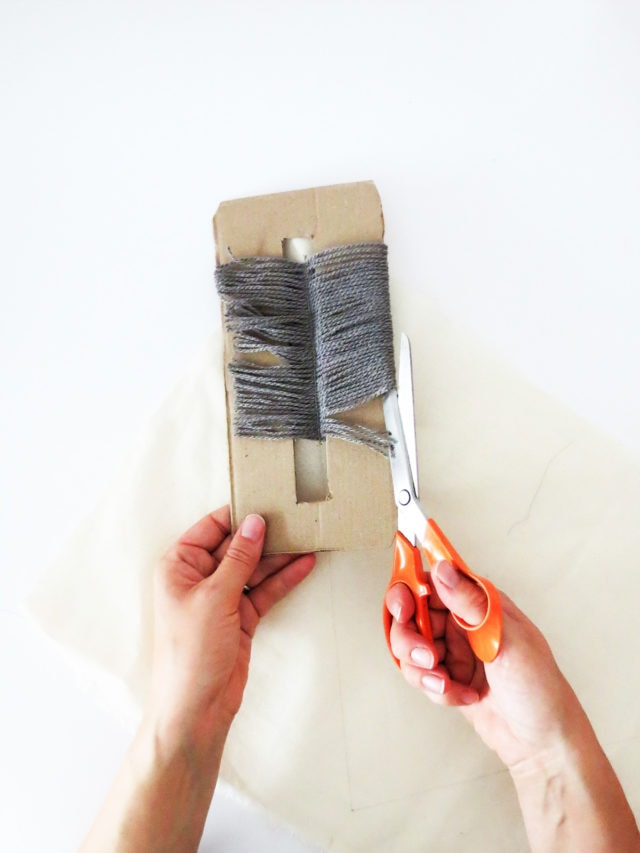
4 — Start wrapping the yarn around the cardboard template.

5 — Once the yarn covers most of the template, place it on your fabric.
6 — Center the presser foot in the slit and sew following the line you previously traced on the fabric. Use a small zigzag point so that the yarn is well stitched with the fabric.

7 — Cut the yarn following the sides of the cardboard.
8 — Remove the template, and now you have your first row of fringe!
9 — Repeat the process as many times as needed to complete your design.
Different ways customize your DIY Fringe Throw Pillow:
Feel free to just have fun with it and go wild! Make several fringe lines with different yarn colors or cover the how front with fringe. Add more texture by sewing a few beads or some sequins as we did with ours.
How to sew the cushion together:
Once you are happy with the design, you need to finish sewing the cushion.
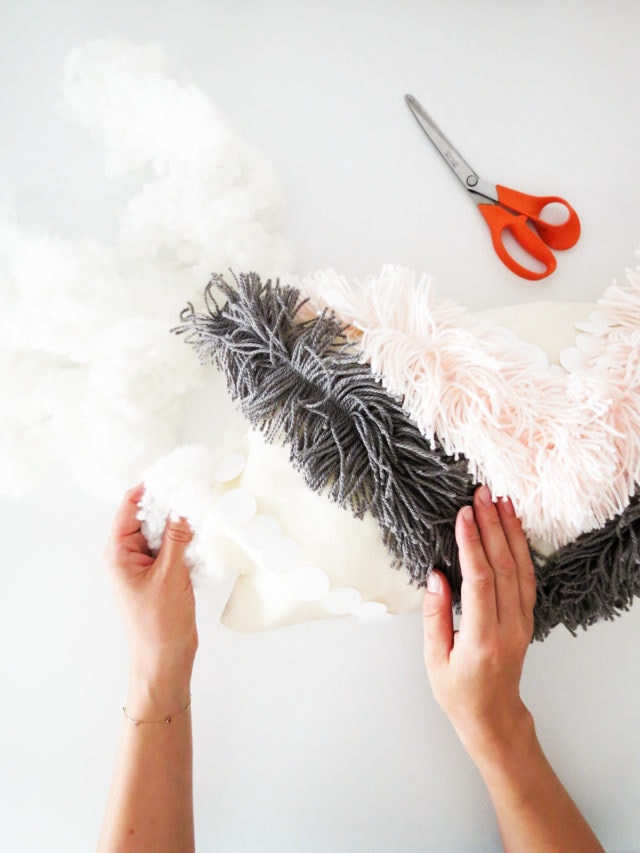
10 — Place the second fabric rectangle on top of the decorated one, both right sides turned inward. Pin the edges together and sew along, leaving an un-sewn gap of 5″.
11 — Turn the cushion through the 5″ opening to have the right side out.
12 — Fill the cushion with foam.
13 — When you are done filling, pin both sides of the opening together and close it with a few hand stitches.
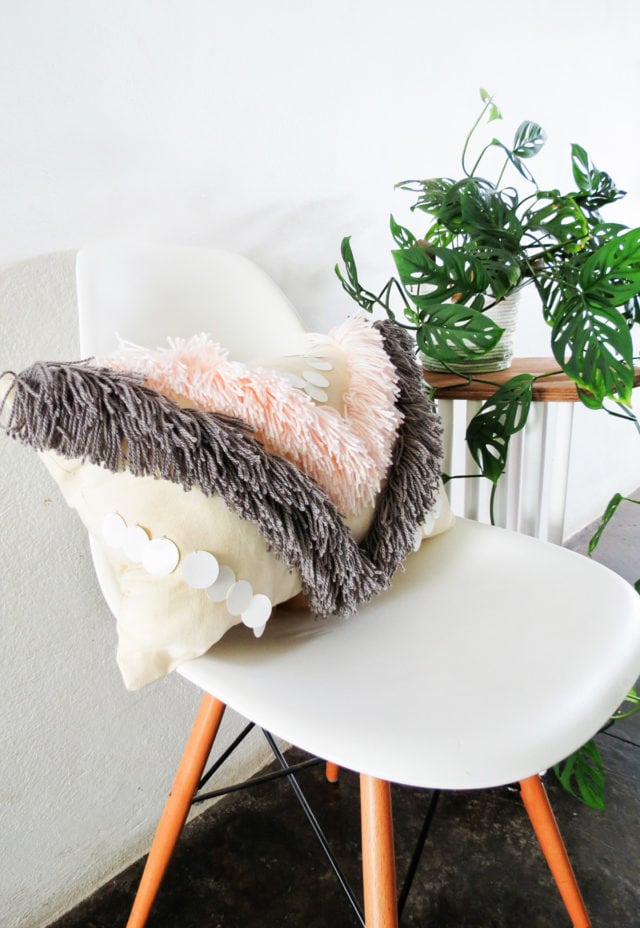
Now your DIY Yarn Fringed Throw pillow is all ready for your couch, sitting area, or wherever you decide to style it!
Why is It Called a Throw Pillow?
The name “throw” comes from the old practice of covering sofas with large pieces of material that were thrown over them. The word roots can be traced back to Middle English, where it referred specifically to cloth used for wiping or drying dishes in kitchens during the cooking time.
This usage was short-lived though because by 1750 they had been replaced by tablecloths! There are many wonderful throw pillows to fit your design style, whether its a store-bought pillow or a creative DIY pillow.
What is Fringe Typically Made of?
The use of fringe has been around since ancient times. Early versions were made out of unspun wool. But now it can be fashioned from any fabric material like silk or leather for added beauty on modern clothes designs. It is also typically made separately and then sewn on.
What is the Most Common Throw Pillow Size?
Most common throw pillow sizes for sofas are 18″ x 18″ and 20″ x 20″. However, if you have a large sofa or sectional with deep seats, then we would recommend using 22-24 inch pillows instead.
Can I Stuff My Pillow with an Insert Instead?
Although we stuffed our pillow with foam, you can use a pillow insert. If you want a full and fluffy throw pillow, then opt for a pillow insert that is slightly larger. For instance, for our 18″ x 18″ pillows, we use a 20″ x 20″ insert.
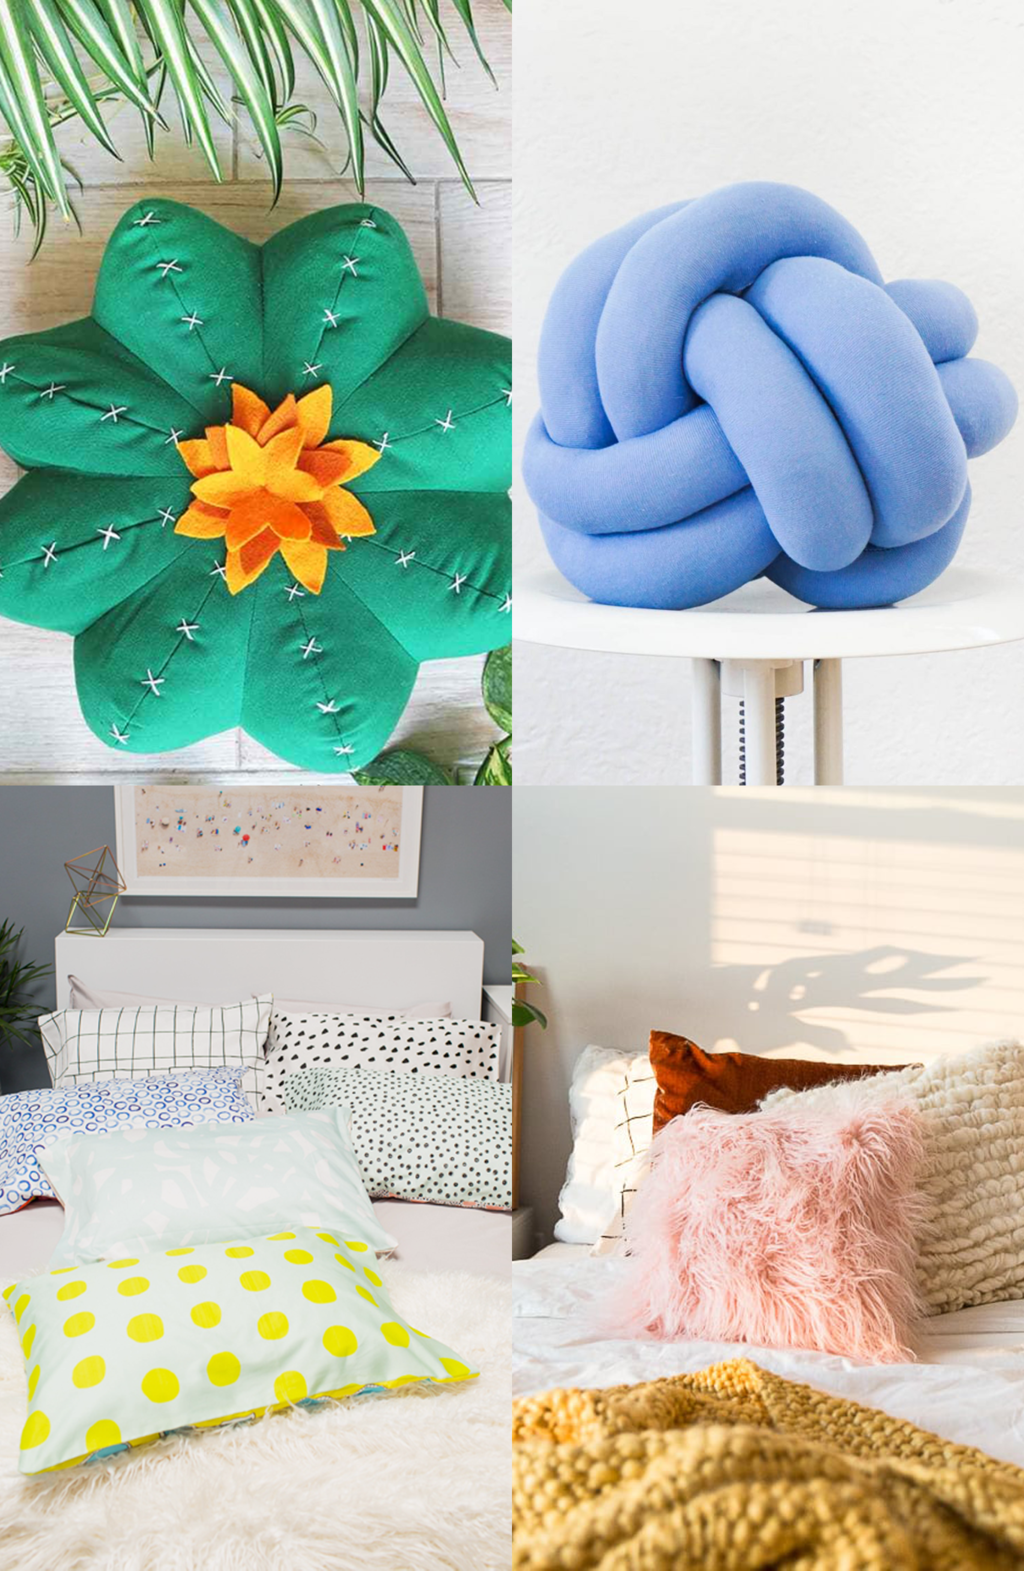
More Fun and Easy DIY Fringe Projects
We love that there’s no strict pattern to this project so that it can be any style you want it to be. Not only is it a great way to dress up your space, but it also would make for a great gift! For more fun ways to play with fringe, check out some of our other fringe DIYs below —
- Fringed Mirror Wall Hanging
- Gold Fringe Drink Toppers
- Door Handle Tassels
- Retro Fringe Beach Umbrella
Equipment
- Sewing machine
- Scissors
- Razor knife cutter
- Ruler
Materials
- Fabric of your choice
- Acrylic knitting yarn
- Sewing thread
- Cardboard to create your design template
- Pillow fiber foam filling
Instructions
- Cut out two rectangles shapes from your fabric that will form the cushion. (Ours measured 12" x 20" each.)
- On the fabric piece that will be the front of the cushion, trace a line where you want to sew the yarn fringe. We made a V-shape design centered in the fabric rectangle.
- To easily make fringes with the yarn, you need to create a template with the cardboard. Cut a rectangle out of the cardboard measuring 9" x 4". And in the center, make a slit that is 7" x 1".
- Start wrapping the yarn around the cardboard template.
- Once the yarn covers most of the template, place it on your fabric.
- Using your sewing machine: Center the presser foot in the slit and sew following the line you previously traced on the fabric. Use a small zigzag point so that the yarn is well stitched with the fabric.
- Cut the yarn following the sides of the cardboard.
- Remove the template, and now you have your first row of fringe!
- Repeat the process as many times as needed to complete your design.
- Once you are happy with the design, you need to finish sewing the cushion. Place the second fabric rectangle on top of the decorated one, both right sides turned inward. Pin the edges together and sew along, leaving an unsewn gap of 5-inches.
- Turn the cushion through the 5" opening to have the right side out.
- Fill the cushion with foam.
- When you are done filling, pin both sides of the opening together and close it with a few hand stitches.
Notes


Please note that we may earn a commission for some of the above affiliate links. However, products featured are independently selected and personally well-loved by us!
THANK YOU for this post — I am printing this out for my “blog notebook”. I’ve been wanting to start a blog for sometime now but it just seems overwhelming. Your post is spot on and a great reference tool. I am stuck on my blog name — once I come up with something I am ready to start. I truly appreciate your time in putting this post together for us that are just starting or thinking of starting.
Thank you, Jayme! Good luck with your new blog!
Fantastic thanku so much for sharing this very cool trick 😆
You’re welcome, Kaz!
j adore ce coussin il est chic et rafraichissant de toute beaute
Merci beaucoup, Louise!
Pillows with great designs!
Thank you! XOXO
I love this so much, the finished product looks amazing! I have featured this on my holiday DIY gift roundup. You can see it here. https://adollarearned.com/quick-easy-diy-christmas-gifts-family-will-love/ Feel free to share!
Thank you so much for easy to follow directions. I hope to try making one soon. I did want to ask if there was a particular kind of yarn (cotton, wool, etc) that you use or recommend as I find the choices overwhelming. Thanks again!
Totally understand! There are a lot of options out there. Luckily you can go with just about any for this project, even the more inexpensive acrylic blends if you’re on a budget. Any medium weight yarn will do just fine! :)
This is probably the most easy and fun fringe cushion I have seen in a long time. Looks like I will be making this soon.
aww, so glad to hear this! Make sure to tag us when you do so we can see it! :) xo
Pillows with great designs!
thank you! xo
Mind Blown! I love how these look! I’m Lisa (long time reader- first time commenter) over at LipStainAndLegos.com, another DIY blog. I’ve always wondered how to to make yarn into that sew-able, fringe stuff. These look so cute and versatile and I love the texture they add to a space. How do you clean it? Spot Clean?
aww, thanks for the love Lisa! And so happy that you commented! Always love seeing new faces (I guess names, haha!) around here. We would suggest spot cleaning as the best route to go! xo
Love this DYI project!! Definitely going to trying out soon! ❤❤
so glad to hear that, Kelsie! Amaryllis did such an awesome job. Let us know how turns out when you do! :)