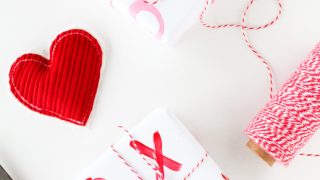
DIY Lip Patterned Gift Wrap
DIY Lip Patterned Gift Wrap — Nothing says I love you like a ton of kisses… on your gift wrap. Make this DIY Lip Patterned Gift wrap for your love or Galentine this year!
Nothing says I love you more than lots and lots and lots of kisses. But nothing says germs and smeared lipstick that won’t ever dry on real paper more than a gift covered in real lipstick kisses!
Lucky for you, they have these things called stamps that make all of those problems go away. And it makes this DIY Lip Patterned Gift Wrap twice as appealing.
I should also mention that this might not be the best idea to make for your boyfriend for Valentine’s Day. Not because it’s not super cute enough.
But because anyone who won’t take the time to Instagram it first won’t appreciate the abnormal amount of time it will take you to create this pattern on any gift bigger than 5×5 inches in size.
Materials Needed To Make A DIY Lip Patterned Gift Wrap
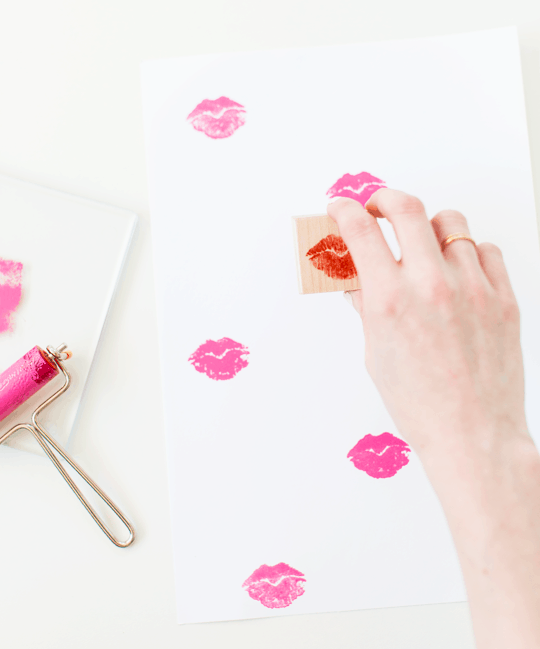
- Lip stamp
- Craft paint in the colors of your choice
- Gilding adhesive
- Gold leaf sheets
- Fine tipped paint brush
- White paper
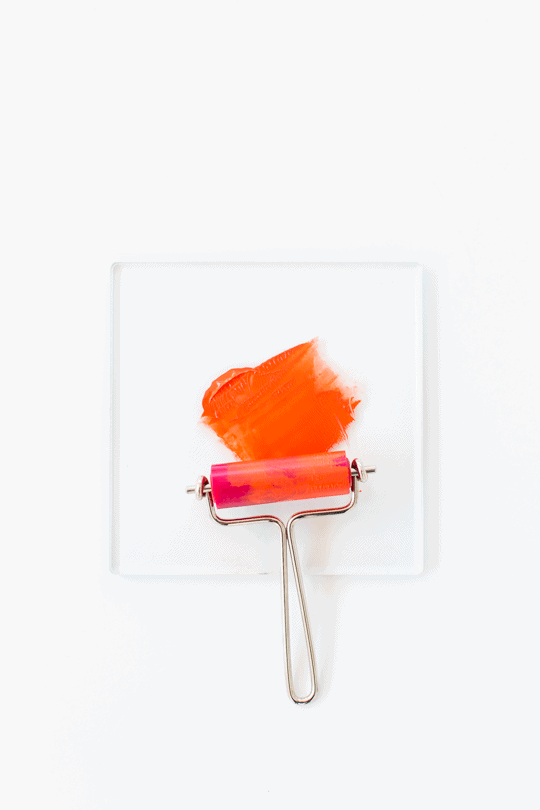
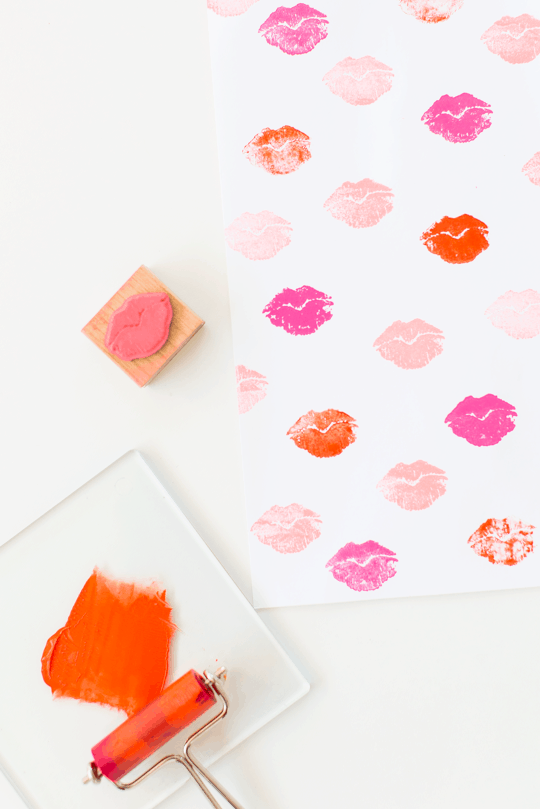
- Brayer Roller — Optional: You don’t technically need a roller and stand for this stamping project. But I have to say they’re REALLY convenient for not over inking stamps when using regular craft paint!
How To Make A DIY Lip Patterned Gift Wrap
Start by stamping just one color throughout the paper.
Let it dry, and them move onto the next color.
Once all the colors have dried, use your paint brush and gold foil adhesive to make small dashes in empty spots sporadically in between the lips.
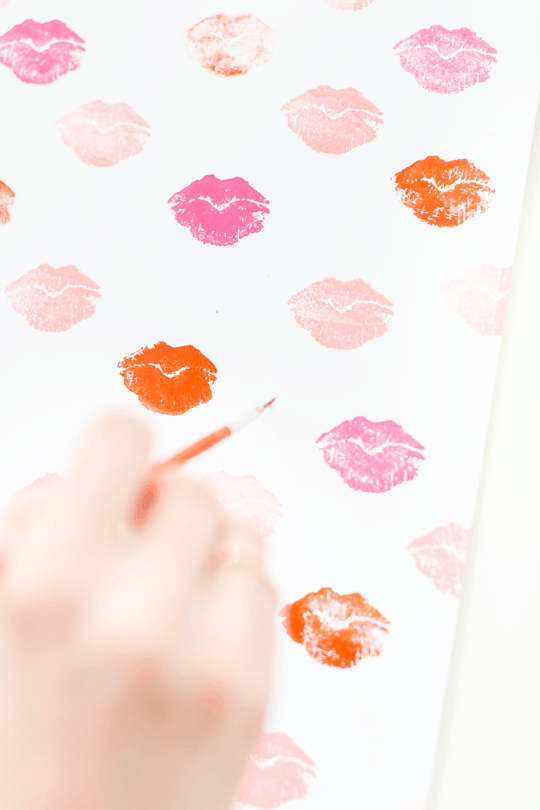
And let the adhesive dry until it’s tacky to the touch.
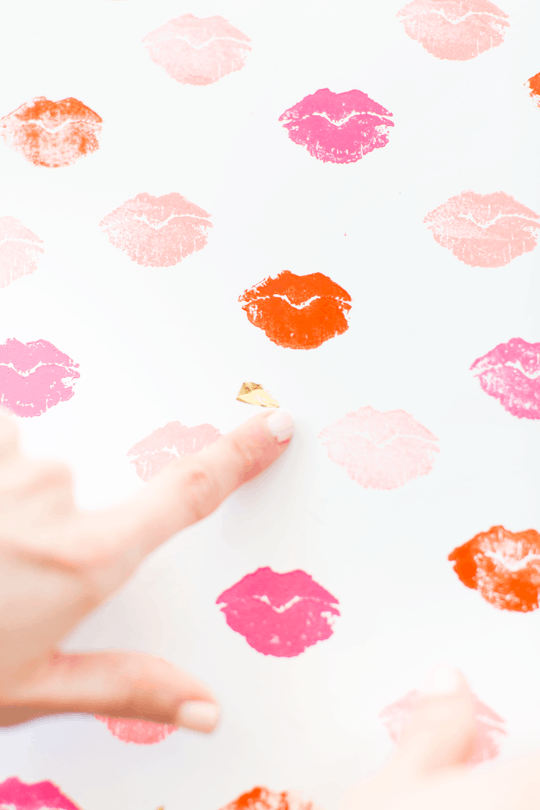
Next go back over the adhesive spots with small pieces of gold foil and press firmly across the foil.
Then, rub away the excess foil that doesn’t adhere with your finger.
Continue to do so across all painted adhesive spots.
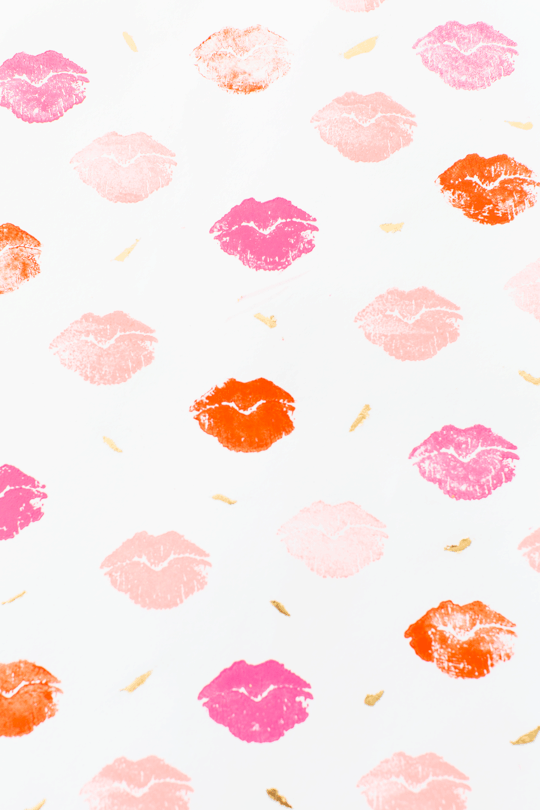
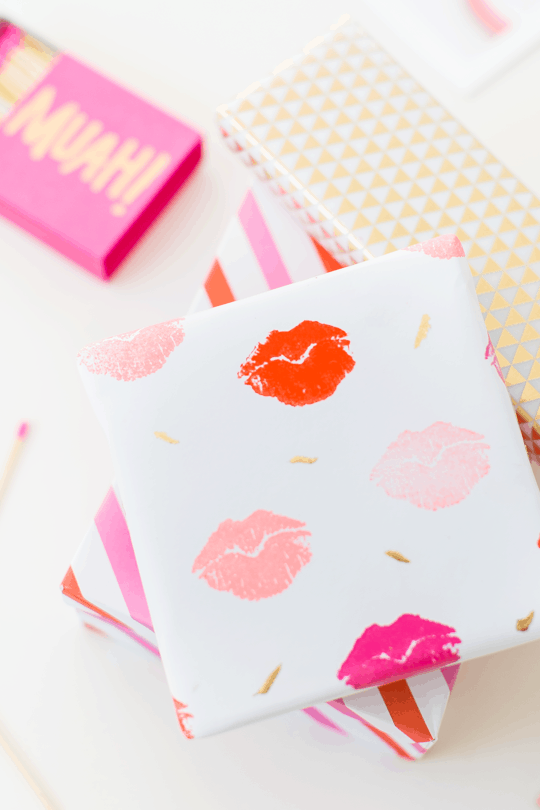
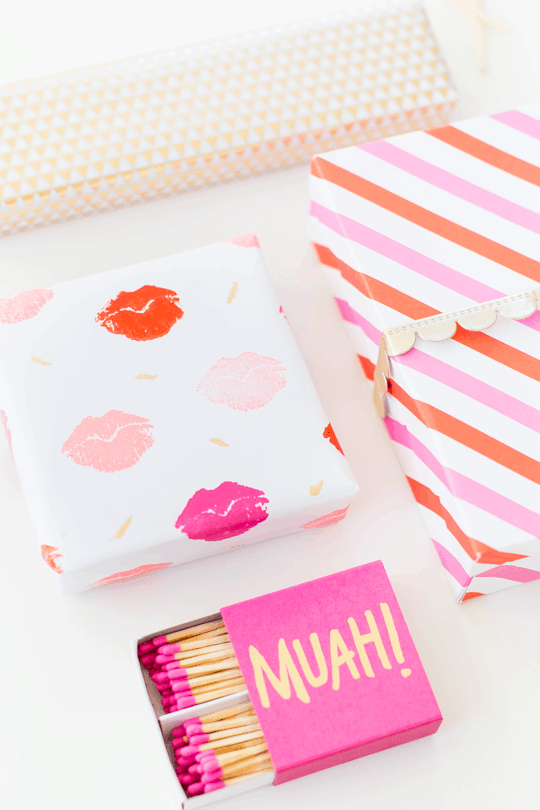
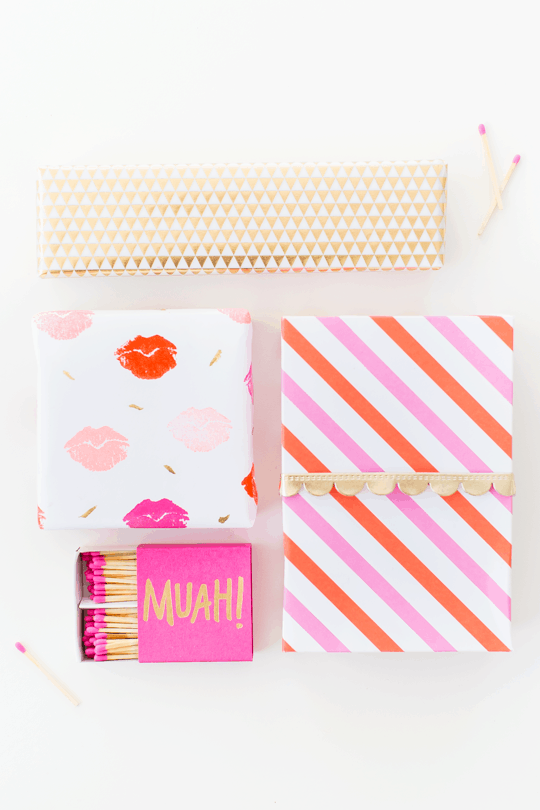
You should end up with a funky pattern kind of like this.
You can make it as colorful and full as you want or stick with a more subtle minimal look. It’s totally up to you… and depends on when you decide this paper takes entirely too much time to completely cover.
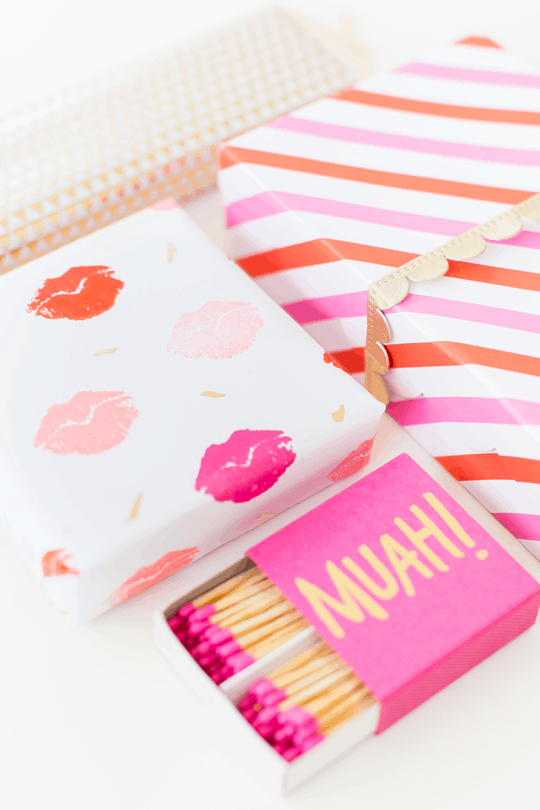
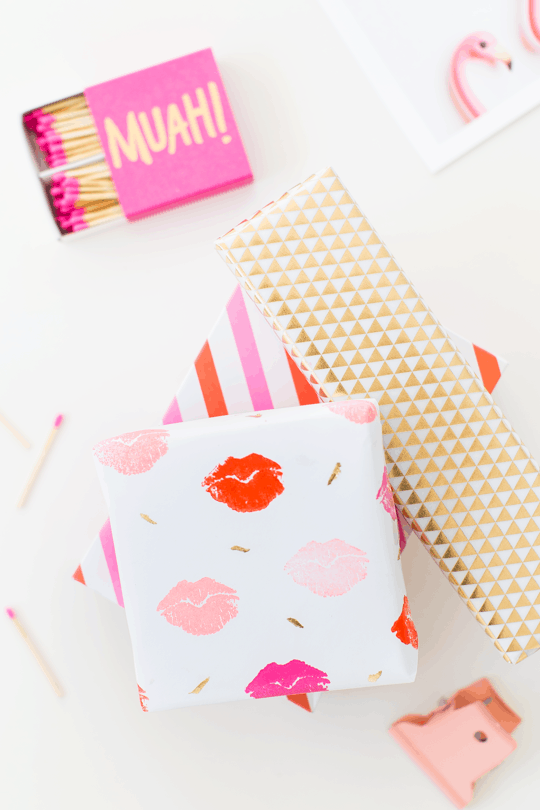
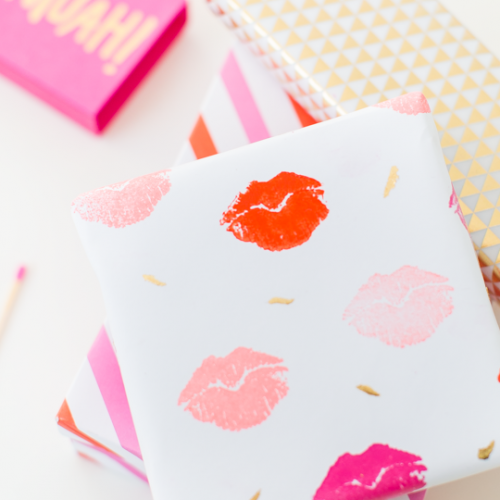
And voila!.. I mean, muah!
Equipment
- Fine tipped paintbrush
- Brayer roller Optional: You don’t need a roller and stand but it does make this project more convenient for not over inking stamps when using regular craft paint.
Materials
- Lip stamp
- Craft paint in the colors of your choice
- Gilding adhesive
- Gold leaf sheets
- White paper
Instructions
- Start by stamping just one color throughout the paper.
- Let it dry, and then move onto the next color.
- Once all the colors have dried, use your paint brush and gold foil adhesive to make small dashes in empty spots sporadically in between the lips. Let the adhesive dry until it’s tacky to the touch.
- Go back over the adhesive spots with small pieces of gold foil and press firmly across the foil. Rub away the excess foil that doesn’t adhere with your finger. Continue to do so across all painted adhesive spots.
Notes
- You can make it as colorful and full as you want or stick with a more subtle minimal look.

Don’t forget to share your DIY Lip Patterned Gift Wrap with us on Instagram using the hashtag #sugarandclothloves. We always love seeing all of your creations! Looking for more interior design inspiration? You can find them all of our DIY decor tutorials and ideas right here!
Please note that we may earn a commission for some of the above affiliate links. However, products featured are independently selected and personally well-loved by us!
Yes, your clothes are good
https://ahm.indvspaks.com/
Really nice I liked the wrap and yes always safely use paints on your lips.
Andrew
https://omgggamer.com
amazing blog, i love this.
https://thefaishal.com
great work you guys are posting in this site and always you love your content
i love your post and enjoy this article when you posted and keep posting this stuff and good luck for furture work
muah! From me :)
https://cricfacts.com/
:)
Wow, Awesome
https://holi-2020.com/holi-wallpapers/
Nice Article can i see more design?
https://www.zerocric.com/
nice
Thanks!
What do you want?
Coming Soon event
http://indvspaklivehighlights.com/pakistan-vs-world-xi-live-highlights/
Love love the paper! Do you carve your own stamps?
best site ever seen related to gift wrap.
https://www.goldcup2017live.us/gold-cup-2017-live-mexico-vs-curacao/
Thanks for the kind words! xo
Thank You very Much sharing useful gift warping ideas
http://indvspaklivehighlights.com
thankx for sharing
Glad you like it, Rohit!
Thanks… i got the needed information form you
it’s really good article thank you for sharing with us
You Will Be shared A nice Idea for Us .. Thaks For Sharing your Ideas With us.http://t20wc2016.com
Love love the paper! Do you carve your own stamps?
So adorable! Love it.
Carrie
http://www.wearwherewell.com
So incredible! I love this :)
WritingMonique
I’ve always wondered how to do this! – I’ve tried it myself with lipstick and it just comes out a smeared icky mess, with no resemblance to lips whatsoever. Who knew, a lip stamp is the answer!?! Brilliant!
I also love the ‘muah!’ matchbox!
xx Hannah
http://www.eatingwithalice.com
Well that’s the cutest wrapping paper ever. And I’ve never used a brayer for stamping before, but it’s so smart!
This is such a cute idea! so chic.
Felicia | Beloved Style
Ahhhh so cute! I’ve never thought to use craft paint with stamps either. Genius!
So adorable Ashley! You have the best DIY’s!
This is adorable! I’m definitely going to make some. Also why have I never thought to use craft paint on my stamps?! Palm to forehead. Love the idea! Thanks so much.
Adorable! I must have that lip stamp.
Great idea!
This is so simple and yet so effective. I shall be definitely be using it come Valentine’s Day!
nice article and nice pictures… Very good. keep it up