DIY Air Dry Clay Coasters
Learn how to make beautiful custom air dry clay coasters and discover chic tips for hosting with paper plates. Because effortless entertaining can still be elegant!
When it comes to hosting, the little details make all the difference! Whether you’re planning a casual get-together or a stylish dinner party, adding a personal touch to your table can elevate the entire experience.
One easy and creative way to do this is by making your own DIY Air Dry Clay Coasters. This is one of our favorite air dry clay projects that lets you customize your decor while keeping your surfaces protected.
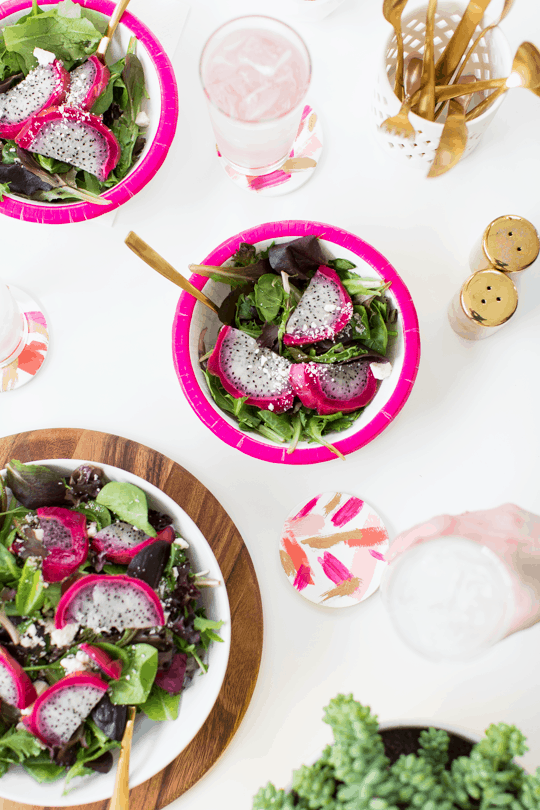
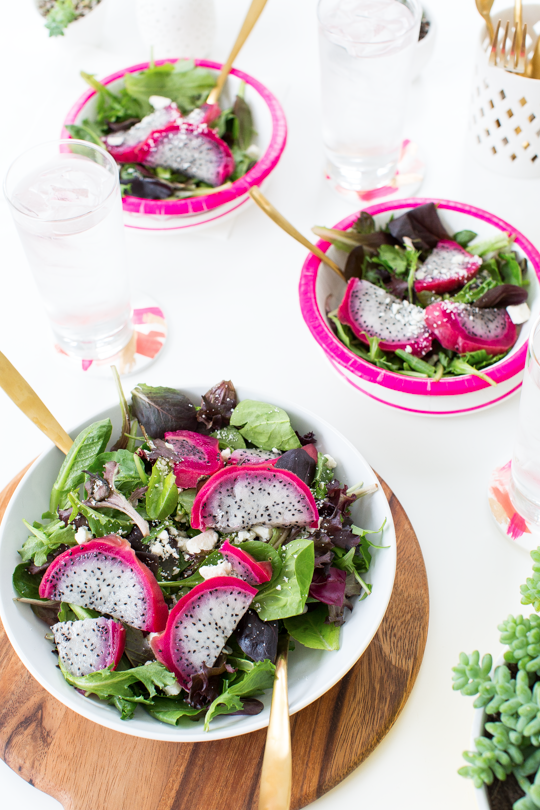
And let’s be real. Not every gathering calls for fancy dinnerware. Sometimes, paper plates are the way to go! The good news? You don’t have to sacrifice style for convenience. With a few clever tricks, you can make disposable tableware look effortlessly chic. Whether it’s layering, accessorizing, or adding a pop of color, we’ve got all the tips you need to entertain in style—without the stress of cleanup.
So grab your clay, set the table, and let’s make hosting easy, fun, and fabulous!
Materials and Tools Needed
- Air dry clay
- Rolling pin
- Round biscuit cutter — Or a glass for shaping
- Acrylic paint colors of your choice — We also used liquid gold leaf.
- Paint brushes
- Matte Mod Podge — Or any other sealer to protect your design
How to Make Air Dry Clay Coasters
1 — On a clean, smooth surface, roll out a chunk of air-dry clay, ensuring it’s an even thickness throughout. This will help your coasters lay flat and uniform.
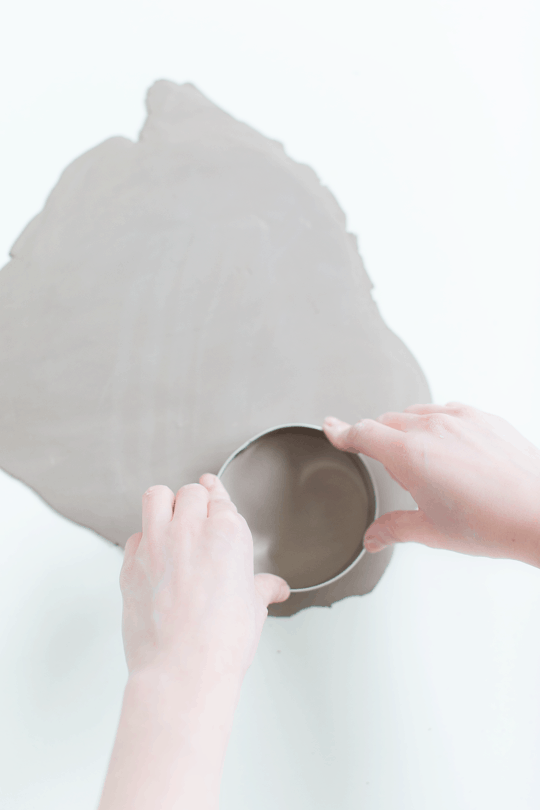
2 — Use a biscuit cutter to cut circles from the rolled-out clay. Gently remove the excess clay from around the edges.
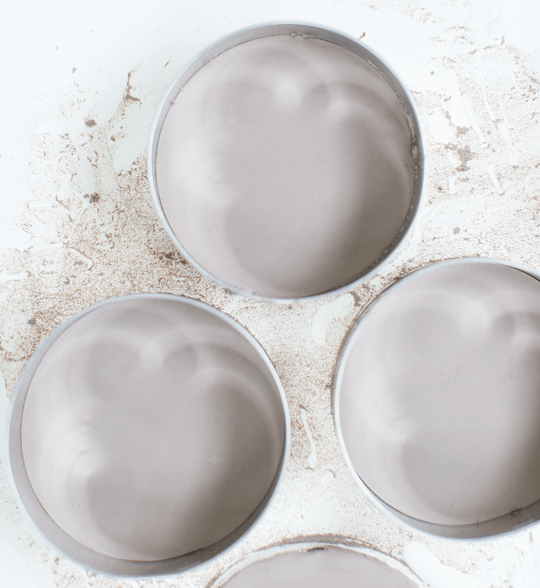
3 — Allow the coasters to dry completely for 24-48 hours before painting. Flip them over occasionally to prevent warping.
4 — Once dry, use craft paint in your chosen colors to decorate your coasters. We started with a white base coat, then mixed various shades of pink to complement our table setting.
For a brushstroke effect, use an almost dry paintbrush to make quick, random strokes for a clean, artistic look. Love this design? We recreated this design in our free DIY gold foil wall art printable.
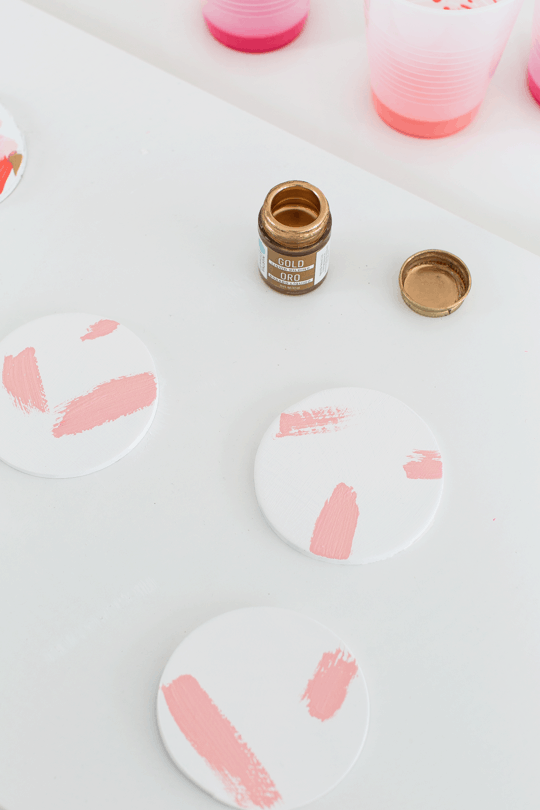
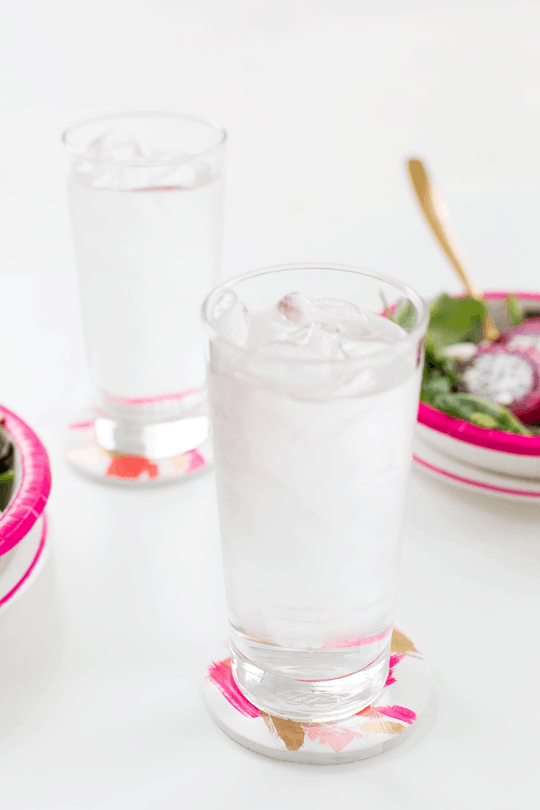
5 — Once the paint is fully dry, apply a clear coat of Mod Podge to the tops and edges of each coaster. This helps protect them from water and everyday wear and tear.
Tutorial Tips and Tricks
- Use cornstarch to prevent sticking: If your clay sticks to the rolling pin or work surface, lightly dust it with cornstarch to keep things smooth.
- Even thickness is key: Roll your clay to a consistent ¼-inch thickness to ensure your coasters dry evenly and don’t warp.
- Experiment with shapes: Try cutting your coasters into hexagons, hearts, or organic freeform shapes for a modern look.
- Get creative with textures: Use lace, leaves, bubble wrap, or stamps to press in unique patterns before the clay dries.
- Speed up drying (but not too fast!): To prevent cracking, let your coasters air dry at room temperature. Avoid placing them in direct sunlight or using a hairdryer, which can cause uneven drying.
- For crisp edges, use water: If your edges look rough, dip your finger in a little water and smooth them out before the clay dries.
- Mix and match colors: Marbling clay colors together before rolling it out can create a chic, high-end look.
- Seal for longevity: If you plan to use your coasters with drinks, apply a waterproof sealer to protect them from moisture and stains.
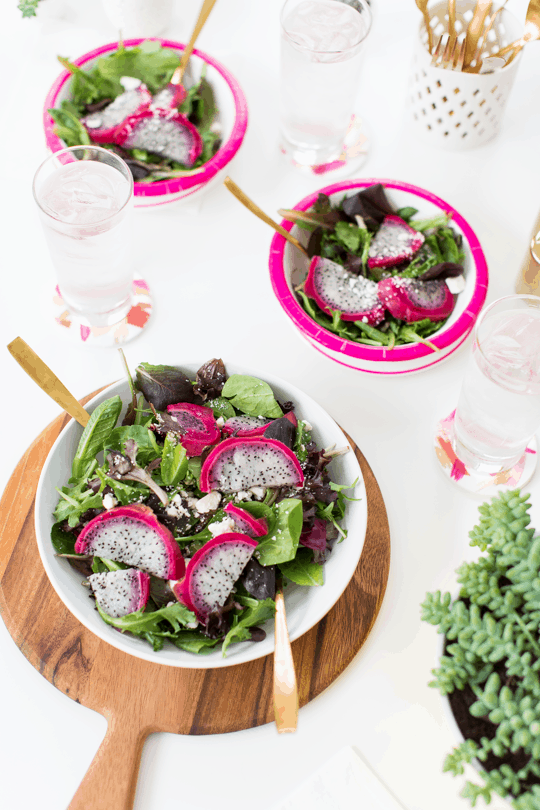
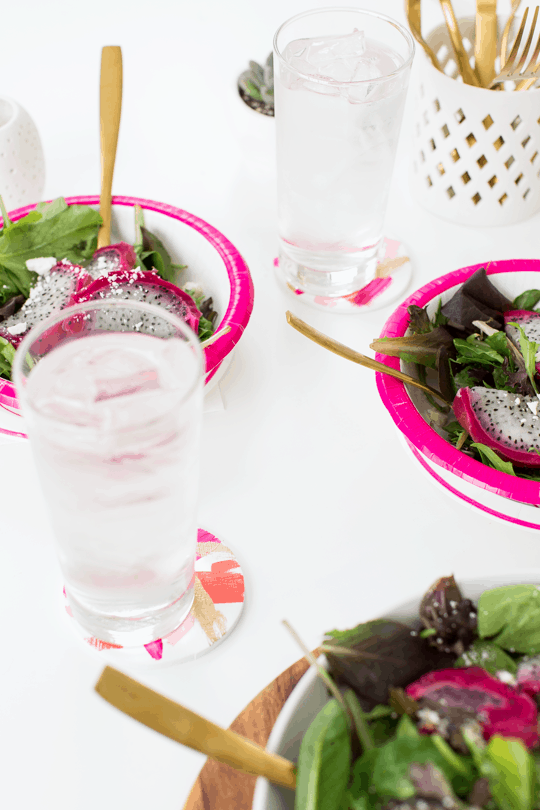
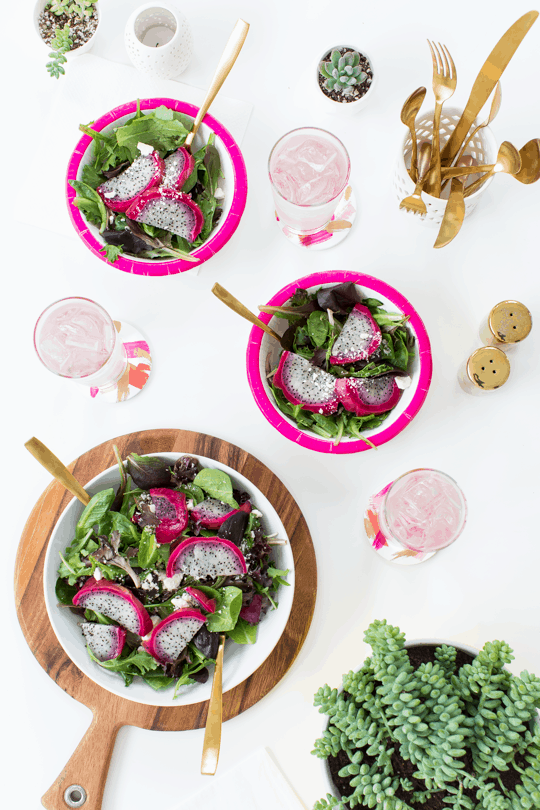
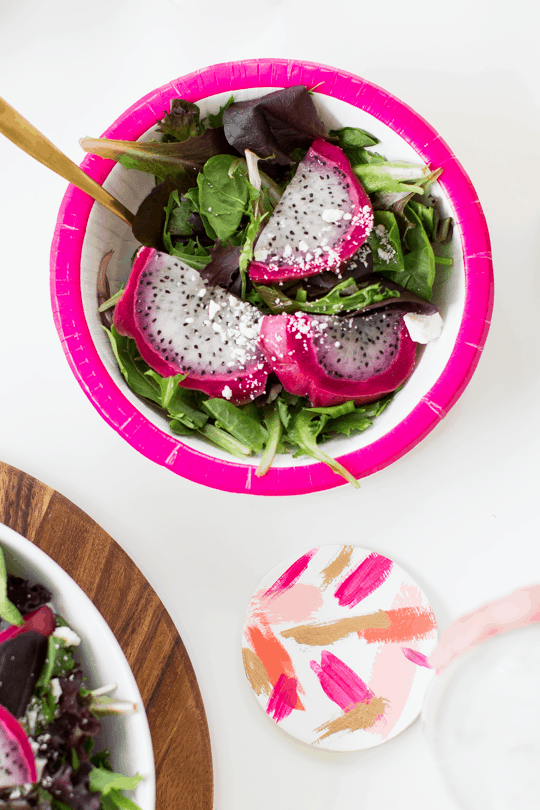
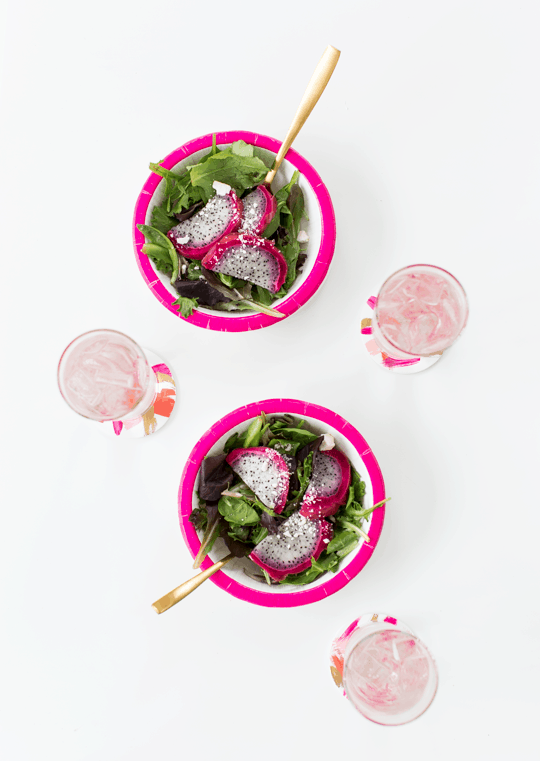
Table Setting Styling Tips with Paperware
For an easy paper plate styling trick, try stacking different shapes and sizes to create a layered look. Not only does this add visual interest to your table, but it also makes disposable plates sturdier!
We like to think of ourselves as paper plate pros. After all, we’ve been perfecting the art of stylish disposables for the past 20 years.
Our biggest revelation? Mixing paper plates with a few statement serveware pieces makes all the difference. Our go-to method: use paper plates for the main meal and bring out the real dishes for sides or anything that can be quickly rinsed or tossed in the dishwasher.
Styling Sources
More Easy Clay Projects to Try
- Clay DIY Photo Holder
- Marbled Clay DIY Incense Holder
- Speckled DIY Clay Keychain Accessory
- How to Make Easy Clay Sculptures for Decor
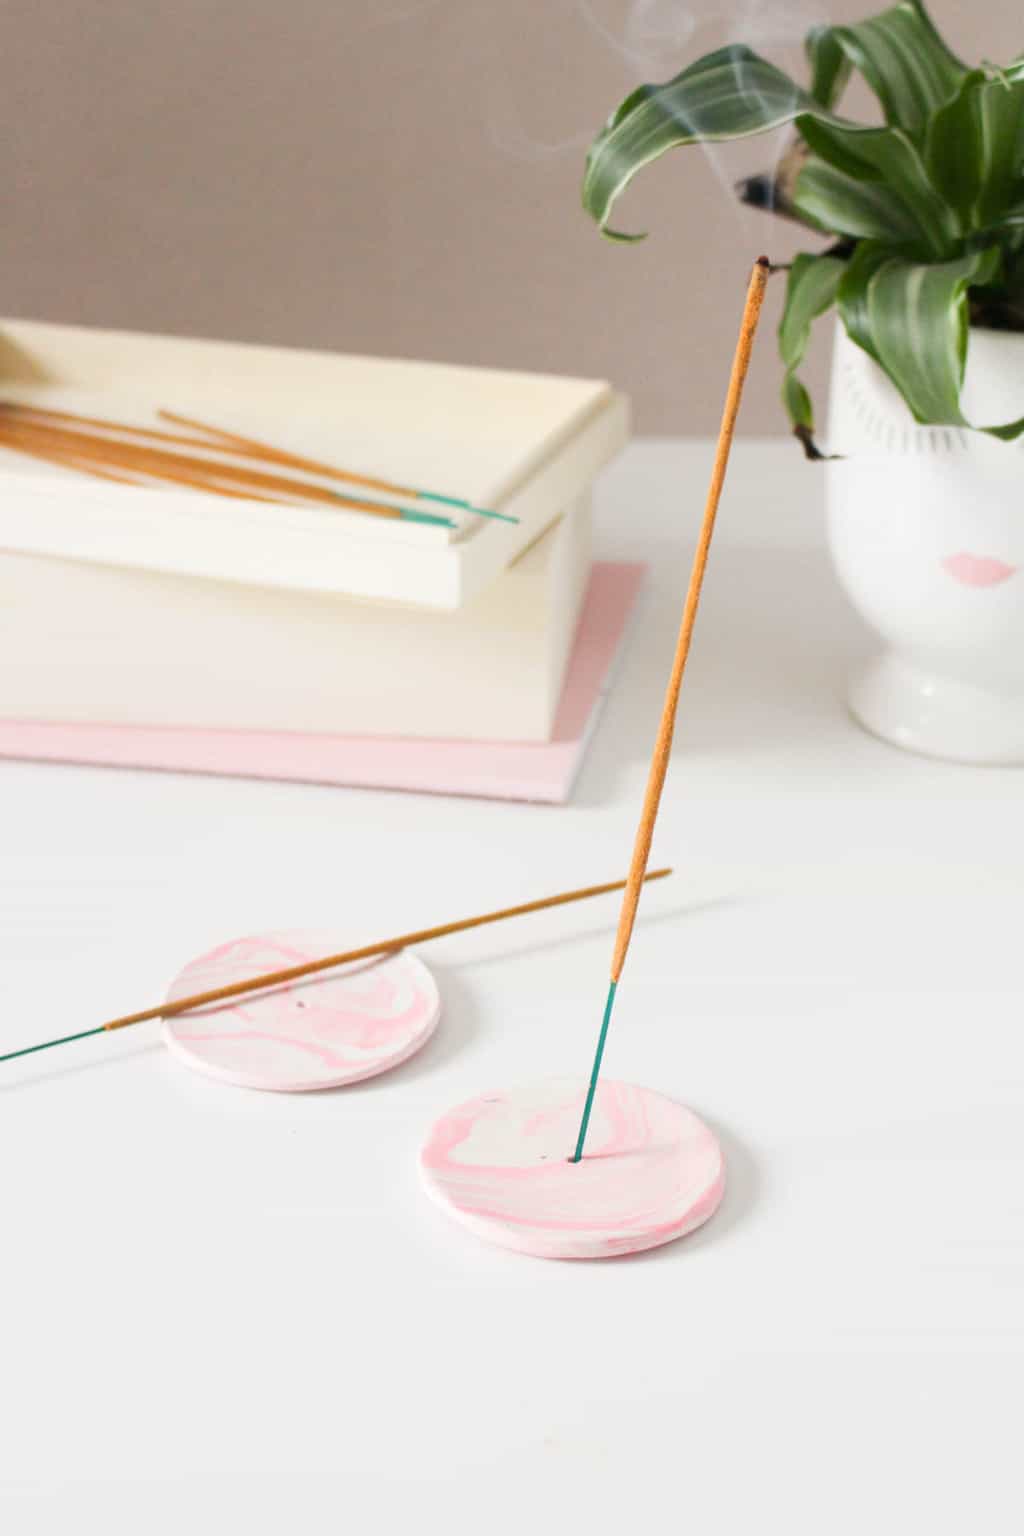
Marbled Clay DIY Incense Holder
Learn how to create a beautiful and functional DIY Incense…
30 Air Dry Clay Projects for Adults & Kids
Whether you’re looking for a DIY gift idea or just…
How to Make Easy Clay Sculptures for Decor
Clay sculptures are currently all the home decor rage, and…
DIY Minimal Beaded Blanket Holder
Short on storage? Display all those favorite blankets as a…
Please note that we may earn a commission for some of the above affiliate links. However, products featured are independently selected and personally well-loved by us!
Great post bro i like it thankshttps://feichuncable.com/”>Drag Chain Cable Manufacturer information.
Hi you have a fine website It was very easy to post I am impressed
Thank you, Florine!
Hi you have a user friendly site It was very easy to post I am impressed
Thanks, Trenton! We actually just redesigned it.
Hi you have a very easy to follow site It was very easy to post fantastic
Thank you, Lenny for your kind words. XOXO
Love the coasters, but, dying to know what is in your salad? Looks yummm.
Hi Kristin, it was just some greens, dragonfruit, and nuts! Thanks for the kind words about the coasters :)
great post, very helpful :)
Simple and amazing. I am trying it tomorrow.
this is so cute <3
https://aspoonfulofnature.wordpress.com/
love the coasters, the brushstrokes are perfect, love the colors… i have the clay, just need to buy some spring colors to make these..
So stunning and sounds pretty simple! I love the photography as well! I’m a huge fan of daylight savings as well :)
Xx, Tiffany | http://www.sunshinedaydreamphotography.com
Let’s talk about those paper plates for a second. Love them. They look so good. And those coasters are amazing. You need a shop to sell all of your DIYs :-)
Love the coaster idea! I have some coasters that are in need of an update and this is a fantastic idea!!
Cute! I have some clay ready and waiting!
How simple but practical and beautiful. I’ll be trying this at the weekend.