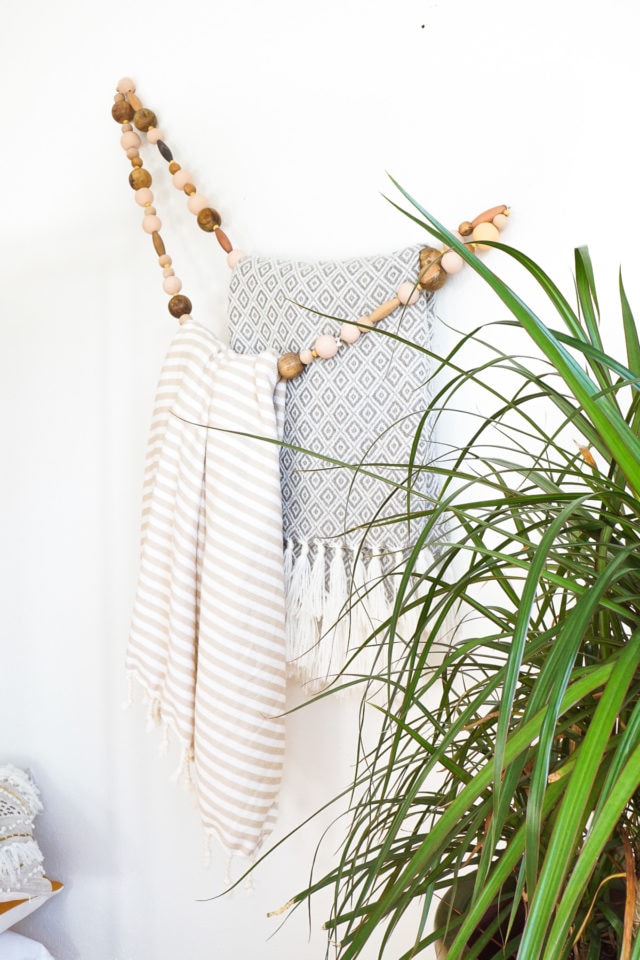
DIY Minimal Beaded Blanket Holder
Short on storage? Display all those favorite blankets as a pretty wall hanging with this fun DIY Minimal Beaded Blanket Holder.
Blankets are out of storage and back with a vengeance at this house!
‘Tis the season to cozy up for movie night with a blanket and warm bev or layer an extra one on your bed for cool nights.
I, Erin needed a spot for extra throws in our bedroom.
And since closet space is at a premium in our 1930’s abode, I turned my focus to the walls with this DIY Minimal Beaded Blanket Holder.
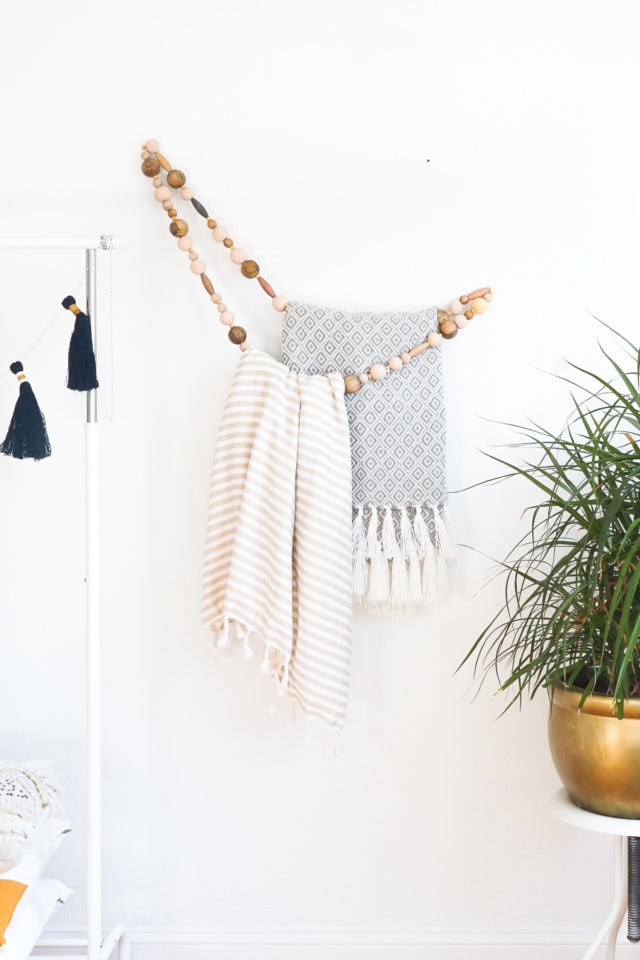
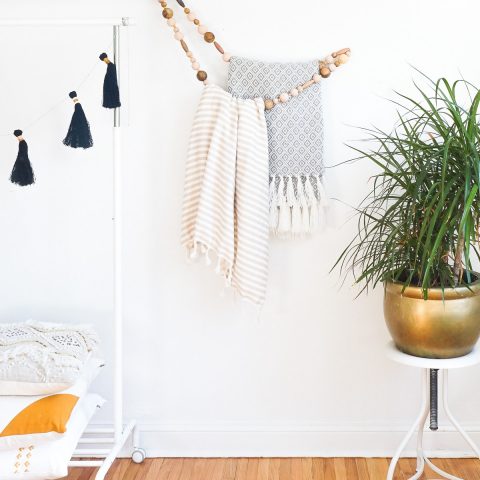
A combination of wood and polymer clay beads come together as a wall-mounted loop useful for draping blankets in a tight space.
Together with your DIY Rag Rug Storage Basket, it’s one of our creative ideas to store your blanket and stay organized this year?
So let’s get beading!
Materials and Tools Needed to Make a DIY Minimal Beaded Blanket Holder
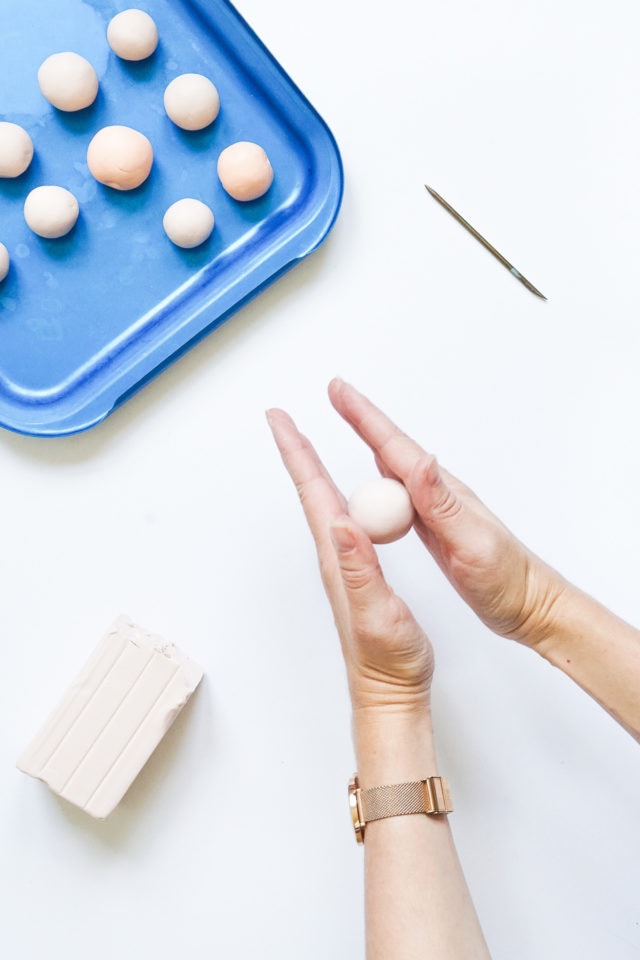
Beige clay — or any color of your choice
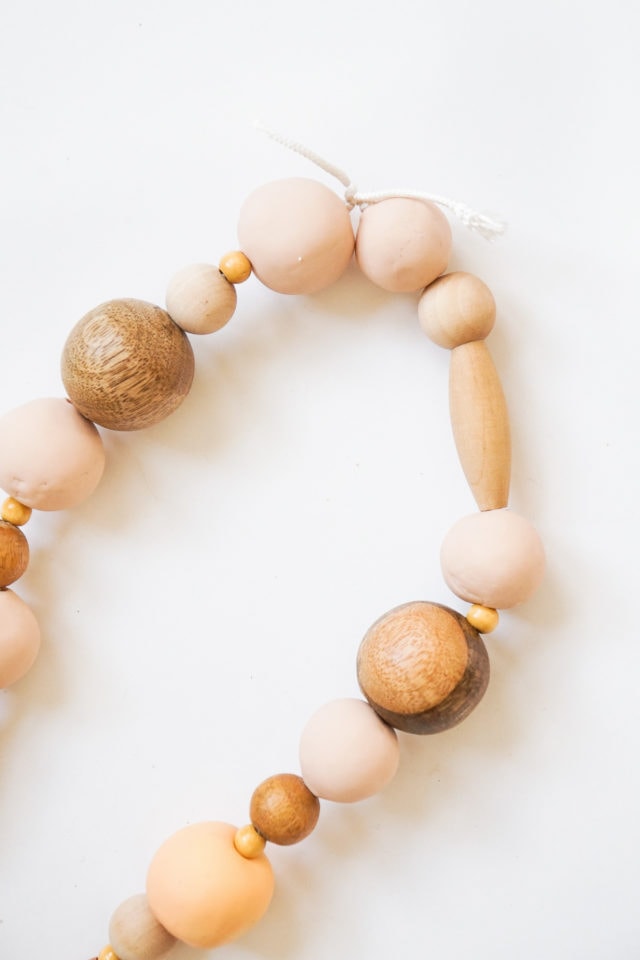
Assorted wood beads – Think large, medium and small spheres, as well as oblong wood beads.
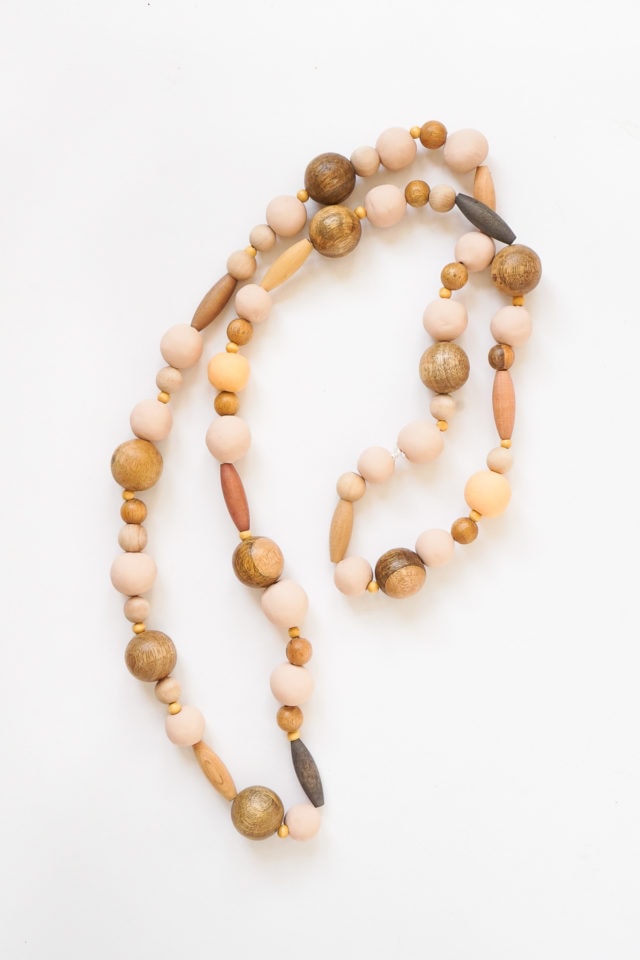
String — Ours is 80″ long.
How to Make a DIY Minimal Beaded Blanket Holder
Step 1 — Roll clay into 1.5”-2” balls and poke a hole through the center using the tapestry needle.
Step 2 — Wiggle the needle around a bit as you make the hole so it’s large enough to accommodate the needle and string.
Step 3 — Bake beads at 275 degrees F for 10 minutes per ¼” thickness. Remove from the oven and cool.

Step 4 — Tie a big knot at one end of the string (large enough to keep the beads from sliding right off).
Step 5 — String polymer beads and wood beads onto the cord in a random order.
Step 6 — Once the entire length of the string is covered in beads, tie the two ends together with a triple knot.
Step 7 — Hammer 2 nails into the wall roughly 36” apart.
Step 8 — Hang the nails level with one another for a uniform look or at different heights to create a dynamic asymmetrical look.
Step 9 — Hang the bead loop on the wall and drape it with blankets!
It’s the perfect place to hang your colorful DIY Watercolor Throw Blanket or your XOXO throw blanket.
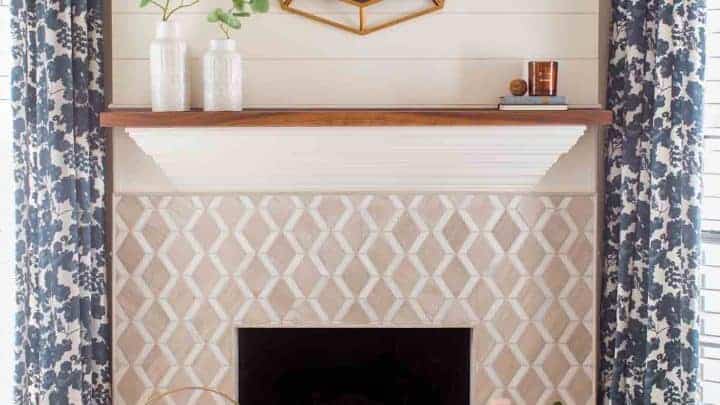
More Home Decor Ideas
This baby is going on our bedroom wall for easy access to blankets this winter. Where will you hang yours?
For more DIY home decor ideas like this, you might want to consider our related posts below –
- How To Make A DIY Watercolor Wall Art – Watercolor Prints
- DIY Gold Foil Wall Art With Free Printables
- How To Make A DIY Pegboard Wall Art
- DIY Paper Shapes Wall Art
DIY Minimal Beaded Blanket Holder
Equipment
- Hammer
- Baking sheet
- Wall nails
Materials
- 1 lb Polymer clay in clay or any color of your choice
- 1 string
- 1 plastic tapestry needle
- Assorted wood beads
Instructions
- Roll clay into 1.5”-2” balls and poke a hole through the center using the tapestry needle.
- Wiggle the needle around a bit as you make the hole so it’s large enough to accommodate the needle and string.
- Bake beads at 275 degrees F for 10 minutes per ¼” thickness. Remove from the oven and cool.
- Tie a big knot at one end of the string (large enough to keep the beads from sliding right off).
- String polymer beads and wood beads onto the cord in a random order.
- Once the entire length of the string is covered in beads, tie the two ends together with a triple knot.
- Hammer 2 nails into the wall roughly 36” apart or at a length wide enough to hold your blankets. Our string is 80" long.
- Hang the nails level with one another for a uniform look or at different heights to create a dynamic asymmetrical look.
- Hang the bead loop on the wall and drape it with blankets!

Don’t forget to share your DIY beaded blanket holder with us on Instagram using the hashtag #sugarandclothloves. We always love seeing all of your creations! Looking for more interior design inspiration? You can find all of our home decor tutorials and ideas right here!


Please note that we may earn a commission for some of the above affiliate links. However, products featured are independently selected and personally well-loved by us!
Thank you
You’re welcome!
I’m not sure I understand the importance of the clay beads. Is this a crucial step? Also I love everything DIY project you post.
Hi Audrey! The clay beads are just part of the DIY so it won’t be a full string of wooden beads! However, if you like that look then it would also work with just the wooden beads. Hope this helps !
Love, Love, Love!!
Beautiful idea.
so glad you like it, thank you! xo
Such a cute project!
thanks so much, Regina! Erin did such an amazing job :)