Lakeside Bathroom Remodel Before & After
Our New Master Bathroom Remodel — It’s been a long time coming, but I’m so excited to finally share the before and after photos of our new master bathroom!
I am SO so excited about finally sharing our master bathroom remodel.
In case, anyone else was wondering if it was ever going to happen in the year 2019, I feel you!
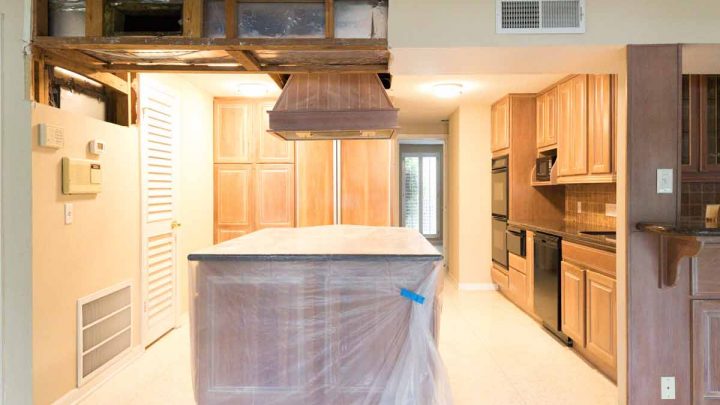
In case, you missed it, you can see all of the before photos of our new renovation house and video walkthrough here to get an idea of what we were really up against.
We had quite a few hurdles when it came to finishing the master bathroom. And I wrote about some of them in our master bathroom design plan and update post.
I also shared all of the “must-haves” when it came to deciding what we wanted to spend our money on changing from the previous design in that post, too.
Genesis CP was the construction team we used throughout the whole house to bring my designs to life.
And we also used Innovative Skylights for installing the Velux sun tunnel skylights in this space to brighten things up…
The Floorplan & Flooring
One of the other things that HAD to go was the weird pocket door opening that the previous owner used to enter a second bedroom from the other side.
It really made no sense to have a second entrance from another bedroom into the master bathroom. Not to mention that the door barely worked anyway. One of the many quirky things about this house when we first bought it, haha!
Other than floorplan change, we essentially kept the footprint of the master bathroom the same and simply updated the style and features.
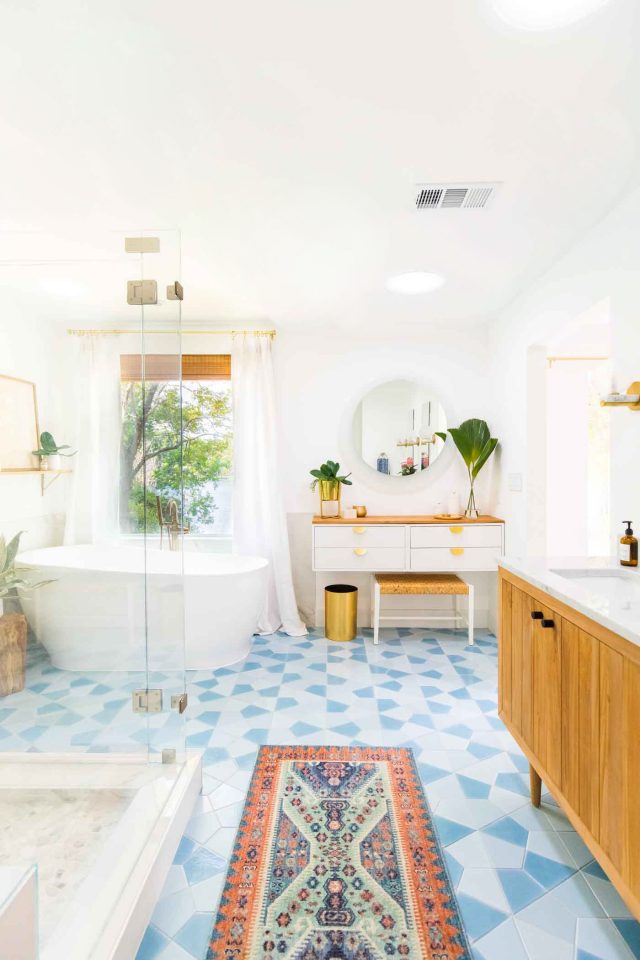
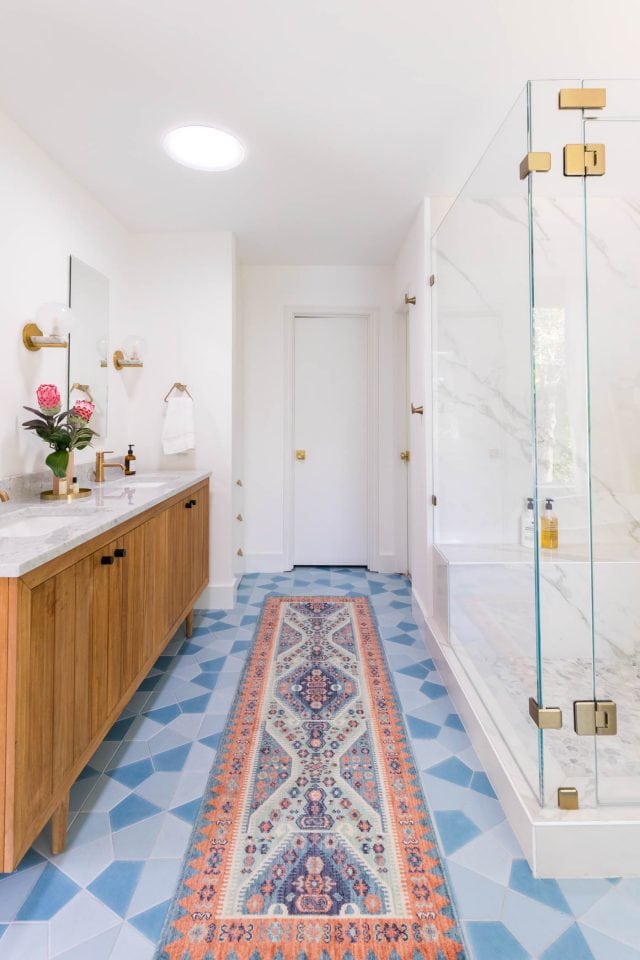
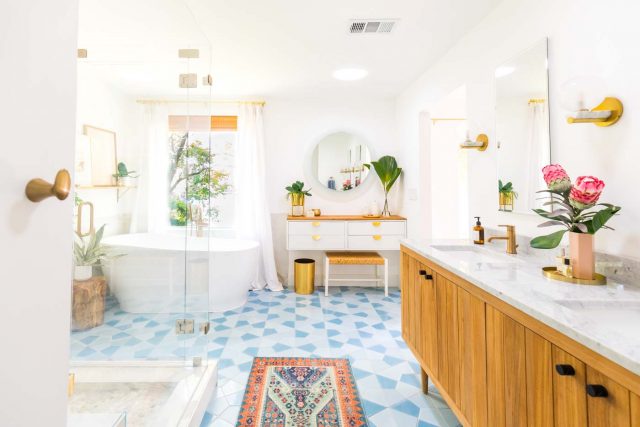
The real statement maker in this room is the custom Fireclay Tile flooring pattern. I really wanted to do a mixture of blues. And I love how the mixture of the crater lake, morning thaw, and Caribbean blue hexite tiles turned out.
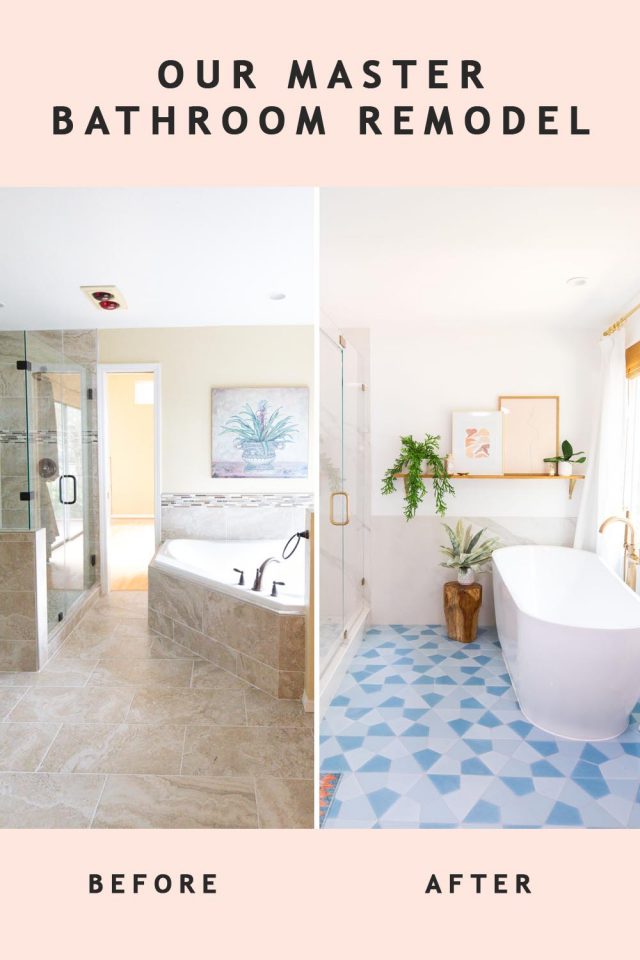
Our Master Bathroom Remodel Before & After Photos
You can see the weird pocket door opening in this before and after comparison.
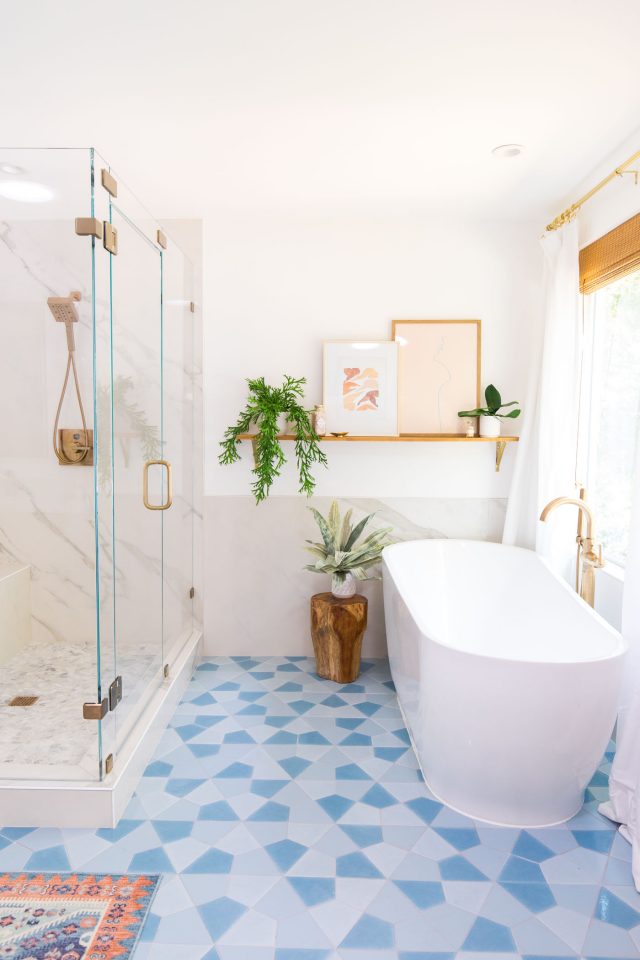
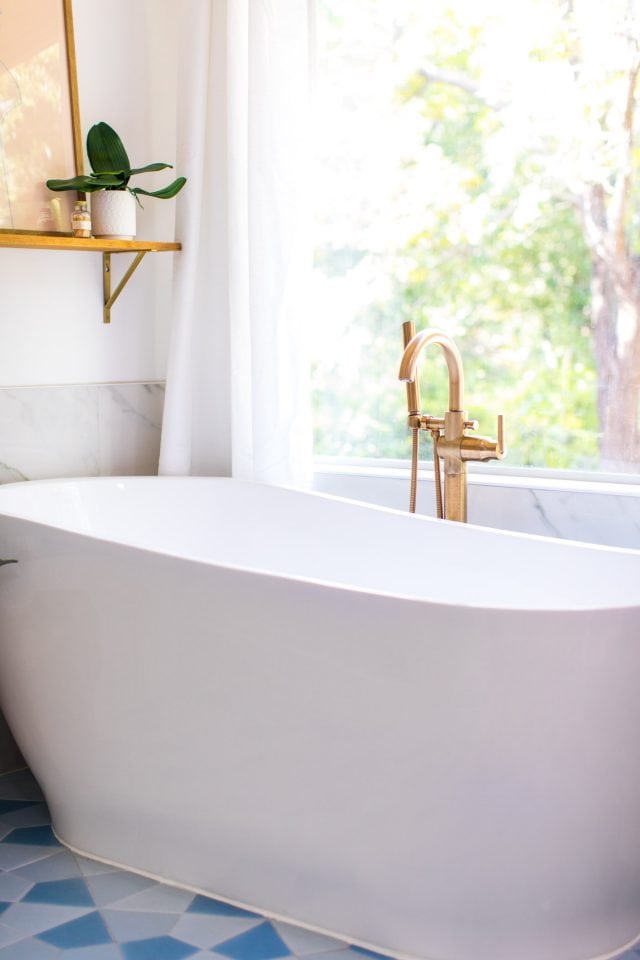
Once Genesis closed that off, we expanded the shower size and changed the outdated, no longer working jet bathtub.
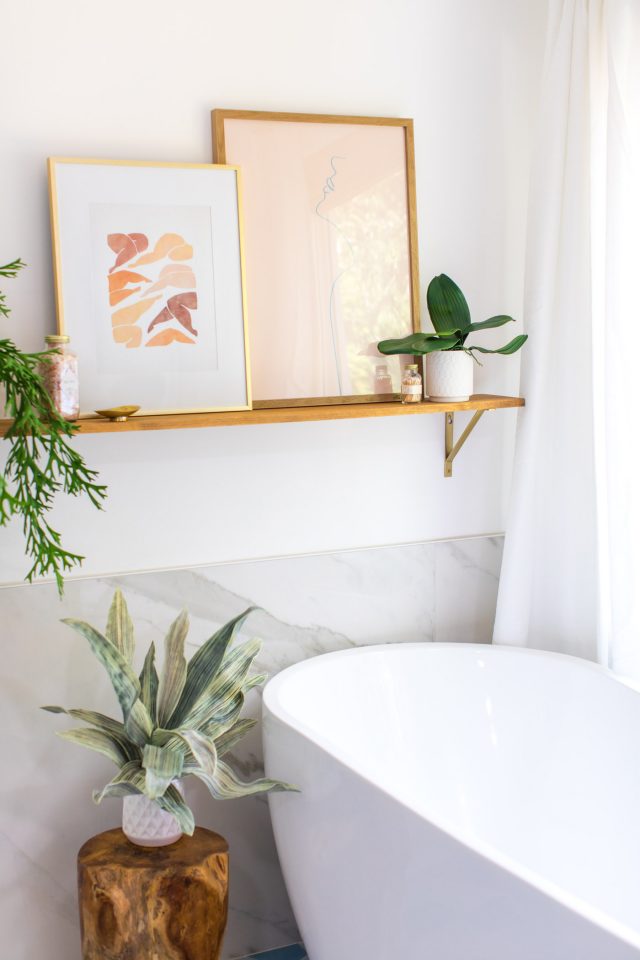
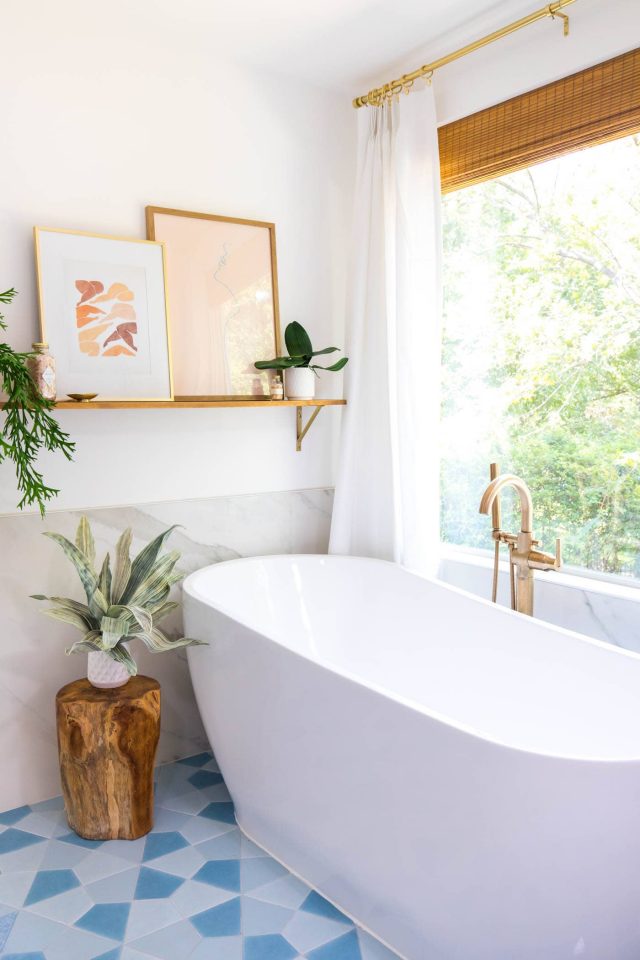
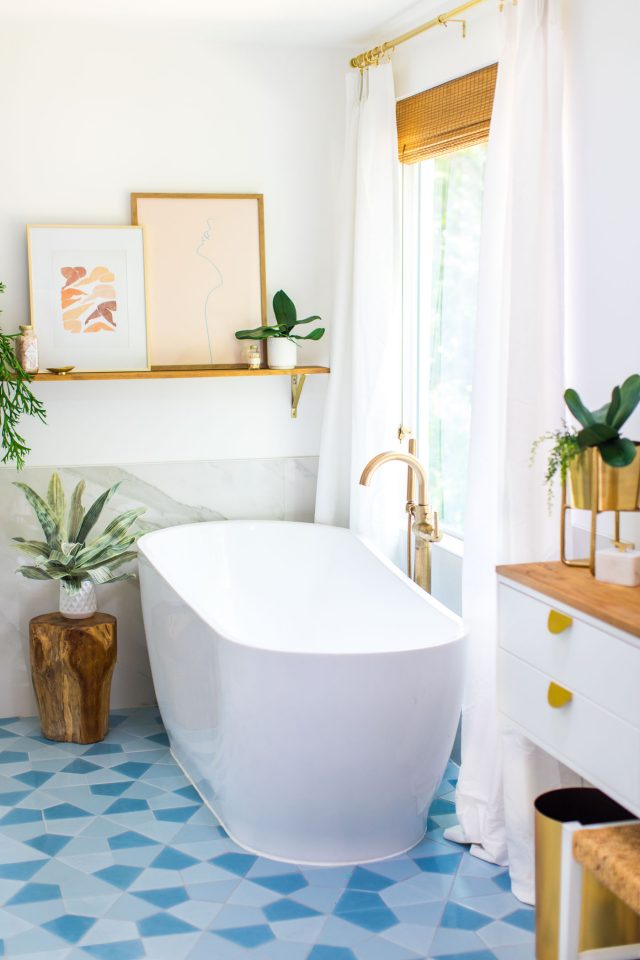
We replaced it with a new floating tub from Signature Hardware and an accent shelf above the space to add to the focal point.
I love, love the way it looks with the hanging faux plant and downloadable artwork I snagged on Etsy.
All of our master bathroom remodel room sources are linked at the bottom of the post!
All of the fixtures we used in the space are from the Delta Champagne Bronze Collection.
And I have to say that the freestanding tub faucet is by far my favorite.
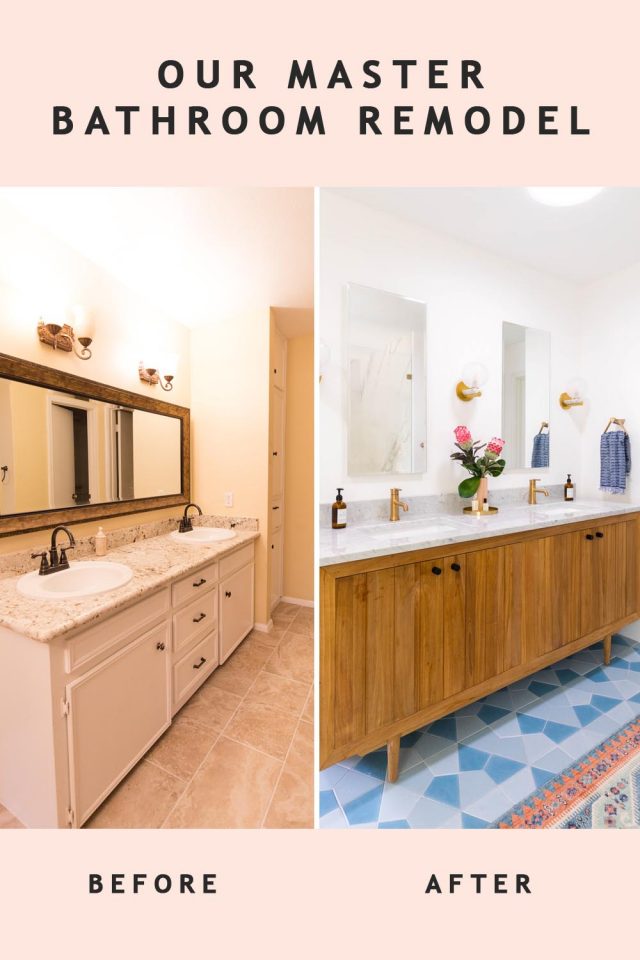
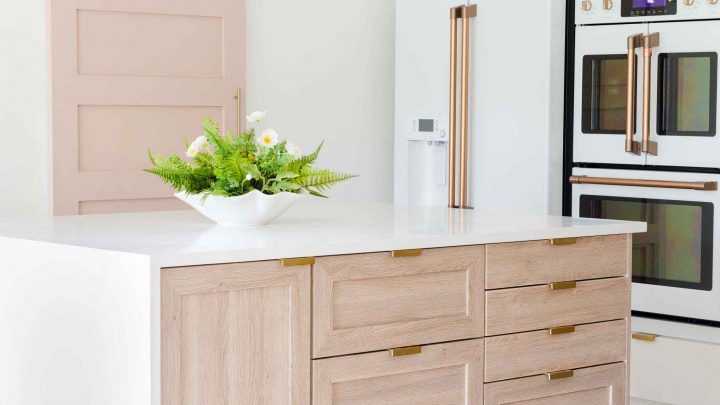
The Vanity Sink
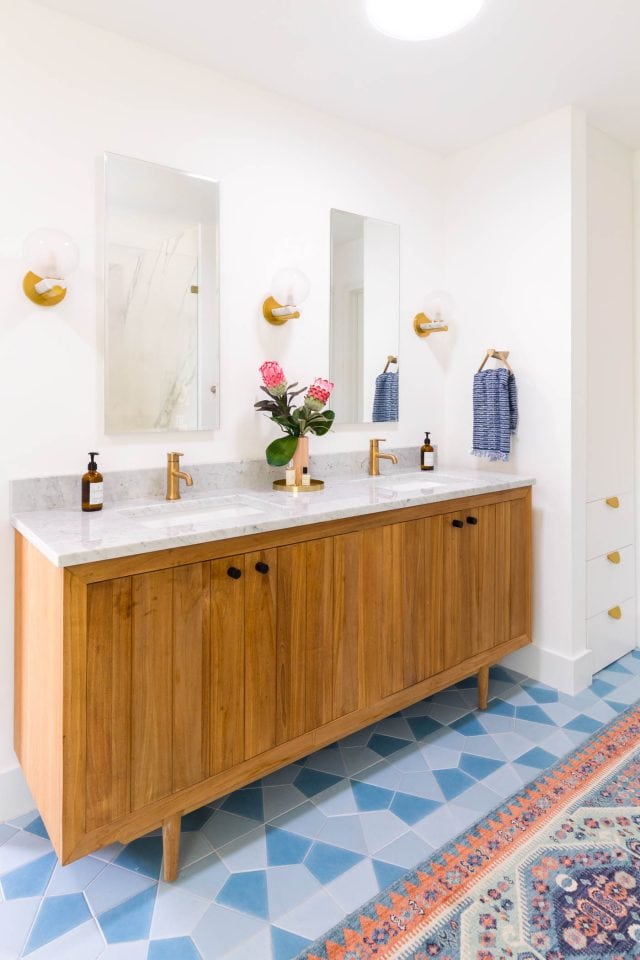
We did a major overhaul on the double sink vanity area, even though we kept the same size and placement. It’s amazing what a difference new lighting, mirrors, and vanity can make!
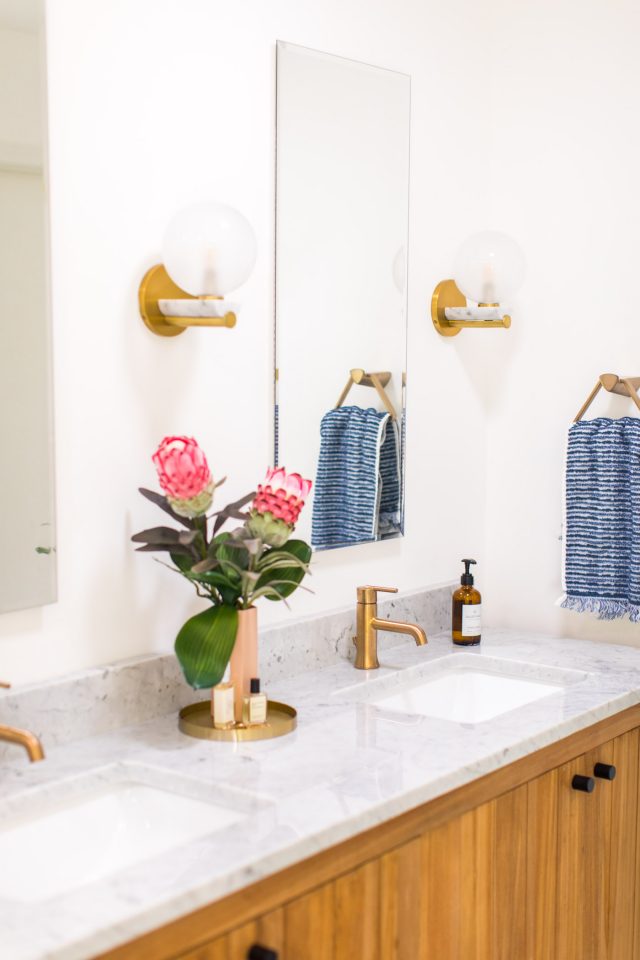
Rather than having one large sconce, we opted for three smaller sconces from Hudson Valley Lighting in between simple medicine cabinet mirrors.
The warm tones of the teak bathroom vanity help make the space feel cozy, don’t you think?!
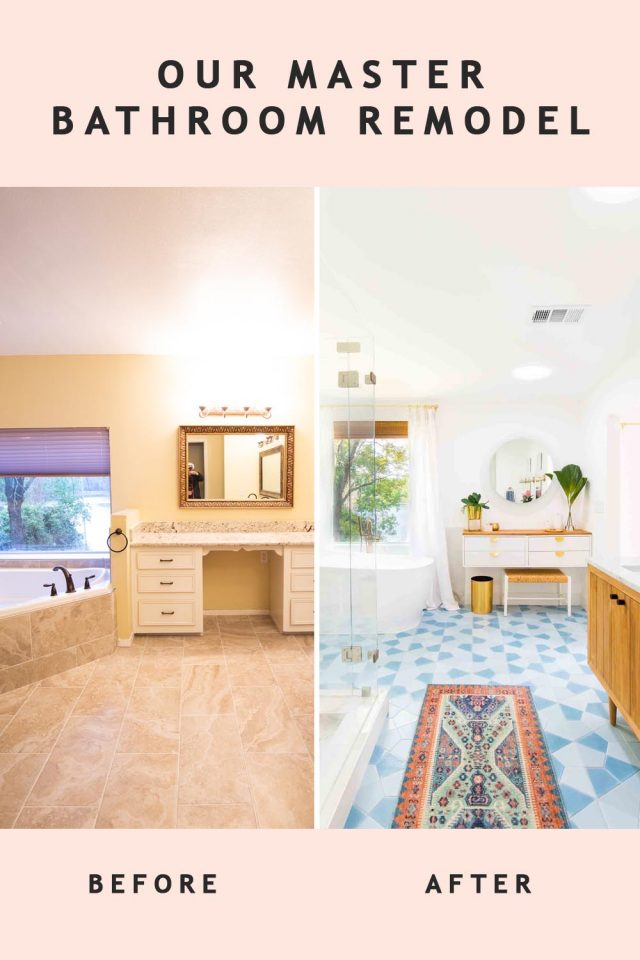
The Master Bathroom Decor
It was a little tricky trying to choose a bathroom rug to go with our statement tile floors. And we tried so so many different options. If you follow along on our Instagram stories, then you know the struggle was real!
We finally decided on this simple Target runner. Which I think ties in the blue and warm tones really well.
Side note — I’m not sure if it’s socially acceptable to be in love with a faux plant stem. But this light green veining stem from Kalalou was the perfect addition for a wooden stump side table next to the tub.
I also really debated adding curtains to this room or not. But I’m so happy I did! It really softens the look.
And I’m a big fan of how it’s layered with the Blinds.com wooden blinds.
The Vanity Area: Master Bathroom Remodel DIY Idea
We definitely left the heavy lifting to the Genesis construction team.
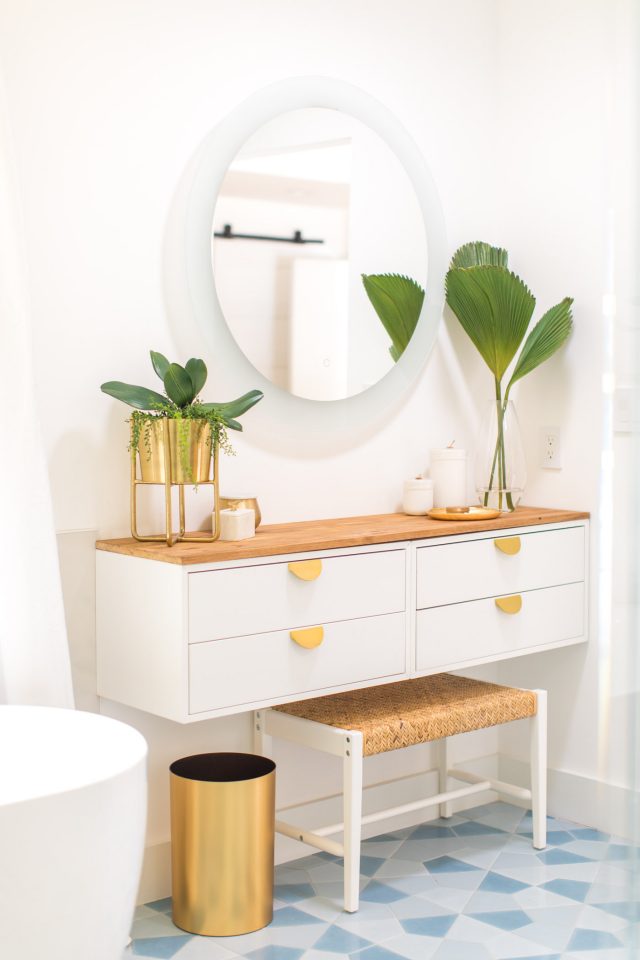
But this floating vanity was a DIY Ikea hack that we came up with ourselves. I’ll be sharing the full tutorial for it early next week. And you’ll be super surprised at how easy it is to make!
I use it to house all of my makeup and hair related things.
And it’s the first time I’ve ever had a dedicated vanity storage space. So worth it!
Rather than doing a separate sconce above the vanity mirror, we opted for one that had the lighting built in from Signature Hardware. I’m SO glad we did.

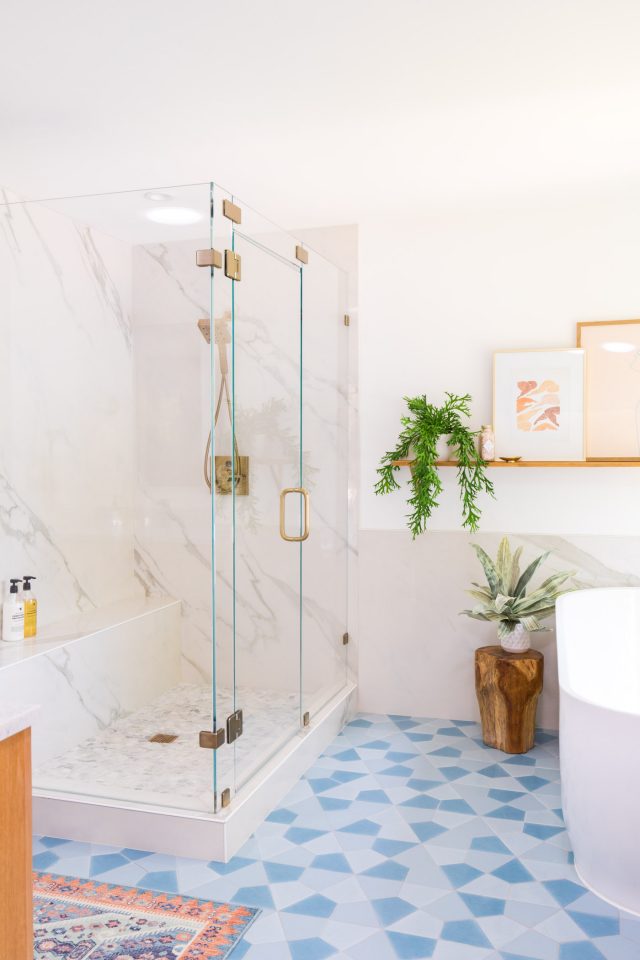
The Shower Remodel
The porcelain marble slabs for the shower walls and behind the bathtub were surprisingly affordable.
All in all we spent $2100 (not including install) on that element. But it was worth it for the seamless look!
To mimic the marble slabs, we chose a marble cobble floor option from The Tile Shop for the shower floor.
And they all flow together really well.
If we hadn’t chosen to use the slabs, I think we would’ve gone with a minimal white tile to keep the focus on the floors.
All in all, I couldn’t be happier with the way this room turned out! What do you think? Be sure to let me know in the comments below!
And in case you missed some of our recent new house remodel posts, you can see our downstairs guest bathroom before and after, our living room and dining room makeover, and kitchen remodel.
Or if you’re not in the remodeling phase, you can also shop our favorite Amazon home decor furniture finds!
Master Bathroom Remodel Before & After Room Sources
- WE USED GENESIS CP AS OUR CONSTRUCTION TEAM HERE IN HOUSTON
- EDINBURGH ACRYLIC FREESTANDING TUB W/ JET SYSTEM FROM SIGNATURE HARDWARE
- 72″ OSA TEAK DOUBLE VANITY FOR RECTANGULAR UNDERMOUNT SINK – NATURAL TEAK WITH MARBLE TOP AND WHITE SINKS FROM SIGNATURE HARDWARE
- MIRABELLE TWO PIECE TOILET W/ SLOW CLOSE LID IN WHITE FROM SIGNATURE HARDWARE
- DELTA FAUCET In2ition SHOWER H20KINETIC DUAL HANDHELD SHOWERHEAD WITH HOSE IN CHAMPAGNE BRONZE
- SHOWER WALL TILES ARE LARGE PORCELAIN, MARBLE LOOK SLABS FROM VIVALDI SHOWROOMS IN HOUSTON, TX
- CHAMPAGNE BRONZE DELTA GRID SINK FAUCET STRAINER
- DELTA TRINSIC SINGLE HOLE SINK FAUCETS IN CHAMPAGNE BRONZE
- DELTA FAUCET TRINSIC FLOOR MOUNT TUB FILLER IN CHAMPAGNE BRONZE
- FIRECLAY TILE CUSTOM PATTERN MADE FROM HEXITE CLAY TILES IN COLORS CRATER LAKE, MORNING THAW, AND CARIBBEAN BLUE
- VELUX SUN TUNNEL SKYLIGHTS, WHICH YOU CAN FIND IN YOUR AREA RIGHT HERE
- TOP DOWN, BOTTOM UP WOODEN SHADES FROM BLINDS.COM
- MARBLE COBBLE TILE SHOWER FLOORS FROM THE TILE SHOP
- Boone Wall Sconces from Hudson Valley Lighting
- Round LED Vanity Mirror
- Rectangular Medicine Cabinet Mirrors
- Leg Print from Etsy
- Abstract Line Drawing Of A Woman Print from Etsy
- Gold shelf brackets for the DIY Wooden Shelf
- Persian Rug Runner from Target
- DIY Ikea Hack Vanity Tutorial
More DIY ideas below
- A Before and After Simple Bedroom Makeover for Zach & Caitlin
- Before & After Of DIY My Backyard With Home Depot
- Office Design Makeover – Our Home Office Giveaway Reveal
- Before & After: Our Lakeside Master Bedroom Design
- Before & After: Our Wet Bar Makeover
Our House Renovations
You can see more of our recent house renovations and design ideas from our 1970's remodel below...
Please note that we may earn a commission for some of the above affiliate links. However, products featured are independently selected and personally well-loved by us!
The transformation here is stunning! I love how you managed to keep the original footprint but still bring in so many fresh elements like the custom tile pattern and the floating vanity. The warmth of the teak combined with the champagne bronze fixtures really makes the space feel both cozy and luxurious. Your DIY Ikea hack for vanity storage sounds genius—can’t wait to see the tutorial! Thanks for sharing such an inspiring and detailed remodel journey.
New Year is the time to begin a fresh start of the year and an ending the previous chapter of despair, sadness and the like. “Happy New Year” symbolizes a fresh bright hope and prosperity
That flooooor! Wow. Very nice job guys! -Andy from General Contractor Alden, NY
Thank you, Andy!
That’s absolutely stunning! I’m really impressed by your bathroom design. I recently bought a new house too in a new Paradise Developments community in Whitby and was looking for some interesting design ideas online. I’m definitely going to use your tips and decor ideas for my new bathroom, especially wooden accessories and a colorful rug.
Must say loving the remodel on the bathroom, looks amazing !
Great article !!!
If you have time you can check our my Website we also do remodeling work.
All i can say is WOW! really amazing how you did with the bathroom remodel and the furnitures you put.
Thank you so much, Alex!
I Love your design.Such an amazing creativity.I have no words to appreciate your work.These design are awesome.Further if you need cleaniness its honor for us you contact us Because we have best cleaning company.
I absolutely love it. The tub and countertops (I guess it’s Caesarstone) are just stunning. The whole combination of colors looks just perfect – so bright and colorful at the same time. I’m definitely going to use some of these ideas when it’s time to renovate my bathroom.
Hi Adam! Thank you so much! We are in love with the bathroom. We did get are countertops from Caesarstone for our kitchen. However, the tub, vanity are countertops are from Signature Hardware. There’s an option to get the vanity without the countertop but we opted to get it with the marble top. Links are in sources section if you want more details! Good luck with your bathroom renovation!
This is probably my favorite Tiles you’ve ever posted! Thank you for sharing! I am absolutely going to try this one. What a GREAT idea!! <3
Thank yo so much! XOXO
The after is so dreamy! I like how the tile feels playful and it looks pretty with the wood vanity. It’s such a good mix of modern and timeless touches. Amazing job!
Thanks, Ashley! We had lots of fun with the tile! XOXO
I could reverse engineer all the links you have to figure out the materials costs but can you just state how much this reno cost? With the vanity alone being $3000 plus, I’m estimating this was a $45,000 project including labor…
It was closer to $25k because we did a lot of the smaller installing ourselves as far as the vanity, mirrors, new lighting, wall decor, etc
I love your remodel! It’s so pretty! I love how bright it looks!
Thanks, Kristyn! We were definitely trying to brighten up the space! XOXO
What a transformation! I love the tile, it’s so colorful and a pop to the room.
Thanks, Julie! It was really fun picking out the tile and it seems to have been a big hit with everyone!
I am obsessed with that floor! So gorgeous!
Thanks, Anna! We are obsessed with the floors too!
ooooohhhhhhh those tiles are soo awesome!! and the rest of it is gorgeous – if that was my bathroom i doubt youd ever get me out of there😉
Lol. It’s been hard getting out of that awesome big tub of our. Thanks for the kind words, Angel!
Oh wow! It looks soooo good! I love the tub and the color of the flooring. Great job!
Thank you so much, Krissy! It’s been a labor of love so we are just excited that it’s finally done.
I love it!! It is so bright & fresh feeling! I also love the colors! It’s beautiful!
Thanks, Natalie! You know us, we love color!!! XOXO
Loooooooove it! Your vanity is genius, can’t wait for that hack tutorial, I have an existing vanity in my master that is big and bulky that I’d love to replace. And the floors are stunning.
Thanks, Jani! We will publish the DIY hack soon!
10 things you must know finishing a basement aren’t only for getting some space to use as a storage space. Today, families are converting basements into everything from guest quarters to workplaces, rentable nursery gardens to very good quality hang-out spaces.