DIY Rag Rug Basket
Stay organized, and learn how to craft a charming rag rug basket in our step-by-step tutorial. This ingenious Ikea hack can be used with any rug too!

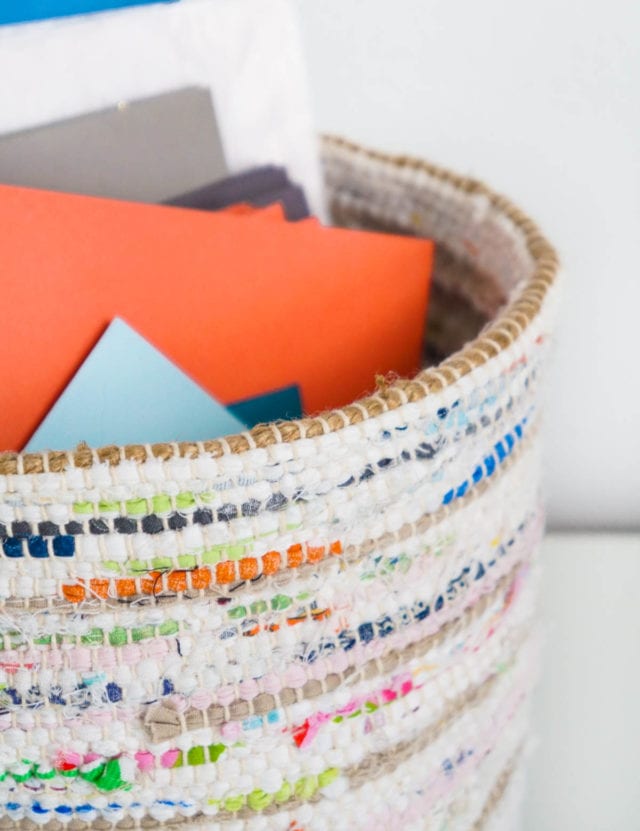
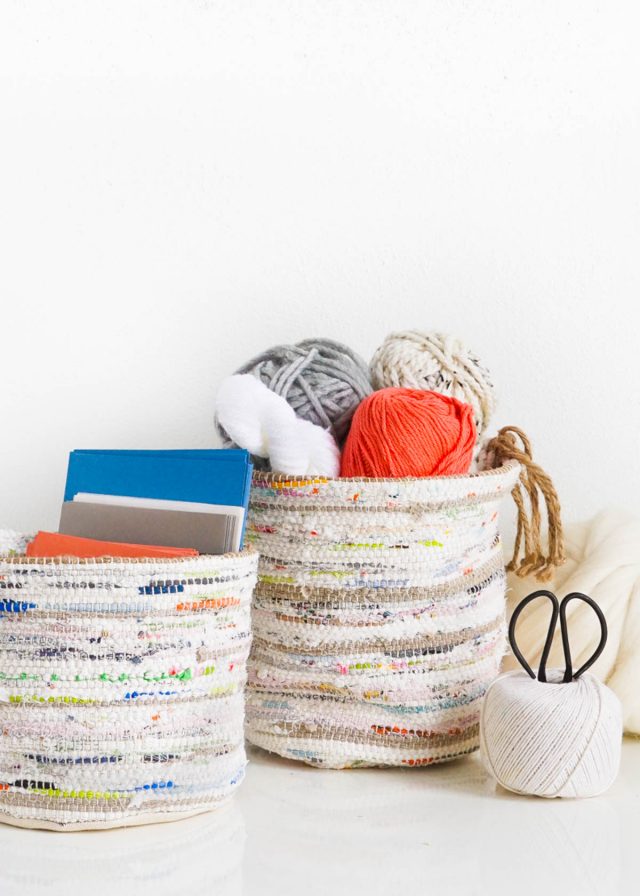
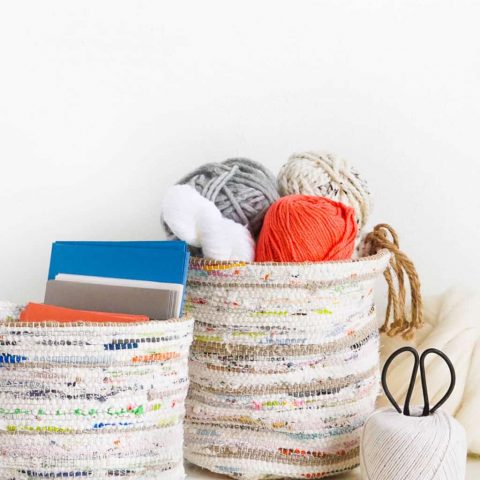
Rag rug baskets, also known as rug baskets, are a beautiful and practical addition to any home decor. These unique and handcrafted pieces combine the functionality of a basket with the cozy texture of rag rugs, resulting in an eye-catching and practical storage solution.
Whether used to organize toys, magazines, or household essentials, rag rug baskets effortlessly blend style and utility. And this time of year, many of us have organizing on the brain as we start the year with resolutions to keep the clutter at bay.
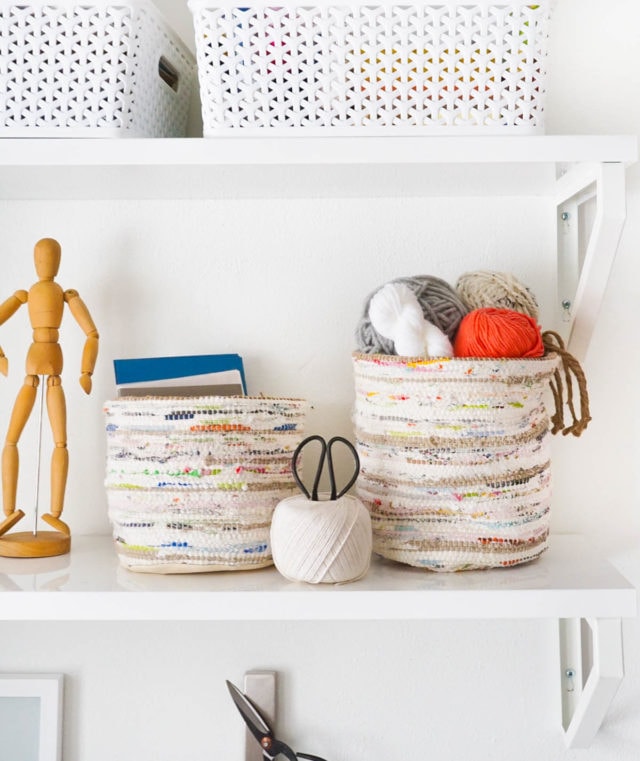
For me, Erin, it’s about finally organizing my craft supply stash so things are easier to find and less stressful to look at. These textile baskets, made from an inexpensive Ikea rag rug are perfect for storing everything from craft supplies to linen closet toiletries, and can collapse flat when not in use.
Plus, these rug storage baskets are as pretty and cute as they are functional. Because you know that we’re all about a little bit of color in our life!
Materials and Tools Needed
Rag rug — We used the Tanum Flatwoven Rug from Ikea. It’s a durable rug that has been available at Ikea for years. And even though this is an Ikea hack, this DIY project will work with any rectangular rag rug.
Coordinating canvas or twill fabric — For bottom of basket
Matching thread
Sewing machine with size 14 needle — We’ve seen some tutorial use fabric glue. But for the sake of longevity and durability, we recommend using a sewing machine to reinforcing the seams with stitching.
How to Make a DIY Rag Rug Basket
1 — Lay the rug out vertically in front of you. Using the T-bar, measure 7” down from the short side of the rug. (10” down for a larger basket.
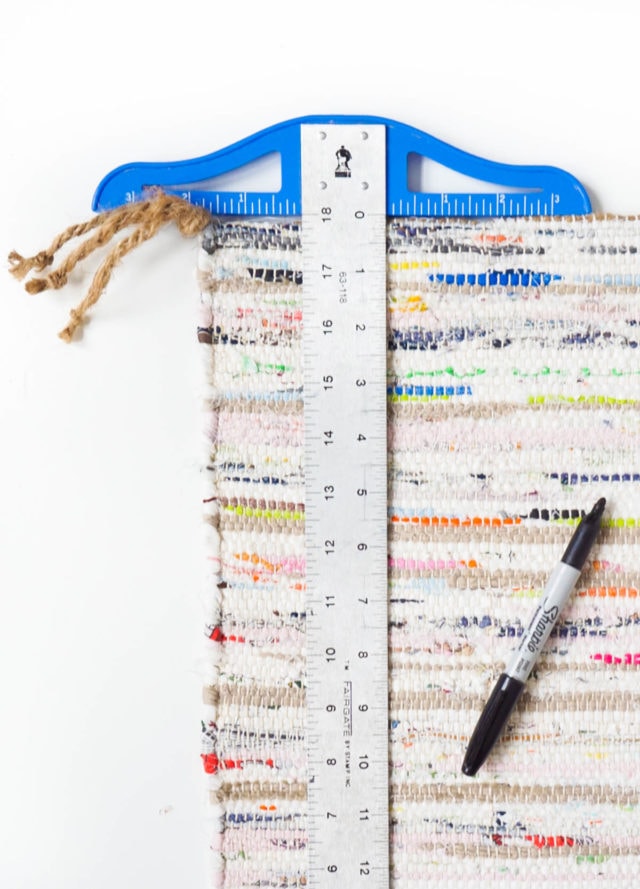
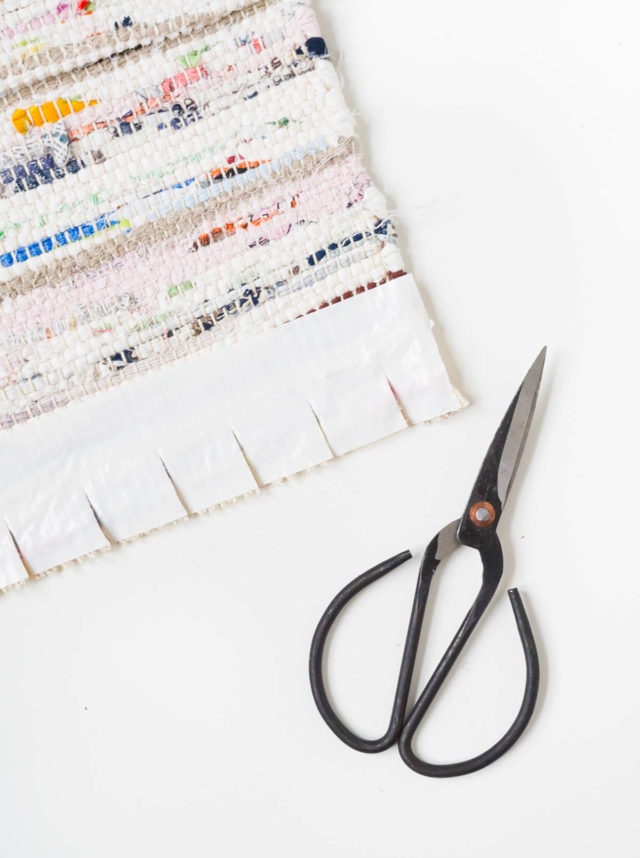
2 — Using scissors, cut across the width of the rug at this measurement.
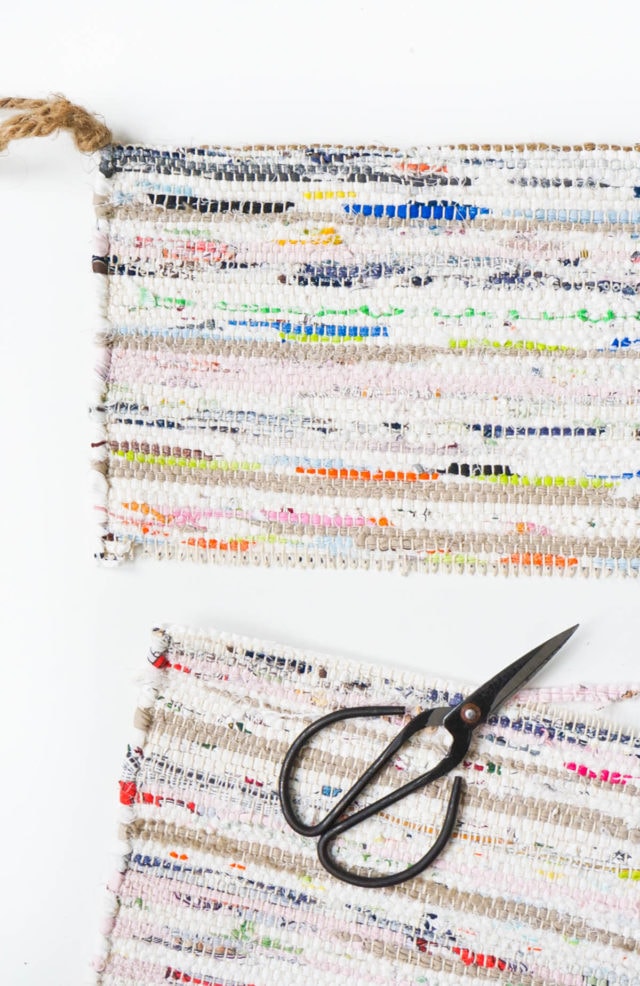
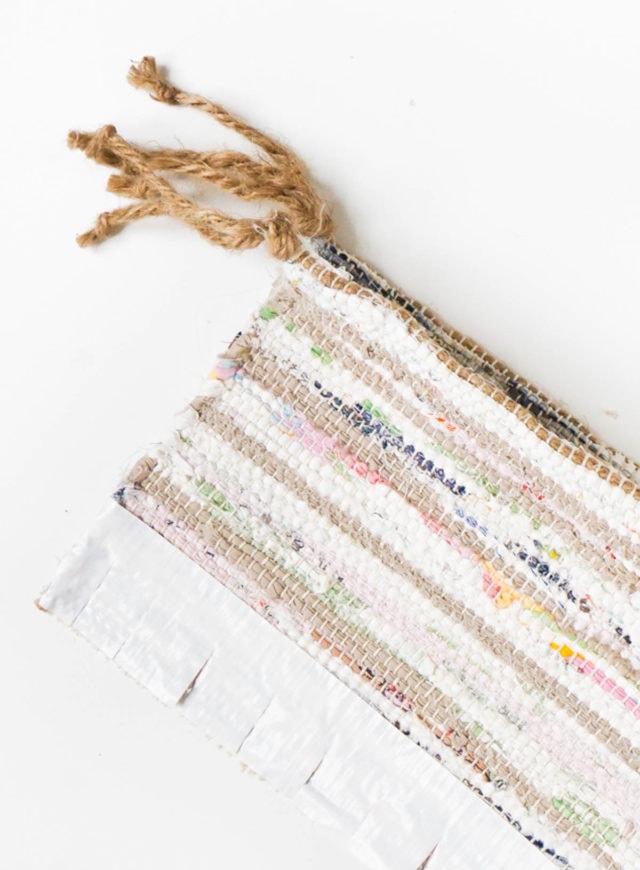
3 — Run a strip of duct tape across the bottom cut edge of the rug to prevent fraying, and make 1/2″ clips every 1” along the bottom edge of the duct tape.
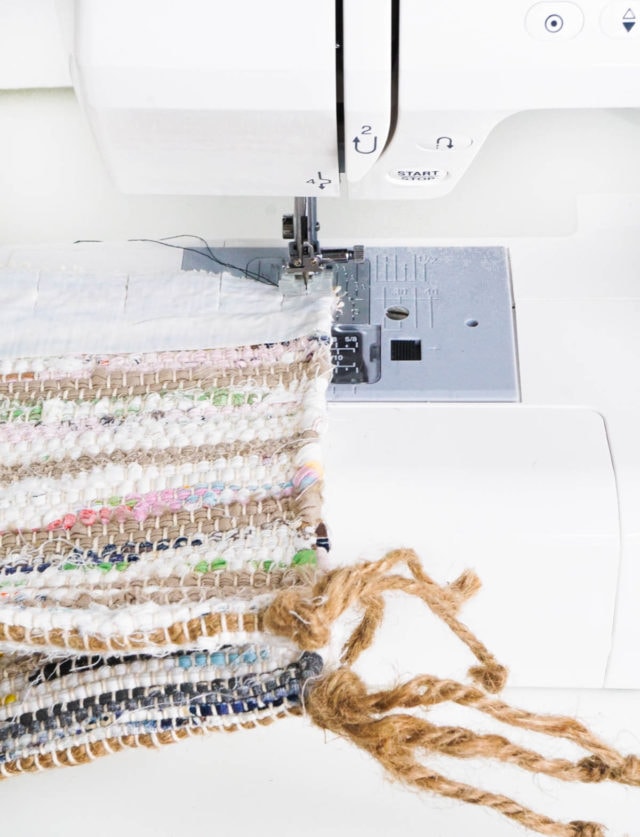
4 — Fold the rug in half with the right sides facing one another.
5 — Sew up the edge at 3/8” seam allowance, stopping just before reaching the twine ties.
Because of the thickness of both layers of rug, we chose not to pin them together for this step. It was a short enough distance and there seemed to be enough texture not to need to.
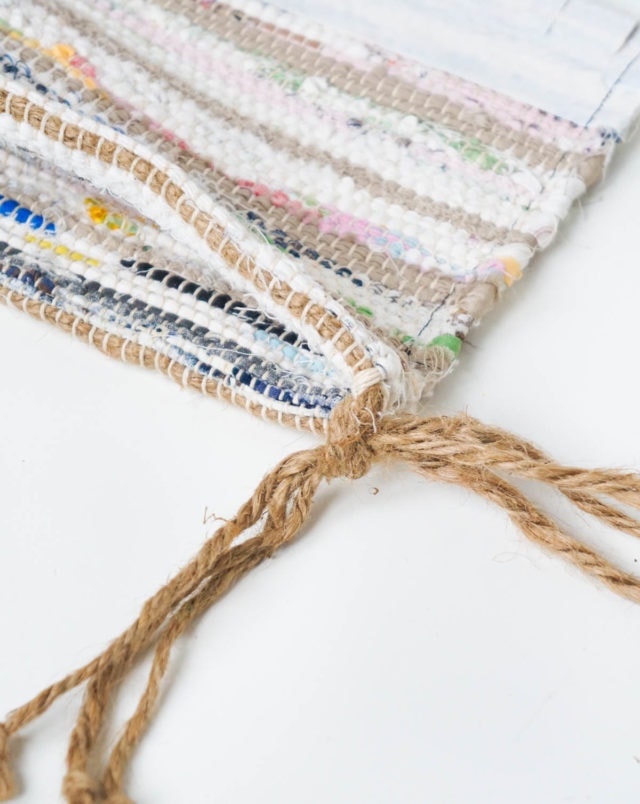
6 — Next, untie the twine knots at each end, and re-tie the two groups together to form one knot.
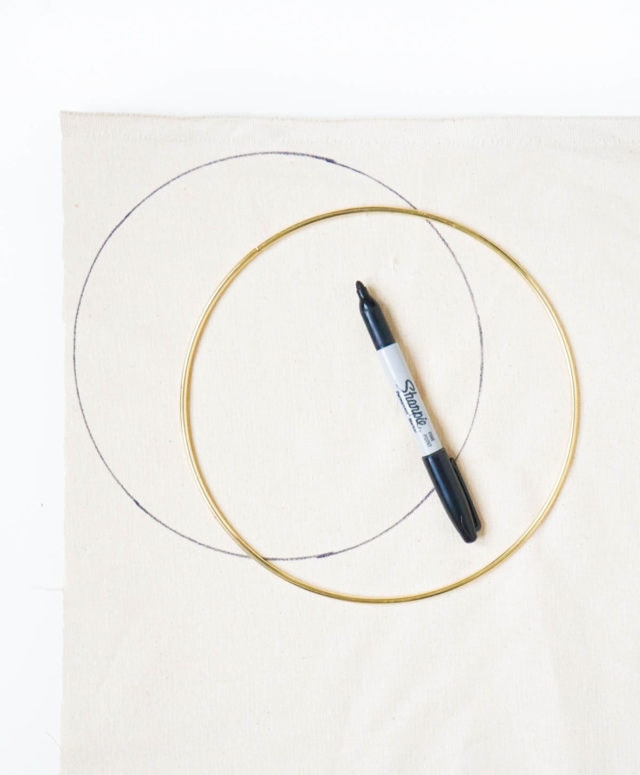
7 — Cut out an 8” circle of canvas. We used a gold hoop as a guide, but any kind of round bowl or plate will do too.
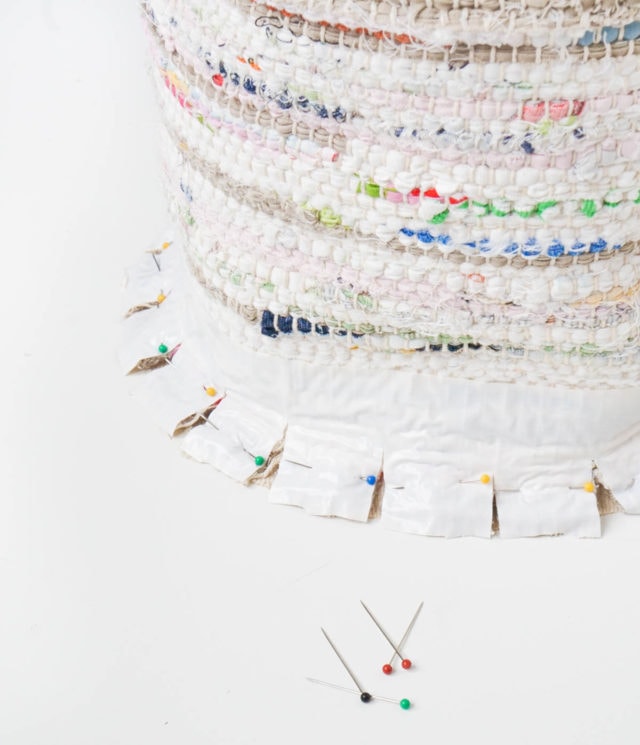
8 — Pin right sides of the rug and the canvas bottom together with sewing pins. The clips at the bottom of the rug will allow it to form to the circular canvas bottom.
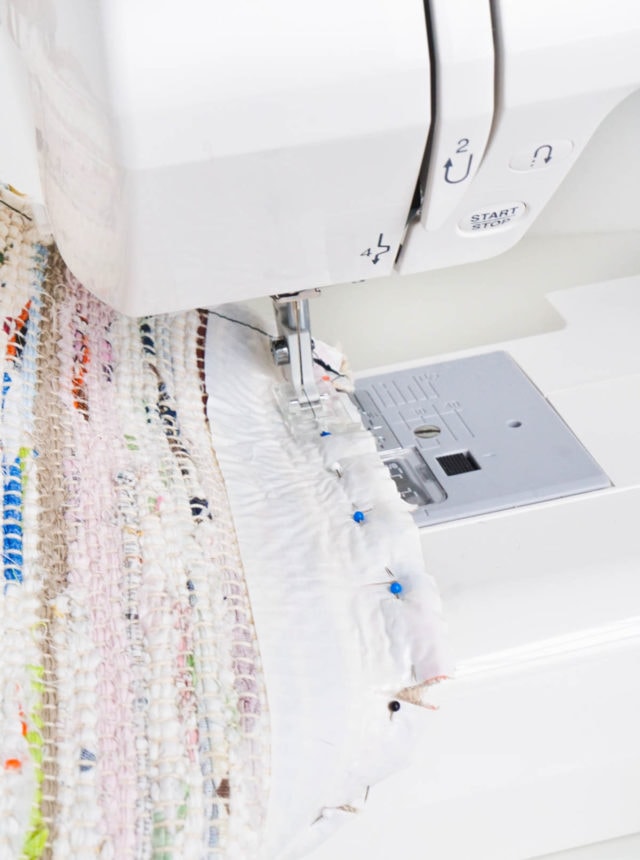
9 — Sew the two layers together at 1/2” – 3/4” seam allowance.
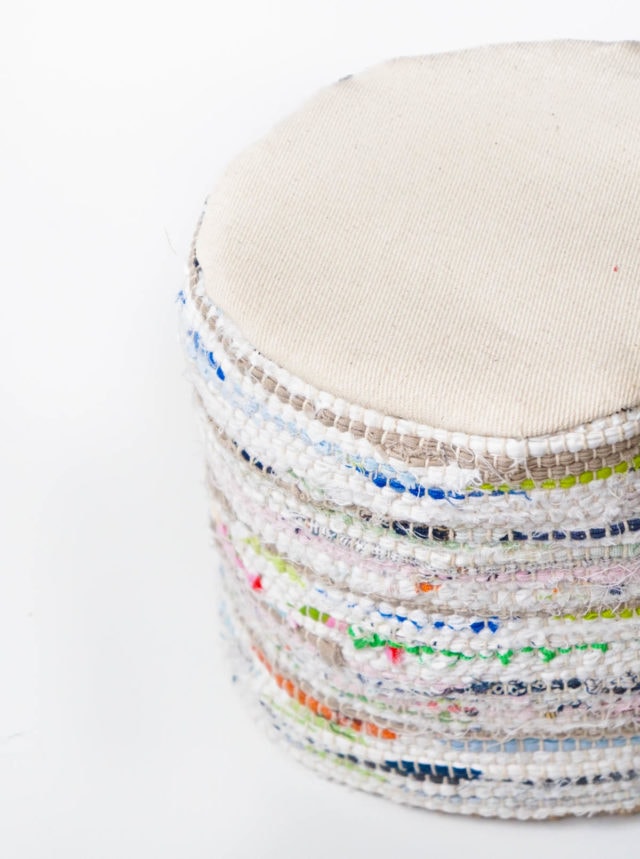
10 — Turn right side out, form into cylindrical shape, and braid the twine ties if you wish. And now you’ve got your own DIY woven rag rug!
More Easy Ikea Hacks
We’re using our rag baskets specifically for yarn and stationery storage. It’s also a clever blanket storage idea. What will you use yours for?! Our blog is filled with Ikea hacks so if you love making them just as much as us, check out some easy hacks below —
- Inspiring Ikea Kallax Hacks for Every Room
- Genius Ikea Besta Hacks for a Stylish & Functional Home
- 19 Creative Ways to Hack Your Ikea Malm Dresser
- DIY Kids Table Ikea Hack
DIY Rag Rug Basket
Equipment
- Sewing machine with size 14 needle
- Scissors
- T-square
- Marker
- Duct tape
- Sewing pins
Materials
- 1 rag rug
- Coordinating canvas or twill fabric for bottom of basket
Instructions
- Lay the rug out vertically in front of you. Using the T-bar, measure 7” down from the short side of the rug. (10” down for a larger basket.)
- Using scissors, cut across the width of the rug at this measurement.
- Run a strip of duct tape across the bottom cut edge of the rug to prevent fraying, and make 1/2" clips every 1” along the bottom edge of the duct tape.
- Fold the rug in half with the right sides facing one another.
- Sew up the edge at 3/8” seam allowance, stopping just before reaching the twine ties.Because of the thickness of both layers of rug, we chose not to pin them together for this step. It was a short enough distance and there seemed to be enough texture not to need to.
- Untie the twine knots at each end, and re-tie the two groups together to form one knot.
- Cut out an 8” circle of canvas.
- Pin the right sides of the rug and the canvas bottom together with sewing pins. The clips at the bottom of the rug will allow it to form to the circular canvas bottom.
- Sew the two layers together at 1/2” – 3/4” seam allowance.
- Turn the right side out, form into cylindrical shape, and braid the twine ties if you wish.

More Easy DIY's To Try

Please note that we may earn a commission for some of the above affiliate links. However, products featured are independently selected and personally well-loved by us!
These are so pretty! I’m going to weave my own rugs and then use them to make these baskets. I have a project on the loom now but will let you know how they turn out.
Hi Karla! Yes, please let us know how they turn out. We’d love to see your finished project. XOXO
This is adorable! Do you have any advice on how to upsize it for blanket storage?
Hi Monica! Great question. Storage for a blanket may be a bit tricky since I am assuming this is a large bed blanket versus a living room throw blanket? We recommended taking a large rug, testing to see how it would be form as a basket and seeing if it’s too floppy. Using too large of a rug would make the basket not as sturdy when standing upright…. if you’re okay with this. Once you have your blanket stores in, the rag rug may be sturdy. It really just depends on the size rug you use and how much you want to store in it. Hope this helps!
Super cute! Can’t wait to create something fun out of my old rag rugs. Thanks for the inspiration! ❤️
So happy to hear that, Jenna! xo
Wow!! These turned out so pretty!! I could have a dozen of those around the house :D
So glad you like the DIY, Corina! We also love how practical they are.
Such darling baskets! Love this DIY project.
One of our favorites too! Erin is the best :)