Rug Hooking: How to Make a Pillow with Rug Hook
Learn how to create a cozy and beautiful rug hooking pillow with this step-by-step tutorial! This DIY pillow idea has similar feel to a rag rug. And you can customize it to your home decor using simple rug hooking supplies!
Every so often, a DIY technique will come along that completely rocks our little crafting world. And this rug hooking pillow is our new obsession! Can you relate?
We’ve recently started rug hooking a lot and can’t help but eat, sleep and breathe it! If there was a local club for rug hookers, we’d be leading it. What I (Erin) love about rug hooking is how fast and forgiving it is. If you’ve ever attempted knitting or crocheting, then you’ll appreciate what we’re referring to here.
Rug hooking is a relatively simple and fast craft form to do. We made this DIY pillow in a day and with a baby in the house, that is a serious feat! And if you mess up, you literally just give your yarn a tug, and easily pull out your stitches. So it’s great for beginners and non-perfectionists like us, which is why we love this creative DIY pillow idea.
What is Rug Hooking?
While rug hooking is an art form that goes way back, you can essentially think of it as a primitive hooking method for making items such as wool rugs, jute rugs, and even wall hangings. It’s a series of pulling loops through a sturdy fabric such as burlap or linen using a punch needle or latch hooking tool.
Rug hooking is different from the latch hook method simply because you aren’t knotting the wool yarn or strands as you go like you would with latch hooking. In this case, we’re putting a twist on it to share how to make a pillow using the same method for an easy weekend craft.
Rug Hooking Supplies
There are plenty of options out there for rug hooking kits if you want to buy all of the supplies together for a pre-packaged craft project. Since we’re steering away from the usual wool rug DIY here, we’ve listed all of the rug hooking supplies separately below for how to make this pillow. Keep in mind, you’re welcome to buy a premade burlap pillowcase to use on the stretcher frame for this rug hooking tutorial if you don’t want to sew your own from yards of burlap!
- 3 ply yarn or medium weight wool roving about 1-inch wide
- Burlap — We like using 100% jute burlap for our ground cloth because it doesn’t stretch as much as others, making it great for beginners.
- 1/2 yard of pillow back fabric — We used linen.
- #10R Oxford punch needle
- 24” wood stretcher frame — We used an art store canvas frame with the canvas removed.
- Scissors
- Staple gun
- Marker
- Flat head screw driver or pliers
- Sewing machine
- Sewing pins
- Zipper foot (optional)
- Iron
- Feather pillow form
How to Rug Hook
1 — Cut a 30” square piece of burlap. Stretch it around your wood frame and secure it to the back of the frame with a staple gun. You want to pull the burlap as tight as you can to make sure you have a taught fabric surface to needle punch.
2 — Draw your design onto the burlap with a marker. You won’t see the marker in the end so if you mess up or change your mind while marking it out, that’s okay.

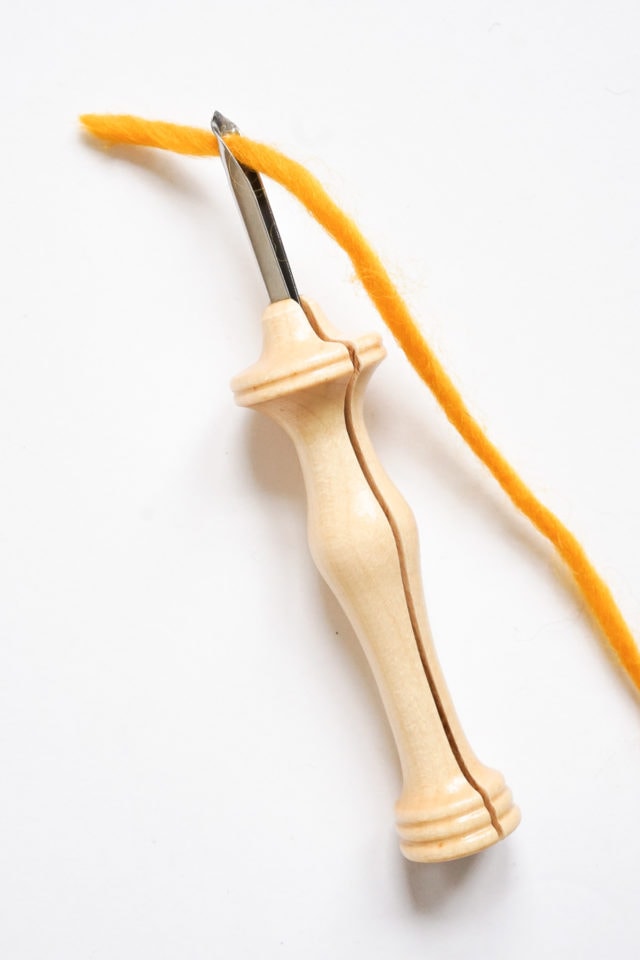
3 — Thread your punch needle by inserting your yarn or strips of wool through the hole at the tip of the needle.
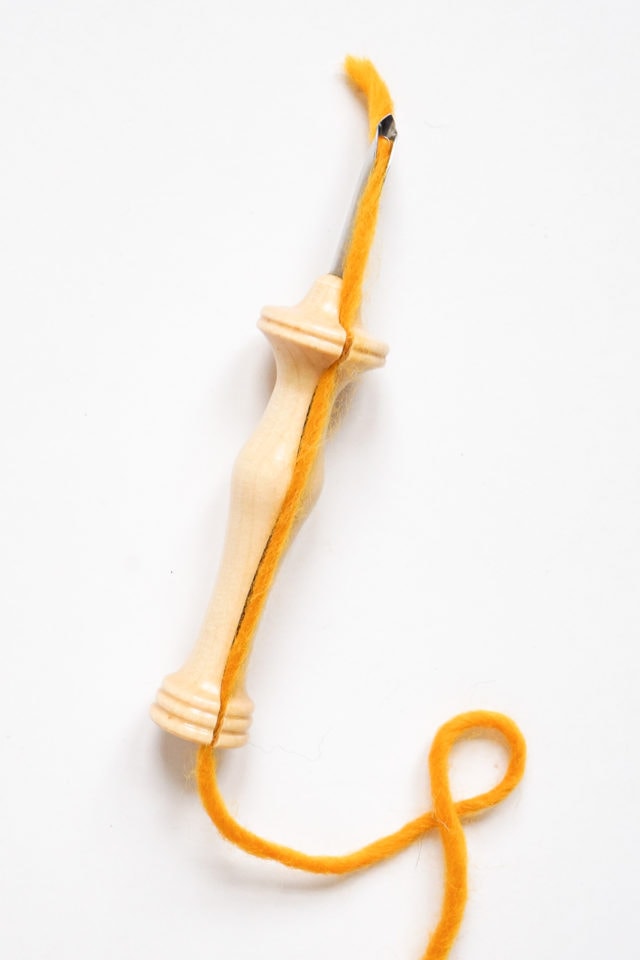
Then, place the yarn string along the channel on the wood handle. Work the yarn back and forth until it settles into the channel. Now you’re ready to punch!
4 — Hold your punch needle so the wood channel on the handle faces the direction you’re stitching. Insert the metal part of the needle into the burlap. We like to hold onto the yarn at the end of the needle (on the underside of the burlap) just to make sure it catches.
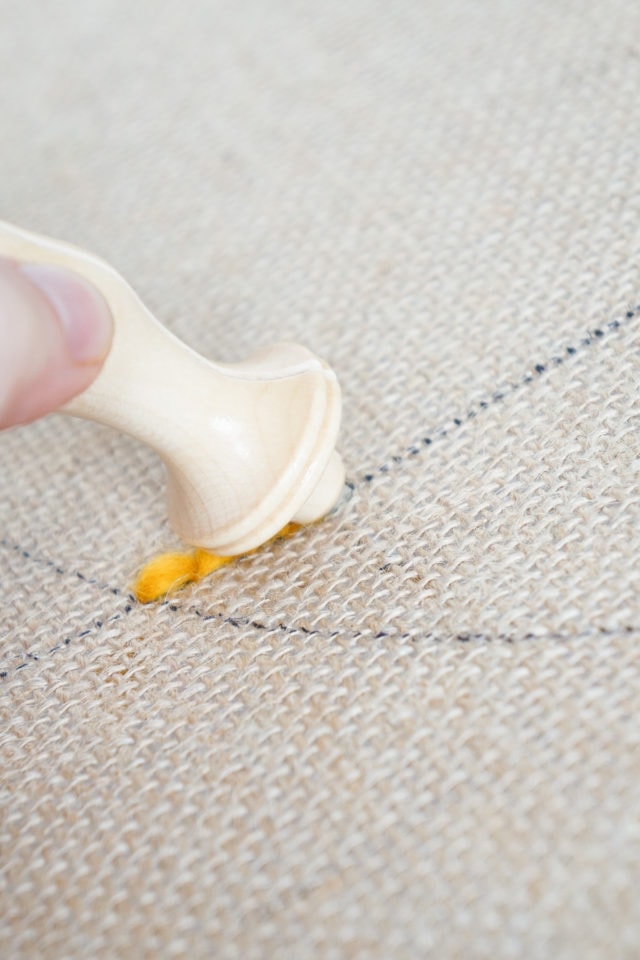
Then, pull your needle up out of the burlap just enough so it skims the surface of the fabric. Then, insert it back into the fabric a 1/8” – ¼” or so away to create a stitch.
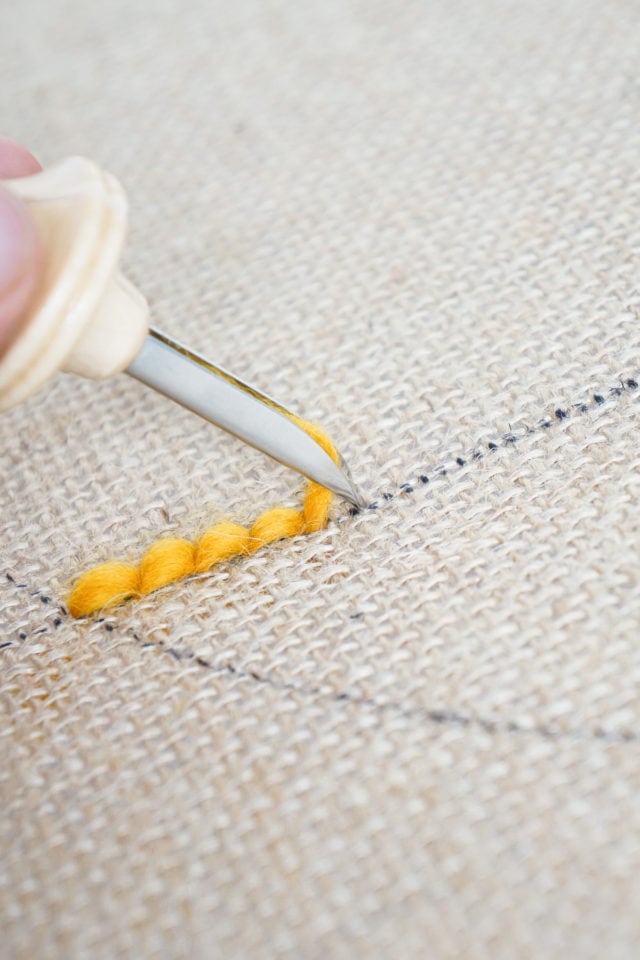
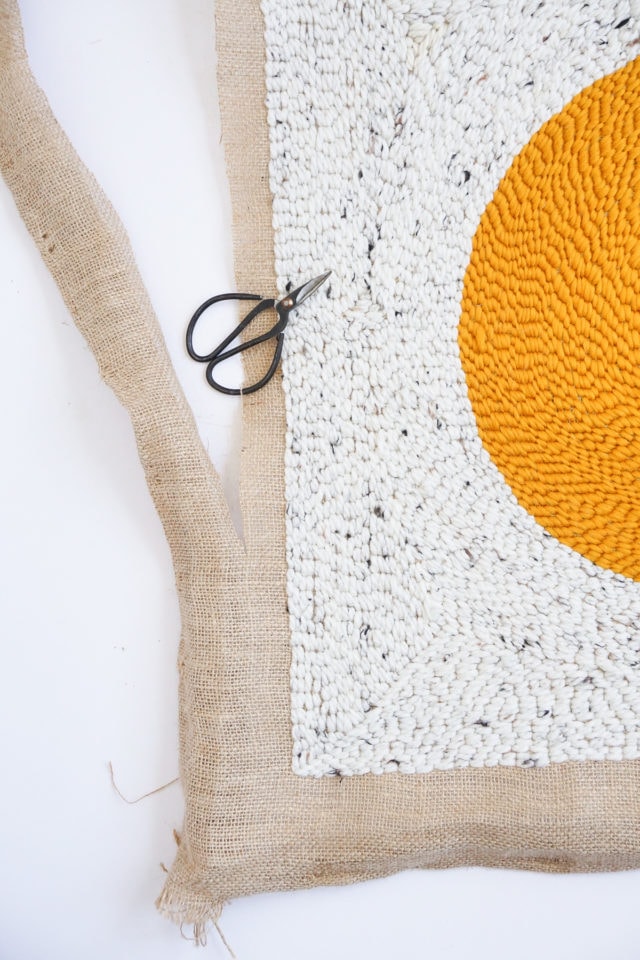
You’re striving for about 4-5 stitches per inch. Continue punching the outline of your first shape. Once you make it all the way around, start on the 2nd outline of stitches. Keep going until the entire shape is filled in.

5 — When ready to switch yarn colors, pull your needle out of the fabric just barely until the needle grazes the face of the fabric.
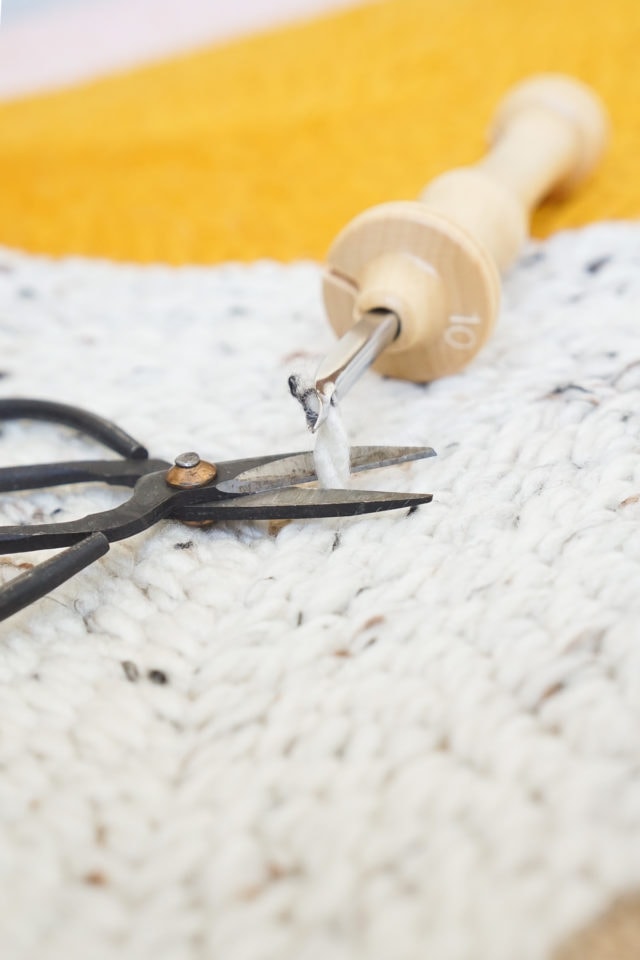
Use scissors to trim the yarn as close to the fabric as possible.
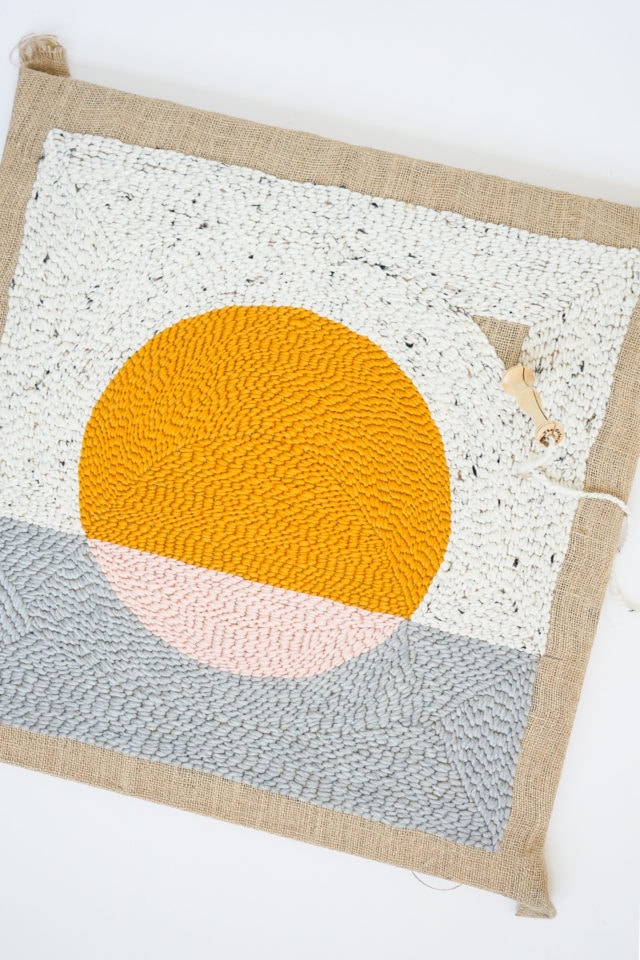
6 — Once the entire face of your pillow is rug hooked, remove the burlap from the frame by pulling out the staples with a flathead screw driver or pliers.
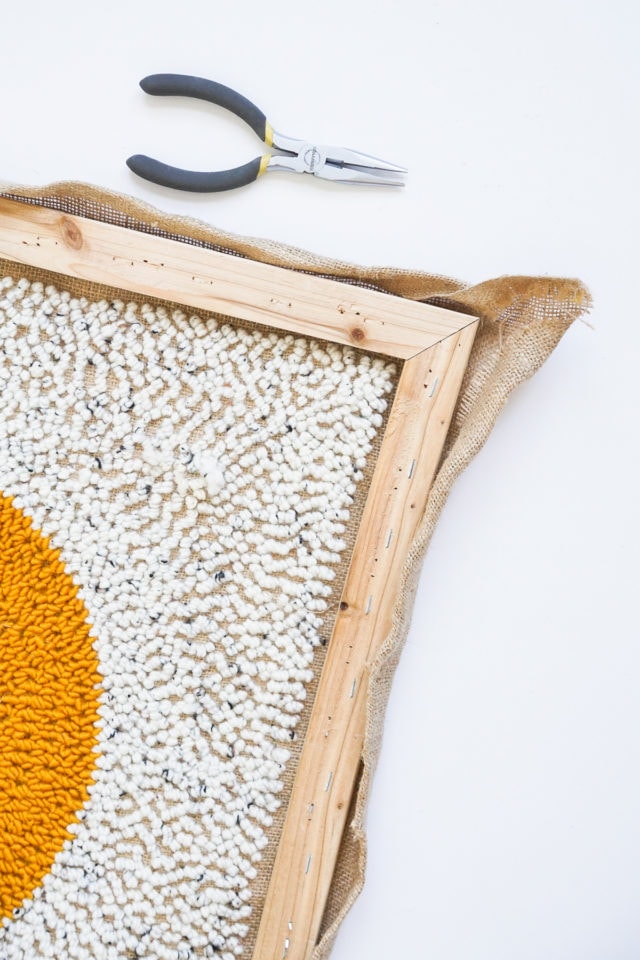
The burlap will condense a little bit as it comes off the frame securing the stitches into place. Technically the front of the rug hooking design is the side with the loops. But we like the “stitched” side better. So I’ll be using this side for the pillow face.
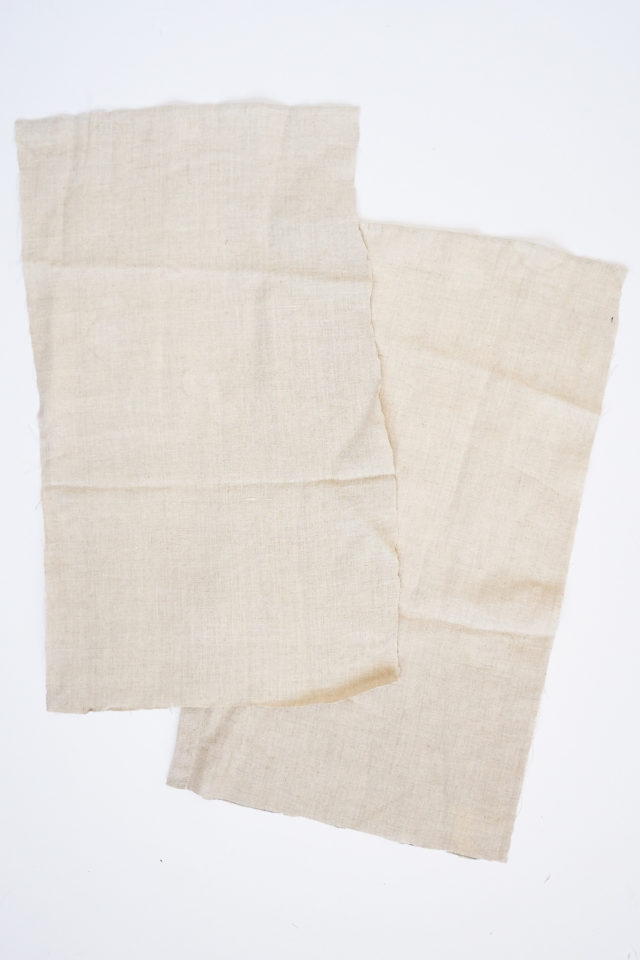
7 — Turn your design into a pillow by adding an envelope pillow back closure. Our rug hook pillow face is roughly a 21” square. So we cut 2 pieces of linen backing fabric 14” x 22”. The back pieces need to be large enough to overlap one another as well as accommodate ½” seam allowances.
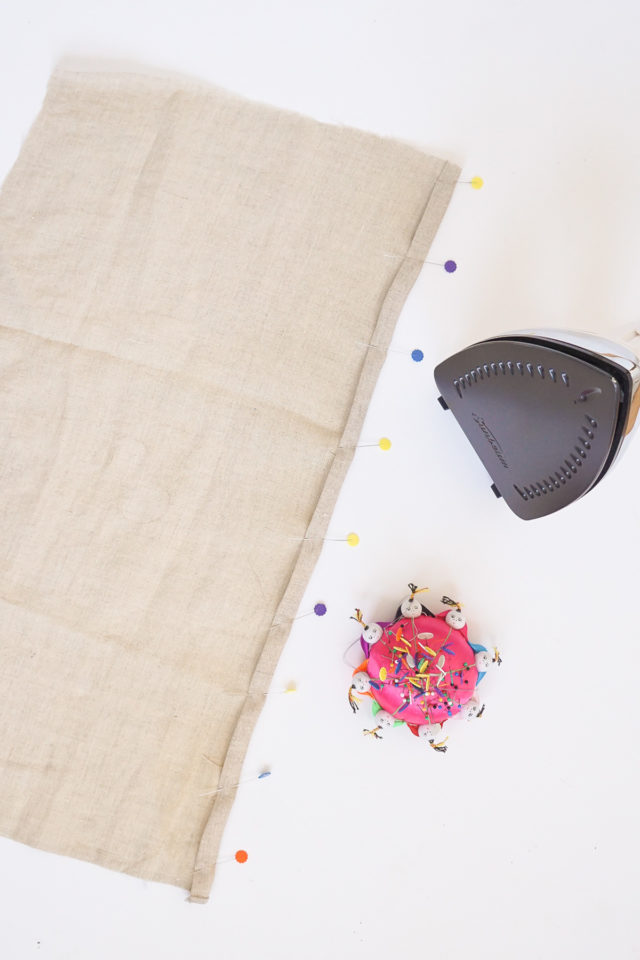
8 — Fold the long edge of one of the back pieces over ½” and press with an iron. Then, fold the edge over again. Press with an iron and pin into place with sewing pins. Repeat with the second back piece.
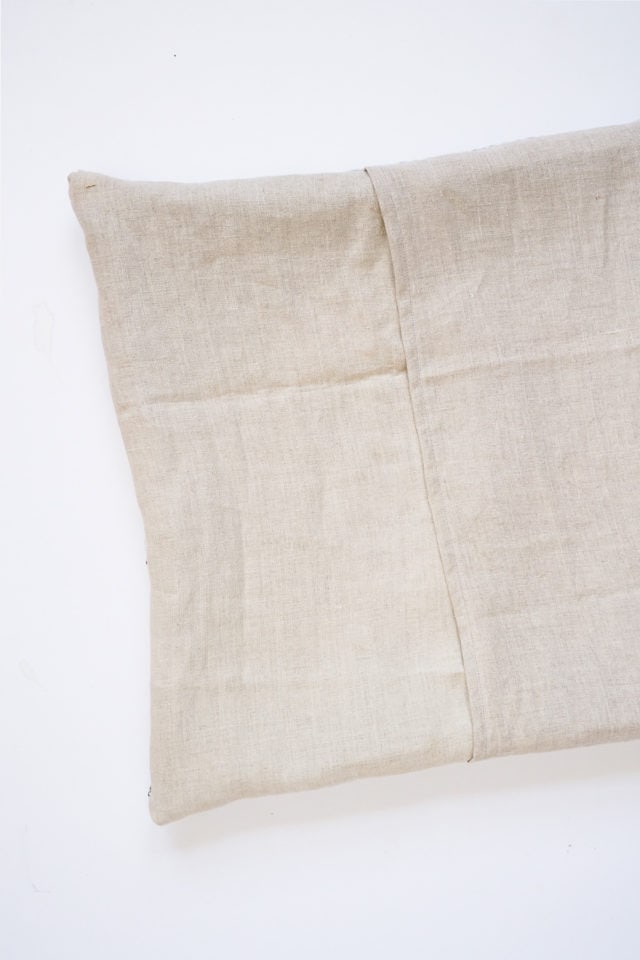
9 — Place your rug hook design face up, and lay your 2 back pieces face down on top of your rug hook design. The back pieces should overlap a few inches at the center. Pin layers together at edges.
10 — Switch your sewing machine’s standard sewing foot for a zipper foot and move your sewing machine needle all the way to the left. (This is optional, but it’ll help you sew nice and close to the edge of your rug hook design.).

Sew the pillow layers together using the thick rug hooked layer as a guide. You won’t be able to see it, but you’ll be able to feel it.
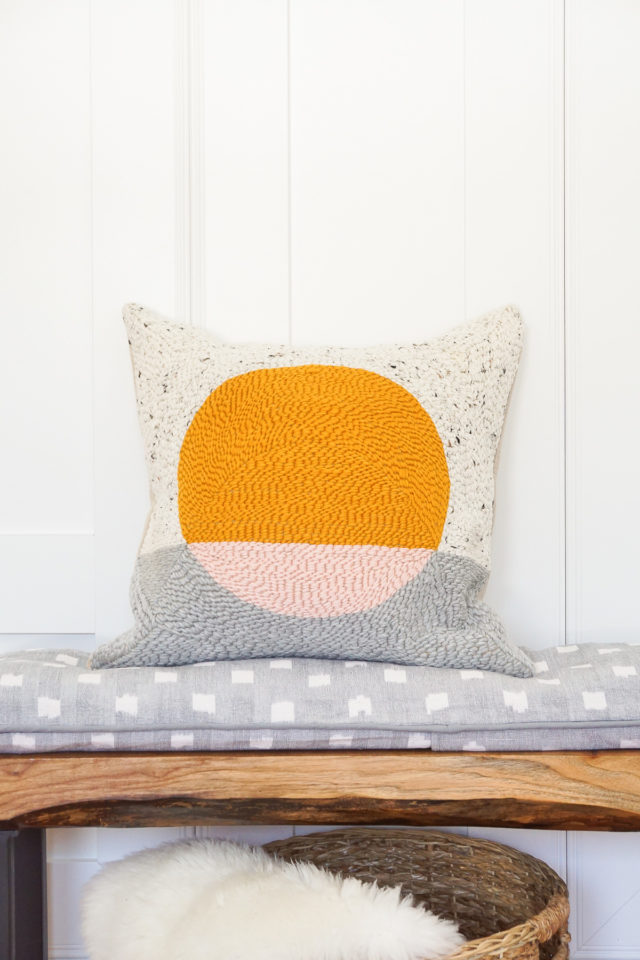
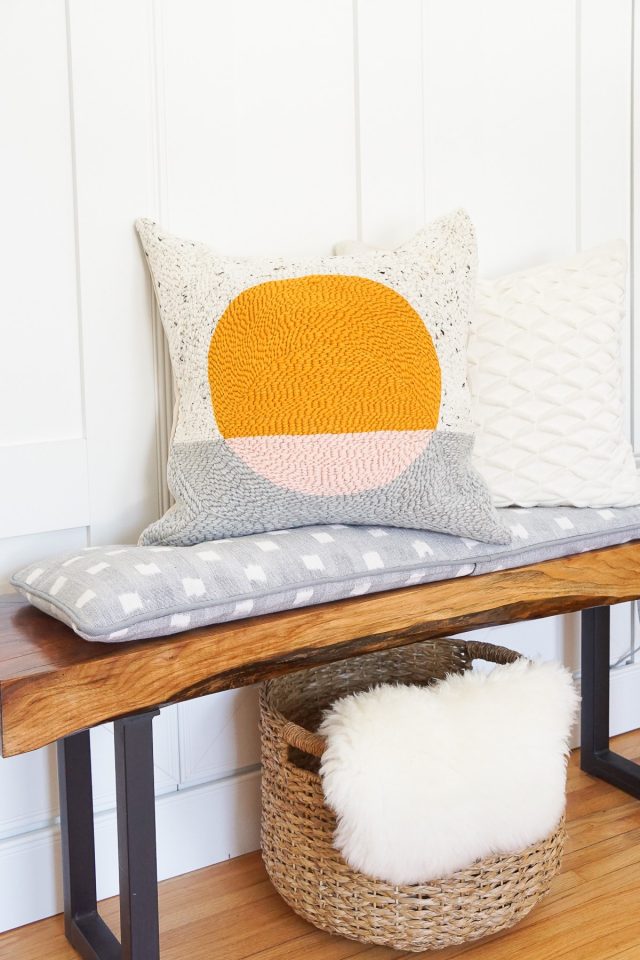
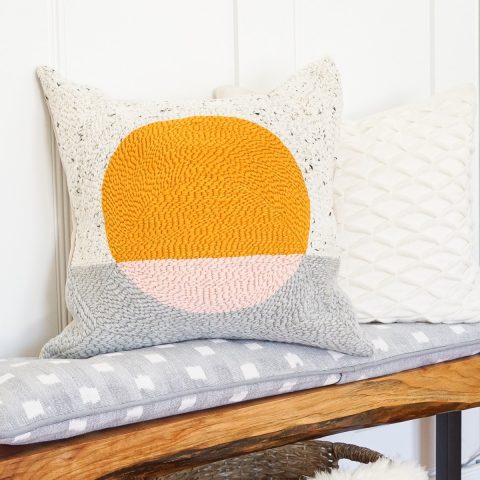
11 — Turn your pillow right side out, and stuff with a cushion insert.
More DIY Pillow Tutorials
So what do you think, guys? Are you hooked? Get it?! You can find more of our DIY pillow tutorials here. Or check out a few of our favorites from the archives below —
- Knot Pillow
- Tassel Pillow
- Structured Pleat Lumbar Pillow
- Fringe Pillow
- Gold Ombre Pillowcase
- No-Sew Flamingo Lumbar Pillow
- Shibori Throw Pillow
DIY Rug Hooking Pillow
Equipment
- Sewing machine optional if making you're own burlap cover
- Scissors
- Marker
- Iron
- Staple gun and staples
- Flat Head Screw Driver or Pliers (for removing staples in burlap)
Materials
For Rug Hooking
- 1 #10R Oxford Punch Needle
- 1 24” wood stretcher frame (I used an art store canvas frame with the canvas removed)
- 3 ply yarn or medium weight wool roving about an inch wide
- 1 burlap pillow cover (if you're not making your own, see below)
For How to Make a Pillow
- 1 pcs burlap – I like using burlap for my ground cloth because it doesn't stretch as much as others, making it great for beginners.
- 1 zipper foot optional
- ½ yd pillow back fabric I used linen
- 1 feather pillow form
Instructions
- Cut a 30” square piece of burlap. Stretch it around your wood frame and secure it to the back of the frame with a staple gun. You want to pull the burlap as tight as you can to make sure you have a taught fabric surface to needle punch.
- Draw your design onto the burlap with a marker. You won’t see the marker in the end so if you mess up or change your mind while marking it out, that’s okay.
- Thread your punch needle by inserting your yarn or strips of wool through the hole at the tip of the needle. Then place the yarn string along the channel on the wood handle. Work the yarn back and forth until it settles into the channel. Now you’re ready to punch!
- Hold your punch needle so the wood channel on the handle faces the direction you’re stitching. Insert the metal part of the needle into the burlap. I like to hold onto the yarn at the end of the needle (on the underside of the burlap) just to make sure it catches.
- Then pull your needle up out of the burlap just enough so it skims the surface of the fabric. Then insert it back into the fabric a 1/8” – ¼” or so away to create a stitch.
- You’re striving for about 4-5 stitches per inch. Continue punching the outline of your first shape. Once you make it all the way around, start on the 2nd outline of stitches. Keep going until the entire shape is filled in.
- When ready to switch yarn colors, pull your needle out of the fabric just barely until the needle grazes the face of the fabric. Use scissors to trim the yarn as close to the fabric as possible.
- Once the entire face of your pillow is rug hooked, remove the burlap from the frame by pulling out the staples with a flathead screwdriver or pliers.
- The burlap will condense a little bit as it comes off the frame securing the stitches into place. Technically the front of the rug hooking design is the side with the loops, but I like the “stitched” side better, so I’ll be using this side for the pillow face.
- Turn your design into a pillow by adding an envelope pillow back closure. My rug hook pillow face is roughly a 21” square, so I cut two pieces of linen backing fabric 14” x 22”. The back pieces need to be large enough to overlap one another as well as accommodate ½” seam allowances.
- Fold the long edge of one of the back pieces over ½” and press with an iron. Then fold the edge over again. Press with an iron and pin into place with sewing pins. Repeat with the second back piece.
- Place your rug hook design face up, and lay your two back pieces face down on top of your rug hook design. The back pieces should overlap a few inches at the center. Pin layers together at edges.
- Switch your sewing machine’s standard sewing foot for a zipper foot and move your sewing machine needle all the way to the left. (This is optional, but it’ll help you sew nice and close to the edge of your rug hook design.). Sew the pillow layers together using the thick rug hooked layer as a guide. You won’t be able to see it, but you’ll be able to feel it.
- Turn your pillow right side out, and stuff with a cushion insert.

60 Amazon Bedroom Decor Picks to Revamp Your Room
Discover the best Amazon bedroom decor items to create a…
Continue Reading 60 Amazon Bedroom Decor Picks to Revamp Your Room
Please note that we may earn a commission for some of the above affiliate links. However, products featured are independently selected and personally well-loved by us!
Yes this is NOT rug hooking! Traditional rug hooking requires a rug hook, NOT a punch needle or latch. Wool and other fibres are mediums that many artists now use with rug hooking as it requires different techniques and more complex than punching or colour by number latch hooking!
This needle punching, not rug hooking. Hooking requires a different tool and is executed in a different manner.
This is really intriguing. Is this a super delicate pillow or does the loops/yarn stay in place? I want to make a punch needle pillow but I worry it will be too delicate with young kids in the house, ha!
To be honest, yes, we would be scared to have this throw pillow around young kids. Our living room has always been connected with the dinning room and kitchen so kids can easily go from grubby snack fingers to our throw pillows! We’ve also learned the hard way that they love anything textured and picking out textures! Hope this helps!
Hi Erin, how can i clean this pillow?
Everything is very open with a very clear description of the issues. It was definitely informative. Your site is extremely helpful. Thank you for sharing!
Such a gorgeous design!! i have yet to take up needle punching but it looks amazing and like it might be a lot faster than the embroidery I I do…
Hi Natalya! I know what you mean, embroidery feels like the never-an-ending-in-sight kind of project, so this might be a fun change! Let us know if you give it a try. :)
I’m trying punch for the first time and I’m very curious about one thing you’ve done here. What is keeping this pillow from being snagged on something and ripping all the stitches out as this is the worked side and nothing secures the loops on the other side
Hi Lauren! That’s a great question! I had the same thought when I started needle punching too. After you “hook” your piece, and un-stretch the burlap from the frame, the burlap will contract around the yarn stitches making for a tight surface, and it should keep everything in place under normal use. (Keep it out of reach of your cat!) Stretching the burlap tightly around the wood frame and shooting for 5-6 stitches per inch with 3-4 ply yarn, will help you achieve that beautifully dense, nubby surface.
Oh wauw, this looks amazing! I love the combination of colours with the not-even circle <3 Really would like to make one of those myself sometime!
The colors are my favorite too! So glad you were inspired! :)
Hey! Love the pillow, as we all do, but I have a question. I think you used wool, but when I clicked “3 ply” on your page it led me to Amazon for Cotten yarn. I was wondering if you think Cotten would work just as well? It’s cheaper and the pillow won’t be keeping anyone warm…
Let me know what you think!
I am so smitten with this project! For years I have tried and failed, time and time again, at crocheting and knitting, because I have congenital defects in my hands. This DIY tutorial not only gives me sweet nostalgia of when I made those yarn-hook projects in elementary school, but also gives me hope I could make a personalized pillow! Thank you for creating this!
We totally have faith in you! So happy that this inspired you just as much as it did us! :)
Hi Erin. This is such a gorgeous design. Thanks so much for sharing your tutorial. We know our readers will just love it!! We’ve included it in our latest craft inspiration roundup. https://craftylikegranny.com/craft-like-no-ones-watching/ Cheers Jodie :)
Thanks so much for sharing! :)
Hi, the design is bright and cheerfull. Beautiful.
I also love the fabric on the bench pillow. Where can I find it¿
So fun and awesome!! I love love the colours that you used. It’s beautiful! I recently discovered rug hooking too but it’s slightly different from how you made yours. I pull the yarn from the bottom to the top instead of pushing it down like you showed. I too have become obsessed!! Lol. I love discovering new crafts! I’m always inspired by others creations. Thanks so much for sharing yours! Now I want to go make another pillow!! ❤️❤️ Have an aw some day!
The colors give a little vintage vibe, don’t you think? :) I love how many ways you can use this technique! So fun! So glad you were inspired! :)
I love this! Your design is pretty with the yellow against the greys. It looks like so much fun to use the needle punch. I like crocheting because it’s forgiving, so this looks like it would be right up my alley.
You should definitely try it out! It’s addicting :)