DIY Dry Erase Board
Reinventing the ugly token office supply with this cute desktop organizer, a DIY Dry Erase Board that you can easily make from items already at home.
We’re totally one of those people that has to have a list on hand at all times. For some reason, lists help us relax. Because if not, we feel like we’re constantly on edge that we’ll forget a major to-do. And forgetting tasks isn’t an option while juggling kids, renovations, The Juliana, and Sugar & Cloth.
Handwritten lists help us rest more easily, and a reusable tabletop version is a must. As it turns out, cute desktop dry erase boards aren’t really the easiest thing to come by.
Office supply stores usually just have your typical white panel board. So we made our own DIY Dry Erase Board out of a few token items that we already had laying around the studio.
Cheap and easy is our current middle name!
Materials and Tools
You definitely don’t need to buy any extra supplies for this DIY whiteboard outside of the frame (unless you want to use one from home already).
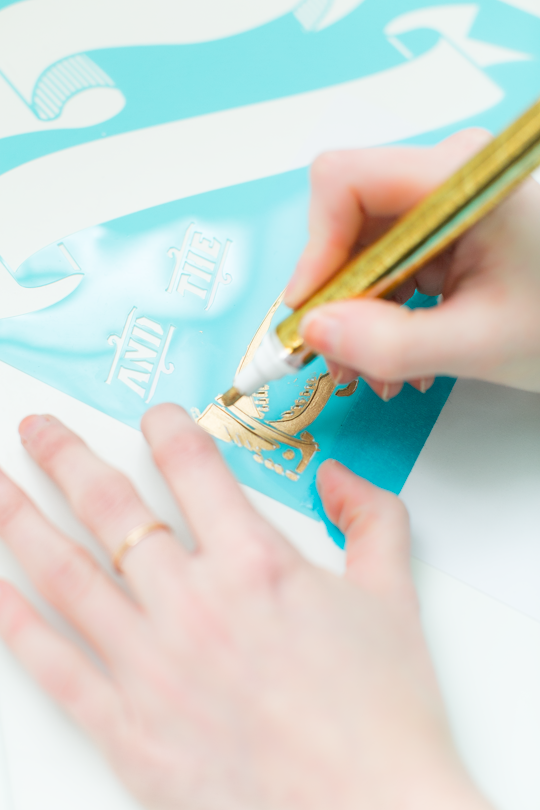
BUT if you’d like to add a little extra graphic or “to-do list” heading that won’t wipe away, just stencil it onto the construction paper with a permanent marker like a gold foil pen. And by the way, speaking of gold foil, these DIY Gold Foil Wall Art with free printables to recreate is perfect for wall decor lovers.
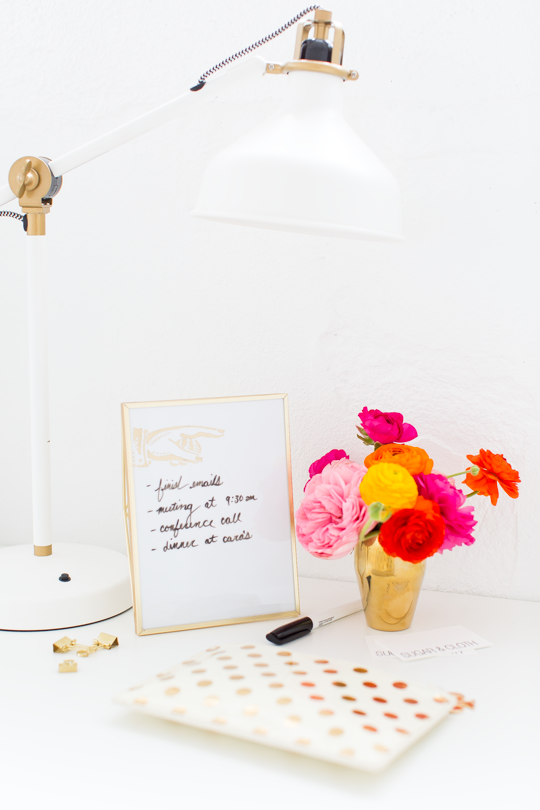
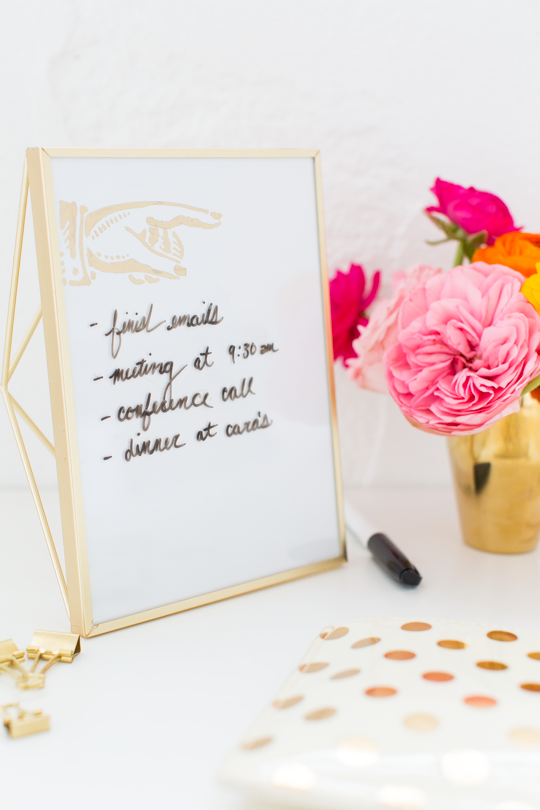
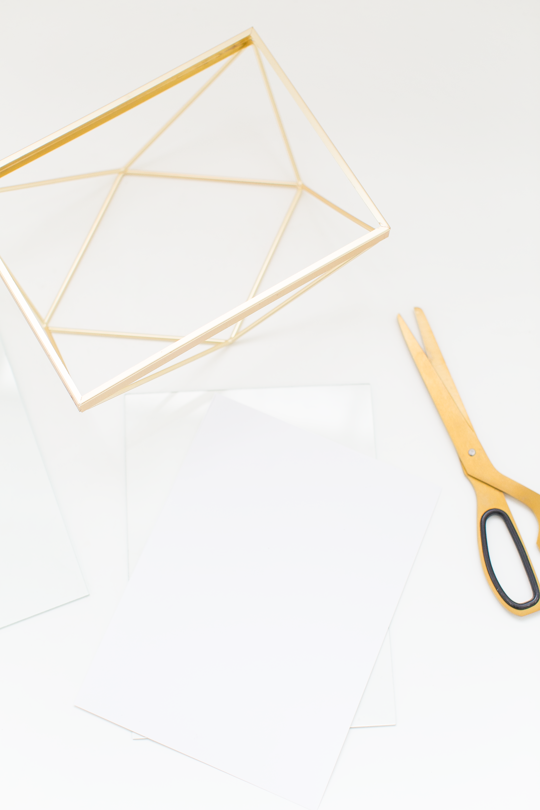
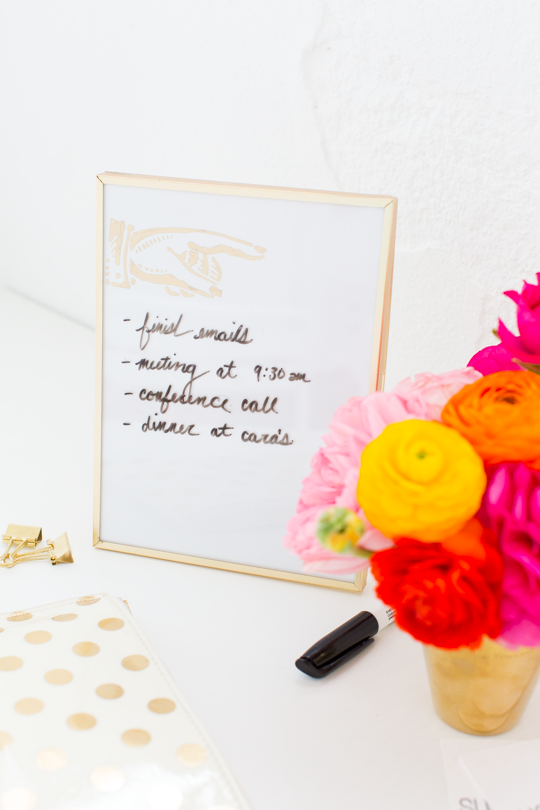
- Photo frame with glass of your choice — Ours is this 5″x7″ gold geo picture frame. You won’t even need to go to your local hardware store for a whiteboard or whiteboard paint because you can just write directly on any picture frame glass!
- White paper or cardstock
- Scissors
- Gold foiling pen — Optional to decorate.
- Stencil — Optional to decorate. Ours is more from an old Martha Stewart stencil collection.
How to Make a Desktop DIY Dry Erase Board
1 — Choose a photo frame that fits your desktop space and remove the backing and any existing photo or artwork. Take out the glass from the frame and clean it thoroughly to ensure there are no smudges or residue.
2 — Cut a piece of white paper to the same size as the glass in the frame. Make sure it fits snugly within the frame without any gaps so that you have a nice white backdrop to write on.
3 — Optional: Personalize your dry erase board by adding decorative elements, like a stenciled drawing or “to-do list” heading. Add your desired permanent graphic or text onto the white paper the gold foil pen. And let it dry completely.

3 — Place the cut paper inside the frame, on top of the glass, securing it in place.
4 — If the frame has a backing, reattach it to hold the glass and paper securely in place.
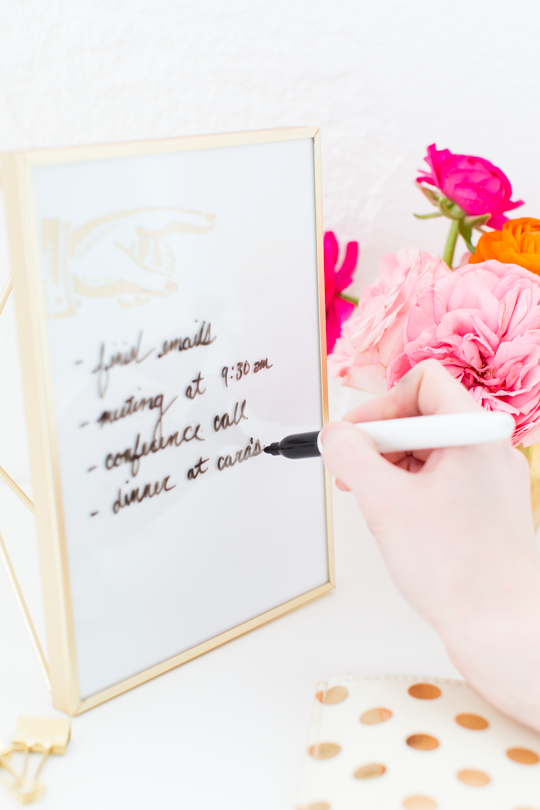
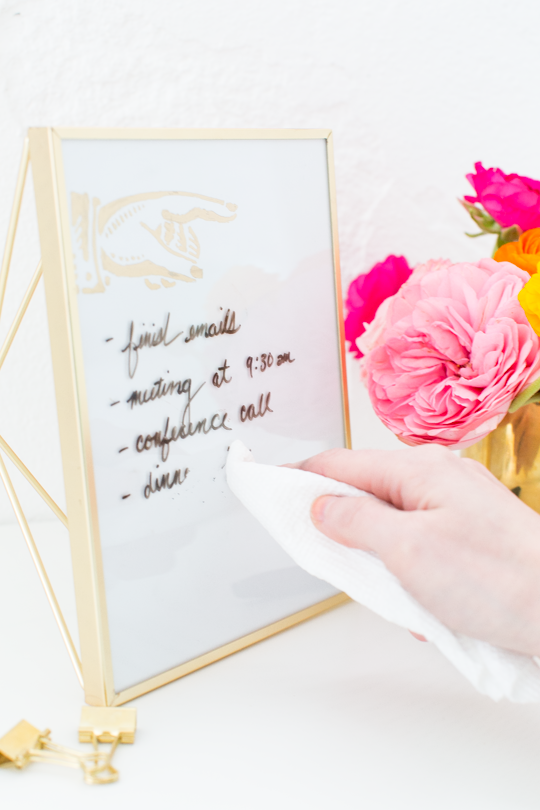
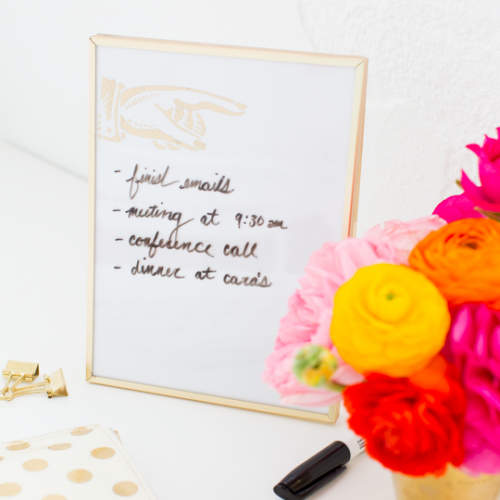
Place the frame on your desktop in a convenient and accessible location. Use a dry erase marker to write or draw on the glass surface of the frame. The marker can easily be wiped off with a dry cloth or eraser, allowing you to reuse the board multiple times. Easy, right?!?
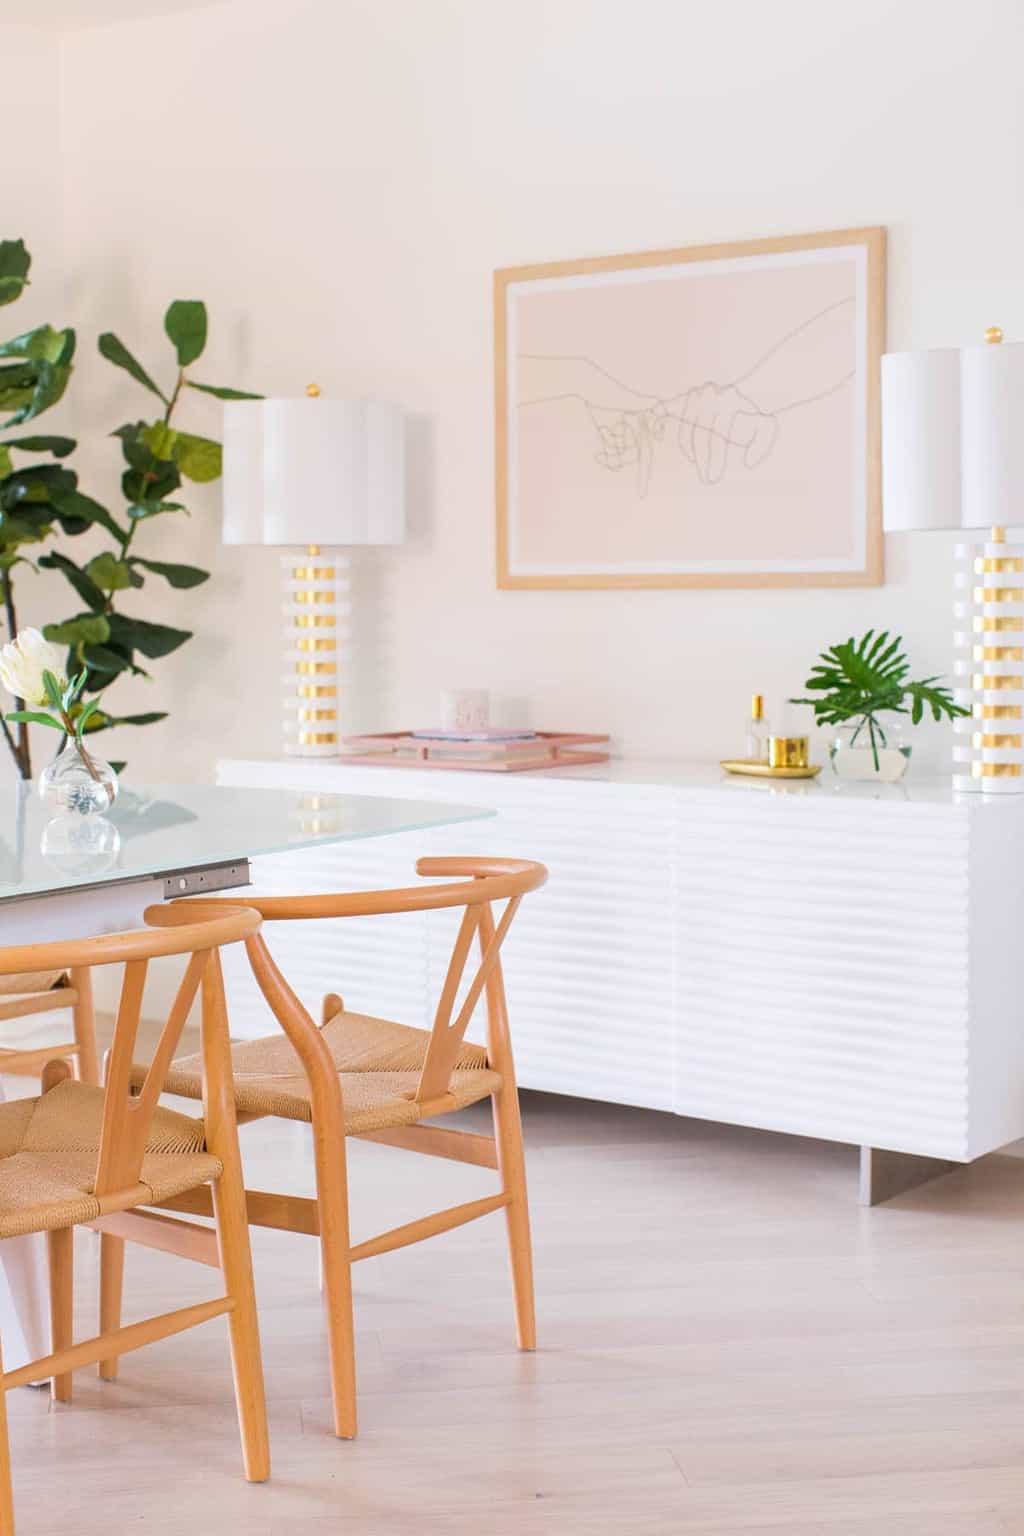
And what a pretty way to keep your desk organized while displaying all your cute things at the same time with a hexagon DIY pencil holder too!
Other DIY Organization Projects to Try
Keep your space clean and tidy with some of our other favorite DIY projects from our archives for more great ideas —
- DIY Nesting Desk Organizer Set
- Hexagonal DIY Pen Holder
- Geometric DIY Chalkboard Desk
- DIY Desktop Organizer with Cork Board

DIY Dry Erase Board
Equipment
- Scissors
Materials
- 1 photo frame with glass any size of your choice
- 1 white cardstock or construction paper
- Gold foiling pen optional
- Stencil Optional
Instructions
- Take out the glass from the photo frame and clean it thoroughly to ensure there are no smudges or residue.
- Cut a piece of white paper to the same size as the glass in the frame. Make sure it fits snugly within the frame without any gaps so that you have a nice white backdrop to write on.
- Optional: Personalize your dry erase board by adding decorative elements, like a stenciled drawing or “to-do list” heading. Add your desired permanent graphic or text onto the white paper the gold foil pen. And let it dry completely.
- If the frame has a backing, reattach it to hold the glass and paper securely in place. Now you can write on the front glass from the frame with dry erase markers!

Don’t forget to share your DIY Dry Erase Board with us on Instagram using the hashtag #sugarandclothloves. We always love seeing all of your creations! Looking for more interior design inspiration? You can find all of our home decor tutorials and ideas right here!
Affordable Wall Art: 54 Stylish Prints Under $200
Looking for affordable wall art that still makes a big…
Continue Reading Affordable Wall Art: 54 Stylish Prints Under $200
Easy IKEA Billy Hacks Anyone Can DIY at Home
Get inspired by clever IKEA Billy hacks for living rooms,…
Continue Reading Easy IKEA Billy Hacks Anyone Can DIY at Home
46 Cute Desk Accessories to Brighten Your Workspace
From colorful pens to quirky paperweights, spruce up your work…
Continue Reading 46 Cute Desk Accessories to Brighten Your Workspace
19 Unique & Easy Houseplants that We’re Loving
Looking for unique house plants? Dive into our guide to…
Continue Reading 19 Unique & Easy Houseplants that We’re Loving
Please note that we may earn a commission for some of the above affiliate links. However, products featured are independently selected and personally well-loved by us!
Love it. A few questions.
1. Do you think it could be made with a different color than white?
2. I wonder if I could make a long horizontal one? I need a weekly at a glance in front of me . I coordinate rental space for garden weddings and university events. Theres always one more thing to do for ea event in house
3. Lastly do you think it could be made cheaper than $30? A smidgen pricey these days :)
Hi Michele! Great questions! 1) Yes, but we recommend choosing something light and pale so it can be read easily. 2) Yes, you can! As long as you find a long horizontal frame (which we don’t think would be hard to find). Your job sounds lovely! 3) Yes, you could make it cheaper. It cost us about $30 because the frame was about $25. So the cost of the project really depends on how much you spend on the frame. Hope this helps!
Ingeniously simple, neat idea. I love the stencil you used! Where did you get it?
Hi, Natasha! It’s a Martha Stewart stencil. Unfortunately, it’s no longer available.
http://home-babos.ru
As pretty my opinion, To be a little more precise people should give a little more of an emphasis on quality rather than quantity. It’s all about value
Definitely quality over quantity!
Great round up and a really great idea – awareness definitely still needs raising. Really sorry that I couldn't contribute but I just didn't manage to fit anything in, busy busy!
It’s a real pluraese to find someone who can think like that
I love this so much! Such a fabulous DIY! Can’t wait to try it out :) Gorgeous photos too!
I always love your DIY projects – your color palette, as usual, is excellent. Love it.
Wow this is so lovely and seems so easy thanks for the tips.
http://www.interioridea.net
This is so cute! It would be a perfect gift for someone who got a new job.
So simple and cute! Great idea!
This is so adorable! And so easy to make as well. Perfect for office decoration!
WritingMonique
This dry erase board is so easy to make! I’ve been trying to be more organized lately, and having one of these desktop dry erase boards would probably be a good first step toward achieving that goal. Plus, it looks so pretty! I really love the gold stencil that you added to the frame because it gives the board a fun touch!
-Helen
http://www.sweethelengrace.com
Ashley! I love this idea. Firstly because it’s adorable. But mostly because my refrigerator won’t hold magnets for some reason (makes me so sad) and I have no where to put my dry erase board (which is ugly, honestly). I want to make this! It’s so cute.
What a cute DIY! Thanks for sharing this with us!
Rae | love from berlin