DIY Geometric Accent Wall
Add a colorful modern (and quick) touch to a wall with our DIY Geometric Accent Wall tutorial.
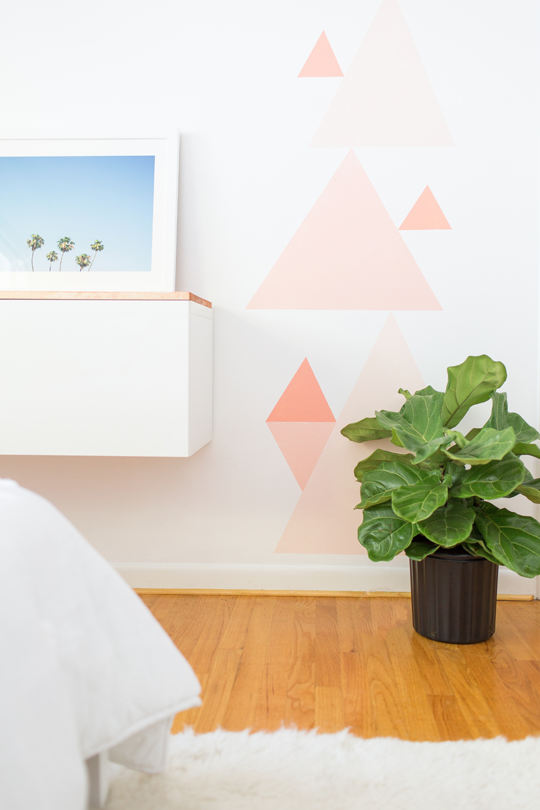
For the second installment (before the full reveal!) of Ainsley’s room makeover, we present to our my take on the ever-faithful DIY geometric accent wall.
You already all know that we love a good white bright room.
But for a little girl’s room, we wanted to punch it up a bit with a colorful modern touch in her favorite colors.
This easy handmade wall painting idea is perfect for a quick weekend project update because you don’t need to go full-force on a whole room.
It’s more like a quick table-runner version of an accent wall by just highlighting a small section and leaving the rest of the color up-to the pretty accessories.
Materials Needed for a DIY Geometric Accent Wall
Paint — We used Valspar Reserve Paint in Simply Coral 2001-2A, Coral Mist 2001-2B, and Apricot Ice2001-2C. These colors are exclusively at Lowe’s.
Painter’s tape
Mini paint rollers — One for each paint color for quickness.
Level
How to Make a DIY Geometric Accent Wall
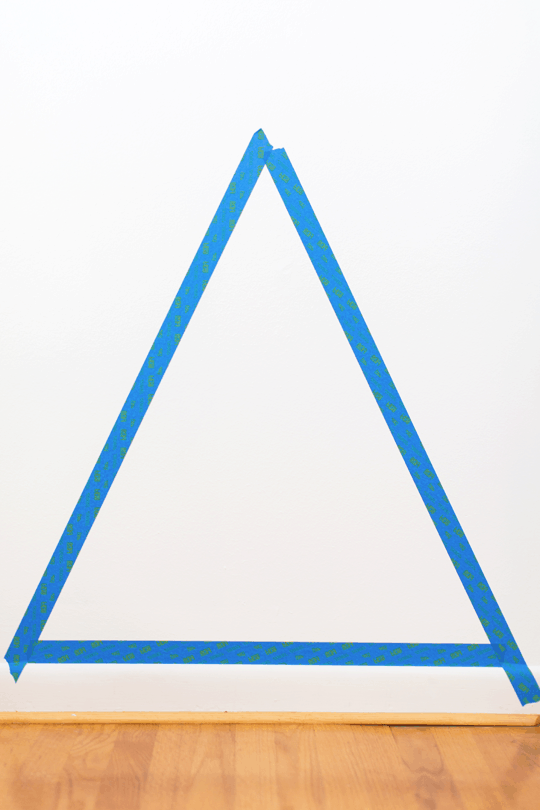
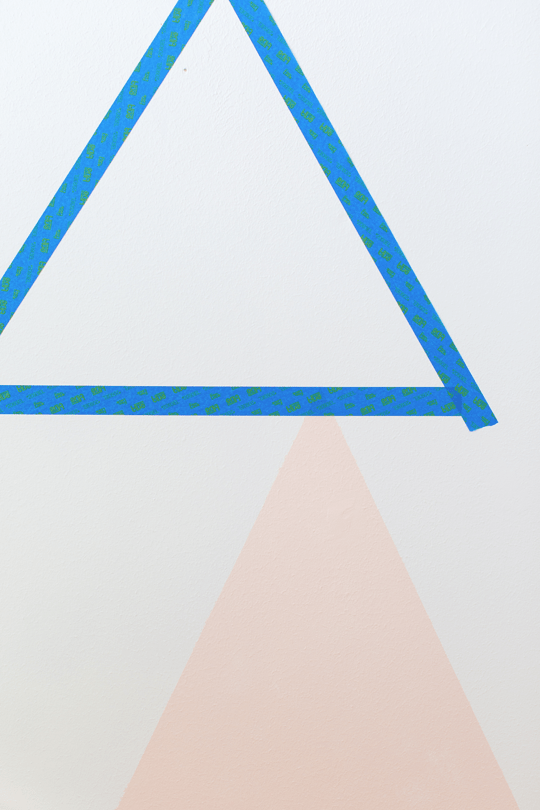
1 — Starting at the bottom of the wall, use the painter’s tape to tape off a large triangle. Use the level to make sure the bottom tape line is straight.
2 — Painting the bottom triangle first will allow you to build up the wall from there and be able to visualize the end product better, especially with all of the Valspar Reserve color options in case you’re choosing your own color combinations to mix and match.
By using multiple Valspar Reserve colors from the same color family you’re not only keeping the accent wall toned down by not being too contrasting. But you also get to skip the trouble of having to pick just one favorite.
Plus, it’s stain and scrub resistant which makes it a great choice for redoing spaces with littles ones that might get a little over-zealous with crayons here and there.
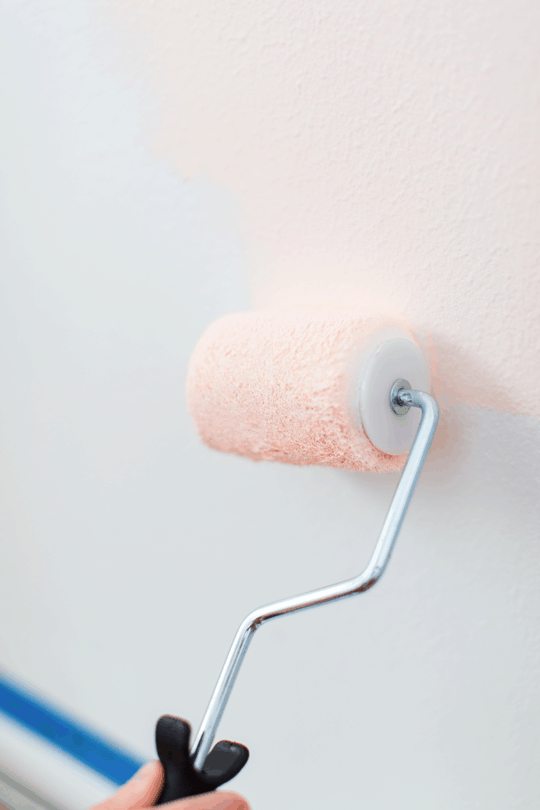
3 — Paint your first color choice in the triangle.
4 — Then, remove the taped edging. Let it dry to the touch
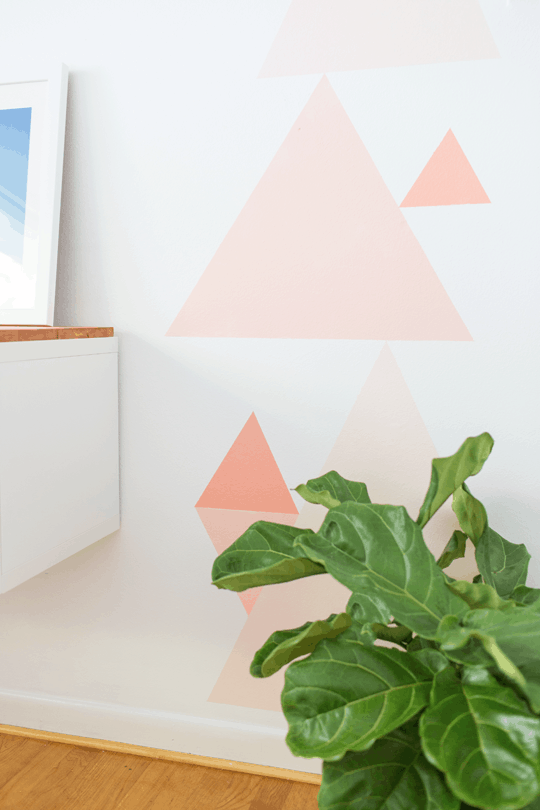
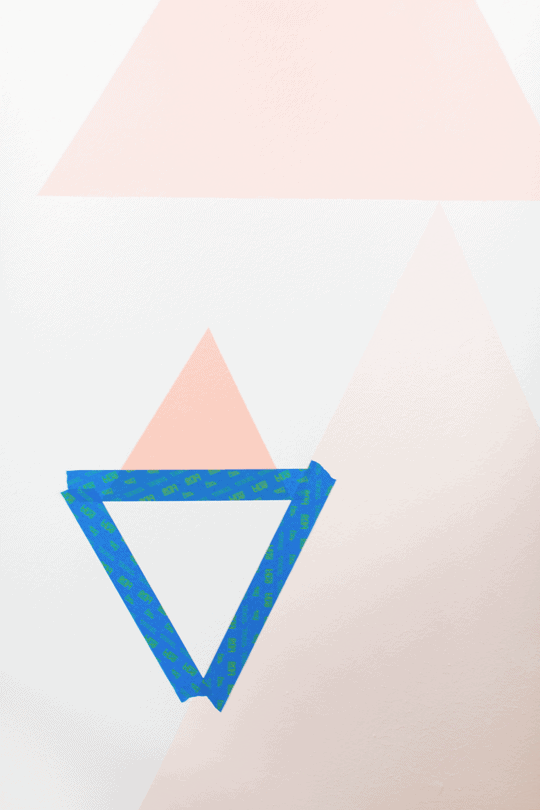
5 — Next, use the top of the first triangle as the base point to your next (somewhat smaller) taped triangle. Make it slightly off-centered from the first triangle so that they stagger up the wall as you go.
6 — Repeat the painting process for all of the larger squares. Let them dry and then using them to move on to the next triangle making sure they all touch.
7 — Use the painter’s tape and level to make a small triangle on either side of select triangles. You can create more, but we wouldn’t recommend creating too many triangles since they are just small points of interest.
8 — Paint the small triangle(s) the colors of your choice. Let dry.
9 — Tape off a triangle that’s mirrored upside down on the small triangles to make color blocked diamond shapes.
10 — Paint the mirrored triangle. Allow to dry. Now you’re ready to style and enjoy your quick and easy new geometric accent wall!
DIY Geometric Accent Walls Tips and Tricks
For less defined shapes:
If you would like for the design to have a certain depth, wait until your last two coats of paint are going on and slightly pull up on your tape or use isopropyl rubbing alcohol and lightly touch up the edges then proceed to remove the painter’s tape.
Prep your space beforehand:
Make sure that all personal items such as furniture, appliances, doors, etc. are removed from their place before painting!
They can be put back when fully dried but it is best to avoid putting anything in the way of nice clean lines when using painter’s tape because unintentional damage will happen if they get shifted around while work is being done.
Work in sections:
Not everyone can paint across the entire wall in one piece.
If this is the case, it may be best to leave some sections unpainted until you are done with others or else they will run into each other and look like a mess.
You can also paint with one color and allow it to dry completely before you move to the next.
Create a stencil:
If you do not have the skills to cut out designs free-hand draw them on paper first then proceed to tape off your desired areas so that they can be painted later on. (this is also good for kids murals)
Don’t stress yourself out during this process:
Even though painting seems easy enough “practice makes perfect” cannot be more true when it comes to painting so just have fun!
You can also start this process by finding pieces of post-it notes or any other paper substitutes and doing the design on there first so that you have an outline to follow while painting over it!
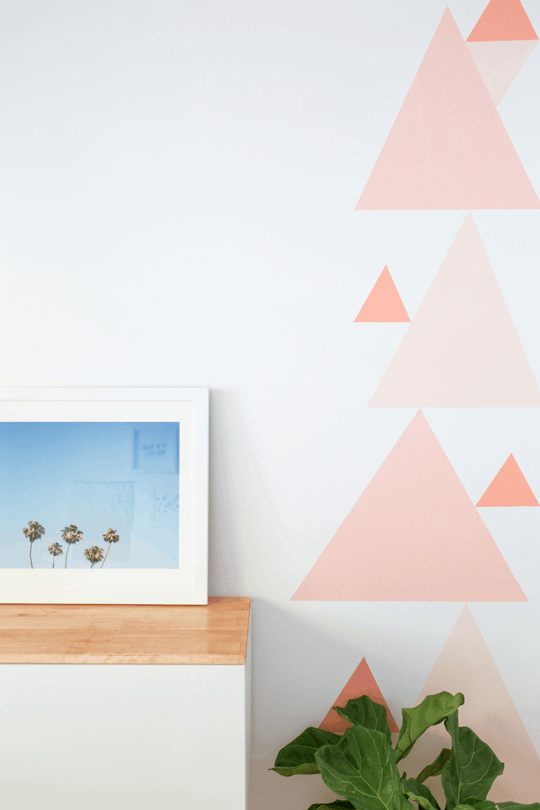
I also really love the idea of doing an ombre version of this project. I toyed with doing so for Ainsley’s room. But I wanted to use the colors evenly to create a full wall as opposed to your eyes being directed toward just one section first.
I really love the way it turned out. And it’s just the perfect amount of girly for her while still being neutral for when they use the room for guests!
What’s your favorite weekend paint project that you’ve conquered? I’ll be honest. I’m always a sucker for quick satisfaction when it comes to room makeovers!
This makeover series is made possible in partnership with Valspar. Find Valspar Reserve, exclusively at Lowe’s. Thank you for supporting the brands that allow us to bring bigger and better content to you!
Please note that we may earn a commission for some of the above affiliate links. However, products featured are independently selected and personally well-loved by us!
I love this but can’t use a level…I would mess this up big time!! I have an accent wall in my office that I want to do in triangles…if you created a stencil with this pattern it would buy it :)
Love this! It looks so great and think this is a paint project I could actually do. If I had any walls I was allowed to paint I’d be doing this.
I am so in love with this! xo
http://www.chasing-peonies.blogspot.com
love, love, love this!