Sequin Polka Dot DIY Pumpkin Decoration
Bring some sparkle to your fall decor with our step-by-step guide on creating an easy Sequin Polka Dot DIY Pumpkin. A chic no-carve pumpkin idea for Halloween, Thanksgiving, or autumn centerpieces using faux pumpkins, sequins, and glue.
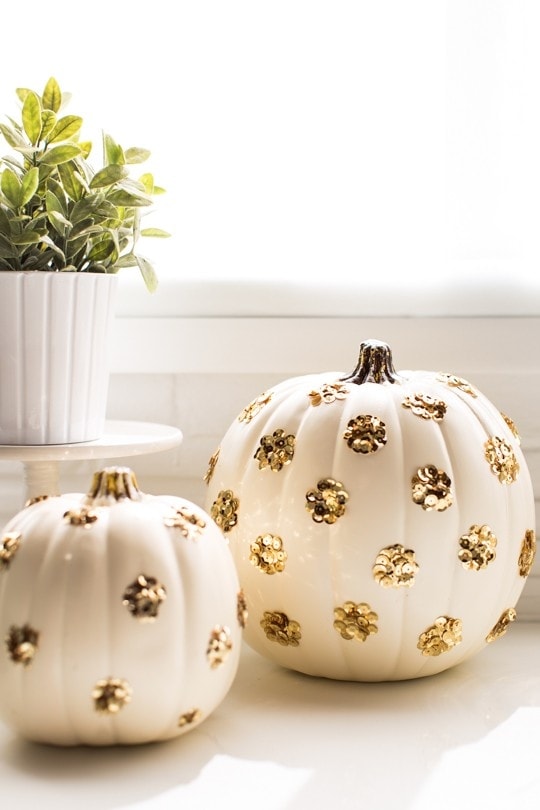
Looking to add a touch of glitz and glamor to your fall decor? This fun and easy Sequin Polka Dot DIY Pumpkin project will transform an ordinary pumpkin into a stunning centerpiece or eye-catching accent for your home.
It’s definitely the perfect Halloween decor if you want to go the chic route instead of the usual spooky creepy vibe. You could also make mini ones for your Thanksgiving table.
With just a few supplies and some creativity, you can create a festive masterpiece that is sure to impress all who see it. Get ready to dazzle with this step-by-step guide on how to bring sparkle and style to your pumpkin patch!

Materials Needed
- White pumpkin: Faux craft pumpkins work best to so you can reuse them every season and save on time. Prefer the real thing? Grab a pumpkin and give it a coat of paint in the color of your choice. Try different pumpkin colors (like black or orange) to make metallic sequins pop.
- Loose sequins: Ours are 6mm gold sequins, but you can choose larger or smaller sequins in any color for a different look.
- Tacky glue: Or any strong craft adhesive.
How to Make a DIY Sequin Pumpkin
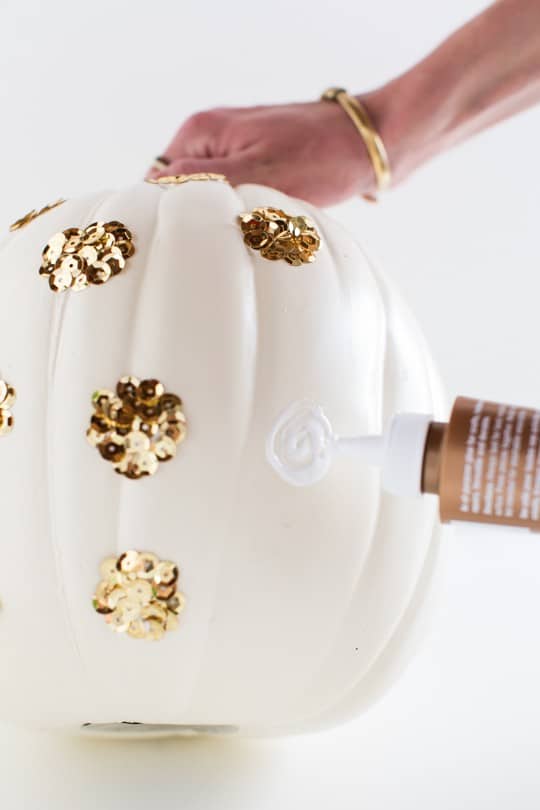
1 — Apply glue: Use a small circular motion to apply glue to the pumpkin’s surface.
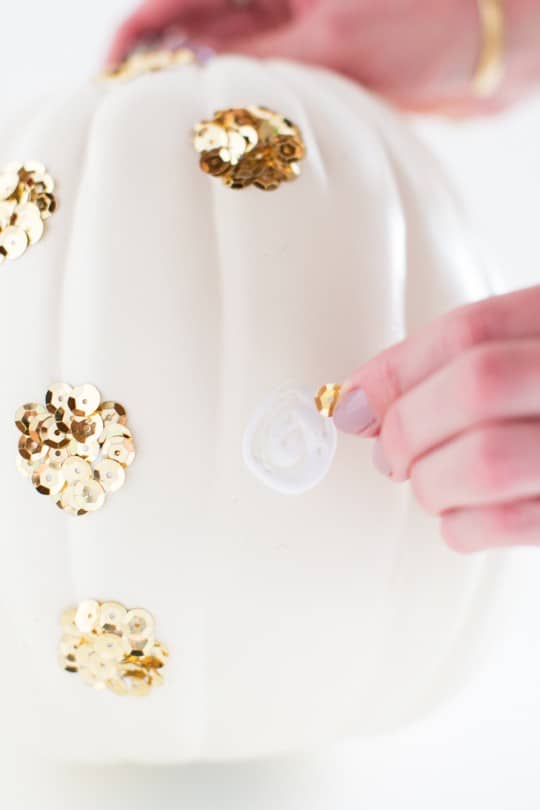
2 — Add sequins: Once the glue becomes tacky, press sequins into the glue until the circle is filled.
3 — Repeat: Continue adding sequin circles around the pumpkin until you’re happy with the design.
4 — Dry: Allow the pumpkin to dry completely before handling or displaying.
Tutorial Tips for Best Results
- Work in sections so the glue doesn’t dry before you add sequins.
- Seal with clear spray sealer if you want extra durability for long-term storage.
- Create patterns such as stripes, swirls, or clustered dots instead of random placement for a designer look.
- Decorate your home with these sequin pumpkins for festive centerpiece, lining them along your staircase, and styling them inside an empty fireplace idea.
More Easy Fall Decor Ideas
- 32 Easy DIY Pumpkin Painting Ideas
- DIY Pumpkin Place Card Holders
- 23 Easy DIY Turkey Decor Ideas
- 42 Best DIY Thanksgiving Table Decorations


DIY Sequin Pumpkin
Equipment
- Tacky glue or any strong craft adhesive
Materials
- 1 craft pumpkin
- Loose sequins
Instructions
- Apply glue to the pumpkin in a small circular shape.
- Wait until the glue is tacky, then press sequins into place to fill the circle.
- Continue adding sequin polka dots all around the pumpkin.
- Let dry completely before handling or displaying.


Please note that we may earn a commission for some of the above affiliate links. However, products featured are independently selected and personally well-loved by us!
This is really interesting, You are a very skilled blogger. I have joined your feed and look forward to seeking more of your wonderful post. Also, I have shared your site in my social networks!
Omg these pumpkins look so beautiful, nice post
Thanks, Barbra! The pumpkins have been one of our most popular DIY’s.
Yes, this post helped me a lot.
So happy to hear!
nice blog
dhokla
I am so grateful for your blog. Really looking forward to read more. Really Great!.
Thank you! We are so grateful to have you keeping up with the blog! XOXO
Making money from house is the method to go.
I am glad to ƅe one of the visitants оn tɦis
outstanding internet site (:, tҺank yоu fоr putting up.
Thank you for any other fantastic post. Where else
could anyone get that type of info in such a perfect means
of writing? I have a presentation next week, and I’m at the look for such info.
This design is spectacular! You most certainly know how to keep a reader entertained.
Between your wit and your videos, I was almost moved to start my own blog (well, almost…HaHa!) Wonderful
job. I really loved what you had to say, and more than that, how you
presented it. Too cool!
They don’t just follow one way or system; they build upon what they have.
The business design structure can span the plethora of simplistic to complex.
They know the top type of advertisement is word-of-mouth and realize when the customer gets involved as a result of
rewards system their message or product is certain to get
out even faster.
Pretty! This was a really wonderful post. Thank you for providing this information.
Oooh!! These are so cute! I especially like that they are extremely easy and user-friendly :)
The pumpkins were beautiful, congratulations for the creativity!
Thank you very much for sharing your ideas.
So glad you liked them, Lucila! Thank you! xo
gorgeous pumpkins! what mm sequins did you use? thank you!
Hi there! Any size of sequin will work, but we used 5mm sequins!
This is such a fun idea. i love sparkle on anything :-)
Us too – we’re partial to gold :)
This is the CUTESt idea ever!!!
xx Tess | Sequins are the New Black
Thanks, Tess! xo
I love pumpkins! Very nice!
It looks beautiful! very good idea
So so so gorgeous! I’m going to add this to my no carve roundup this week. Thank you for sharing!
This looks so simple that I might actually try it.
I love this! I’m going to try it this weekend. :)
So cute! May I know where you bought the white plastic pumpkins?
Very glam! And such a minimal amount of work! Can’t wait to DIY!
I’m not sure I’ve ever seen a glamorous Halloween DIY that involved a pumpkin…until now. These are so pretty and fun, Ash. They remind me of a disco ball, in a way. And you can’t go wrong with that!
Eeee! Super cute. I love ’em. I should have bought plastic pumpkins too, since I’m painting them anyways. Oh well.
bellissima!
These pumpkins are so adorable! They would be the perfect Halloween decor!
<3
ALINA ERMILOVA
I for one think this is one of the classiest pumpkins I have ever seen. A unique twist on the traditional, big applause!